Leaderboard


Popular Content
Showing content with the highest reputation on 06/14/2018 in all areas
-
Hello all! I've seen a lot of confusion about wetsanding and polishing with the goal of increasing the shine. Lots of people mixing up terms and using the wrong methods/products at the wrong time/place. So I decided to put up a little tutorial to clear (hehe) things up. DISCLAIMER: I am not a professional, I do auto detailing in my spare time and have some experience with paint correction. This will be a pretty long tutorial but stick with me and hopefully we'll learn something 1. What is shine? To be brief: when something is really really flat, it will reflect a lot of light directly into your eyes, making it appear shiny. Below is an illustration of perfect paint reflecting light, this would look like glass: (Illustrations are not to scale, just there to give you an idea). But that's a show-car-130-hours-polishing-lunatic-finish. Most of us use spray cans, and spray cans suck. They spit out paint unevenly and most of it is propellant anyway. And we do it in conditions that are not optimal, so we end up with very uneven paint full of orange peel. For this tutorial i've prepared a plate of ABS plastic which has been painted black (easier to demonstrate) and clear coated. See this pic below? See that wrinkly, orange'y look to it? That's orange peel. Image 1: If we want to go the extra mile to get rid of this, we need to do.. 2. Sanding - Levelling the paint Using sandpaper is ABRASIVE. From Merriam-Webster: abrasive 1: causing damage, wear, or removal of surface material by grinding or rubbing Focus here being "removal of surface material". Every time you swipe that sandpaper it removes some material. What we are trying to achieve here is a flat surface, we are trying to flatten out those "peaks and valleys" by removing/flattening the clear coat. A sandpaper's "grit" determines if it's coarse or fine. A higher number means it's more fine, and will remove less material. A lower number means it's more coarse and will remove more material. You need to have enough clear coat on your piece to be able to do this correction. Or else you might sand into the basecoat or even the primer. Which sucks because that means a re-paint.. Here is a list of my PERSONAL sandpaper grits: 40 - Super coarse for doing an Alderaan on whatever you are working on, I never use this 80 - Very coarse, for removing material quickly. I use this on woodworking projects 120 - Quick removal of material while still being in control 180 - I use this to knock down 3D-print lines and filler 240 - Smoothing filler if i'm feeling a bit scared 320 - This is what I sand my parts with before primer 600 - For wetsanding my primer 800-1000 - Anything from color-coat/clear-coat fixes to wetsanding hard clear coat 1200 - For knocking down tough orange peel 1500 - For knocking down orange peel 2000 - For removing 1500 scratches 3000 - For removing 2000 scratches For this test piece I started with 1500 grit to knock down the orange peel as the clear coat I used is kind of soft. Keep in mind every sanding step in this tutorial is done wet/wetsanding. As you can see here i've flattened out the peel on most of the piece but I missed a spot. I went over it again and made sure the entire surface was equally "dull". After this I went over it with 2000 grit. This is a finer sandpaper and my goal here is to eliminate the scratches from the 1500 job. Notice the sanding marks going the opposite direction this time. This is a good way to gauge if you've successfully sanded away the marks from the previous steps. And finally I went over it with 3000 grit in the opposite direction to remove the 2000 grit marks. At this point you should start seeing some shine My camera really struggled to focus taking these pictures. And we're done with sanding! Dry off your parts and move on to.. 3. Polishing - Levelling the paint again, just very very little From Merriam-Webster: polished; polishing; polishes transitive verb 1 : to make smooth and glossy usually by friction : burnish 2 : to smooth, soften, or refine in manners or condition 3 : to bring to a highly developed, finished, or refined state : perfect This is were it gets confusing. Some people "put polish" on their car, but they really mean wax. Some people "polish in the wax". I mean, it's been used so much in so many different ways I know it seems confusing. For simplicitys sake: Polishing is the last step in paint correction. In the auto detailing world, if you would let's say fix orange peel on a car, you'd go through all the steps above then.. 1. Use a RUBBING COMPOUND with a machine to knock down the 3000 grit scratches, paint should look like ANH Vader at this point 2. Use a POLISH with a machine to further level the paint from the faint marks the COMPOUND may have left, at this point the paint will be as clear as an ESB Vader 3 Apply a WAX/SEALANT/COATING on top of the newly corrected and flawless paint, to protect it (and also add a tiny bit more shine). Wax/sealant/coatings will fill in tiny tiny scratches making the paint appear more shiny, but the effect will diminish as the wax deteriorates. Rubbing compound and Polishes are ABRASIVE, they will REMOVE clear coat, just like sandpaper, only much much finer. Think of them like liquid 30000 grit and 80000 grit sandpaper After drying off my newly 3000 grit sanded piece, I found a foam polishing pad, and primed it with some rubbing compound. Priming is basically just "feeding" the working area of your pad with polish so there are no dry spots. All my compounding/polishing was done by hand. I then applied some more compound to the pad, a pea sized drop and went to town in small, circular motions. Follow the instructions on your product. After finishing I wiped off with a microfibre cloth aaaand... BAM! Shine!! The compound I used was Menzerna FG-400. It's a really good compound, it finishes super fine and you could just leave it as it is right there! You can also use Meguiars M105 for this step. Or any "rubbing compound", as long as it doesn't have fillers/wax in it which will trick you and lie to you. You can also just straight up use a polish, but you might have to work a bit longer to achieve the same effect. Now on to the polishing, for this I did the exact same thing with a finer foam pad and Menzerna SF-3500 (Meguiars equivalent M205). Honestly it didn't make much of a difference since the FG-400 finished out so nicely. If you're using other products you may have to do this step if you see "haze" from the compounding step. I tried my best getting an in focus picture but my camera got so confused because of the shine 4. Wax/Sealant/Coating - Protective Layer A wax is a protective layer, it is NOT abrasive. At this stage you can add wax if you want, it'll protect the paint a bit and also give it a tiny bit more shine. It's the prep-work and COMPOUNDING/POLISHING that really makes it shine. I didn't bother adding wax to my polished test piece as it was already as good as it gets. I did however tape off the piece before polishing, so I had one side which was 3000 grit sanded, and one side that was polished. I tried adding wax to the sanded side: After buffing it off with a microfibre and removing tape: And that's it Hope you learned something! Any questions feel free to post them here and i'll do my best to answer. After closely inspecting the piece I can see some orange peel left, but that's from when I put my color coat on, which is under the clear coat.. oh well.. Spray cans suck!!4 points
-
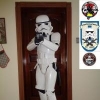
Hi bros I did this. I hope you like it!! Imperial cheers from Barcelona!!2 points
-
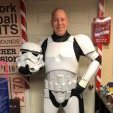
Clearance and ID received and looking forward to trooping and meeting many of you2 points
-
There are people on here with a LOT more expertise than I have! However, I did get there and I want to just give a tip synopsis of things that are valuable to me. These are tips for those just starting. Much of it can be found on here, but here’s what I wish I knew at the start, with my own personal spin on it, from experience or from a lot of digging in the forums. Of course, some things you’ll still have to figure out for yourself…I wouldn’t take that from you! A million thanks to the FISD community. I owe realizing the dream of proper TK armour to you all! Helmet: Don’t rush it. Everyone’s been looking at this helmet for 40 years, and when it’s not perfect it doesn’t look completely right to people, even though they can't peg quite why. The look and consistency of the original costumes was really quite amazing, overall. Things to hyper focus on … the eye holes and the teeth. Eye holes…I often see people not taking enough out, or crooked lines. Slightly crooked can be cannon I guess, in some examples, as some of those eye holes were a bit messier than others. Sand and look. Sand and look. Teeth…people often make them too long and too square. I initially used a dremel, and then refined with hobby files. Compare them constantly to the movie worn helmets. If you make your teeth right, your helmet will likely stand out as an amazing example! Return Edges: People seem to have a desire to keep return edges. This can create fit, shape, and wearability issues…plus it just doesn’t look “cannon.” Again, look for the screen references. The return edges are often much much smaller than we’d all first think, and often there aren’t any at all. For instance, people often want to have too much return edge on the top of the butt plate, or any at all on the other edges of it. This will give you “trooper dumpy butt” I call it. Again, screen reference and look at the best Centurion submissions. Bending ABS: I know some people use a heat gun. This is outside of my comfort zone. Too many horror stories. I did a lot of bending to get things where I wanted them to be. FYI, I was able to accomplish this by pouring boiling water from a kettle on the parts I needed to bend, and applying a plastic clamp for the weight to apply the bend force. When it was where it needed to be, or just past actually (it goes back slightly), I'd immediately put it under cold running tap water. Sometimes I had to repeat this process. This worked perfectly, on 1.5mm ABS. My Favourite Build Resource: Centurion submissions! The build threads were cool, of course. For me, the single biggest help were the Centurion Submissions. So much detail, and real life scrutiny of what you eventually want to have. Specifically, and this is really important, find submissions of your armour make (RS, ATA, etc.) with someone who is approximately your height and weight. That’s a huge help. Glue: I read a lot about E6000. I was unsure about it, as I heard about how bad it smelled and how long it took to cure. The smell does go away quickly. I couldn’t recommend it more. When you wear your armour, it will flex, and there will be times where it may be called up to really flex. CA glue does not allow for any flex at some points on your armour that have a LOT of tension. E6000 is a way safer route to go. Plus, if you make a mistake you’re not hooped. I can’t imagine using anything else. Also, people talk of 12 hour cure times. On anything that has a bit of tension in it you'll need to go 24 hours. Even then, I put it over a forced air heat register (in cold months). If you push short cure times you'll eventually get some separation. Not fun to go backwards! Cover Strips: I did not use interior strips. I’m not saying you shouldn’t do it. It’s all about preference and comfort level. In my experience, if you do your outside cover strips properly, your armour will absolutely be strong enough, and you’ve just saved yourself an incalculable amount of work and curing time, in what is already a long and arduous process. When using E6000, it is VERY important that you glue right to the very edge of the cover strip where it touches your armour. You want some bleeding out. Most of the force is at the edges. When you clean the glue that has pressed out, if you happen to peel even a fraction of a mm from underneath the cover strip, you can expect your cover strip to come away at the edge at some point. For some people that’s not an issue...lots of people with cover strips that aren't consistently flush and in full contact. For me, I need to have my cover strip in complete flush contact. Better to leave a tiny bead of E6000 at the side edges of the strip, than to completely remove it and have separation. Strapping: Tandy snaps are the best. Reading other's horror stories, I'd go as far as to say essential. To keep gaps very minimal, keep the snaps very close to the edge of each piece of armour, and make the strapping tight. It will stretch and it’ll always seem like you’re making the strap to short at first. In fact, even then you’ll likely eventually make them shorter. I tried elastic strapping and I hated it. It flexed better, but the gaps were a mess. So, for back to kidney plate to butt, I changed to nylon/no stretch strapping. Nice and tight with almost no gap! I just used flexible straps from the chest to ab. Even those, make them shorter then you think you need them, or you’ll have issues with your chest plat ending up under your ab plate on troops. They’re expensive, but buy lots of extra snaps. Don’t be afraid to scrap and start again on strapping for bits that aren’t cutting it. Likely will be shortening at some point. Don’t use velcro for anything that has a lot of force, torsion, or will do any pulling away. The only place I have velcro is for my wide white elastic at the shoulder, from my bicep to forearm connection and for my shins. They work great in those applications only. Even then, use the industrial strength velcro and E6000 it to the ABS or to the strap. Don’t rely on the adhesive that’s already on there, especially on the strapping. Armour ABS Thickness: I have 1.5mm ABS. It’s extremely durable. I don’t worry about it cracking or breaking. I’ve felt others' 1mm ABS armour, and I'd be very nervous with it. Cutting your ABS: Score and snap is your friend! Again, it’s comfort level with how close your willing to go to the final line. Take your time (can’t stress this enough). A dremel to clean up a line and shape a little I think is very necessary. Then, I use a 180 grit sand paper to smooth, and finish up with an 800 grit to make the edge shiny and smooth. Boots: You can research and research, and the conclusion that you’ll come to is that Imperial Boots is pretty much it if you want proper high quality boots at the time I’m writing this. The good news is that they are really really good guys and they do an amazing job, and they’re worth the money and wait. On the wait … plan on getting your boots early. You could end up waiting almost a month for an ordering wave, and then another month for processing and shipping. Don’t be sidelined like I was for 2 months because I wasn’t proactive with this. On fitment ... I did the prescribed, order a size bigger. Out of the box they were a tiny bit loose. However, I put in gel insoles, still leaving the original insoles in, and they're absolutely perfect! Wouldn't have them any other way at all. Check out your local fabric store: You’ll be surprised how much of what you’ll need you’ll find there, and for cheap!! Neck Seal: Do not buy one that has rigid metal wire running through it. They’re a nightmare and you won’t even be able to look down while putting your armour on without breaking your neck. Buy a completely soft ribbed one only. Learn from my pain. Literally. On another note, does anyone want to buy a wire ribbed neck seal? Special price! Helmet Cooling: For helmet, like others, I highly recommend dual 5 volt blowers and a usb battery. You can get all of this super cheap on eBay from China. Will last hours on one battery. When the battery is new, charge and discharge it a couple times to make sure it’s not defective. You don’t want a lithium-ion battery lighting on fire when it’s next to your head! Seriously. Audio: Whatever audio solution you choose, it’s imperative that you have sound dampening in your helmet. All plastic surfaces should be covered. I used sticky back 1/4 inch thick x 3/4 inch wide foam. This should almost completely eliminate most feedback for most setups. If you still have issues, put a bit of foam inside your chest plate at the top, to prevent sound from coming up into your helmet (thank you BDWC for this tip!). Lastly, whatever audio solution your pick, it needs to have the static burst after you talk, at a bare minimum. FYI, I use an Aker amp and mic, and the TrooperTalk iPhone app. Blaster: You’ve spent all this time, effort and money on your armour. Amazing! Now don’t fall short on your blaster! The idea of doing your blaster right can be a bit scary, but you can do it. Actually, if you do it right it can be the most fun part of your custume to make! I did DoopyDoos. It’s an amazing resin casting, it’s cheap, the shipping is fast. They have horrible communication but they get it done. The FISD E-11 Blaster Reference thread is amazing and the build threads by Cable Guy and T-Jay were very important to me too. If you do your blaster right, then you really do feel like you’re back on the movie set in ’77…you’ve gone that last mile on your costume! Thermal Detonator Screws: What a freaking pain! Did you know that the planet earth pretty much stopped making slotted screws? And for good reason! If you do find a slotted pan-head screw, it’ll likely be a threaded screw—which means the only way to make it hold in the PVC is to glue it. So, after much much searching, I found a slotted wood/metal screw, but it had a domed head—not CRL Lvl 3 kosher. Again, dremel is your friend! I just dremel’d off the dome and made it into a pan-head. You can do this, or you can order 4 screws from somewhere in the UK and wait a month. Start to build with Centurion as the end goal! If you have Lvl 3 on your mind right from the start, you’ll easily get there. I notice that people who don’t start their builds this way, have a harder journey and seem to be a lot less likely to get there. Furthermore, their armour at the basic approval level can tend to be a little bit of a mess, because they've been lone ranger-ing it, and haven't been using Centurion submission photos as their go to. I'm guessing that those who start this way, most often have far better looking armour right from the start...even if they never progress to EIB or Centurion. Hope that something in here helps someone on their journey!2 points
-
Update… I fixed the back zipper as best as I can by removing the additional black material and the zippers. Sewing in a binding along the seam of the mesh seems to help stabilize the seam. Then I added the additional black breathable fabric and finally the zipper. I should have some pictures of this in the next few days. Sanding, ho hum… Ok I sanded the glazing on the gauntlets and they are done I think. I also 220 grit sanded the chest plate, thermal detonator, back belt, posterior plate and groin plate. These parts will need to be inspected and glazing putty applied if needed then re-sanded. I forget if I mentioned this in a previous post so I will add it here. My sanding process: So once a part is cut and fitted, I prepare it for painting by sanding and filling imperfections. All the sanding I do is wet sanding. I use a square (2.5” wide 4” long and ½” thick) of EVA foam as my sanding block. The foam is stiff enough to hold its shape but will bend and conform around uneven surfaces. I use two types of sand paper. The first type is 3M pro grade ultra flexible sand paper. This stuff comes in rolls and sheets but I get the roll from home depot. I have only seen it in 3 grits; 100, 150, and 220. The other type is 3M silicon carbide wet/dry sandpaper. You can get this in almost any grit so I use 300-2000 grits. You can get this stuff at any auto parts store, home depot, and Lowes but I get mine at Ace Hardware, they seem to have a larger selection of grits. SO my process is as follows: I start with a 4” square piece of 100 grit and soak it in cold water. I keep a bowl of water next to me that I will repeatedly dip the sandpaper in as I sand. I warp the sandpaper around the EVA foam and start working on a part using light pressure and working in a circular motion. This will become more important when I sand the primer before the pain but is a good practice to get into. The goal here is to smooth and feather any imperfections form the surface being sanded “without” leaving any sanding lines in the finish. I constantly re-wet the sand paper and keep the surface wet. I change directions randomly and keep working in a circular motion. It is tempting to go in one direction along seams and squared off features but I try to avoid doing this as it will leave sanding lines. Next, I repeat this exact process with 150, and then 220 grit. For good adhesion of the primer the finest grit I will use will be 320 grit, anything finer and the primer may not stick to the surface and may delaminate later ruining the entire paint job. Once everything has been sanded to at least 220, I wash off the part with mild soap and water and let it dry. Next, I inspect the part. I am looking for any uneven surfaces, pin holes, sanding lines, gaps, etc… Anything I find, I circle with a Sharpie. Next, If I can fix the problem with sanding, I do so. After that, I apply a filler. If the imperfections are small pine holes or very minor issues, I use an automotive grade glazing putty like Evercoat. Most fillers are two part, the filler and a hardener cream. If the issue is larger I may use Bondo. If the issue is on a heavy ware area like an edge that sits on top of the boot and may be exposed to stress, then I would use fiberglass resin, PC-7, or some sort of reinforced filler that will not simply break off with use. If one of these is used, the area will need to be sanded after the reinforcement and filled with bondo or glaze to smooth the surface. Regardless, once all the areas are marked and filled, I let them cure and then wet sand with the last grit I sued on the part, such as 220 grit. I blend/ feather the filler with the surface. Re-wash everything and let it dry. Next, I use a rattle can of automotive primer and apply it to the part. One this is cured, I look for imperfections. Some people use several different layers of primer and alternate primer colors to know how deep to sand. Regardless, the purpose of priming at this stage is to use the primer to bring out the imperfections and now is your last opportunity to fix them. If needed, sand and/or fill the issues then re-sand as needed. Do not be concerned about removing the primer when you do this final cleanup. You will be applying additional coats of primer once you are done with this stage. Re-wash and dry the part and it should now be ready for priming and painting. So that is my sanding process, I hope this helps some people who do not have a lot of experience doing this kind of stuff. I know I have read several posts from people who are intimidated with spending this kind of money on a costume and still have to do all this work. I can only say that building it is half the fun and do not let a lack of experience deter you from building a set of armor. This forum is here to assist you as is your local garrison. Dive in and if you make a mistake, most can be fixed and you will learn more about your armor in the process. Thanks for the interest and I will continue to update this as I progress.2 points
-
Funny you mention that....I ordered the undersuit for a biker scout, and found some sewing patterns for officer uniforms as well.2 points
-
I finally am at that point in my build where I decided to just submit for basic approval. In my mind there are little things to do and touch up but maybe I am just overthinking it. So I pulled the trigger and sent in my pics. Time to see what happens2 points
-
That's correct. There should be a small gap between the rear end of the grip and the hinge from the folding stock. About 2 or 3 mm should be fine.2 points
-
Same over here. Bought about 7 or 8 of their kits during the last years and never had any issues with missing parts or delayed shipping. Okay, it takes a few weeks to arrive, but once you know that... The email to inform about shipping is not that new, but the tracking info is. Nice feature. Now what do we have to do, to make them change the mold of that magazine??? And the counter? And the power cylinders?2 points
-
I just ordered my third DD E-11 resin kit a little over a week ago, and for the first time I actually received an email stating that it had been sent, along with a tracking number, WOW! I know in the past that DD has not had the best reputation for communications (to say the least), and shipping times to the U.S. could take up to 8 weeks or more, but it seems they have changed their tune for the better, happy to say. On a side note, I also ordered another one of Tino's awesome E-11 finishing kits which (of course) arrived in less than a week!1 point
-
I got my official Legion TK ID yesterday, and I am extremely glad to be part of that wonderful group! Thanks to everybody contributing to this forum - you are all so great and always helpful! I can't wait to troop and represent the Empire everywhere I'll be going. I have had a really great experience building my armor and meeting you all here on the FISD forums, and I pretty much think I'll be building some more stuff someday. For now, I've got a troop tomorrow for the premiere of Solo - what a great first official troop! So once again, thanks a lot to all of you and I hope you have as much of a great time as I've had! <31 point
-
Not sure how I missed this thread when you first posted, however, many congrats!! I hope your troop went well. Dan :-) Sent from my iPhone using Tapatalk1 point
-
Congrats and Welcome to the Legion and FISD!!1 point
-
That’s awesome! Sent from my iPhone using Tapatalk1 point
-
Oh and as David stated split rivets are a bit easier to install perfectly acceptable at all levels of approval.1 point
-
Cap rivets are roughly 7.4mm or 5/16 though I have yet to find any in that exact size. Closest I've seen is 7mm on Ebay.
 1 point
 -
Looking great! Good luck!1 point
-
Nice job Jeff! Already looking forward to your next build1 point
-
I did spray it and is sucked ! Haha I have a friend who told me everything you just did so I’m gonna make a clay mold now [emoji12]1 point
-
Thank you! I went into the build planning for centurion so definitely put in the sweat equity up front1 point
-
Looking good! You should not have much problems clearing basic approval!1 point
-
If you are indeed referring to the pic that David provided than the answer is yes. It is worn on the inside. Thumb print won't be seen unless you wave and flail your arms like a crazy wampa1 point
-
Hi Freddy, The thumb print would be inside of the arm. The coverstrips would be front and back of the arm. Thumb print is usually on the left arm. Dan :-)1 point
-
Sorry for asking, but what do you mean exactly by "thumb print"? Are you talking about that : If that's what you mean, it goes on the inside. The front has a cover strip that joins the two halves of the bicep.1 point
-
Why not put this in the "getting started-section"?1 point
-
When in doubt - Always follow the reference pics for a higher standard aka screen-looking suit1 point
-
Really it's a little trial and error with width of the elastic, how much it stretches and how much force is needed to keep them closed, BUT at least with E6000 you can just pull them off if they are wrong Here's a few references for spacing and a couple from others builds.1 point
-
Honestly, don’t be worried about it Kenny. The reason we do this hobby is to see the smile on people’s faces when we troop and to have fun trooping. Rounded or square has no impact on the joy we bring to folks at events, or the excitement we have when kitting up.1 point
-
Just bear in mind that clearance and screen accurate are different things. The CRL tries to find a happy medium between screen accurate (suits thrown together quickly for filming, battered by stunt men, damaged during filming etc) and idealised. Personally, even if rounded corners can pass (as per your example) personally I’d still rather follow the reference of the suits we grew up dreaming about. Just my personal view. No offence to anyone with rounded edges.1 point
-
Things being left open to interpretation worries the crap outta me! [emoji23] Sent from my iPhone using Tapatalk1 point
-
Hello all I am excited to announce the new 3D Printer section as mentioned in the June News Letter is now live. Please take a look around and if you have anything you would like to see added as topics or you have some goodies or expertise you would like to add, go for it and make a post. https://www.whitearmor.net/forum/forum/201-3d-parts-and-technical/ Thanks all, have fun1 point
-
Except for specific areas return edge is not a requirement, nor is it canon. There are plenty of areas on the movie suits where there was no or very little return edge. It all comes down to preference and/or how the armor fits your body. If you have a thin body and still have good mobility without excessive chafing then leave the return edge on, if not remove it as needed. Other info, canon connecting brackets require a return edge to mount to, snaps do not. When in doubt ask1 point
-
Thanks, yeah I trimmed very little off most of it mostly the arms, biceps and forearms. Everything else is just to the anovos lines. Hopefully my build will help you further along in your build. We learn through others mistakes as well as our own. Look up ukwraiths build for this kit or look up tk1636 on YouTube both have been helpful for me. Good luck on your your build as well you can never research enough. Cheers mate. Sent from my VK815 using Tapatalk1 point
-
This is how I trimmed all return edges. But do not take these measurements as must-have for approval. It's just note taken from my friend who helped me to build my armour (I have same return edges like him). All return edges average 1/4 inch(6 mm) but can be up to but not much more than 3/8 inch (9 ish mm)Chest: bottom edge against ab. Sides but taper down as you get closer to shoulders. Minimal to none around neck. Back: bottom against kidney. Sides but taper down as you get closer to shoulders. Minimal around neck.Kidney: top, bottom and slight in kidney notch. None on sides.Butt: all sidesAb: top under chest, lesser return edge around cod area. None on sidesShoulders: none on edge against chest. Return edge against arm.Biceps: minimal to none. Some leave return edge some remove it all together. Forearms: none at wrist opening even up into the square indent ridge. Minimal to none at elbow side. Your choiceThighs: return edge on tops and bottom.Shins: return edge on top. None against boots.1 point
-
Welcome! You made the right choice, stay clean! Do a TK and then a TD that way when your TK gets dirty you can make it a TD. Or like most of us here when you do your first build you’ll want to do more so then you can make a TD and have both. Sent from my iPhone using Tapatalk1 point
-
Thanks! I finally got my Mic tip screens in and attached them (after painting them). I also painted a rank bar finally! Not pictured is a lot more trimming and sanding I got done on the rest of my kit. I did manage to Plast-Dip the inside of my helmet black and started planning out some padding. My head is too big to use a lot of the recommendations for 3/4” replacement pads I’ve seen others use. When I put one at the top it immediately makes it impossible to see through the helmet so I went ahead and ordered some thinner pads. I did use some EVA foam and some felt to make a nose bridge, it’s not attached yet but I can already tell it’s going to add a little extra comfort and keep me from scratching my big nose on the lenses. Sent from my iPhone using Tapatalk1 point
-
Could I add a suggestion to your great info piece? When making magnet sachets, it's a really good idea to make sure that you've got polarity-correct pairs. An easy way to help identify magnet pairs is to assemble them using fabric with high-contrast colors. Kind of like this:1 point