Leaderboard


Popular Content
Showing content with the highest reputation on 05/29/2018 in all areas
-
Most do use webbing and attach directly, but I did the rivet-in-snap method you did with your cod snap in case I ever need to change out the webbing or separate the ab and kidney completely. It's worked out really well for me so far (7 months, 10 troops.) In general I tried to make as many parts of my armor replaceable/repairable.3 points
-
Buttons painted3 points
-
TK-21615 ready to troop!!! Thank you all so so much for your expertise and moral support along the way. I can't wait for my first troop this weekend!3 points
-
You can go a little bit wider than 15mm for the back cover strips on the forearms. That's what I did on my AP kit - I think I made it 16mm or so. A few millimeters larger at the back don't bother at all as it's not that visible, and personally, I prefer having a cover strip that covers all the ridge rather than having a cover strip that doesn't cover it all. Guess it's still a personnal choice, but you'd be okay with a wider cover strip at the back. On another note, the improtant thing is to keep it as proportional as possible. For example don't go 15mm front and 20mm back - I'd rather go for something like 17mm front and 17mm back or something like that if possible. Anyways, you get the point! Good start by the way - lovely job on that AP kit so far!3 points
-
It's usually different from one trooper to another, so I'd suggest finding something specifically for yourself for better fitment. Try it on yourself and find what works best on you, then measure the distance between the chest and back plates once it is properly positioned. After that, you'll have a pretty good idea of how long your shoulder strapping should be. Also, if you can get help from someone to measure the distance between the pieces while you are wearing them, it makes it way easier to have precise measurements! By the way, nice painting on thos ebuttons!2 points
-
Hi all. Rather than me posting on specific threads, I thought I’d make a post about the correct use of the “Dave M” style decals/templates for ANH Stunt lids. If it is deemed worthy, perhaps it could become a sticky. I will then try my best not to mention it on individual posts (as the last thing I want to do is upset anyone). As the name “Tube Stripe Police” was bestowed upon me, I feel it’s my duty to try and spread he work to keep up the high standards of TK screen accuracy. I hope I have not become a nuisance by flagging it. So, here are some shots of the Set for Stun, or “Dave M” helmet from ANH. These pictures are from the excellent website www.starwarshelmets.com My interpretation of these stripes are that they were intended to look like vents on a curved surface. When viewed from straight on they should naturally curve with the tube. Here are some shots that I put together (using my old SDS lid, hand painted stripes using Dave M style templates/stencils from Mike at Trooperbay). For obvious reasons, I won’t show pictures of those that have been applied the other way around as they are not mine to share and I don’t want to alienate people. Should anyone wish to share, please feel free. I hope that all makes sense. Any comments of suggestions to improve this thread, please let me know. Kind regards, Dan1 point
-
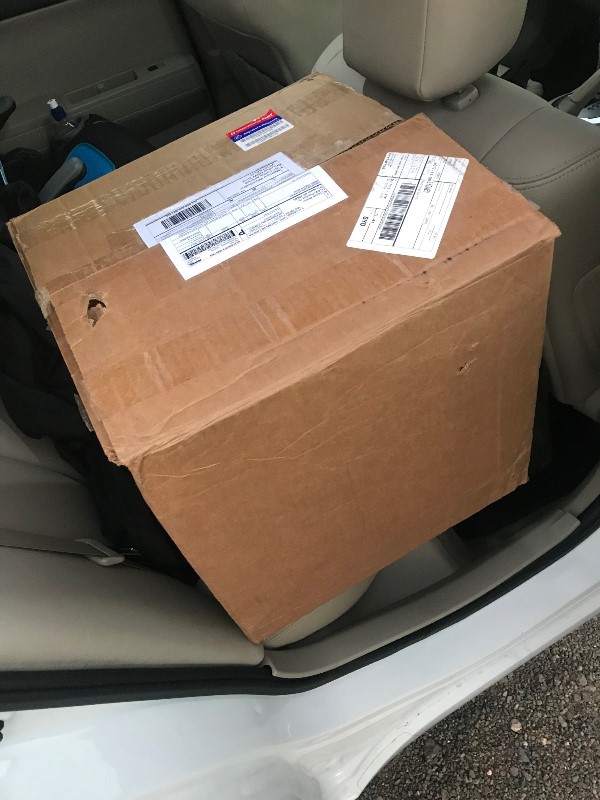
G'day All Well the BBB day has arrived, I bought my ATA Armor from a fellow sqaud member in Australia and had to order a matching helmet direct from ATA. Great part was i managed to skip the wait for the Armor. Both have now arrived and i am slowly collecting all the other bits a pieces required for the Build, Glue, Magnets, Blades etc etc etc. I have a DARMAN holster on its way and messaging him about neck seals as well, and UKSWRATH detonator clips, A Thigh Garter System from PENCAP510, plus a heap of stuff from Trooper Bay. Plus I got a great set of fans from an Aussie TK Sly. Just waiting on a few more parts and the the FIRST CUT. Plan to run a build thread on my local Southern Cross Garrison forum and also here.
 1 point
 -
Hey guys! My R1TK is officially approved! Whoop whoop! In other news however, I made this fan film with members of the 501st, family, and friends (poor family...) and below is a trailer for it. The final film will be posted on June 10th, so keep an eye out for that. I'll be coming up with a Field Report soon. https://www.youtube.com/watch?v=443fj5XUrRQ&feature=youtu.be1 point
-
Hey FISD, me again! The spraypaint inside my helmet had to dry, and since everything else for the armor hasn't arrived yet, I decided to build a decent display for my E-11. Shopping list: three pieces of wood, one base board and two "legs" to put the Blaster on. On top of that, a calculator, pencils, paper for sketching AAAAAND, for the first time since Grade 8 at High School, a different kind of rotary tool - a pair of compasses. Oh yeah, and an E-11 of course.. I started by measuring how much wood I'd have to cut away for the legs, and I realised they had to be different shapes and different heights, due to the two spots of the blaster that I wanted the legs to hold, the back of the tube and the folding stock. So I started to calculate and sketch and ended up with this: I then whipped out the good old jigsaw and started to work my way along the lines, always leaving about one millimetre of wood on top of where the pencil line was so I could adjust the fit with the dremel later. That's what it looked like: First test fit looked quite good: However I realised the front leg was a bit too high, so I corrected that with the jigsaw. Then I realised the construction was everything but stable, so I used some of the extra wood from what I sawed out of the top of legs to create some triangular backings. Test fit still looked good: I finished the working day by spray painting one side of the wood objects black: Whenever I find some time this week I'll paint the other side and then probably screw the legs onto the base board from underneath and then glue the two backings on with some wood glue. Thought I'd just share this project, and perhaps I can inspire someone to recreate or evolve the display. And as always, critique and comments are always welcome Next update shall follow soon... Cheers, Freddy out1 point
-
Nice build Zac, good luck with your review.1 point
-
I glued my strapping where I thought the distance would be than tried on. I didn't like it so I tore it off and re-glued giving it a better fit to my frame. Welcome to the trial and error phase of the build!1 point
-
Well done, Zac! Super clean build. I think you *might* be asked to supply a picture of the inside of your right thigh ammo pack rivet. Also, the elastic holding your shoulder straps looks wide; most common is 1/8". This is only a requirement for Centurion and it's not actually specified in the CRL so I think it might be one of those things that is for accuracy only. Finally, when I applied for EIB/Centurion, I was asked to paint over some of the brass weathering on the scope on my Hyperfirm so you might be asked to do the same. See you at Centurion soon. :)1 point
-
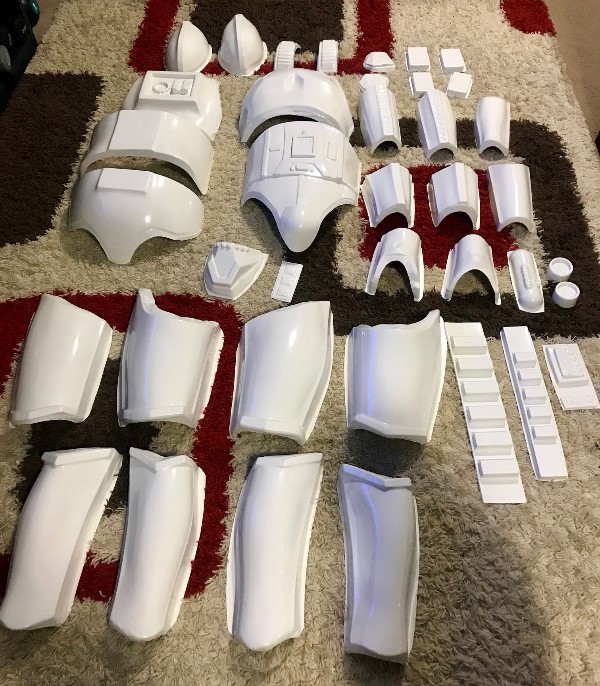
Ok time for an update, First, after figuring out how I would attach the shoulder bells I test fit all the arm armor and discovered that my forearms are about ½” too long but due to the detail on the armor cutting off just ½” would not be possible so I took off about 1” from the back side. Once they were cut and sanded I tried all the arm armor on. Please excuse any similarity to a Von Trapp family singer, its hot in my basement this time of year. Ok, after that I wanted to test fit the thigh and chest/back plates. BTW, if anyone is wondering, yes the fiberglass on the inside of the armor is rough and itches badly. I know some people have coated the inside of their armor with plasti-dip. My only issue with this idea is that my experience with plasti-dip is that it comes off and when it does, it does in large sections. So, I am considering a few other options. One idea I have is paint on flex-seal. I really do not need the coating to be rubber but it does need to be sufficiently thick enough to seal the fiberglass and flexible so any suggestions are welcome. Ok, next I used PC-7 to adhere the leg ammo belt. I also sealed up the font seams on the lower leg armor with PC-7. I had been holding off on this until I could determine if they needed to be cut down but without an additional set of hands its damn hard to hold the lower leg armor in place and tape them shut then mark where they need to be cut. Since the forearm cut-down went well, I figure I can put the armor on and mark them if they need to be cut. Lastly, I removed the connector straps from the groin and posterior armor and added snaps. I discovered that I placed the snaps for the straps about 1.5” high inside the bottom lip of the abdominal armor and once the abdominal armor is tightened, it’s very hard to reach under the bottom lip and attach the straps. So I will make some straps that have snaps on both ends and snap them inside the abdominal armor then attach the groin and posterior plates. So I still need to sort out how the shoulder straps will attach to the chest plate and how to make the straps lay flat on my shoulders. I am thinking Velcro but I am open to suggestions. I am also considering cutting out the bottom of the attachment points (the red squares in the picture below and then just using Velcro to attach the shoulder straps. Also, I need to figure out how to attach the belts (front and back), the back plate cover strip, cutdown the side plates and finalize the helmet inserts. Once all this is done, it will be time to sand and fill then painting. Thanks for the interest.1 point
-
That is 100% the plan! Only thing I need to do is get another pair of rubber gloves and attempt once more to get the silicone guards to stick (yeah, I know that's Centurion, but I'm thinking ahead )1 point
-
Looking good. Yes, cut your back cover strips the same width as the raised return edge. The cover strip should cover all the flat part of the return edge. Like you mentioned, the top of the vocoder needs some definition, but otherwise things are looking great. Keep it up! Also, if you did use a slightly wider cover strip on the back of your forearms, you are going to want to do the same for the back of your biceps - just so they look uniform from the back.1 point
-
Helmet came out great. As for the clips, I have to redo mine, after a troop or two you’ll be redoing a few things to get the comfort down pat. Sent from my iPhone using Tapatalk1 point
-
Big weekend! Started setting some snaps. Have put the female (flat backed) end in some 1” nylon strips. Now those are attached and curing on my shoulder bells and biceps. Went loosely by the BillHag diagram. Oh, and added elastic. Oh, and first time with the heat gun! I made my bicep clips. They are not perfect. And one day I may try to re-do them. But I’m proud of myself and learned lots in my efforts! I (think I) finished my bucket! Well, you know “TK finished” (meaning I still may tweak it 1000x for comfort.) My fans from ukswrath are ordered (woohoo on that Memorial sale!), and are on the way. So it looks like I’ll be starting that tweaking soon. And first official bucket selfie—- And re-finished that thermal detonator. This time with the control panel on correctly. But, this is still on my “not perfect” list, and will re-do to higher level standards. And (no pictures), did my first hot water bath. I molded my shoulder pieces and my ammo pack. I think I may tweak the ammo pack, but that will be another post with dedicated pictures. But a picture of why I am so amazingly thankful for the ultimate sacrifice paid by so many for our freedom. Sent from my iPhone using Tapatalk1 point
-
I think I might of painted them white when I was touching them all up last week. I’ve adjusted bells a couple times but can’t seem to get them to stay closer to the bridges if the do they seem to pulled biceps so I lowered them lol.. Thanks for the feedback on needed adjustements1 point
-
So shiny! Looks great!1 point
-
1 point
-
Excellent job AJ looking great1 point
-
The WTF kit is smaller than the RS kit that I previously built. So my assumptions of cutting the same amounts and in the same locations for a Luke suit were way off. While the kit I have been building fits me well, I'm not getting the "Hero Luke look" that I was going for. Which is why I ended up buying new ab and kidney/butt plates. To me, I see that the Luke suit has a cut chest and back, but the rest hasn't been altered much. The belt sits high, and the ab buttons sit higher because the cod hasn't been cut down. The kidney and butt plates haven't been cut down. And the lower part of the chest flares out quite a bit. So off I go to assemble untrimmed ab and kidney/butt plate parts again! I ended up having to make new returns on the kidney and butt plate because the WTF kit has these as an 'all-in-one'. Thankfully, I've done this more than a few times before, and it took me less than an hour to make spiffy new returns on those parts using a heat gun. No pics because you've most likely seen that all before from me. Next, it's time to shape things together. I've got the back pieces gaffer-taped together before shaping. None of the parts have been trimmed in these photos. I wanted to shape the parts to a bit more oval-torso shape before making any trims for size. My goal is to get the halves meeting together on their own. This will result in less strain on the strapping and reduces likelihood of cracks on the armor. So much flare! I used a large lobster pot to boil water and was easily able to dip my full-sized parts into it. I avoid the heat gun for this because boiling water is much more forgiving and does the trick nicely. I don't insert the entire piece into the water, but rather dip just what I want to curve. So for the ab, I only dip to here: And the kidney, I only dip to where my hand is because I don't want the middle part to curve: It took less than an hour of dipping and cooling to get the halves meeting together nicely. Here's a nifty before and after: I shaped the butt plate a little bit on one side, but forgot to take pics of that. The flare on the butt plate doesn't need the kind of attention that the kidney does. I also flared out the chest piece as well on the ends a bit. The lower part of the chest on the Luke Hero doesn't curve around the torso very well, so I flattened the bottom sides of my WTF chest a little. This has resulted in the chest now feeling too wide when wearing it, so I'll need to shave off some of the the sides of the chest near the arms to fit.1 point
-
I just had a Future Trooper ask me a few questions about my Executioner so thought I would Post them on my build for future troopers as well. Some great questions asked. Hope these help but if not, pls ask for further clarification. - Can you list all of the spray paint you used I used Montana Cans Gold Series Universal Primer and Shock White and Black. Reason why i went Montana Cans is that its an Acrylic based paint that offers more flexibility than Enamels or Lacquers. I used Montana cans for all 3; Primer, Top coat and Clear coat. Clear was Gloss on white and flat on the black. Additioanlly i also used Primer from Rustoleum for Etching Primer and Rustoleum High build primer. - Can you List the steps you took to paint everything? Especially the helmet The paint was a lenghtly process, only cause i really like my paint to look like glass. But if you are not, you can certaintly skip some of the processes performed. Start - mix up bondo and run a skim coat over the helmet, this will start filling in all the low spots. Next lay a thin coat of filler primer and allow to dry. Block Sand the helmet with 240 grit carfully. Rinse with water and hold into the light reflecting the surface looking for high / low spots. if you see more low spots, mix up more bondo and repeat steps. Once level, spray ecthing primer and allow to dry. Wet sand with 400 and rinse and allow to dry. Spray 2 coats of Montana Cans Universal Primer. Once dry, using Bondo Spot filler, fill in any pin holes. Wet sand with 800 grit. repeat for any missed pin holes. Now your ready for Base Paint. Lay down 2 coats of White and allow to dry. Wet Sand with 1200. Lay down another 2 coats of White and allow to dry. Wet sand with 1500. Now your ready for Clear. Lay down 2 coats of clear and allow to dry., Wet sand with 1800. Lay down another 2 coats and allow to dry., wet sand with 2000. Now Very Important - Allow the Helmet to dry for 5 days before touching again. Since there is alot of paint and clear, it will take time to fully cure and harden. If you Dont wait and start masking off for the black, youll find that the paint is still soft and youll have tape marks left behind and will need to wetsand again. For the remaining parts - i repeated all above but skipped the 2nd bondo application. - Did you have to get any extra pieces to make the kit accurate? All the hard goods from Jim were acurate enough for lvl 1 approval. However when you want to achieve lvl 2 or higher approval, then youll need to outsoure a better belt, rubber gaskets. Youll want to reference the CRL closely: https://databank.501st.com/databank/Costuming:TK_TLJ_Executioner - Any areas you feel needed to be reinforced and how did you do it? Youll find that you need to Reinforce a few areas immediatly. Mainly the Yoke and Thighs. There are a bunch of build threads where the gents used Fiberglass Boat Repair to Reinforce the inside of the parts and others had used Devcon Plastic Welder. I would do either or. - Anything you wished you did now that your done? For the Yoke, I would recommend getting Ukswraths @ukswrath yoke supports. Really wish i used them as film acurate and fantastic option to reinforce the yoke. Wish i had also contoured hte back side of the thighs to allow more mobility and also countoured the upper thighs more to match the cod. - what glue did you use? Devcon Plastic Welder, Loctite CA Universal, Loctite Marine Grade Epoxy - How did you get the lens in? Epoxed Chicago screw bases to the inside of the helmet . then marked and drilled a small hole for each and secured with screws. - magnets or snaps? Both. Magnets on the Chest plate and snaps everywhere else. - Can you list all of the sand paper you had to use? 240 Dry, 400W, 800W, 1200W, 1500W, and 2000W - Can you list the extra pieces you had to buy on top of the kit? Undersuite from Stormtrooper Undersuit, Gloves and Boots from Imperial Boots, Belt from Belts of the FirstOrder @JAFO, Neck seal from Anovos Premeir Line, Cloth Gaskets from Jim, Canvas Belt boxes from TrooperBay, Helmet Sound and Fans from Ukswrath @ukswrath.1 point
-
Alrighty, my armor delivery is just around the corner and I'm getting pretty excited to get started. I've been trying to keep busy preparing with more research and assembling my equipment. To that end, one of the questions I had when I first started on this journey and one of the reoccurring comments for beginners like myself are, what will it cost? While I will not address armor costs for obvious reasons, I have been keeping track of what I've bought, where I bought it (links are embedded for online purchases) and how much it cost. Here is a compilation of all the things I've acquired in three categories; Tools, Accessories and Materials. I generally looked for quality, preference, what I felt most comfortable and informed on and the best price. I would not say I went overboard because I could have easily spent more but I also know one can do this on more of a shoe string budget so I'm not trying to discourage anyone. Hopefully this will be useful to some. Tools: (1) Lexan Curved Scissors (Amazon $10.40 USD) Not shown in Pic; I purchased Lexan Straight Scissors for $10.40 too since I saw evidence of curved leaving 'wave' patterns when cutting straight lines (less to sand?) (2) Small Clamps w Rubber Articulating Tips for outer glue clamp work (Harbor Freight $4.49 for 4) (3) Pencils for marking cut lines, 5B - slightly darker (Hobby Lobby $3.98 for 2 plus sharpener) (4) Respirator for paint, glue fumes, Acetone, etc. (Ace Hardware $34.99) (5) 3M Sanding Sponge - Fine, for light shaping and finishing edges (Amazon $5.44) (6) Folding Lock Back Utility Knife (Harbor Freight $5.79) (7) Qty 12 - Neodymium Rare Earth Magnets 7/8x1/8 N40 for inner glue clamp work (ebay $19.98) (Ref: Joseph's Magnet 101) (8) Blue Painters Tape (Already have a bunch on hand) (9) Set of 12 small files, various shapes - half moon, triangle, flat, etc. for Frown/Teeth (Harbor Freight $4.89) (10) Soft measuring Tape US/Metric for circumference and angled measurements (Hobby Lobby $1.99) (11) and (12) Tandy Leather Craftool Line 24 Snap Setter 8058-00 + Tandy Rivet Anvil - 20/24 (Amazon $8.54 USD) (13) Leather Punch Tool for creating holes in strapping and elastic (Harbor Freight $6.99) (14) Rivet Gun for helmet Rivets (Already had this on hand) (15) TEKTON 30812 Double-Faced Soft Mallet, 35 mm recommended as easier on snaps (Amazon $7.91) (16) Not numbered in pic (40 inch Aluminum Ruler US/Metric straight edge for measuring/cutting cover strips (Harbor Fright $2.99) (17) Not Shown in pic (Dremmel with sanding drums for helmet eyes and smaller rounded corners) (18) Not Shown in pic Popsical sticks for even spreading of E6000, toothpicks for cleanup of paint or glue. Various sandpaper 150, 180, 250 grit for smoothing edges and roughing up of glue surfaces. Subtotal: $ 118.88 Accessories: (20) TK Boots Size 12C ($84.00, $102.00 USD Shipped) (21) Correct TD Screws (Justjoseph63 $3.25 USD) (22) 5/16th Single Cap Rivets - set of 4 REPLACES HEAD SET RIVETS FOR AMMO PACKS (Justjoseph63 $3.00 USD) (23) Centurion Level Rivet Set of 10 (Justjoseph63 $2.50 USD) (24) Correct screws for TK ears (Justjoseph63 $3.75 USD) (25) Centurion Flexible Silicone Hand Guards (Justjoseph63 $25 USD) (26) Lavento Men's Compression Long-sleeve T Shirt, Large (Amazon $12.99 USD) (27) CompressionZ - Compression Pants Men, Large (Amazon $18.97 USD) (28) Trooper Black Latex Gloves (Trooperbay $9.00, $16.99 shipped) (29) Neck Seal (Trooperbay via Amazon ($59.99 +Shipping) Subtotal: $248.44 Materials: (30) Qty 100 Nickel plated Line 24 SNAPS (Joseph recommended) (ebay $32.33 USD) These will be for double snap method on 2 inch strapping. (31) E6000 220011 High Viscosity Adhesive - 3.7 fl. oz (Amazon 3.7fl.oz. $7.80) (32) Cosmos 2 Inches Wide 10 Yards Black Nylon Heavy Webbing for high tension areas if you are using the double snap method. (Amazon $6.98) (33) XFasten Adhesive Hook & Loop, White, 1-Inch x 10-Foot Industrial Grade Velcro (Amazon $12.97) This will be for back of calf closure although I'm not entirely certain I'm going with Velcro for this as yet. (34) Dritz Ribbed Non-Roll Elastic, 2" by 1 yd, White (Amazon $7.69) This is elastic between chest and back plate, under shoulder Straps (35) Dritz Nylon Strapping - Black - 1" x 60" (only need 8ft total) (Amazon $6.13) Additional nylon strapping as/if needed for additional areas besides torso-2 inch strapping. (36) 1/4 inch wide white Elastic (1 ft.) for securing rear shoulder straps (Hobby Lobby $ 4.95) (37) Performix 11203 Plasti Dip Black Multi-Purpose Rubber Coating Aerosol (Amazon $5.82) For coating inside helmet in black. (38 and 39) Gourd 1 Inch Heavy Knit Stretch Elastic 5 Yards White and 5 Yards Black (Amazon $9.99) 1 inch wide black for shoulder bells, etc. and 1 inch wide white for drop boxes. (40) Sugru Mouldable Glue - Original Formula - Black 3-Pack (Amazon $9.99) For attaching lenses to inner helmet (Ref JustJoseph63) Subtotal: $112.45 Total: 490.17 nylon (correction previously referencing elastic) Additional Consideration: I May go with 2 inch nylon (correction previously referencing elastic) on arms and 3 inch nylon (correction previously referencing elastic) to hold upper thigh to inner belt but I need to have the armor in hand, fitted and positioned such that I can determine what will better hold some of this in place. This is by no means an end all, complete list. I have numerous aditional items to obtain (helmet stuff, TK Belt (awaiting armor fitting to size it), holster, E-11 and probably things I haven't even thought of yet) but this was the minimal "base" list of things that I both; felt comfortable enough in my research to purchase and knew I'd need to begin and get through much of the build. Special thanks to Joseph for helping me to prepare for my build and getting me set up with many of the Centurion required components (absolutely love the Centurion Flexible Silicon Hand Guards). He is the epitome of Stormtroopers helping Stormtroopers. While I have a growing list of 36 links to reference as I build, below were excellent supply and resources references that helped me to fill in a number of gaps: Supply list for your TK build - by justjoseph63 (Extensive list of tools/supplies for TK build) TK Resource Thread - by bobojuice (Great TK Build Resource References)1 point
-
Well...very unexpected but KB received massive help and support and the FOTK is back on so I cancelled the claim....1 point
-
Nice work! This has always been my idealized trooper. When I think of Stormtroopers, I picture this one. Can you share more about how you reworked the scope and mount on the blaster? Sent from my VS996 using Tapatalk1 point