
Leaderboard


Popular Content
Showing content with the highest reputation on 04/18/2018 in Posts
-
Holster attached to the belt! Same holes as I had marked in above picture, used soldering iron to create the holes than I riveted using a 3mm washer in the back for extra strength. Also tightened the velcro on the belt which allowed the belt to sit correctly on the bottom Ab button3 points
-
I wanna play. I'm Steve and I am from the Empire City Garrison. I've been a member of the 501st since 2014. I have always wanted to be a stormtrooper since I was a kid. Finally I started to get serious around 2011 and found the FISD. I did some research and realized how expensive this hobby was so I decided to step away after a few months. I finally made my way back in 2013 and decided it was time. Like many of you it was a very exciting time but also very stressful. I was always wondering if I had what it takes to build a set of armor. I powered through it and haven't looked back. I now have 5 costumes built and am currently working on an ESB vader. Here are a few of my favorite pictures from my time as a member: 1ST TROOP: CELEBRATION ORLAND ECG: CELEBRATION FISD STAFF PHOTO: I'll also leave this link here. This is a little "about me" story that is posted on the ECG blog: https://501ecg.wordpress.com/2017/06/14/why-we-troop-tk-10466/ Steve Sheades TK-104663 points
-
Hey Frank! Good to see you are still around. Thanks for the feedback on my build. The movement on the arms at the elbow is surprisingly good. I cut deeper into the inner forearms in order to accomodate better movement and prevent armor bites. I'm actually going for a tighter fitting connection at the elbow because I'm trying to emulate the Luke Hero suit. You can see in some of these screen shots how close the forearm and bicep are together when Mark's arms are relaxed. His biceps tend to ride low on him, too. I still have to install the left forearm on the right arm (I am wearing the right forearm in the photos), but it will be similar to how it is in the pics. The Luke suit also has overlap on the left arm between the forearm and bicep- I don't know if I want to go that far with this, though. It doesn't look comfortable at all, and I don't think it'll pass at the higher level awards here. That said, there is nothing in the CRL about overlapping biceps/forearms. Hm. It's not a huge deal, but I suppose I should probably ask Tony about this! At any rate, I won't be able to do a Luke suit as well as I had hoped with this kit, no matter what mods I make to it. The proportions seem 'off' on some things, and I can't compensate for that. For example, the back plate. And me: Even if I cut more off the bottom and sides of the back plate, it still won't look like what's on screen in ANH. Here you can see the difference between my RS (left) and WTF (right) back plates. The RS OII box is more rectangular in shape and is larger overall (RS box is 20 x 15.5cm, WTF is 19 x 15cm). The OII shapes themselves are different, too. These are really small things overall, but things I wish I could change. Will I eventually work with another RS kit again to get exactly the Luke suit I want? Heck yeah! Will these things prevent me from trying to do the best Luke suit I can with what I've got? Not at all! I'm done with my griping... it's time to get this kit finished!2 points
-
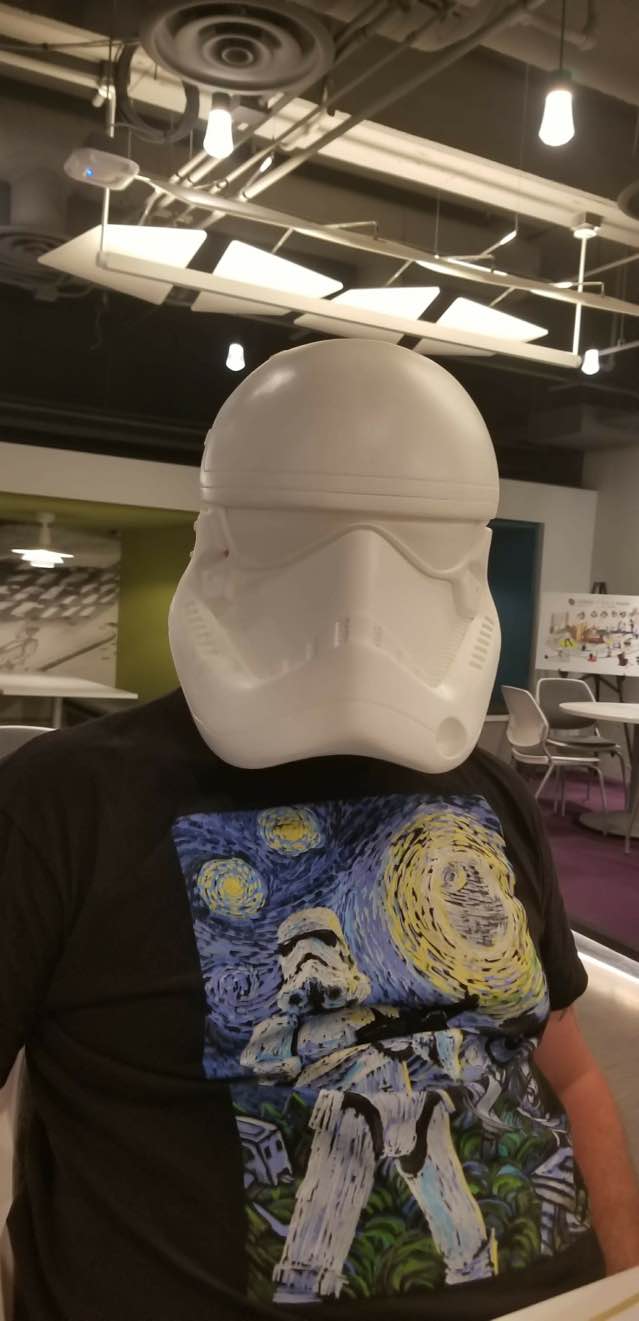
So something that's finally sinking in is just how BIG the FOTK is compared to the OTTK. I got really discouraged last night because I decided to try on the chest and back, and they just looked silly on me. It looked ok when it was just the armor: But on me, I was swimming in it. I really wanted to just give up on the whole project, but I spent some time today looking at some builds photos on the KB Facebook page, and there were a few troopers who also had slim frames who somehow managed to make the armor work without doing any major surgery on the kit. I recalled everyone saying that the gaskets would add some bulk, so I decided to just try it. I have a set of custom gaskets coming from Teresa, but in the meantime I have a too-large gasket set from FN armour that I decided to try. I started by trimming and taping the ab/kidney. The chest/shoulder gaskets were so big I couldn't even get the biceps on, but once I had the chest/back/yoke on top of the gaskets, the abdomen, and added the helmet, I dare say that everything actually looked pretty ok: When I'm not wearing the ab, you can see how small my body actually is in the armor: Nevertheless, tonight was the first time I actually felt a bit of confidence that I'd be able to pull this off.2 points
-
I decided to work out a complete, comprehensive list for those about to start an OT TK armor build (ANH Stunt, Hero, etc,) to help get everything in place for when "Big Brown Box" day arrives! This list does not include soft parts, (neck seal, boots, etc.) but focuses on the hardware and supplies for building the armor itself. However, a list of soft parts can be found HERE I believe I have covered most items, but would appreciate additional suggestions/corrections to add, and will keep it updated as such. Yes, it looks a bit daunting, but some of the items you will already have, and the rest can be purchased at major home improvement stores, online, or borrowed from a TK friend! Plus, it gives you something to do while you "hurry up and wait" for your kit! This list is includes items used for the EIB and Centurion programs, (marked with double red asterisks)**. These items are not required for initial TK approval, but I encourage everyone to consider them as an option. Hope this helps, and best of luck on your build! PLEASE NOTE: Some kits come with all the hardware you will need to build to Centurion level, i.e. split rivets, ear screws, TD screws, etc., however, not all armorers supply the correct ones. If you are (hopefully) planning on aiming for level 3, please check with your armorer to see if they provide these. You can also reference the photos below to see if they are accurate. These supplies are based on using the snap method for connecting the armor. Example photos are shown at the bottom for many of the items, but not all. (Everyone knows what a hammer looks like). Items with photos have a notation. 1. E-6000 glue- Great for almost everything, and removable if necessary. Highly recommended. (Pick up some wooden tongue depressors as well, makes spreading it easier)! (Photo 1) (Please see updated information on E-6000 below, after #50 before purchasing). 2. Binder or notebook- To keep notes on your research. 3. Dremel or rotary tool- A "must have". (Photo 2). Be sure to get the sanding drum attachment and extra sanding drums (Photo 3). I suggest the 180 grit type. 4. Small plastic containers- Keeps everything organized. 5. Lexan scissors- Curved and straight, for cutting ABS. (Photo 4) 6. Small spring clamps- For holding things in place while gluing. You can't have too many! (Photo 5) 7. Line 24 snaps- For strapping. You will need at least 30, and do NOT "cheap-out" on these, but purchase quality ones. (Steer clear of Wal-Mart snaps). Tandy is recommended. Tutorial located here: https://www.whitearmor.net/forum/topic/44617-snap-setting-101/ (Photo 6) 8. Snap setting tools- There are 2 types to choose from- One is a two piece set (requires a hammer) (Photo 7) and the other is the pliers style (Photo 8) 9. Hammer- For setting snaps if you use the 2 piece style of snap setter. 10. Pliers/vise grips- 11. Screwdriver- Slotted head. 12. Rivets-** 5/16 (8mm). (Photo 9) Round head bifurcated/split rivets with washers. You will need 9. (3 for the kidney, 3 for the ab, one for the cod piece, 2 for the thigh ammo pack). You will also need 3 speed (Chicago") rivets to attach your ABS belt to your canvas one. These are attached by hand and not to be confused with the aluminum ones listed below (#19). Some like to use the screen accurate single cap rivets (Photo 10) to attach the ammo thigh pack but these are not a requirement. 13. Elastic- 1 inch wide black for shoulder bells, etc. (4 ft.) 2 inch wide white for ab/back plate shoulder connection (1 ft.), 1 inch wide white for drop boxes, (1 ft.) 1/4 inch wide white** (1 ft.) for shoulder straps. 14. Nylon strapping- 1 inch wide black, at least 6 to 8 ft. long. 2 inch wide black (48 inches) for high tension areas if you are using the double snap method. (NP) 15. Exacto knife/extra blades- For cutting, trimming, cutting nylon strapping. (Photo 11) 16. Heavy duty razor knife/extra blades- For cutting cover strips and scoring around pieces that will be removed. (Photo 12) 17. Heavy duty scissors/tin snips- For (carefully) cutting large sections of ABS. (Photo 13) 18. Metal ruler or straight edge- (At least 18 inches long). For use as a cutting guide, especially cover strips. 19. Hand Rivet gun/aluminum open end blind rivets- For putting your helmet together. Available for about $10-$12.00, EASY to use! (Photo 14) 20. Metric Ruler- 21. 2 x 2 or larger piece of carpet- Protects work surface, keeps dust down, and stops small parts from rolling away. 22. Rags/paper towels- And plenty of them. 23. Blue painter's tape- 1 inch and 2 inch widths. For keeping glued parts in place and dry-fitting your armor. 24. China marker/pencil- For marking cut lines. 25. Sandpaper- I highly recommend Sandblaster Pro Flexible silicone sanding sheets from 3M, 220 grit. You will never use anything else, I promise. They last forever! 26. Sanding block- The sponge type, 120 grit. 27. Band Aids- You will need these. Might as well keep them handy. 28. Rare earth magnets- (10 minimum) SUPER strong! I use the 20 mm x 3 mm round ones. Cover them in blue tape to prevent scratching your armor. You cannot have too many!!! Tutorial located here: https://www.whitearmor.net/forum/topic/44619-magnets-101/ (Photo 15) 29. Butane Lighter- For sealing the ends of nylon strapping. (see # 44 below for a better option) 30. Large "half-round" file- For smoothing out edges before sanding. I used this a LOT, especially in the curved areas. (Photo 16) 31. Small "Needle file" set- Very inexpensive, comes in 6 different shapes, and is perfect for the teeth and eye openings on your helmet. (Photo 17) 32. Foam padding- 1 inch thick. Great for helmet and armor padding. Available at craft or fabric stores. 33. Velcro- 2 inch wide black (various uses) and 1 inch wide white, for calf closures (about 36 inches). Go for the "Industrial Strength" kind. 34. PAINT: Satin Black: Humbrol # 85 or Testors # 1747 for vocoder, trap/ tear drop/ear bar outlines/stripe(s), ROTJ and ESB frown, TD screw heads. Gray: Humbrol # 5 or Testors # 1138 for trap/tear drop/ear bar background, ANH frown and ab-buttons. French Blue: Humbrol # 14 or Testors # 2715 ForTube stripes/ab buttons. Mediterranean Blue Humbrol (Tube stripes alternative color) Testors: No exact match Gloss white for all rivet heads (excluding cod rivet). Mineral spirits for brush cleaning 35. Goo Gone- Citrus based solvent that will remove latex and enamel paint and NOT harm your armor. (Photo 18). 36. Small paint brushes- Assorted sizes. Try to buy quality ones.. Cheap brushes =cheap looking results. I suggest picking up a "filbert" (Photo 19) style brush (photo 5) as well, as it's rounded tip works great for painting the ab plate buttons and vocoder. Another GREAT way to get clean, crisp lines on the ab buttons is to use Testors Micro-Sponge brushes (Photo 20). 37. Wire or fiberglass mesh- (Window screen). For inside the "frown" of your helmet. A piece 3 x 8 inches will work fine, and you can trim it as needed. 38. Safety Glasses- It never hurts to be too careful, especially when using a Dremel type tool. For your Thermal Detonator, (TD) clips: (Note: There are some GREAT pre-made TD clips you can buy on this site, and some kits include them, but you can use the following 5 items to make your own. 39. Aluminum strip- 1 inch wide 40. Screws- Size #6 pan-head slotted screws **, 1/2 inch long, You will need 4. (Photo 21). NOTE: The CRLs have been updated and round head screws are permitted, but they must be the slotted (not philips) style. 41. Hacksaw- For cutting the aluminum strip. 42. Drill- Electric or battery operated, with various size bits. 43. Vise grip OPTIONAL ITEMS: 44. Heat sealing iron- For making return edges. Not normally needed, but there are some great tutorials on this here on FISD. Try it on a scrap first, though! 45. Soldering Iron- For making holes in nylon strapping and sealing the ends. Pretty inexpensive, and worth the cost! (Photo 22) 46. Plasti-Dip- A black rubberized coating you can spray inside your helmet, (also available in a brush-on). Or, you can use spray paint. Just remember to sand and prime first! 47. Heat gun- Not normally needed. For shaping ABS. Use this CAREFULLY, and practice on scraps first until you get the hang of it. These things can reach 1500 degrees and melt your armor. 48. CA (super) glue- Not recommended for first time builders, as it is PERMANENT, and you can't fix mistakes. Also, if it drips on your armor it is nearly impossible to remove. It can also become brittle over time, causing connections to fail. 49. Acetone- For use ONLY in making ABS paste for filling small gaps, (see tutorials). Do NOT put this directly on your armor, as it will melt it. 50. SUGRU- This is an easy way to attach the lenses in your helmet. Tutorial located here: https://www.whitearmor.net/forum/topic/44593-how-to-attach-lenses-using-sugru/ 51. Respirator- An informative post was made by Clint, (cm325i) concerning the effects of E-6000 glue on some individuals. Definitely worth a read: http://www.whitearmor.net/forum/topic/33347-e6000-warnings-read-them-and-wear-a-respirator/ 52. Cut resistant gloves- Especially helpful if you are prone to cutting yourself. Available online for about $12.00 (Photo 23) E-6000 update: Please note that there are certain online retailers (including those in Europe) that are selling FAKE E-6000 or "knock-offs" like these: The genuine product is clearly marked Made in the USA, and has a batch number on each tube. They do not sell to distributors in Asia, so if you try to save a few bucks by ordering from a seller there it is not the real stuff. If you have any doubts, you can contact the manufacturer at www.eclecticproducts.com, and they will let you know where to get it. The fake stuff is garbage and will not hold up. 1. 2. 3. 4. 5. 6. 7. 8. 9. 10. 11. 12. 13. 14. 15. 16. 17. 18. 19. 20. 21. 22. 23. IMPORTANT UPDATE! To make life easier, Ray (Dieltski) made this into an awesome Google spreadsheet, which you can download to keep track and add notes! Just click here. Thanks, Ray! .1 point
-
Got my bucket in from TDK Props this last weekend and my armor, hopefully with the riot shield, will ship out this week from KB Props, picking up my boots and gloves (imperial boots) tonight. Still need to get the soft parts, Blaster and baton (hoping to find a baton that is functional). I do have a pair of Army silk weights from my time in the military that I was wondering if it would work or not. Other then that, I hope to have it finished and ready for submission in time for Denver Comic Con this year.
 1 point
 -
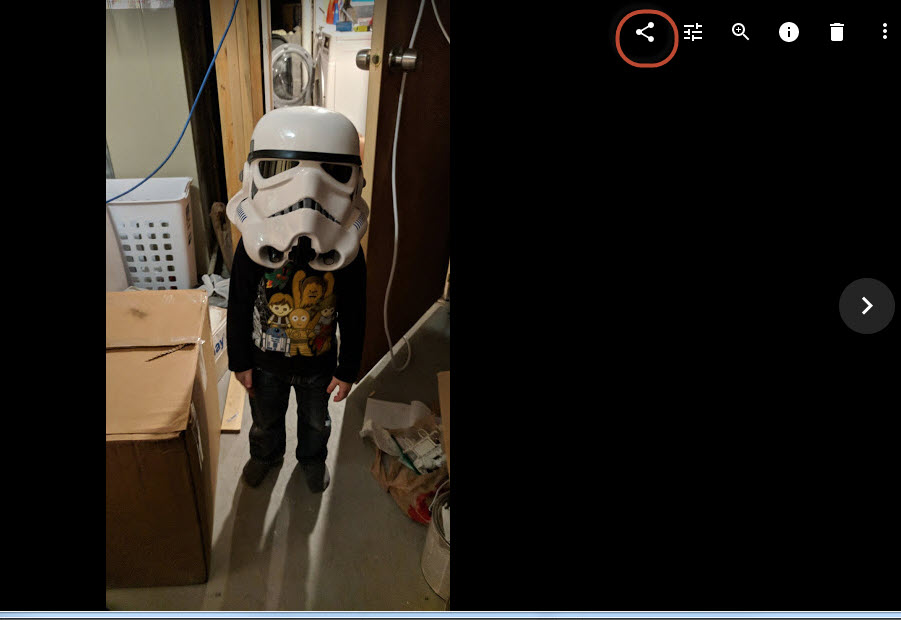
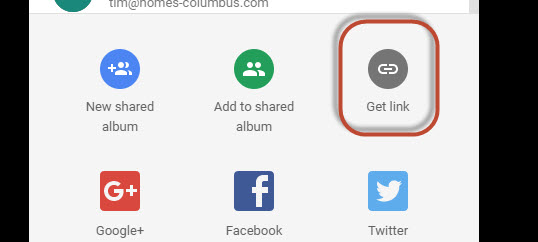
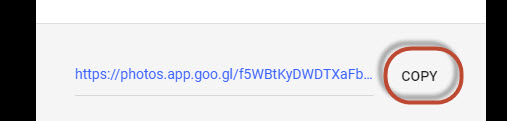
Hi Troopers. Thought I would share how I have been adding my photos from Google Photo if anyone wants to use google photos as there image hub. First you find your photo that you want to use and click the share icon (circled in red) Than click get link And click copy From there go to https://ctrlq.org/google/photos/ and paste the link where it states paste google link here and click on generate code The webpage will perform its internet magic and provide you with a link below Copy and paste into the direct link into whitearmor forum of your choice and you have your picture! <a Hope this helps everyone!

 1 point
 -
Most people go ANH. You can look at this by seeing the Legion approved costumes by type. ESB is up there, but the vast majority are ANH. Most of it is personal preference, some is cost. It's a second helmet and hand plates, and holster at the least. I ended up getting a second belt too to make it easier to swap. Personally I don't really holster my blaster anyway, so that was never an issue for me. It's really what you want to create. My favs in order were always ANH-Hero, then ESB, then ANH-Stunt, so the vast majority of my troops were ESB for instance.1 point
-
Thank you!!! In some of the pictures above the chest plate was definitely choking me! I had it taped pretty close to the back piece, though, so I'll make sure I don't choke myself when I actually fit it! Only Vader gets to choke stormtroopers . . .not their armor!1 point
-
Congrats on achieving Centurion!1 point
-
Congrats on Centurion!1 point
-
My thoughts exactly. If you used E6000, for example, you could just rip off the back coverstrip on the thighs, trim them down some, and reglue, no hassle. Again, it's worth stating that you should be able to be approved as is, we're mostly talking comfort/noise making here1 point
-
Additional thoughts on this. I'm guessing that on a movie set, they wouldn't have the time to do these crazy mods to the armor like I have. Like creating new returns on the kidney, or cutting down the cod piece. Things would be altered on a "quick and dirty" type basis I assume. The only places I see big cuts on the armor are the bottom of the back and bottom of the chest. So maybe I've been approaching this all wrong. Maybe I should not have altered the cod or kidney in any way at all, but instead, made all of my cuts to the back and chest alone. Hm. I think I know what I need to do now. I'll report more once I'm done.1 point
-
Hi D. 1st generation is a good thing - they are one of the few makers that have an actual screen used set of armour, making it near enough an exact copy of those in the movies. If you take your time to build the kit to a high standard, Centurion can be achieved with this kit (if the Centurion guidelines are followed, of course). Just to confirm what others have said, reaching Centurion is more to do with the build and fitting of armour, not just the armour itself. Even though RS is one of the best armours around, it still has to be carefully built and fitted to the wearer to reach Centurion. Research and patience is the key to achieving a beautiful set of armour. If you haven't already, perhaps take a look through some of the approved Centurion applications to see what steps are taken to reach the highest level. Also bear in mind that if you go the TD (sandtrooper) route, Centurion would not apply. You would be aiming for the sandie level 2 and 3 which are called PO (Police Officer) and SWAT. Check out the MEPD forum for full specs and requirements for sandtrooper L2 and L3. http://forum.mepd.net/index.php?act=idx Best wishes, Dan1 point
-
The LMO team did a great job on this guys. Definitely worth a read even if you think you know what a CRL is supposed to be https://databank.501st.com/databank/Costuming:CRLGuide1 point
-
Actually it's more to build up on, I tried 3 different versions until I was happy, the first a trimmed down sized TFA and it ended up being too narrow. Also the TFA has a round bulge at the end, the TLJ has more of a fatter curve which does not stop like the TFA it continues under the wearer. If you look at the images below the top is the same width as the TFA but the sides do not curve in like the TFA so you need to add to it or if you try to trim down until the sides are straight you will end up with it looking too thin. Also it is much longer, as you can see if you compare the gaps between some of the armor in TFA to TLJ.1 point
-
The TFA cod is ok for basic approval hence the same image, this will not doubt change once amror makers add them to their kits. It's definitely different though hence a requirement for higher levels1 point
-
Roughly1 point
-
That's because we are iconic Fun fact because I have the stormtrooper book, most of what you see in ESB are ANH TKs. They were running behind on the mark 2 TKs and only had a handful completed.1 point
-
Looking good Jen! Keep it up1 point
-
And a super cool nod to Phasma's history as a Scyre warrior (assuming that was intentional?) As noted, there are differences in some belt boxes it looks like, the gloves, and the greaves/spats. I got a PDF from Jim before ordering that had a side by side of some of the TFA/TLJ pieces. I'm hoping I can get time this weekend to go frame-by-frame through the bluray and try and pick out each detail. Comparing that to the TFA CRL should show differences. Best wishes with whatever you've decided. If you do go TLJ, may the Chrome be with you.1 point
-
Updates! Boots and gloves from IB are arriving this week. Final payment made for pet G kits, all 3 of us will be shipping by the end of this week. Will order helmet when Tom from TDK Props gets a new mold in. Then gaskets from Sheev's Emporium! Goal is to be finished by first week of June.1 point
-
1) I plan on glueing some parts of the trim on my helmet where it may be sticking out a bit more than I would like 2) I would at least get the Ab and kidney strapped together before sizing the belt. You can tape these in place on your body and measure for the belt than but only after you have them sized pretty close to you. That is what I did before I ordered my belt from Imperial Issue1 point
-
For the record the center Ab button plate return edge is not required at any level of approval. I know the accuracy nuts hate this but it is what it is. IMHO I would rather see a lower profile plate without return edge than one that appears too tall with return edge.1 point
-
While no definitive explanation has ever been given, from what I have read this would be my best guess: Since the E-11s were constructed using Sterling sub-machine guns, the original long curved magazine clip is on the left, thus the holster had to be on the left. This created a nuisance for the right handed actors, as the magazine would constantly knock into the chest peice, so most of them went to a left handed grip to avoid this. The curved magazine was eventually replaced with a shorter version and modified for the film.1 point
-
Hello fellow troopers, I'm Brien from Northern Nevada (we don't have our own Squad/Garrison... yet!). My 501st journey started back in 2014 when one of my coworkers (TB-10620) joined and started suggesting I look into it. I did, and liked what I saw - a bunch of 'bad guys doing good'. I found the FISD and started looking into various armor kits... and then TFA came out and I fell in love with the FO TK's. I decided to hold out, and when Anovos finally announced the production FO TK kit I pre-ordered one as soon as I could. I then started working on procuring the rest of the soft goods and printing out my own blaster with Germain's excellent files. After several months of waiting, another one of my friends decided to off-load an Anovos ANH TK kit he'd picked up and never assembled. After two years of sitting in the box he decided he wasn't ever going to get around to building it, so I bought it off him in October 2017 and gave myself the goal of building it in time for the Battlefront II troop - which I did. I was approved on Thanksgiving Day, and since I planned on building for L3 out of the box, EIB and Centurion approvals came quickly after. I've loved every second of my time as an "official" member - I have handled off and on since 2015 - and the entire experience. Wearing a costume I built with my own two hands (I am not a cosplayer, this is all new to me), trooping with my fellow brothers, and hanging out and helping here on the forums. ...I'm still waiting on my Anovos FOTK.1 point
-
Both are accurate, but (at least in my area) Testors was much easier to find, so that's what I went with. Just be sure you follow this chart to make sure it's the right color1 point
-
Approved Inviato dal mio iPhone utilizzando Tapatalk1 point
-
I wouldn't bother with paste personally. I would however make sure I fixed the crack to stop to getting worse. I like "poor mans fibre glass". Armour - Repair by Christopher Pearson, on Flickr1 point
-
I gotta' say that being a Stormtrooper has given me experiences that will last a lifetime.... being on stage with "Weird" Al Yancovic, trooping at Disney on many occasions, meeting Brian Muir (the guy who designed the original OT armor) and meeting hundreds of Troopers at Celebration Orlando last year. I started this whole thing a bit late in life, but I'm definitely making up for lost time, lol. That's me standing behind the banner (center) along with a few friends.1 point
-
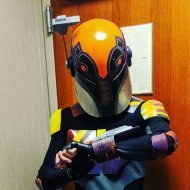
Hey FISD! This is Mike, from the New England Garrison. I am a bigger fan of the more infrequent Stormtrooper armors seen in Star Wars lore, so you'll probably never see me in the clean (however iconic) white armor. I've been lurking around on the forums since 2013, and finally got my zombie Death Trooper approved on January 2016. It's not the ideal primary trooping costume, so I have added a Spec Ops Magma Trooper which cleared in February 2017. I am currently finishing up a Shadow Stormtrooper from The Force Unleashed video game which should be done by this May 4th!1 point
-
Hi I'm Chris, from just North of London in the UK. I first met the UKG back in 2005 at a work function but it wasn't until 2015 that I did much about it. A combination of timing and luck after seeing the TESTED videos previewing the Anovos kits. I ended up being the first Anovos kit cleared into the UKG, and was cleared all the way to Centurion. I also was one of the more popular photos on their instagram feed. Have dabbled with several other SW builds, I have "half" a TIE and "half" a Shoretrooper (including a cast from screen used part) in a box somewhere! Most of my recent time has been invested in a screen accurate Lucius Malfoy OOTP Death Eater costume for the non Star Wars wing of the UKG: Reel Icons.1 point
-
In the end of the day it`s about beeing a Stormtrooper and putting smiles to faces, how one go about it is up to each and everyone to decide for themselves, some like the building aspect and some rather buy a comission. Kudos though for not taking kudos for someone elses work Best of luck with your approval but as I said - it`s a slam dunk1 point
-
Still waiting for the TLJ Executioner helmet. Though I no longer need it being I have two others from other manufacturers I really want to see if they make it correctly. If not I guarantee it will become a very expensive football1 point
-
That is asking a lot.1 point
-
At this point as long as I get it done for IX I'll be happy...1 point
-
or when they push back the dates... again which they will probably do....1 point
-
A lot of people mod up the DoopyDoo resin blaster kit, the other option is probably something 3D printed. The DD resin is super easy to carve up to fit bits and then fix any mistakes using 2 part putties. Have a look on the blast FX Facebook group as I am sure someone sells some 3D parts with cavities already in place. Also as your UKG make sure you check the lights and sounds policy for blasters as you will need certain safety features in place and you can't just do anything light and sound wise. That's the safety policy http://www.ukgarrison.co.uk/forum/viewtopic.php?f=198&t=65847 and you'll need to clear it through the SFX armourers.1 point
-
I actually found the eyeshadow in my package before I read this and thought you might have left it in there on accident! Thanks Joseph, you're the best. I've had a great response to my question on the HWT facebook group, so I figured I'd share here for future troopers. Seems like dollar-store eyeshadow and charcoal powder are the leading contenders. I'll probably do a nice mix of the two. A great method that was mentioned on FB was to coat a tennis ball in charcoal powder and have someone throw it at you in your armor. Should make a nice impact mark for blaster scoring.1 point
-
There are a lot of us who have built the RS kit and we are happy to help. Any kit is daunting when you first start out but it is totally worth the effort. Baby steps is how you get thru it. Sent from my SM-G935V using Tapatalk1 point
-
Exciting times, remeber measure twice and cut once, good luck with the build1 point
-
Congratulations!1 point
-
Congratulations trooper1 point
-
Congrats trooper! Welcome to the Centurion ranks!1 point
-
Many congrats. Lovely job on your armour. :-) Sent from my iPhone using Tapatalk1 point
-
Very welcome congrats1 point
-
Hi All, Was too excited and forgot to post in here. TK Appoved on Dec 8th, 2017 as a FOTK from TLJ. Thanks all!1 point
-
Well, the WEDCO 12.5 qt. drain pain has arrived! She's coming together!
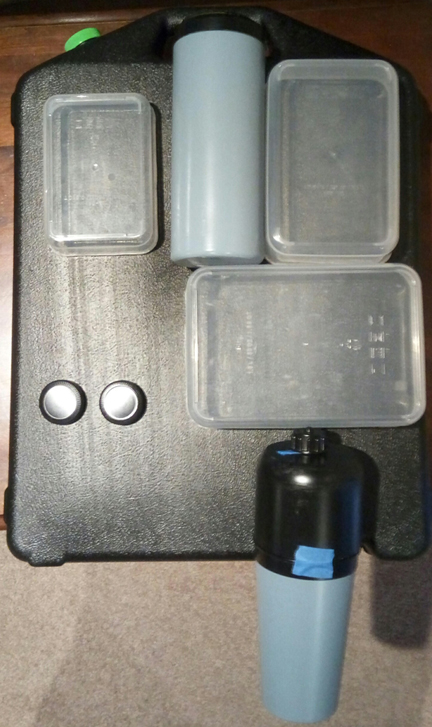 1 point
 -
As you can see from the various screenshots, in-game this bottom-right box appears to be angled downward at the front, but our CRL, I think mercifully, allows for a simple box. And that's what we'll be doing. Rather than glue a panel on, which is sort of the standard practice with most of our HWT's, I decided to cut the windows directly out of the box so that I could adjust depth on the inside. Not perfect, but after some sanding it'll do just fine! Now for the paint... She's painted! The interior is actually the lid, sanded and painted. I will be darkening it just a tad more, as I only want a little hint of that Satin Slate Blue to peek out. The depth of the interior is adjustable, which is what I was going for. If someone wanted to get fancy with LED's for non-official events, this would be a great place to do it without getting into trouble as far as clearing the CRL goes.1 point
-
TK-80494 here. I've been around the forums since 2013, but I only recently got approved in January of this year. I learned the hard way that the most important thing you can do while waiting for your kit is RESEARCH. Read, read, read, and when you get tired of reading, read some more anyway. I went into the build feeling overly-confident but relatively ill-informed, and my kit suffered as a result. For example, I trimmed too much off the sides of my plastic belt, and I used a spray chemical on some of my plastic that wound up making it brittle, causing it to crack and crumble in a few places. My armor is one of the rare red ABS Magmas from ATA, but after ruining a few parts and not being able to afford to keep buying replacements, I decided to make the best of a bad situation and become a Death Trooper. The only reason I'm approved now is because of the patience and helpful advice of folks here on FISD, and the Spec Ops detachment. If you manage to eff your kit up beyond repair like I did, the path to the 501st is still open to you thanks to the Death Trooper option. Just keep in mind that trooping opportunities for that kit won't be as frequent, for reasons I shouldn't need to explain. So I'm well on my way to completing my second kit, an Imperial Shock Trooper, which I'll be able to wear at any event. This one is going *much* more smoothly than my first, now that I really know what I'm doing. Just make sure you're doing it right the first time. Death Troopers are cool, but it shouldn't have to come to that when your original intention was a clean TK (or in my case a shiny red TX)1 point


.thumb.jpg.fe734c2874fe147a5789e833ad00772e.jpg)