Leaderboard


Popular Content
Showing content with the highest reputation on 01/22/2018 in Posts
-
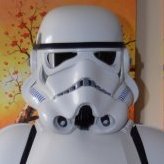
Hi all, Thanks to everyone for the comments and support but I have awesome news, I am now also known as TK11874. Im still not sure we’re the belt issue came from but it’s all good now after a few emails and a small adjustment. I will be working on my EIB submission then hopefully Centurion as this was my goal from the start. thanks again TK11874 (Matt)3 points
-
Painting stages: First layer, grey. Second layer, silver. Third layer, black.3 points
-
The front dosen`t need to be canon for any level of approval but keeping cover strips screen accurate (front and back) is what to strive for, however, if the builder is a bigger person it will look better if the cover strip for biceps are 18 front/back rather than having the front at 15 and the back at 21. But that`s ultimatly up to the builder2 points
-
FISD will get you through it2 points
-
I managed to open the CA glue without damaging the thigh, so I reglued it with a much smaller gap.2 points
-
How much return is left? And no rush, get some sleep and then try them on and post some pics and we`ll get you sorted ones your ready2 points
-
I know really... I find it so uneven, too!! I could "hardly" believe that all the pieces were correct at some point haha. I too have looked around a lot and checked many builds and "tutorials" and it's so true that, right now, I am really unsure about how asymmetrical it is and about how things don't line up. I will post some forearms pictures - along with some interrogations (already haha!) - soon to show you what I mean! And sure thing, I'll keep following your thread my friend. I have already been looking at it for a while and I find all the info you put into it really useful and helpful! Thanks, Dan! As I said above, yeah, I am following a few threads at the moment, including wook's one which is for an AP armor, too. Other than that, I am also looking at the video build present on the TrooperBay website : https://trooperbay.com/assemble-accurate-stromtrooper-armor/ . I guess that can do it too, right? 8-)2 points
-
If it fits fine there really is no need, that`s just how the armor is (most anyway) The RS below...but if it bothers you then there`s always the "hot-water-treatment" or heat gun (use carefully) and for the thighs, try them on and see how it feels, center of joint is a good reference point but that varies with hight, and how much mobility one want. My preference is that I rather look good (minimize amount of black showing) than move well So...tape them together and pull them up as high as possible and try to walk2 points
-
Hang in there, Frank. I had to do adjustments after my first submission too. Based on that and reading comments on other submission, I tried to gather up all the tidbits into one place. It's a ton of stuff! I hope this helps.2 points
-
After waiting about 48 hours, (work, kids, kitchen remodel) here is what I turned up with: I still have a bit of trimming to do, as well as round the edges of the cover strips. Not a requirement but done to prevent catching clothing and comfort. Also I have plenty of E6000 to remove. Luckily it rubs off pretty easily with my thumb.2 points
-
WHAT THIS PROGRAM IS: A dedicated forum where members can submit their completed stormtrooper costume for peer review prior to formal submission to their GML. Your armor will be reviewed and suggestions made by the FISD Staff and Imperial Attaché team, but detachment members can also provide peer review on any submission. All feedback provided will be specific, constructive, respectful, and helpful. Any feedback that is deemed negative, derogatory, inflammatory, or otherwise offensive will be deleted, and the poster can be subject to account suspension for repeated offenses. You may also be provided suggestions for attaining the rank of EI (Expert Infantry) and Centurion levels should you wish to pursue higher levels of screen accuracy. WHAT THIS PROGRAM IS NOT: This program is not a replacement for the GML approval process, as Detachments are not charted to approve costumes for membership. While a costume that passes Detachment peer review should be in a state to be accepted by a GML, Detachments cannot override a GMLs decision, nor are GMLs bound to accept the ruling of a detachment costume approval. That said, as a general rule the goal is that any costume that passes peer-review approval should be accepted by a 501st GML. WHAT YOU WILL NEED TO SUBMIT: You will need to post up various high quality photos of your armor/accessories on the list below, as well as the basic information listed next to it. We realize that this is more information than normally required for basic approval, but we want you to look your best! Also, please include the name(s) of any approved Trooper(s) who have significantly helped you with your build. Yes, we are asking for more photos and information than are normally needed for basic approval. The reason being is that we feel it gives us a better overall view, and we can catch things that may be missed should the recruit want to move to level 2. PHOTOS: INFORMATION: 1. Front view (arms down) 1. First/last name 2. Back view (arms down) 2. Future Garrison/Squad/Outpost or local area 3. Left side (arms raised) 3. Armor maker 4. Right side (arms raised) 4. Helmet maker 5. Ab plate close-up 5. Cloth belt maker 6. Helmet close-up (front, left and right sides) 6. Neck seal maker 7. Detail photos of any parts you have questions on 7. Boot maker 8. Interior strapping (optional) 9. Blaster maker (if applicable 10. Gasket maker (if applicable) 11. Height (optional) 12. weight (optional) 13. TK type (ANH Stunt/Hero. ESB, ROTJ. TFA etc.) 14. Name(s) of any Trooper(s) who significantly helped with your build. INSTRUCTIONS FOR POSTING YOUR REVIEW REQUEST: 1. Go to the Request Pre Approval thread: https://www.whitearmor.net/forum/forum/193-request-tk-pre-approval/ 2. Click on Start New Topic. This is located on the left of the blue "Reply to this Topic" option near the top of the page. 3. In the Title area, post the following information: (Fisd screen name) Requesting Pre Approval Review, followed by the armorer who made your kit in parentheses. Example: MegaTrooper123 Requesting Pre Approval Review (Anovos) 4. Post all required photos/information (as listed above). HELPFUL LINKS: 1. Where can I get in touch with my GML/Garrison? http://www.501st.com/members/displayUnits.php 2. Where can I choose my official TK number? http://www.501st.com/members/search_avail_ids.php 3. How do I join the 501st Legion? http://www.501st.com/members/join_form.php 4. What do I do once I am approved? https://www.whitearmor.net/forum/topic/16-501st-trooper-status-requests-include-link-to-your-501st-profile-in-your-request/ ____________________________________________________________________________________________________________________ WHY WE ARE DOING THIS: Not every garrison has responsive GMLs, and even those that do are not always experts in the stormtrooper costumes. Costume peer review provides members with a supplemental feedback on items that need to be fixed prior to approval, as well as other feedback that will help the overall fit and finish. Catching errors earlier will result in increased confidence a build will pass GML review and thus save GMLs time. It will also provide GMLs insight in to a sounding board beyond the GML peer review area on the 501st boards. Additionally it provides non-GML forum members the opportunity to learn about and gain experience in the costume judging process. This is valuable because it can provide people considering being a GML real-world experience before accepting the role, and provides GCOs a potential pool of people experienced in costume judging who may not have yet served as a GML. ADDITIONAL INFO: 1. Any feedback that is negative, derogatory, inflammatory, or otherwise offensive should be reported immediately, will be deleted, and the poster may be subject to account suspension for repeated offenses. 2. Feedback should follow the same format that Deployment Officers use, e.g. for each item to fix they will be marked as “must fix”, “should fix”, “could fix”. 3. “Approval” only covers base 501st acceptance (aka L1). Expert Infantryman (L2) and Centurion (L3) standards can be cited only for “could fix” items and are never “must fix”. 4. For GMLs, this is intended to catch errors early to make your lives easier. This is not a replacement for what you do. Additionally, since detachments can't approve costumes, there is no concern that a Detachment will override a GML decision. 5. For GCOs, an advantage is that a 501st member in their garrison can gain experience in the costume review part of being a GML before they take on the role officially, and this may also for their Garrison provide an outlet for people considering being a GML, and a pool of experienced members should they need to fill that role. 6. For FB users, other TK Facebook pages can offer advice on their site that may or may not be correct. FISD is the official Detachment run by experienced 501st costume approvers the world over, and this is a service we can provide prospective and current 501st members that a FB group cannot.1 point
-
This video series will cover techniques that can be applied to any armor make or type, but mainly focuses on A New Hope style armor. I will also cover specific changes for Sandtroopers. Introduction and overview Tools and Supplies Cutting cover strips Biceo trimming and sizing Biceps Construction Forearm Construction Shoulder Bells Thigh trimming, sizing and construction Hand Guards1 point
-
Just received my BBB from Anovos. Hoping to start building tomorrow.1 point
-
Don’t shorten the thighs until you have the torso complete and are 110% sure it’s necessary! I’m 5’9” and I didn’t need to shorten mine.1 point
-
Tony, you apparently haven't built one for a skinny-armed trooper. LOL This will help clarify what I was up against. I had to trim a lot off of my forearms to allow them to fit well. Here are the before heat gun (very tough to get a cover strip on these babies): Here is the after: I agree with the heat gun sentiments. You have to have mass respect for the heat gun, but I had really good results with it. Rat, your welcome to borrow mine and I can help you shape them if you'd like.1 point
-
Yeah most likely I will just used hot water. The heat gun makes me nervous and I also don't have use for one outside of this. Sent from my VK815 using Tapatalk1 point
-
Heat guns are something that you practice a lot with before using it on armor, the plastic tends to go from just pliable to melted in the blink of an eye. Great work, coming along nicely1 point
-
Looking good BTW1 point
-
Yeah I have a few points at the seams that are like this, but this is the worst of them. Sent from my VK815 using Tapatalk1 point
-
It has already proved informative to check out the videos - fascinating to see how he installs the trigger switch, which is a much cleaner install than the method I thought of before. Decided to go about it this way (see graphic) Thanks again Lou.1 point
-
For anyone else needing the manual (if just to get some ideas), here is the link from Master Blaster https://www.dropbox.com/s/snajmo4wxtklq9w/UBER%20BLASTER%20KIT%20INSTRUCTIONS.pdf?dl=01 point
-
Your logic for where to place the rumble motor makes sense; it can really add to the sensation of firing, especially when mode is set to long shot. I'm good for mounting shots; I managed to get a hold of the Blaster Master install manual from a TK here on FISD. I have an excellent picture now, thanks for offering!1 point
-
Great! I'll give that thread a follow then.1 point
-
Yep! Boxes are correctly labeled. The trim lines look good, too. I also left a bit of extra edge so that I had enough room for trimming/shaping. Good work! For the shins, because there isn't a lowered region to join them (as the Anovos has), I overlapped them so that the seams are facing the back. This way, the build looks a bit cleaner from the front. It's not required, but just something to consider. I also sanded down the top overlapping edge so it curves slightly downward against the bottom piece, giving the illusion that it is connected with that shelf technique. Hopefully that makes sense to some degree!1 point
-
Will do. I am posting semi-regularly again in my own thread and pose questions from time to time. Please check there as well on occasion when you have time.1 point
-
Looking much better now!1 point
-
Glad that I can help, just paying it forward as I am building my armor at the same time. For the rumble motor, I am placing it high so that you feel it in between your thumb and finger. Just drilled a slightly larger hole, and placed the motor in it loose. This way it moves around a little bit in the hole and increases the affect (IMHO). If you need other shots on how to mount the trigger and switch, let me know.1 point
-
Check my build on CCG forums. I address this issue with the Anovos forearms. I used a heat gun to reshape so I could get the cover strips to glue on flat.1 point
-
Thanks Lou for the pointing me to these videos! - Definitely worth viewing to get familiar with the process involved. Interested to see how he deals with the rotary switch, thanks again.1 point
-
You sir are an inspiration! I'm working on a KB kit myself and will be using this for reference going forward.1 point
-
Here is a listing for electronics using a rotary switch: https://www.ebay.com/itm/LIGHTS-SOUND-DIY-KIT-for-Blaster-Master-Uber-E-11-Blaster-Rifle-Model-/232102221992 This is a three part series where he shows you how to build it: Not affiliated with him, but I have the kit and watched the videos. I also stayed at a holiday inn express (too old a reference?)1 point
-
1 point
-
I'll also get one of my right forearm for better clarity of that issue. Yes I have faith in my future brothers and sisters. Sent from my VK815 using Tapatalk1 point
-
Alright then thanks Daniel and yeah sleep and then a quick test fitting and photos. Better to get answers with photos. Sent from my VK815 using Tapatalk1 point
-
Yeah it's gonna be rough because I will be sizing and firing myself. Plus I want to make sure of how the armor should naturally fit. Like, "Should the stop at the knee or above it? Will I or do I need to trim this down?" even after checking reference photos and the CRL ones it just wasn't clear where the thigh should stop. Better to ask and know then make drastic unfixable decisions. Sent from my VK815 using Tapatalk1 point
-
i sweat, therefore I am. Don't get into any character per say. I just do what the client and patrons want of me. For me, Just standing next to the trooper(s) beside me, i.e. a charity event, there's espirit de corps there. That's enough for me.1 point
-
Sewing and fitting. I finally convinced my wife to do some sewing for me. I don’t sew and apparently our sewing machine is temperamental. We made the belt for the thigh garter and sewed the elastic loops. The shoulder straps were also sewed and snaps added. Sewed on the sew-on snaps for the shoulder bells. Fitting for the thigh garter. The thighs may be a bit high in the pic compared to where I want them. Garter Sewing the sew-on snaps. I’m gonna owe her big time for this. Positioning the snaps. 35mm from the edge and as close to the front as possible. Final fit check for the arms. Ignore the black series helmet - I’m still not done my bucket. My bicep was rotated a bit in this pic - partly fixed it for the other pics. Sent from my iPhone using Tapatalk1 point
-
Finished my hand guards: https://imgur.com/E4YoHfJ Started off trying to attach the hand guards to the gloves with E600 with no success. So did some research and found that Loctite Bonding System worked for most people trying a affix the rubber hand guards to their gloves. https://imgur.com/vX3cFX9 I also finished my right thigh (with ammo box): https://imgur.com/ww6GpVQ I went to my first Armor Party (in Corpus Christi) a few weeks ago and got some really great insight and advice on my build. One piece of advice I got (from TK-71217) was to install cover strips on the inside of my thighs. TK-71217 had done a few troops and let me know that the internal cover strips seems to make the thighs feel more 'solid' when walking around. So, I took his advice and added the strips to the inside of my thigh: strip on inside front - https://imgur.com/s9AMnpM and strip on inside rear - https://imgur.com/fKaX2nL . I'm finishing up the outer cover strip on the left thigh and will install the inside strips as well.1 point
-
Yesterday I started back on my shins/calves as I continue to work on solutions to my strapping/snap plate issues in the background. So, I did some return edge trimming on all of the parts and was ready to start fitting when I remembered I should break out the boots so I have them handy when working on the ankle clearance. Then I realized I hadn't taken a photo of the boots. I went with Imperial Boots: They look really nice. For sizing I took 3 pairs of my "regular shoes" from everyday ones to my tight fitting barefoot-style running shoes and looked at their EU sizes. Since things vary between manufacturers in terms of fit and sizing, I took the average of all 3 and ended up purchasing a EU size 44. They fit nice and snug without being uncomfortable and I'm sure as they break-in/stretch that they will be even better. Alright, so I'm off to work on the shin armor. -Dana1 point
-
Nice work, Paul. That’s a great looking set of armour, and it’s been nice following your build. :-) Just a little thing I noticed was your forearm alignment. It’s just a dressing issue but they might benefit from being twisted round a tad. This will align the cover strips at the front, also aligning the side details at the same time. If you have more than a fingers gap at the bottom of your biceps, they could probably come in a bit too, if you wanted to. :-) Best of luck with your application. I’m sure it’ll go smoothly. :-) Dan Sent from my iPhone using Tapatalk1 point
-
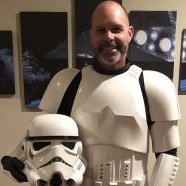
Looks good Paul, I hope to have my application in soon too. matt1 point
-
Small update time! Things got a little busy/crazy over the holidays and I am just finishing up on initial trimming. I'm down to the Ab boxes. So I have these boxes lined up where I think they should go on the Ab. Other than B and E does it really matter? Also, KB's cut lines aren't very clear. I drew lines around where I think they should be, plus a hair more to account for carving out curvatures on the ab piece. Do these look right you think?1 point
-
Just a bit of fine tuning to the left forearm to get the fit just right. I did have a bit of length after I had the forearms lined up. I will make a cut here after I have the cover strip on, since this will be covered and not noticable. I roughed up in the inside to add ensure the strip I put inside the forearm could grip well. Alright first item to glue!!!! Now the wait begins1 point
-
Forgot to mention, also working on a case. Got a plastic tube today with suitable dimensions. Was clear plastic but I'm gonna spray it matt black. Just need to find some thick foam for the inside, had a look while out today but no luck Sent from my SM-G925F using Tapatalk1 point
-
Ok, so the grace period after finishing the blaster has ended, and I'm now making some extra improvements haha Not sure what this part is called, but it's the part that the spring in the inner tube wraps around. I didn't have anything here before, so the charging handle had rubbish stability as it was just glued on and with a nail going into the hollow inner tube. I've seen some people use marker pens for this part; I managed to get some wood, 18mm diameter, to slot into place. I've just cut it down to size, sanded it, and starting on the paintwork. Hopefully with this set into the inner tube, then the nail from the charging handle set into the wood, it should have much greater stability Sent from my SM-G925F using Tapatalk1 point
-
And with that - goal achieved! Thanks everyone - this is a huge relief for me and the web team.1 point
-
For anyone wondering what the various logos, bars, and titles to the left of posts is all about, this is the thread for you! User Ranks Found above the avatar, rank is determined either by post count or other criteria: Private: 0-24 posts Corporal: 25-49 posts Sergeant: 50-99 posts Lieutenant: 100-149 posts Captain: 150-199 posts Major: 250-499 posts Colonel: 500-999 posts Commander: 1000-1499 posts General: 1500-1999 posts Field Marshall: 2000-2999 posts Grand Moff: 3000+ posts Expert Infantry: Users who have received an EIB Award Centurion: Users who have been granted Centurion Status There are also special ranks given to Command Staff and Extended Staff, such as Detachment Leader, Deployment Officer, Combat Photographer, Hall of Fame Curator, etc. Achievement and Service Awards The FISD Achievement Award is granted for exemplary service to, or outstanding achievement for, FISD. Tradition holds that persons currently serving on staff cannot be granted Achievement Medals (or else it can become too self-serving). Thus, if you see a staff member with an Achievement Medal, they've all earned them prior to joining staff. To date only two people have ever earned a second medal, and no one has ever earned a third. Award Levels FISD Achievement Award (1st Award) FISD Achievement Award (2nd Award) ... FISD Achievement Award (6th Award) (and so on) The FISD Service Award is granted to recognize the contributions of Command Staff for their commitment to keeping the detachment running. Each award represents a full year of service. Additional awards are denoted by a star (1 Gold Star = 5 Silver Stars, 1 Silver Star = 5 Bronze Stars, etc.). A frame denotes fifteen years of service, with additional stars for further years. Award Levels FISD Service Award (1st Award) FISD Service Award (2nd Award) FISD Service Award (9th Award) FISD Service Award (10th Award) ... FISD Service Award (16th Award) (and so on) 3D Contributor Award This program, as with others, is an optional Detachment-only award incentive. It recognizes members who have gone above and beyond in contributing to our 3D forum section. The Silver award can be earned numerous times over the years. The Gold award is given to those that have contributed at such an astounding level that it is deemed appropriate. All awards are given at the discretion of Command Staff. Award Levels Silver 3D Contributor Award Gold 3D Contributor Award For more information please refer to this thread. Attaché Outstanding Achievement Award This award is bestowed to those who consistently exemplify the meaning of an Imperial Attaché and have gone above-and-beyond in helping their fellow troopers for at least one full year: For more information and a list of recipients please refer to this thread. FISD Master Armorer The FISD Master Armorer program is an optional, detachment only incentive award to recognize individuals who have directly helped another 501st stormtrooper to achieve Expert Infantry status. Some people spend countless hours helping others, and want to reward their results as well as incentivizing new people to help as well. Award Levels FISD Armorer (5+ "wins") FISD Senior Armorer (15+ "wins") FISD Master Armorer (25+ "wins") Centurion Badge These are awarded to those who have reached the highest levels of costume approval for FISD. These are awarded only once, to the person, regardless of costumes: Expert Infantry Badge (EIB) These are awarded per costume, thus a person can have more than one EIB award. Stars (like the awards above) indicate multiple awards, and appear above the EI badge (1 Blue Star = 5 Gold Stars, 1 Gold Star = 5 Silver Stars). Award Levels Expert Infantry Badge (1st Award) Expert Infantry Badge (2nd Award) Expert Infantry Badge (3rd Award) Expert Infantry Badge (4th Award) Expert Infantry Badge (5th Award) Expert Infantry Badge (6th Award) Expert Infantry Badge (7th Award) Expert Infantry Badge (8th Award) Expert Infantry Badge (9th Award) Expert Infantry Badge (10th Award) Expert Infantry Badge (11th Award) Expert Infantry Badge (12th Award) Expert Infantry Badge (13th Award) Expert Infantry Badge (14th Award) NOTE If you are approved with a "2nd Version" of a particular costume that you are already approved with you do not receive an additional award, there is only 1 award issued for each costume version ie: only 1 x Hero, 1 x Stunt, 1 x HWT, 1 x ESB, 1 x TFA and so on. If you have a second/additional version costume approved you will see "2nd Version" and [APPROVED] added to the thread title, no additional profile stars For more information on the Expert Infantry and Centurion programs, please refer to this thread. EIB and Centurion requirements can be found in the corresponding costume CRLs (as Level 2 and 3), additional information on how to apply is available here for EIB and here for Centurion.1 point
-
Hi everyone, I roll-up my sleeves a little higher here as I gather understanding and attempt to modify my doopy trigger and trigger housing to follow that of the real thing. I ready green stuff to soon add to my doopydoos trigger and make way in the trigger housing for a future installation. I finish off with a light show of sorts; enable better light transfer for my BlastFX LED light to travel down the receiver tube. I use a 1/2 inch outer diameter clear acrylic tube (plexiglass) to mimic the barrel following SMG references. Trigger housing as seen from the top following SMG references. Interesting to see component parts out. Here are some underside pictures of the trigger housing. The hole for the trigger goes all the way up and room to boot. Really liked studying these pictures of the FISD E-11 blaster reference photo compendium. Here, you can see the casing that goes over-top the trigger housing taken out. Here's a picture of Tino's replica trigger and SMG reference. This here breathes light on how the trigger actually worked. I gather that the trigger maintained constant 'push' pressure from that bullet looking component, the trigger plunger and in pulling the trigger, compressed the spring on the back of it. I will attempt to mimic this action but after modifying the doopydoos trigger piece and doing a little carving into the trigger housing. Use green stuff to add to doopy trigger to mold like the real thing following SMG references Tino's Replica SMG trigger used to mold after. Part of Trigger housing hollowed to make way for trigger and trigger axis pin installation To increase the light effects inside the barrel when invoking the electronics, will apply a half inch outer diameter with 3 / 8 inch inner diameter clear acrylic tube (plexiglass) over top the LED light. Frost it with 150 grit sandpaper. Frosted acrylic tube; it is no longer clear and can carry light down the tube Test light effects of frosted acrylic tube with red colored blaster bolts from BlastFX Test light effects of frosted acrylic tube with blue colored stun rays from BlastFX Thank you for checking up on me once again; have a terrific day!1 point
-
Why not since we are all already building them that way1 point
-
WOW I've only just found your build Christian and I'm blown away. This is exactly the kind of information that I have been looking for for my upcoming sterling conversion. I have already made my scope rail according to your template, so thank you for that. Excelent work.1 point