Leaderboard


Popular Content
Showing content with the highest reputation on 10/03/2017 in all areas
-
Right, made quite a bit of progress this evening. Started with the scope. For those that haven't used spade bits before (like me before this evening), they look a bit like this; (Image from google - don't know if this is the right size) I measured up and drilled a Pilot hole. Then started with the spade bit, varying the speed to get a steady result. I stopped at this depth as I don't have any smaller sizes. Off to borrow more from my dad. ;-) Separated the sight and sight pin(?) Then back to using my favourite Dremel disc to work on the stock and t-tracks. And here's some pics to show the t-tracks. Really pleased with the appearance of separate parts. Before and after: As always, more to come. :-) Sent from my iPhone using Tapatalk2 points
-
Hello! I've been with the Legion 16 months now, first as an IN then as a TI for the past year. This is only my fourth post in FISD, but my first as someone seriously about to begin on a TK build. I'm apprehensive, to say the least, and just trying to pace myself with the research as it's like trying to drink from a firehose navigating through all the info here. I've built a Walt's Trooper Factory Navy Trooper bucket, as well as his TIE Pilot setup. This feels like it's on a whole other level. Waiting on FOTK armor from Kevin at the moment, but in the meantime he's sent me one of his new Judicial kits to work on. Any immediate suggestions, comments, tips before I begin -- very much appreciated! -Mark
 1 point
 -
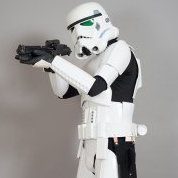
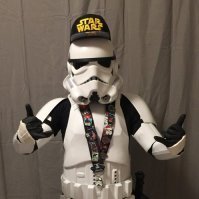
Basic Information Name: Alberto Oscarelli FISD forum name: Albaz 501st Member Page: http://www.501st.com/members/displaymemberdetails.php?userID=24123 501st ID: TK-20055 Garrison: Empire City Garrison (NYC-US) Mandatory Information Armor Maker = AP Helmet Maker = AP Blaster Type = Hyperfirm E-11 EIB application/approval: Optional Information Height = 6'1" Weight = 173 pounds Boots Maker = TK Boots Canvas belt = AP Hand Plates Type = TrooperBay Electronics = iComm + AKER Neck Seal Type = DarmanProps Holster Maker = TrooperBay Corrections (belt, lens, drop box, and forearm) - Added a second layer of acetate lens, moved belt 1/2 up, and glued straps of drop boxes to belt to maintain alignment. I tried to move the forearm down as much as I can. Unfortunately I have long arms and this is the best I can do. also...I had to take the pics on my own, so every time I would get in position they would slide up a little since I had to bend my arms to reset the armor ;-P1 point
-
*NOTICE* No images yet... I've tried uploading pics, but keeps telling me that imgur is not a allowed file extension?! Will be uploading soon... Fixed *EDIT* Adding a color indicator for what I've got completed and what I don't: I have 3 initial stages that I'm aiming for: Stage 1: Cut out and fit the parts (Finishing Helmet last) - This part is finished!!!! Stage 2: Glue and snaps (followed with/by photos for approval) -2A - Entry Level Approval - Basic Approval Achieved!!!! (I have all the "requirements for EIB and Centurion, but have not started the approval process yet) -2B - EIB Approval - not started -2C - Centurion Approval - not started Stage 3: Troop! So I ordered my kit last week from AP (Thank you Mark) and it arrived today! Even though the tracking STILL says it's out to be shipped... tomorrow lol. I was notified that there was a "big" box at my door and so when I got home there was a BIG box: Was not expecting that when I walked through my front door lol. I took everything out and started making sure it's all there... even though I might have overlooked one thing in my excitement... (sorry Mark).... it is I looked at what I had and was a little nervous at what I would start on. I debated on the shins, helmet, forearms and so on until I settled on the abdominal/cod plate: That was my practice cut... found out that I have to keep a constant pressure to make sure my scoring marks don't slip! I MIGHT have shed a little blood on this one... but makes it all that more special to me So I made the last two (or several dozen final cuts) and came out with a base line for this: Still have a few lines to clean up, but I always like giving myself some extra room on the sides so I don't make too many mistakes. It can always be sanded down1 point
-
I think that's in the plans. I'm doing these based on time constraints and to give some alternative options for those with Jim's kit. Ideally you wouldn't have to craft quite so much in a ready to build kit, so I'm sure that's what Walt intends for future runs.1 point
-
Is Walt working on making a correct set of shoulder straps and drop boxes (in addition to everything else ) Looks great Eric!1 point
-
Looking good! Can't wait to see it completed. Sent from my Nexus 6P using Tapatalk1 point
-
Trying to make plenty of room , and mount switches for all electronics1 point
-
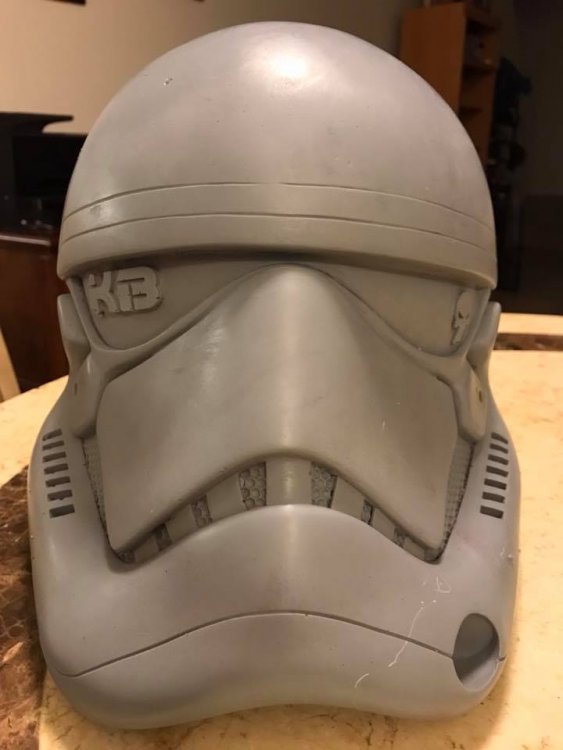
Progress is slow but the bucket is slowly taking shape... Started with sanding the teeth out with the dremel then using needle files to get the desired shape of the teeth. Next clamped the hood to the faceplate and got the brow where i wanted it Drilled some holes and bolted together. Now onward to the ears!!!! A quick question to anyone who cares to answer...I'm looking into cutting the lens into 2 pieces and making hold down clamps. I've seen some ideas while doing research but cannot remember where i saw them. Does anyone happen to know some links to some good ideas on this? Thanks1 point
-
Thank you very much!!!! Party hardy, my friends! Now a brief update: I have added the shims (with great thanks to @wingnut65 ) and have also started adding the abs paste! I will post pictures soon... unfortunately I'm at work so cannot upload pics here. However I added one layer, sanded down, but there were still a lot of imperfections. Added a second and third layer (slowly flaring outwards to blend the two halves together), sanded down and only have a few more spots to fill and blend. I have tried to add these with a stir stick (free from starbucks, but extremely fragile) so I went ahead and use a chop stick to stir. I must say... a lot more sturdy! I then used a popsicle stick to smear the ABS Paste on (thick) to sand it back down. Thanks to Jeff, again, I'm going to be polishing it out to make it a bit easier to paint/prime. I will be heading to my local hardware store either this weekend or this Friday to choose the correct paint and primer combo. I will post pictures of the process when I get home, hopefully if everything goes well1 point
-
Blasters are not required for basic approval, but are for levels 2 and 3. What type did you order?1 point
-
Took a break from building and cutting in my hot and humid florida garage and started painting the bucket today! Woohoo! First coat is on everything. I free-handed it. I feel like masking sometimes gets in the way and it can actually create more work in the long run if things don't go according to plan. While I had the blue Humbrol out, I hit the button plates too. I traced circles with a pencil first. For most of the buttons I used the 15/32 circle and for that top right, smaller button I used the 13/32 circle. Does that button need to be smaller or should it be the same size as the others? Either way, I think one coat is gonna do it for those buttons. The layer of paint I put on there is pretty dang thick already. Side note: nearly poured out all my blue Humbrol on the table by accident. That wasn't fun. These dang cans are so tiny and hard to handle man!! Also, I desperately need paint thinner. Been trying to use all kinds of other things to clean these brushes, but to no avail. Gonna pick some up tomorrow. Let me know what you think guys, thanks! Sent from my iPhone using Tapatalk1 point
-
Soooo close to be an approvable set1 point
-
I have ordered a perfect blaster, I was hoping to sort out any issues with the armor while I wait for that to arrive. Sent from my iPhone using my thumbs1 point
-
Welcome to the party1 point
-
1 point
-
Looking forward to seeing the end result, great work1 point
-
Well I’ve started to fit the strapping brackets to the butt and kidney armour I have previously re-enforced the return edge with additional ABS..... it still needs some final trimming with the Dremel once they are fixed on Oh dome extra snaps I bought to use to strap together the arms Tried a test drill hole on some scrap ABS Tried the bolt fir size Decided to counter sink it Marked out where to drill the first two holes on the centre of the butt Marked the holes o the centre of the kidney Fitted the bracket Now I don’t have a sewing machine so I’m going to have to stitch the elastic by hand...... how tight does the elastic need to be? On I have fitted five of the six brackets today .... so done reasonable progress..... I also fitted a snap to a scrap bit of elastic..... just practising for the arm strapping..... will attempt the same on some ABS next Sent from my iPhone using Tapatalk1 point
-
Good evening. Had some fun with the ammo pack rivets last night ... NOT!! ;-) Didn't have exactly the right clamp so tried a couple of methods. My make shift use of a brick pin under the rivet and a hammer the other side left me with wonky rivets (not a recommended method, it turns out). Ended up using a good quality g-clamp to bring them home, pretty much perfect. :-) I used a large Humbrol tin for my corner curve. I checked out lots of screen shots and noticed that a large proportion of them had a gap between the cover strip and the ammo pack. As such, I followed that look. Drilled the holes with a 3mm drill and applied E-6000. Apart from painting the relevant rivets and adding another coat to the boots, I think my armour is about done. Cheers Dan :-) Sent from my iPhone using Tapatalk1 point
-
I want one of these as a display piece. I wouldn't want to lug it around on troops.1 point
-
Got to finish the main body and trigger frame ,,, soon ill keep posting progress pics1 point
-
Those eargaps are perfectly fine , in fact, better than most of the screen used movie helmets . If you get the gaps tooo close and perfect, it looks more wrong . You done good.1 point
-
Glad my thread can be of help! I know it's nowhere near as detailed as some of the ones I have seen, but good to know it's still helpful. Troopers helping troopers! Really nice job on the bucket too!1 point
-
Lens install!! In the AP kit, Mark includes what is the original lens style/color for the bucket eyes, but I wanted that darker look. I ordered the hard, darker green lens material from TrooperBay and went at it. I saw a lot of threads that left the lens material as one piece and curved it around the helmet face, but I really just wanted to have two separate lenses for mine, I just love the look of it. I bought the T-nuts from Home Depot as mentioned earlier with the matching screws. I tried gluing these over night in the below positions. I really experimented with the placement of the T-nuts because I wanted the lenses to be as flat as possible against the openings for a clean look. The T-nuts seemed to have glued fine, but as it turns out, the bottom corner location doesn't exactly have the flattest surface so the glue didn't get a very good hold. After attempting to install the left lens, that specific T-nut popped off. I removed the Plastidip from that area and re-glued this time with Zap-a-gap (I didn't want to wait another 24 hours, haha!). Re-installed the lens and everything went great! BUT, same thing happened with the other side! So I did the same thing. Cut off the Plastidip for a better hold and re-glued with Zap. But this time, it popped off again! So after that I tried sanding the back of the T-nut (this is where it was separating) so the glue could get a better hold and I used like three times as much Zap-a-gap. I waited for like 8 hours and boom, it worked. I think it also helped that I made that bottom corner hole bigger on the lens so that the screw could be angled out and not put so much pressure on the lens and itself. I think I might get some plastic washers to put between the screws and the lenses, but other than that, they turned out pretty great! Also just a side note, I was really scared of Zap-a-gap at first (as one should be!), but it really has some good uses. And if you know you'll have no reason to pry something off in the future, only having to wait 15sec for something to glue/dry is pretty amazing!! Thanks for reading!! Sent from my iPhone using Tapatalk1 point
-
Outstanding work mate. Really hoping that BlastFX will fit into it too.1 point
-
Cool. I guessed it would but wasn’t sure if some sacrifices had to be made when producing the parts. This will be epic.1 point
-
i am very very sure that the magazine release will work like the real thing... i am hoping that there will be also a trigger mechanism on the trigger frame.1 point
-
About the cover stripes, i don't see it mentionned but one thing i like to do before gluing them is to cut the corners: And for the butt plat, i think i would have removed all the flat section and place the two snaps accordingly. If the guy you're building this armor for isn't that large, that would certainly have been enough:1 point