Leaderboard
.thumb.png.69856e02550a2e6d07e44a2b1bda020c.png)

Popular Content
Showing content with the highest reputation on 11/29/2021 in all areas
-
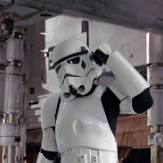
Got my ID: TK-328493 points
-
The AP sniper knee. It's a pain. This is how mine was. It wasn't bad but... man... it just wasn't great. I was not happy with it at all. I didn't feel confident in submitting this for EIB and Centurion... so it got cut right off and shoved in some boiling water. I boiled the knee for about 20 minutes. Warming the plastic, bending and manhandling, rewarming, rebending. The final shape had the outside end bent waaayyy down from where it originally was. The two ends were pretty even from the factory, but the knee armor isn't shaped that way. The outside edge is much lower. The sniper knee needs this shape as well if it wants to follow the armor lines. While boiling and bending, the knee cracked. And honestly, it was pretty fantastic that it cracked. This allowed for a tiny bit more reshaping and let me get the knee to the shape it needed. And then I clamped it. This was nearly as much work as the boiling. I got the outside edge clamped first and it started to cure and not slide around anymore. Then I added the magnets for the center and got it situated without having the outside edge move. And about 10 minutes later I was able to add the inside clamp. Everything sat like that about 2 hours until the E6000 had just enough strength... ... to fix the knee crack. I (very very lightly and carefully) drilled a relief hole so the crack wouldn't spread. I also stuck some extra plastic behind it for strength. Huge thanks to @Scimitar for the tips. Then some ABS paste to fill the gap and repair area. ABS also holds the plastic strip behind the repair in place. After all that, the knee got to sit for over 24 hours. The paste and E6000 got a good cure with clamps in place the whole time. I sanded the ABS paste flat and gave it a polish. Better than new! Here's the finished sniper knee. I'm SO proud of this! I'm no longer embarrassed by that knee. I submitted my pix for EIB immediately.3 points
-
Received approval! Now to receive my trooper ID!3 points
-
Most of us build so that the bicep and forearm line up. But yes, many examples from ANH show the forearm rotated out. @CableGuy had a discussion about this on his FB page - you might have seen the reference there. Screen accurate or not, GMLs may want to see the strips lined up. My two cents.2 points
-
OK, I'm gonna' say it... WOW! One of the best submissions I've seen in quite a while, Adam. GREAT attention to details, and I'm glad to see you went with the "double snap" method for strapping. Hang in there, sir, and one of us will be with you shortly.2 points
-
Looking fantastic Adam, best of luck with your approval.2 points
-
I think the pursuit of perfection has come to a close on this. Honestly I cbf doing much more on it at the moment, however that being said I absolutely will keep working on it at some point hahaha. Im very happy with the V3, got those fixes in and thinned the ears and i rekkon it looks a million bucks. I aint no expert on ear trimming I will admit, its an art for sure. I threw this one together in an couple hours and Im very happy with it. Mould was still a little unrefined so did a HDPE to "hide" the imperfections. Keen to hear feedback on this one! please keep in mind, I wasnt making this accurate to any specific TK bucket, just a rough idea. Im sure assembly can be improoved.2 points
-
So we got to a gluing backlog (sharing resources has its drawbacks). But we've decided to take the next while just to glue things and take our time. First off, the hot water bath worked like a charm. So happy with how my forearms look now. So easy and so awesome! I start my thighs and got the idea from a post I saw about doing them from the inside out (inner strips first). I actually quite like this method and broke it down by just gluing half the under cover strip to one side of the armor before merging the 2 halves and will probably keep this method going. It take way more time, but I'm in no rush. Here is my (almost) finished thigh. I just glued the front cover strip on last night, but I'm worried it slid a bit when I clamped (forgot to re-check...doh!) I can clearly see the ridge line on the left, and it is more or less non-existent on the right (especially in the middle). I'm thinking of redoing it, but wanted to get some input. I really don't mind the extra step of redoing it to get it right, but if it's not going to notice or matter when it's all said and done, I'll take that under consideration. Thank again for all the support so far, BTW. This forum is great support.2 points
-
Name: Adam Wolf Height: 5'11" Weight: 165 lbs Armor: AP Helmet: AP Blaster: HyperFirm E-11 Boots: Imperial Boots Canvas Belt: AP Hand Plates: Rubber (AP) Electronics: Ukswrath (Hovi-tip Speakers, Hearing Assist, & Fans) Neck Seal: Darman's Props Holster: AP Build Thread: Full Body Photos: Front Back Right Left Right Detail Left Detail Action shot Armor Details: Ab Buttons Cod/Posterior connection Interior Strapping Wrist openings Ab/Kidney rivets Han snap Sniper knee Sniper knee Sniper knee Ammo pack Ammo pack Ammo pack Helmet Details: Front Back Left Right Green lenses Hovi tips and vocoder Accessories: Neck seal TD Front TD Rear Holster attachment Whole belt, rear Boots Rubber gloves Blaster: Left Right Rear / D-ring Thank you for your time!1 point
-
Name: Kris Typolt ID: TK-23410 FISD Forum name: Crampeat Garrison: Titan Legion Profile: https://www.501st.com/members//displaymember.php?userID=34008&costumeID=124 EIB Thread: Amour: RS PropMasters ANH Stunt Full Commission Helmet: RS Propmasters ANH Stunt Baster: RS Propmasters Boots: Imperial Boots Canvas Belt: RS Propmasters Handplates: RS Propmasters Neck Seal: RS Propmasters Holster: RS propmasters Height: 6' 0" (182 cm) weight: 165 lbs Front: Back: Left : Right: Left Detail: Right Detail: Cod: Bridge Detail: Thigh: Backs Filled in for Centurion: Sniper Plate: Wrist: Ab Buttons: Posterior: Helmet Front: Left: Right: Back: Hovi: Trim: Screws: TD: Hand: Belt/Holster: Boots: Blaster: Action Shots: Helmet Off: Thanks to all the DO staff for their help with adjustments, especially the sniper plate. Let me know if anything else is needed. Thanks!1 point
-
Back to the bucket. This is a pillow speaker set. I had no idea this sort of thing existed till the other day. I guess they're meant for listening to books or white noise or whatever through your pillow. They're thin and soft and seemed like they'd be perfect for a bucket. Since I replaced the top two helmet pads with my amp and iComm, I had two spare helmet pads left over. They got immediately grabbed up and sliced open for headphone duty. I was surprised by all that was inside. Some soft couch foam, harder closed cell foam, and a sheet of stiff vinyl as backing. No wonder it's $20 for like 8 of these. Hole cut for pillow speaker! Taped in and ready for action. And I wish I could report that these were awesome. They DID fit. My head can slide in and out of the helmet with those pads at my ears. And the speakers do work... barely. They are extremely quiet. They seem to be designed to be pressed hard against your head for sound to transmit to your ear, like if you were lying on a pillow. That's great and all, but I can't have that with the bucket. That's what I had before with the big headphones and I couldn't take the bucket on and off... And then inspiration struck. I hacked apart my big headphones and shoved them in the helmet pads. I managed to only take this one photo. Basically, the headphones are held together with 2 screws each. Unscrew them and you get access to the little driver as seen above. The ear pad and driver are left mounted to a thin plastic wafer. It's about 3x as thick as the pillow speaker, but it's less than half the original thickness of these headphones. I covered each driver with gaffer tape very carefully. The tiny thin delicate wires are tiny, thin, and delicate. With any luck they'll last a while and not get torn away. But the tape is quite secure and should hold things safely. Then I cut larger recesses in the helmet pads. I cut the soft padding away completely, just leaving a donut around the outside of the headphone. Annnd... IT WORKS!!!!!!!! The big headphones are much louder than the pillow speakers and work beautifully. I can get in and out of the helmet without harming headphones or shifting the padding around. It's comfortable and I can hear clearly. I don't even have the SHA volume all the way up. I feel like my bucket is now "complete." I'll tidy up the wires and get everything situated to my liking after my next troop, but I'm just over the moon about this. - the SHA works beautifully, doesn't pick up fan noise, and I can hear things. - the amp is wonderfully loud and the iComm makes a lovely crackle noise just as I wanted. - the fans keep me cool. One usually does the trick. - the bucket is comfortable and I can see clearly thanks to careful padding adjustment to get my eyes in just the right spot. I'm a happy trooper.1 point
-
Here’s some examples from ANH that highlight the alignment when worn. This appears to be based on the positioning of the elastics within the bicep and forearm. This is probably the video in question. As always with original trilogy armour, not every suit will be the same. However, there are usually very clear patterns where a majority of suits support a certain feature.1 point
-
Hello there! It's been a month since last time, life got in the way of things, but today I managed atleast to finish my belt! We shall see if it goes this slow with the rest (hopefully not), See you next time!1 point
-
The logo on mine is a black glossy label. It's either invisible or gets covered with black cloth tape. A quick strip of the old timey electrical tape is what I've done.1 point
-
Screen accurate to which suit? The video you saw might be looking at a different suit. Not all were assembled exactly alike. RS will build to match their original suit that they own though. I would have kept it as it was.1 point
-
Good luck, Adam.1 point
-
Chalk and cheese boys. Just need to get some new 1.5mm plastic and I'll start a couple. Will transplant he new face on the new dome for a mock up. Sent from my SM-G950F using Tapatalk1 point
-
I got a 3 pack of these from Amazon and like them. Good compression, good price. Currently on cyber monday deal. https://www.amazon.com/gp/product/B07ZF5RKYR For pants, I hit Dick's Sporting Goods and got their house brand. It has a pocket on the left thigh spaced perfectly to hide under your thigh armor. I can keep and retrieve a phone from there. The holster hides it perfectly. DSG house brand compression pants. They come in both regular and cold weather.1 point
-
Thanks for the feedback guys. Big moves on reshaping atm. I'm hoping switching to 1.5mm material will get everything nice and sharp. Stay tuned. Sent from my SM-G950F using Tapatalk1 point
-
Hi @justjoseph63, @TKSpartan Updated photos with less gap on the right side. Long term. (maybe sooner), I think I have to add a second snap on strap to keep the bottom closer to the back side (saw a few good posts in the forums how to do that). Otherwise the bottom part will always have the gap. For completion reasons, I added these pictures in the original post as well. Tarkan1 point
-
I concur with Joseph...the Anovos frown paint is very thin...so thin that I just wet my fingernails and drag in the direction I want the paint removed...might take me 30 mins to clean up the "fog" around the frown paint..1 point
-
Hi everyone! Thought I would post some pics of my cleaned up version of the Pugman. Thanks to Mark at Sheartech who kindly allowed me to use his casts as a base to produce sharper casts moving away from the "rough and ready" version. Hope you like, and as always any suggestions and feedback are welcome! Marc Sent from my SM-G950F using Tapatalk1 point
-
I can update the PDF when I get a moment. Thanks for the feedback, always appreciated and we do want to make these tools as easy as possible for members. EDIT: Updated PDF and corrected spelling issue.1 point
-
Hi Justin, You can reach EIB and Centurion for sure Trooper. we have some approved EIB and Centurion tall troopers . Check this up. You may want to give a try and apply for EIB. We are here to help you every step on the way1 point
-
I believe Chris's issue is with the cap rather than the face plate Also glad the video isn't working as its Ainsworth and he doesn't deserve the airtime after the stunt he pulled lying about who designed the Stormtrooper in the first place.1 point
-
The D.O.s are far better placed to answer generally about screen accurate vs practical, but specifically your lower right hand strap definitely won't be a problem. I recently achieved centurion, and I have that strap. Moreover, without the strap you're more likely to not achieve the higher levels because of struggling to keep the gap closed. Really glad to hear you're thinking about those higher levels. From what I've seen it should be minimal work, and the sense of achievement everytime you put it on is worth all the effort [emoji16][emoji106]1 point
-
I removed the light green film that came with my AP helmet and added dark green lenses instead. Here is how I went about doing it... I took 5 Chicago screws ( Four 1/4" for the outsides and one 3/8" for the middle) and then drilled a hole in a strip of abs to put the screw through it so that when e6000 glued down the screw is held in place by the base of the abs plate. I also heat bent the abs so the screw base sat flush with the helmet when glued so the screws base tops were flush with the edge of the eye hole. The screw backs were covered with a square of white duct tape so no metal to abs melting would occur especially concerned for that as the helmet is thin compared to the armor. Plates glues in place: Then I bought a dark green grinding shield off amazon and cut out a visor shape to fit over the eyes and drilled holes to line up with the Chicago screw bases. I did one hole at a time and screwed it in as the visor needs to be bent in and held for the tightest fit to position each screw. Once all 5 holes were done all 5 screws were inserted and here is the finished look. The grinding shield has enough extra for a spare replacement lens visor and enough to make likely 4 individual lenses. The middle screw could be swapped out and 2 inner eye corner screws placed in and then you could do individual lens if you wanted. I prefer the single lens myself. The finished assembly: Christina1 point