Leaderboard


Popular Content
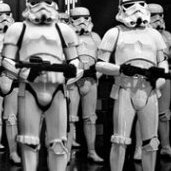
Showing content with the highest reputation on 08/25/2021 in Posts
-
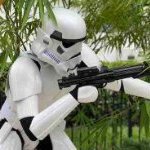
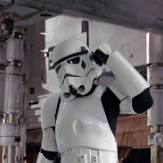
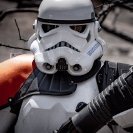
The project that I have been working on has been chugging along - about to have an announcement in a couple of days so I thought that I'd create a landing zone for here. I'll start by gathering the production photos already posted around the net:4 points
-
Thank you @gmrhodes13, just downloaded the guidelines for Expert Infantry and Centurion level. Will definitely look into it.3 points
-
Hi Richard. 1-Pauldron. Does it matter what colour the poppers are at the neck? CRL pic shows them as dark finish rather than silver. As Glen pointed , I don't see any issue either, my preference would be darker since in the reference images from the video game they're not visible at all. 2- Also, seen a thread from last year by Nada where there were issues with a visible rivet near the neck, which burkbench pauldrons also have(?) Looking at the Nada's Pauldron, it looks like it is located too low in the front and this make it visible, You may want to check if th the location of the one you ordered could make it hidden or not. 3- Ammo Pouches: There's 2 different patterns. Does it matter which one is used? And should the shoulder pouch have the small tool pouch attached? As Glen already pointed too, both have been approved for centurion. To my eyes the more accurate is the first of your photos but you can use the other type too. NOTE: What I would not recommend is to mix them (use one type on shoulder and the other type on the hips ) . Reference Images Hope this can help.3 points
-
[emoji23][emoji23][emoji23][emoji23] I’m almost tempted to go and wake her up but I would like to get to my first troop alive. Sent from my iPhone using Tapatalk2 points
-
Ohhhhhhh man doesn't it kill to have to wait for an extra pair of hands or someone to take photos2 points
-
Hi Ardeshir, and thank you for your EIB application! First of all, I would like to congratulate you for the IMPRESSIVE work.. CRL and EIB Application Requirements: All required photos have been submitted, and on behalf of the entire D.O. staff we are pleased to welcome you to the rank of Expert Infantry. Congratulations! Other-Armor Fit/Assembly; In this area we review observations made by your fellow troopers and the DO team. Some observations may lead to suggestions to improve the overall look of your armour. Note that we consider both text (CRL) and pictures (screen caps/reference images) when reviewing submissions. Your neck seal looks great and you have the correct number of ribs and shiny finish as required. It would be great if the zipper was on the front. Reference Images One thing to be aware of is that your forearms appear to be more like Finn's (TFA) than TLJ's. Finn's TLJ It looks like your TD is a bit angled. Reference Images We have noticed that the shorts wrinkle around the cod piece. This is an aesthetic problem. We mention it for your consideration. Reference Images We are suggesting trimming your posterior plate to better reflect the angle as seen in TLJ. Reference Images *************************************************** Centurion Requirements; In this section we prepare you for Centurion. Because Centurion photos show more detail than EIB, items pertaining to Centurion might be seen there and not here and additional photos may be required. We try to point out all that we can from what we see, but the final accuracy is the responsibility of the trooper. If we are not wrong, it looks like your TD mount and TD plate are one piece, and although not specifically mentioned in the CRLs (they are currently being worked on),they should be 2 separate pieces (nice job simulating the joint). Reference Images About your Blaster, a rectangular "D-ring" must be present, and both it and the mount need to be white. Reference Images Another thing that we miss on the blaster is a light mount on the barrel also known as a Picatinny rail (Pic), which can be found online ( example ). Reference Images That's all Ardeshir. Just a few details that I'm sure will be no problem for you, seeing the quality of your armor. Again, very good job. Excellent armor. Congratulations . See you in your Centurion thread .2 points
-
Here are James's completed arms:2 points
-
Thanks Joseph. I've contacted the pauldron guy and he's going to use all dark hardware, and I've just received some leather look vinyl to have a go at making the simpler pouches myself (wish me luck!!!)2 points
-
Ditto to what Mario mentioned, Rich, and you can always add some black paint to the snaps . The more basic looking ones in my opinion are more (videogame) "screen accurate", but the others (although pricey) are more readily available.2 points
-
Perfect. Thank you both! Much appreciated [emoji106]2 points
-
Hey everyone, After getting our BBB several weeks ago, we've finally started! James isn't much of an online guy, so I'm posting for both of us. Day 1 has been pretty productive. We are roughing all the arms and legs to start. Still on the hunt for a good AM 4.5 build thread to follow as we are finding it slow to start and we are piecing it together of different build videos (Panda Trooper, Troope Bay, etc) even though they are slightly different armour types. Anyway, I was going to post some pics as a Google Photos links as I haven't' figured out a way to shrink photos on my Chromebook yet. If my posted etiquette sucks, please do let me know. Here are pictures of my biceps armor Here is James biceps armor We were also able to get our forearms figured out. This took a while to figure out which forearms piece when where, as they are clearly angled differently on the back of the forearms, and we weren't sure why or where the one arm piece with the groove went. We decided to put it on our right so that when we hold a blaster, it will be a bit more comfortable. Our forearm measurements were the same, so we could always swap if we want. We figured we could cut the other arm to match, but seems like it may not be worth the effort. We are aiming for centurion standards and have cut the wrist return edge completely. Here are my forearm pictures. I will upload James's tomorrow. Pretty happy with how it's going, but wanted to post these pics and see if we should change anything before glueing the cover strips.1 point
-
Name: Jacob Gonzales Username: Pistolsheets TK-86267 Southern California Garrison Inland Empire Squad Armor Maker = Anovos Helmet Maker = Anovos Blaster Type = E-11 by Hyperfirm Height = 5'10 Weight = 170lbs Boot Maker = Imperial Boots Canvas Belt = Kittle Belt Hand Plates = TrooperBay rubber latex plates Electronics = Icomm, UKSWrath fans, Microphone, Aker speaker Neck Seal Type = Anovos Holster Maker = Anovos EIB Application Link: https://www.whitearmor.net/forum/topic/51105-tk-86267-requesting-anh-stunt-eib-status-anovos1026/ Recommended changes on EIB have been addressed. Full Body Front: Full Body Back: Right Side : Right Side Detail: Left Side: Left Side Detail: Action Shot: Helmet Front: Helmet Back: Helmet Sides: Hovi/Vocoder Detail: Lenses Color: Accessories Belt: Neckseal: Gloves: Thermal Detonator: Blaster: Strapping: Extra Details: EIB Updates:1 point
-
No problem. It’s almost 11pm here in the Uk and my helper ( the wife/ photographer) is in bed . Zzzzz. so tomorrow I’ll suit up again. thanks, Regards, Colin1 point
-
I only wish every trooper submitting for higher levels had large, detailed photos like Colin does. Makes our job as D.O.s MUCH easier!1 point
-
WOW!1 point
-
Good choice Richard!. They look much more accurate...And Good luck!!!1 point
-
Congratulations!!!. Your armor looks great... Just one thing(second pic, thinking about the two trooping events in October) : -Although it is not required at any level: "Something that characterizes us(Stormtroopers) is that we are anonymous. Children(and "not-so-children" ) in Trooping see their characters with emotion and do not imagine that within that armor there is a fanatic like them. For this reason, we try, by adding a mesh behind the "teeth" of the helmet, to prevent our face from being seen through the holes in them". Welcome to the ranks, Tarkan!!!1 point
-
looking good.1 point
-
Here are James's thighs.1 point
-
Here are my thighs. This was the most stressed I've been so far. Time for lunch.1 point
-
1 point
-
Suit looks great. Your photos are very crisp and clear which I really enjoy looking at all the little details1 point
-
Wow!! Amazing , great work , congratulations!!1 point
-
Congratulations Trooper !! Welcome to the ranks. Enjoy being a Bad Guy Doing Good1 point
-
The same maker on CG trader does have a model for the forearms that are pretty TLJ accurate I’ll take a pic later1 point
-
Looking great Jacob! Chemi will be with you shortly.1 point
-
No need to wish you luck, brother. I've seen how tenacious and detail oriented you are, and I'm sure they will turn out great! If you have the time and patience, a detailed tutorial would be awesome... (hint hint.. nudge nudge) .1 point
-
Congratulations Tarkan, and welcome to 501st. Looking forward to seeing the pics from your first troop1 point
-
Have added more on this the above in build thread here1 point
-
As per my post here I have decided to abandon my helmet mounted speaker system [amp + iComm] for a chest mounted solution. I wasn't happy with the low audio out levels and feedback and have gone for a chest mounted solution. I had an old Aker amp and have mounted that along with the iComm box with velcro behind my chest. Am getting much better audio throw and clarity with the only issue to date being feedback if volume is too high when using the Aker headmounted mic. To counter that I have been researching throat mic solutions. I order a cheap throat mic from a local supplier [Jaycar] which I received today - it turned out to be pretty crap [cheap and that line is discontinued - go figure]. I have this throat mic currently in route from supplier, a few troopers here have used it with positive results, am looking forward to testing once received. In the meantime I made up a switching system to mount behind my chest, one switch simply kills the microphone with the second switching microphone inout between the iComm box and the Aker amp. This will let me easily kill the mic if needed during a troop, plus toggle between static bursts [iComm] and normal speech [Aker direct] if required. Bench testing worked perfectly, just need to make a box to house it all and position behind chest. I went down this route as the switches I am using are easily controlled while using gloves. Also going to parallel a larger momentary switch off the Aker switch and mount that along with the two toggle switches.1 point
-
Quick update. Firstly many thanks to Mighty Atom for his help in solving my noisy helmet fans problem. Always great to have a garrison member help with their knowledge and physical support The hearing assist system is way more functional now I have installed a 5VDC converter [running about 3VDC] - fans super quiet and do not interfere with the hearing assist. I am going to put in a helmet switching system which amongst other functions will enable me to bypass the 5VDC converter if I need to run the fans harder for hotter days.1 point
-
Welcome to the 501st Tarkan, you will never forget your first troop, enjoy every moment of it and many more to come in the future. Congratulations.1 point
-
Great photos Don, we look forward to seeing more of this project in the near future.1 point
-
Here are some of James's biceps. Will post some of his forearms tomorrow. PS, if this is too pictures heavy, please let me know for future posts. Thanks1 point
-
Roger that! Must of got lost in transmission reattached!1 point
-
Looks like a great locations, some colored lighting and fog would have been amazing to add.1 point
-
Nice work trooper, didn't see a photo of your "Han" snap, right side upper ab corner, no doubt the DO's will like to see that1 point
-
Thank you Mr. Tibbles1 point
-
These pics look outstanding! Can't wait to hear more about this.1 point
-
Looking really good Jacob. Best of luck with your application [emoji106]1 point
-
Beautiful build brother. You got this for sure1 point
-
Congratulations trooper and welcome to the ranks, hope you will look at he higher level approvals1 point
-
I've not seen issues with the popper colors before, normally they are silver although the CRL image shows them darker. Both versions of the pouches have been approved at centurion, although the second pouches do match the CRL images. https://www.whitearmor.net/forum/topic/49428-tk-61490-requesting-hwt-centurion-status-anovos-approved-2nd/ https://www.whitearmor.net/forum/topic/42345-tk-20466-requesting-heavy-weapon-trooper-centurion-status-ap-approved-2nd/ If you go off the references the first type should be find (and are easier to assemble ) Hopefully one of our DO's will chime in @TKSpartan @justjoseph63 @Chemi1 point
-
So I am finally continuing this thread after my move. I'm just figuring out the best electronics installation method. I just did a trial fit of the barrel into the barrel shroud. It is a good snug fit, all the way from the flash suppressor at the front, the sight block in the middle, and the receiver attachment point. It makes the entire front half of the blaster solid. However, I now have noticed the BlastFX LED light strip does not slide between the barrel and barrel shroud. Looks like I have to cut a long slot into the barrel in order to have the pew pew lighting effects. Will upload pics soon.1 point
-
Alright, thanks buddy1 point
-
1. Remove much of the return edge on the shoulder bells - that alone may give you the extra room needed to pull the shoulder bells in closer. If not, then you'll need to remove it anyway in order to proceed to the next steps ... 2. Using a large pot of almost-boiling water, heat the armor by fully immersing them in the water (don't let it touch the bottom of the pot!) for a few seconds - I've found that since the Anovos plastic is so thin you only need to immerse it for 5 - 10 seconds to get it soft enough to reform. Any longer than that and you'll start to deform the plastic in undesirable ways. 3. Once the plastic is soft, gently pull the shoulder bell apart to the width you want and hold them in that position - being careful not to pull it too far apart. Have a sink or bucket full of cool water ready and dunk the part in the cool water to set the new shape into place. Stay away from heat guns - unless you have a lot of experience using them you are likely to do more harm than good. The hot water bath is great in that is promotes even heating, whereas a heat gun heats the plastic in focused spots and is more likely to result in warping of the plastic. But yes, please show us some photos before proceeding.1 point
-
Do your best to leave at least some, because they don't look good without it. But it's not technically required to have any.1 point
-
For approval purposes, no - at least not in most garrisons. But IMO they look better with it intact.1 point
-
This is AM 2.0 do I look to broad cause I was told I look intimidating lol. Sent from my iPhone using Tapatalk1 point
-
Intimidating is good, isn't it? <br><br> Shorten the straps connecting to shoulder bridges to move them in a touch? Armour looks awesome1 point