Leaderboard


Popular Content
Showing content with the highest reputation on 05/18/2021 in Posts
-
TD BASEPLATE , AB AND BELT BOXES. TD BASEPLATE Trimmed and Sanded ALL BOXES AB BOXES ORDER AND SIZE BELT BOXES BELT BOXES ORDER REFERENCE IMAGE Return to Index3 points
-
I’ll keep it short and sweet - yes2 points
-
Looking sharp, Devin! It's been a pleasure providing feedback outside of FISD, and Christine should have you approved in no time!2 points
-
Excellent advice there, Glen.2 points
-
Thank you everyone for the warm welcome!2 points
-
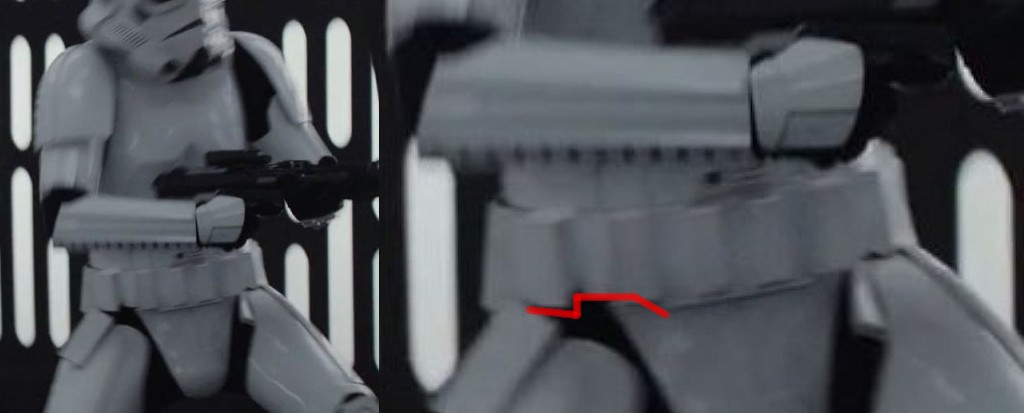
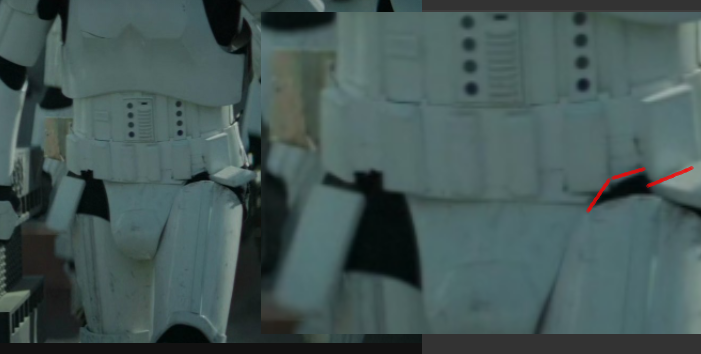
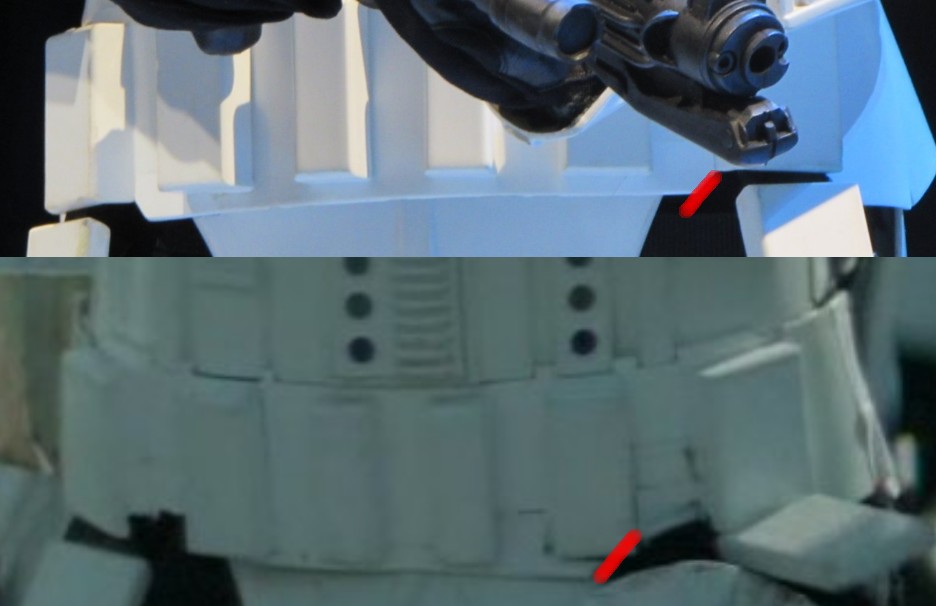
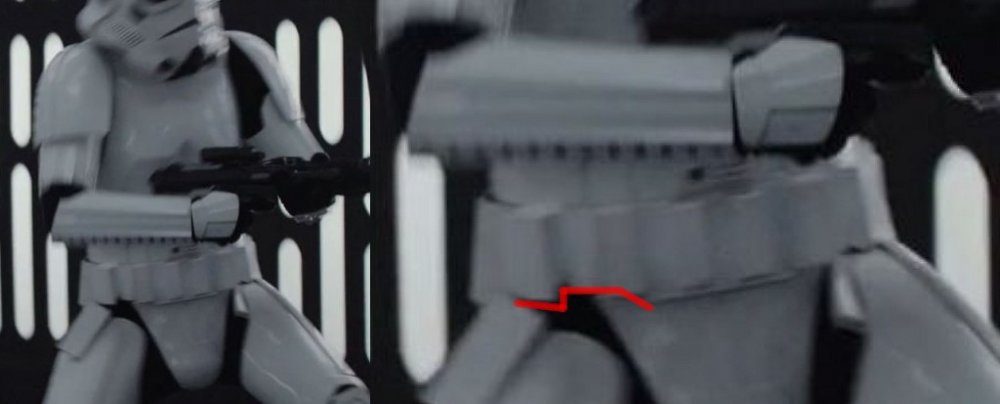
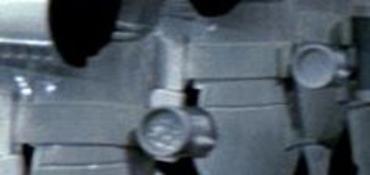
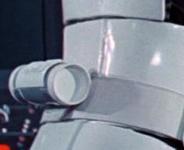
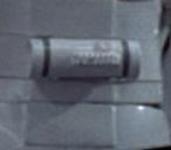
So you have full belt Angled belt and thinner side, does not appear to have drop box overhang Shorter belt sides, no cut corner, or bent behind, with drop box overhang, cod wider than center belt section But also angled belt behind the last center belt boxes so much shorter than the above image and overhang of drop box. This shorter front center belt section could have been cut this way to follow the sides of the cod as the cod height appears a lot shorter than on other troopers. Cod shorter than center belt section And another shorter sides of the belt, drop box overhang and shorter center belt area with angled cut under last box. Cod larger than center belt section.
 2 points
 -
I found with my skinny legs I had to add some foam into my thigh armor, you can only go so small until the armor starts looking too skinny, there is a balance between look and fit. Definitely suit up before committing to trimming too much, easier to trim more off later but hard to put back on2 points
-
I don't like Dremels on plastic, I find it tends to melt not cut. For ABS armour I either used score and snap, or for curves lexan scissors. If I need to clean up I used either files or sand paper. You also don't need to go crazy with sanding, just a quick pass with something int the 180-320 region to take off any sharp bits. The lexan scissors can be a bit hard going on the hands so some metal snips might be a pretty good choice!2 points
-
Name: Devin Padgett Future Garrison: Georgia Garrison (USA) Armor Maker: AM 4.5 Helmet Aaker: AM 4.5 Cloth Belt: Imperial Issue Neck Seal: Trooper Bay Holster: Trooper Bay Boot Maker: Crowprops Blaster: (none presently) Height: 6' 0" Weight: 215 lbs Type: ANH Stunt I've not been very active at all on my build thread for my own personal reasons, however that doesn't mean I haven't been active on my construction process. I submit for your pre-approval review my ANH Stunt OT TK! Front: Back: Left: Right: Helmet Front: Helmet Left: Helmet Right: Helmet Back: Helmet Lens Color: Hetlmet S-Trim: Ab Detail: TD: Shoulders: Right "Han snap": Left Rivets: Rubber Gloves: Hand Guard Flex: Right Thigh: Thanks! -Devin1 point
-
Thanks! I think I’ll glue on the front cover strip, with an inside cover strip as well, and leave the back open for now and move on to the left thigh. M Sent from my iPhone using Tapatalk1 point
-
On both inside sides of each thigh, I found I didn't need any on the front as the thigh elastic holds it nicely.1 point
-
Looks just like mine, I have foam on both insides of the thighs to keep them central and evens out the gap, you will find the strapping on the thigh at the front will keep them nicely positioned, I think go with what you have and and get an overall look once fully kitted up, you can always take some more off later (if using E6000), but very hard to put material back on1 point
-
Glad to see it helping others. Keep up the great work Mario1 point
-
I have practiced a lot with the D.O. 's Coloring Book1 point
-
1 point
-
Wow, great job researching this. I also suspect that the modifications were made to belts for stunt scenes just like the omission of the Thermal Detonator on most of the stunt TKs in the fight on Jedha. Although, I believe the intention of the designers was to have the belt protrude past the ammo boxes by 1/8”, I would not be opposed to removing this requirement or changing the wording to allow for more flexibility give these references. Another possibility would be to develop a stunt class of the ROTK like ANH and no, I will not be writing that CRL but I am happy to assist anyone wishing to tackle that task.1 point
-
Looking amazing so far! The number of belt boxes alone can be intimidating forsure. Looks like you've had lots of practice drawing colored lines on things ;P But that's very helpful - great thread!1 point
-
I don't know, some of those screen shots from the Tantive IV sequence... . Thanks Dan!1 point
-
Fascinating. Could be "stunt" suit mods. Great collection of photos and I concur that the L3 requirement: The front belt protrudes past all mounted ammunition boxes above and below by approximately 1/8”-1/4” 3-6mm. should be struck from the CRL or modified to reflect the reference presented at the next overhaul.1 point
-
Hi Greg, I’ve cleared a couple of my fully spray painted helmets with mild weathering/chipping. Can’t see any issues with it as long as it is representative of what we see on screen. Now, I wouldn’t go as far as trying to clear a “as they look now” type helmet, like the below. This is just too weathered to troop (in my opinion):1 point
-
That will definitely be on my to-do list. I was afraid my belt might have been sitting low. I was walking that fine line between getting everything perfect and not annoying my SO photographer. Hah Sent from my SM-G975U using Tapatalk1 point
-
So, no update for a while. Please forgive me as I "cheat on the FISD." I got in a little over my head on three simultaneous builds. However, for your consideration, please see the following pics of my abdominal armor and let me know your thoughts. I'll provide another update soon, but am looking for some feedback on my hack and slash. Pretty sure I'm the first to do this to a Jimi kit and I'll explain it later. Long story short... extremely comfortable. I'll explain the soft belt later. Also, that's primer on the armor; it hasn't been painted yet. But this thing's going to be smoooooth when it's finished. Thanks again, Jason1 point
-
Looking SHARP, Devin.... you should have no issues getting Basic approval. Once you get your blaster, I hope to see this set of AM armor submitted for Expert Infantry level!1 point
-
GREAT progress, brother!1 point
-
Looking forward to this! Keep up the great work!1 point
-
Nice work, just a couple of things, you could bring your belt up at the back as it is angling down. You could remove the excess clip material sticking out under your belt. I would also add some foam behind your sniper plate to hopefully push it forward away from your knee, it could catch on your thigh. Good luck with approval
 1 point
 -
Looking Great !! Easy pass1 point
-
After reading 501st reviews on balaclavas when trooping in hotter conditions, I purchased the "Under Armor UA HeatGear Tactical Balaclava Facemask (Black)".1 point
-
it's always a dirty start , trimming and sanding, looks like you'll never end . This last weekend I think I have finished trimming and sanding, (at least the first part before assembling adjustment that usually require some more trimming. ) I need to upload the Legs section. In a minute1 point
-
Thanks Joseph. Really appreciate all the compliments. Once approved for basic you'll definitely be seeing my advanced submissions! [emoji4] Sent from my SM-A715F using Tapatalk1 point
-
You can size them down as much as you need to, Matt, but it would help to see how they are actually fitting. If you have your under suit, it would give us a better idea if you could post a photo of you you wearing it. You don't want them too loose or too tight. Once you get the circumference where you need it you can trim off those points in the front and back. Another thing to consider when sizing is the return edge on the inside. Some troopers leave this and have no issue, but others (like myself) find that these can cause chafing. "Question: Is the top of the back supposed to sit right under your butt and the bottom of the front just above the knee? I was trying to look at some pics but with the black undersuit it makes it a little difficult" Leave some room for mobility..1 point
-
Finished the shoulder straps and will mount bells soon. Almost ready to wear the full kit minus belt for first time! Will be able to adjust fit and post some preliminary pics! Then paint!1 point
-
Rebel scum, I mean, that sounds great a rebel costume You do find was you enter this costuming lark you can get bitten by the bug, looking forward to seeing the progress, good luck1 point
-
I mainly use 3 different tips, I use 3 dremels as I hate swapping them out when I'm in the groove Drum roller Deburring Quick change cutting disk I used all 3 when trimming a resin helmet BUT I also had to use some small files and sandpaper in harder to get in cormers1 point
-
Good call on that, David, I do the same thing. Many troopers add the padding in the top but find that it causes the helmet to sit way too high, giving them a "bobble-head" appearance and making it really difficult to see.. (our field of vision when wearing a bucket is not that good to begin with). It works for some, but not for others, so best to do a test run before permanently attaching it.1 point
-
Trimmed, sanded and cut slots. ready for paint!1 point