Leaderboard


Popular Content
Showing content with the highest reputation on 03/01/2021 in Posts
-
Time for another update! A suit is never really "done", right? So I have officially submitted to my GML as of last Saturday the 14th, but there were still a couple upgrades that I wanted to make before considering submitting for EIB - the biggest among being the fit of the posterior armor. I read through @yoshix's thread again (I should have paid more attention to it the first time around...) and decided to cut my posterior armor the same way he did. My fiancé was kind enough to let me know that a higher, cheeky bikini cut is much more in vogue at the moment (ha), and it also matches the reference material better, so I cut about 3/4" off the top, and almost 1" off the sides and bottom of the posterior with my Dremel cutoff wheel, then sanded the edges back to smooth before brushing on some gloss white by hand. I'm much happier with it and hopefully everything sits better the next time I suit up. If I haven't mentioned this previously, I really wish I would have taken the time to fit everything better, even going as far as strapping everything, BEFORE PAINT. If I had one piece of advice for anyone building one of these suits, it's that. Jim actually crafts them so that most of the pieces (maybe not the shins/forearms as much) can fit a wide range of troopers, and the posterior is probably intentionally a bit oversized if you're a "standard" sized person like I generally am, so I really should have trimmed it from the get-go. Live and learn. I also wanted to replace the tube vent backing material - I admittedly submitted with pieces of blue painter's tape behind the tube vent cutouts. @TK 14166/Matt was kind enough to send me a piece of the same blue material he used on his build, which I am super grateful for, so we can match when we troop together! I trimmed a couple of pieces to fit, then used some more 3M VHB tape to secure it in place. That stuff is tricky to work with because it's so sticky, but does a great job. I tried to push it a bit INTO the vents instead of taut so there was little gap. It probably isn't super noticeable, but I'm way happier with it! Hopefully these little fixes help and my approval (or feedback) comes back in the next week or so, then I'll be over to the EIB thread soon! Thanks for reading!5 points
-
TK87537 reporting for duty. Dewback Ridge Garrison Northern New Mexico and ready to get started. Any tips and suggestions graciously accepted.2 points
-
Thanks for the kind words. Paying it forward2 points
-
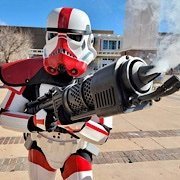
While I'm waiting on my EIB approval. I upgraded my helmet electronics to @ukswrath stuff. Stormtrooper audio system with voice modulation. Also put in the hearing assist system. I like how it turned out. Both work great. It took some trial and error to get it to fit right. Still need to work on the fan placements. My head is snug as a bug lol.2 points
-
oh yeah, I've been looking at them and found another good one on You Tube. Funny story...I got to looking at the 4 ears I got from ATA and almost panicked that they were all the same. But once I took a better look, it was clear which was which.1 point
-
Glad it helped brother1 point
-
Thanks for the support1 point
-
If you want PM me and I will send you pictures of each Helmet from AM from the Original AM to the AM 4.5 Matte Black. https://youtu.be/0x_0Jnljjg41 point
-
Thanks Tony. I am very happy with your electronics.1 point
-
Thank you Tony and thank you for your help. I must have looked at your build thread a thousand times hahaha1 point
-
Thanks Justin. Appreciate it as always. Can’t wait to troop it with you.1 point
-
Thank you brother. Appreciate it1 point
-
Wow fantastic job on the component installation, like Glen "Nice and neat"1 point
-
I had 3 things related to this build that I wanted to get done this past weekend. 1. Glue backings onto gloves. Status? Gloves got cleaned, that was it. 2. Build and paint PVC mannequin. Status? Got parts, that was it. 3. Assemble 3d printer. Status? Let's just say it's the reason nothing else got done. Ordered an Ender 5 plus and then ordered some upgrades for it that were supposed to be plug and play. Figured I would put the upgrades on as I built it. The build itself was straight forward but I just can't get the darn thing to work. The symptom is that the the base won't get within 2" of the print head as part of the calibration. The problem? I'm hoping that the issue is the firmware on the new control board I installed. I've pretty much ruled out everything else that I could think of. It could be a faulty motherboard because I also couldn't get my PC to connect to it properly. Ah well... at least I have a few weeks to get this resolved before BBB day is here.1 point
-
thank you very much Mario. Noted on the changes. Some of them will for sure be a challenge. I will see what I can do if I decide to take this to centurion. I’m building an elite Anovos kit now so I may reserve centurion for that one. But we will see. And I already have my rubber gaskets that are a screen made set. So we will see. The only thing on this one is that my photo mistake is that the blaster has rubberized grips that you can’t see in the photo. So I will make sure it’s clear on the next batch. I will see what I can address on changes for this and see about submitting for centurion. Thank you for the time and guidance and encouragement. Appreciate all of your input as always.1 point
-
Hi Jonathan. Glad to see your EIB submission so soon! Added to the processing line. One of us will be with you shortly.1 point
-
Thank you very much!1 point
-
Oh it’s definitely snug.1 point
-
Looks awesome Justin, you have done a marvelous job with this kit.1 point
-
Don't do anything, as I say I'm sure if anything it would only be a suggestion1 point
-
Your assistance throughout my super long build is greatly appreciated. Looks like you are right about the blaster. The thing is I don't know what to do. The blaster is from RS and was assembled like that. It looks to be mostly resin cast. I would have to physically break it and reposition it. It might be easier to just order a new blaster. I spent so long making the TK I really don't want to build a blaster and I have been looking all over for a approvable assembled blaster. I guess I'll just wait until it's mentioned that is a mandatory change before I try and break off that piece. I'm still looking online for a better blaster.....another reason I don't want to build a blaster is I feel like I might have a chance in making the 500 centurion quota. If I end up getting an unassembled blaster, I think those 7 spots would be gone. I have used this blaster for 2 years trooping so it was badly paint worn. I sanded and painted the entire gun flat black and I painted the grip gloss black. I guess I might do another gloss coat on the grip since it looks like it is weathered a bit.1 point
-
You have been so helpful. Your RS build thread was the first thread I stumbled across that gave me the motivation to make my own TK. Seeing how you were able to tailor the armor to you so nicely made me realize it was possible.1 point
-
I'm pretty sure Joseph has limited internet access at present as he's been away from home, hopefully it won't be too much longer1 point
-
Not to mention the gasp for air after bucket removal.. Thanks buddy.1 point
-
I used Paul's idea to use screws to hold it together so I can work on the ears. Once I've got the ears done, I'll go back and finish the faceplate, reattach it and start on the inside. Big thanks to all who have helped and keep it coming. Let me know your thoughts on my bucket. Keep in mind I still have to clean up the teeth. I'm thinking the eyes are done unless something pops out to you.1 point
-
Based on this photo, I've still got some room to trim on the faceplate section. That should help!1 point
-
Don't need rivets for basic approval or EI , BUT yes as you have added them you would need to add another 3 to add to your shim and replace the elastic, and yes shims would go on both sides. Was just an option to give you basic 501st approval, but carry on with the weight loss1 point
-
Yea let me get closer to my weight goal. I do not like the way the butt plate looked. I will need to probably cut the elastic and bring that in and under. All the offsets I see including the shoulder bell is due to the clamshell not closing. I'm not aware of side shims being easy to install or remove. I just think I need to do it right the old fashioned way. Sweat blood and tears my way back 20 or 30 pounds. :D. I didn't even ATTEMPT to snap the right closure.1 point
-
First FULL FIT balaclava, neck seal, gloves the whole bit. Don't judge too harshly. Just a first full fitting. I brushed my belt which unsnapped one. Couldn't get it resnapped. Really needed a spotter. Unable to get the detonator on back. Just a trial full fit. Helmet padding needed. Clamshell unable to close, no side snaps engaged. In order to fix these things I need to stop eating entirely and cardio biking all summer long. Unable to take photos as gloves were blocking and unable to see. Got pretty steamy inside the bucket. Was easier to take a video than to timer snap photos. Video upcoming via Youtube. Wore my butt out! Sweaty experience. I was patrolling the arcade for some Droids I was looking for. All perceived flaws were due to the clamshell not fully closing on the right. SO Yea I have ALOT of work to do with my body.1 point
-
So that your images show try to use the "direct link" option Looks like you will need a lot of work, the belt is also incorrect should be fabric, not hard plastic. Some more photos will definitely help to see what is needed. Here are the CRL's base standards for costume approval https://databank.501st.com/databank/Costuming:FISD_CRL1 point
-
Looks very nice! Good luck!1 point
-
Looking sharp there, trooper! Great job!!!1 point
-
Beautiful build brother. You got this1 point
-
1 point
-
Got a new goodie today!1 point
-
Keep those Centurion applications coming in folks, we are getting close now, so if you are currently ranked Expert Infantry, here is your chance to step up and make the 500. In case some were wondering, we have had a few recently achieve Centurion but these members have already reached Centurion rank with other armour so although approved for their latest costume, they dont add to this tally, hence why the number doesn't drop. First time centurions are what bring the number down, so get involved and step up today1 point
-
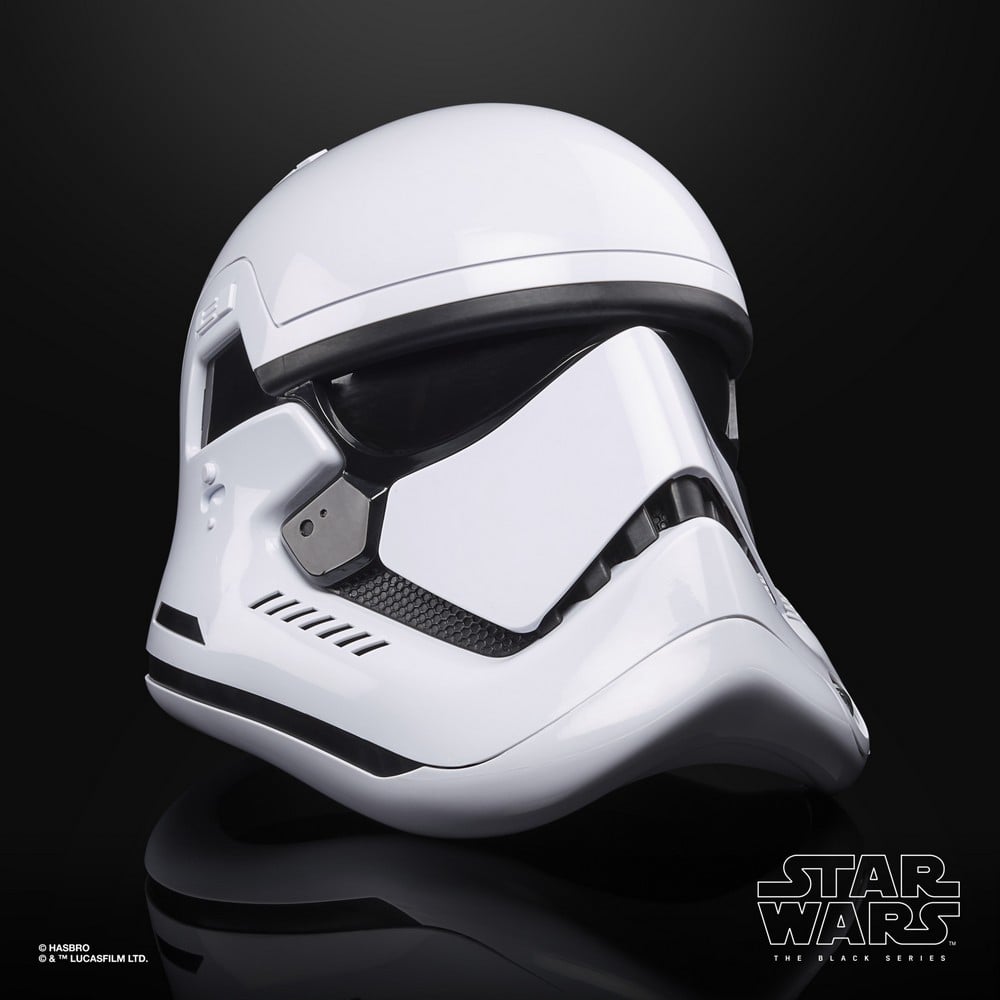
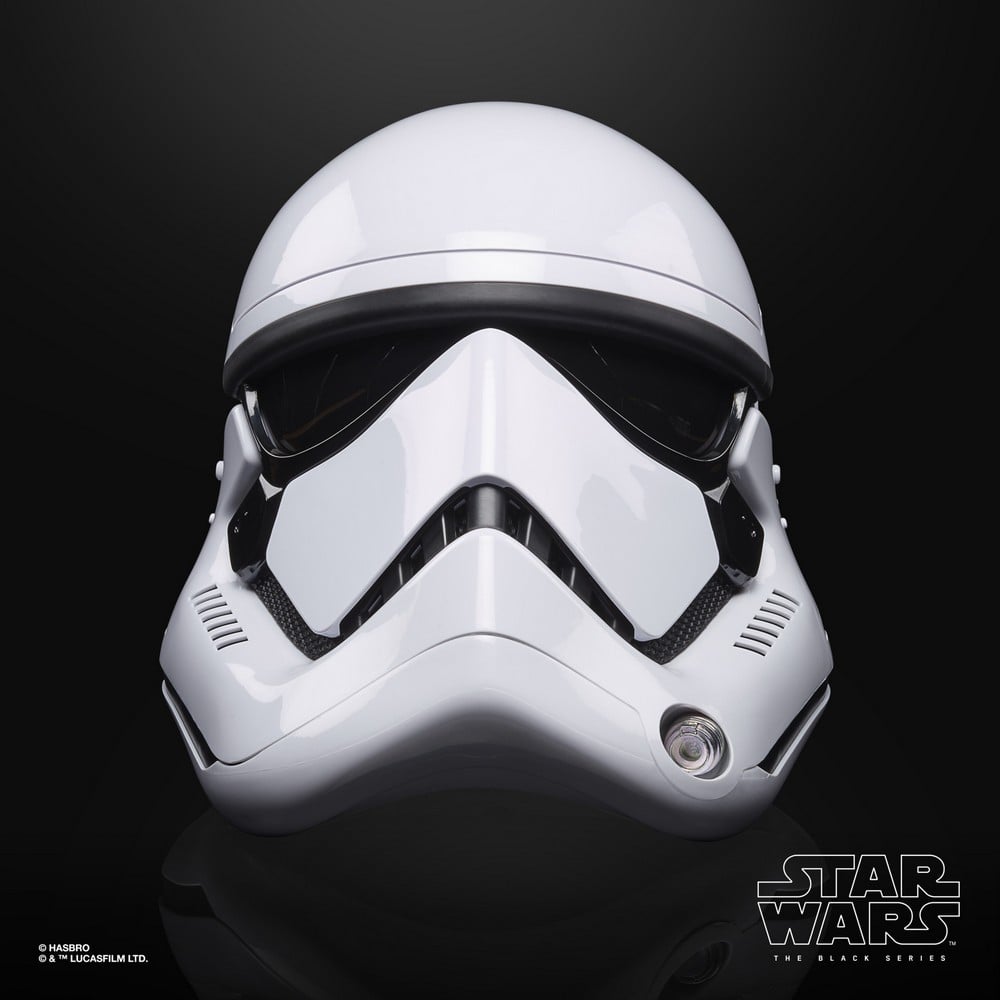
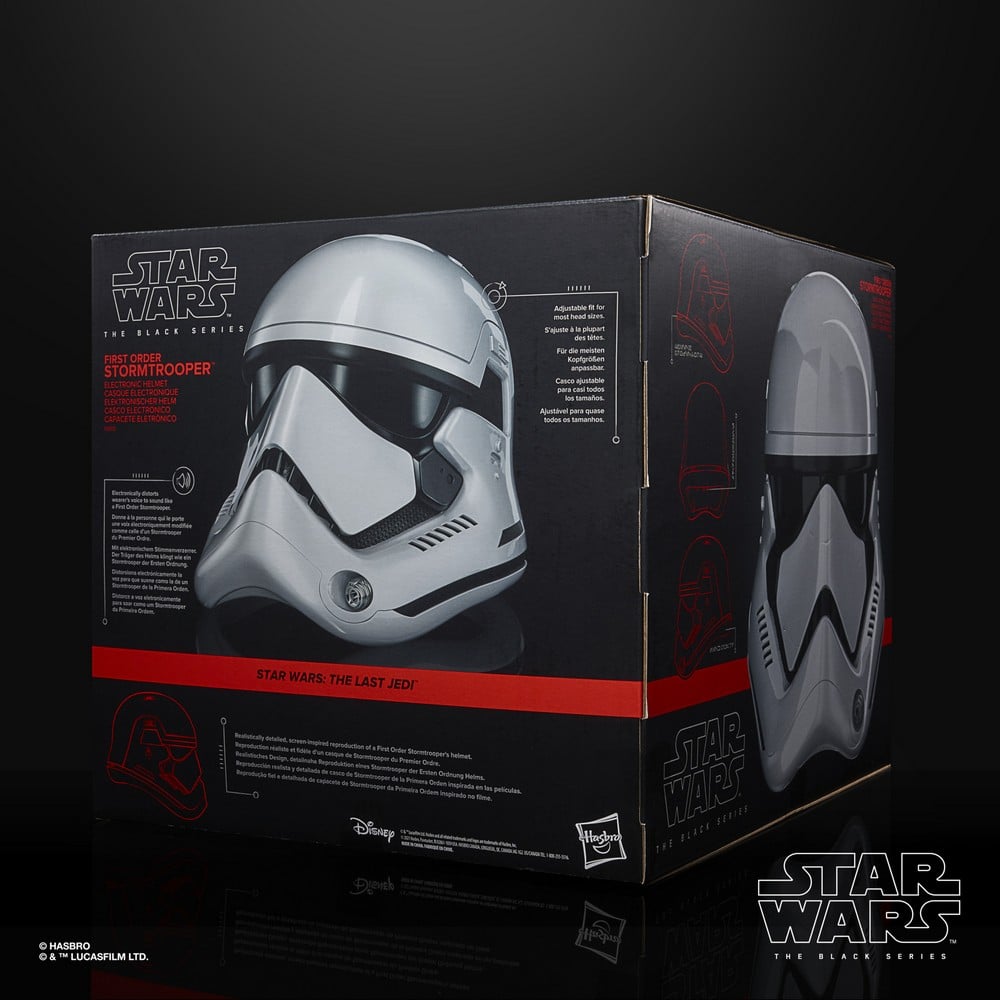
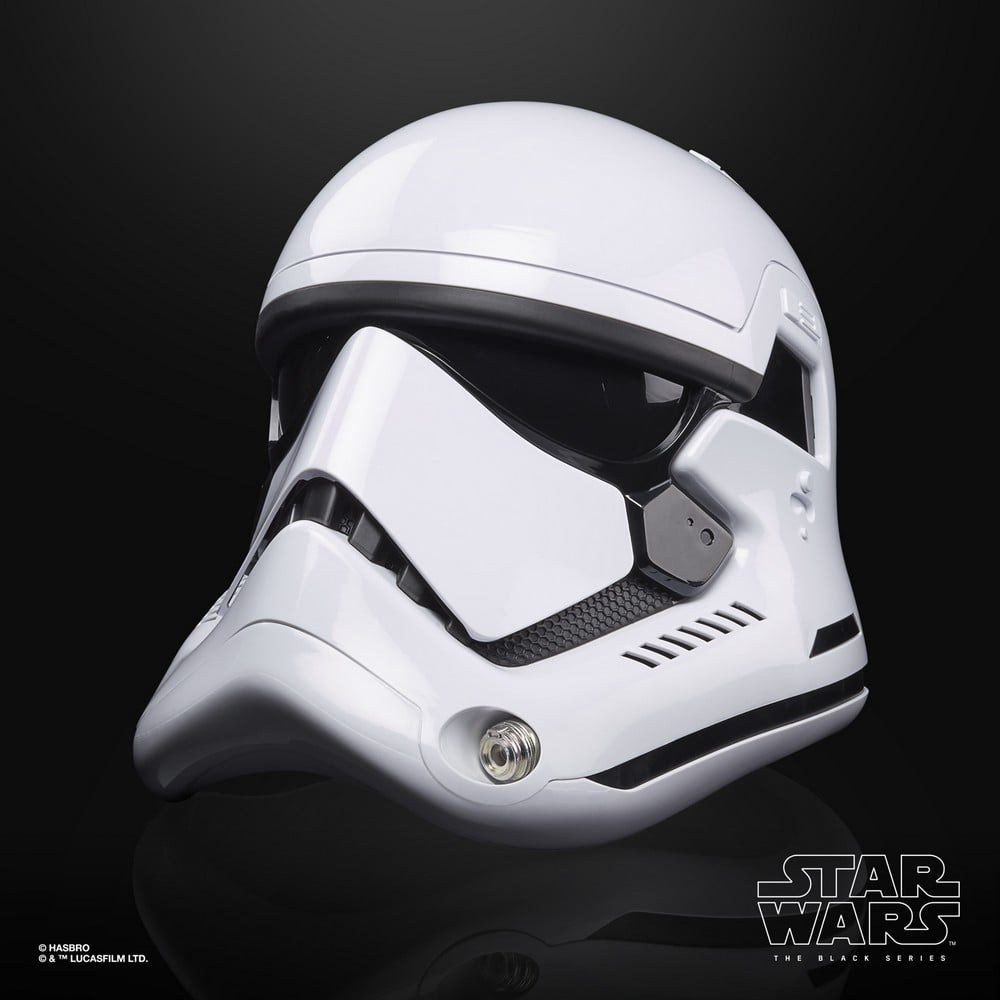
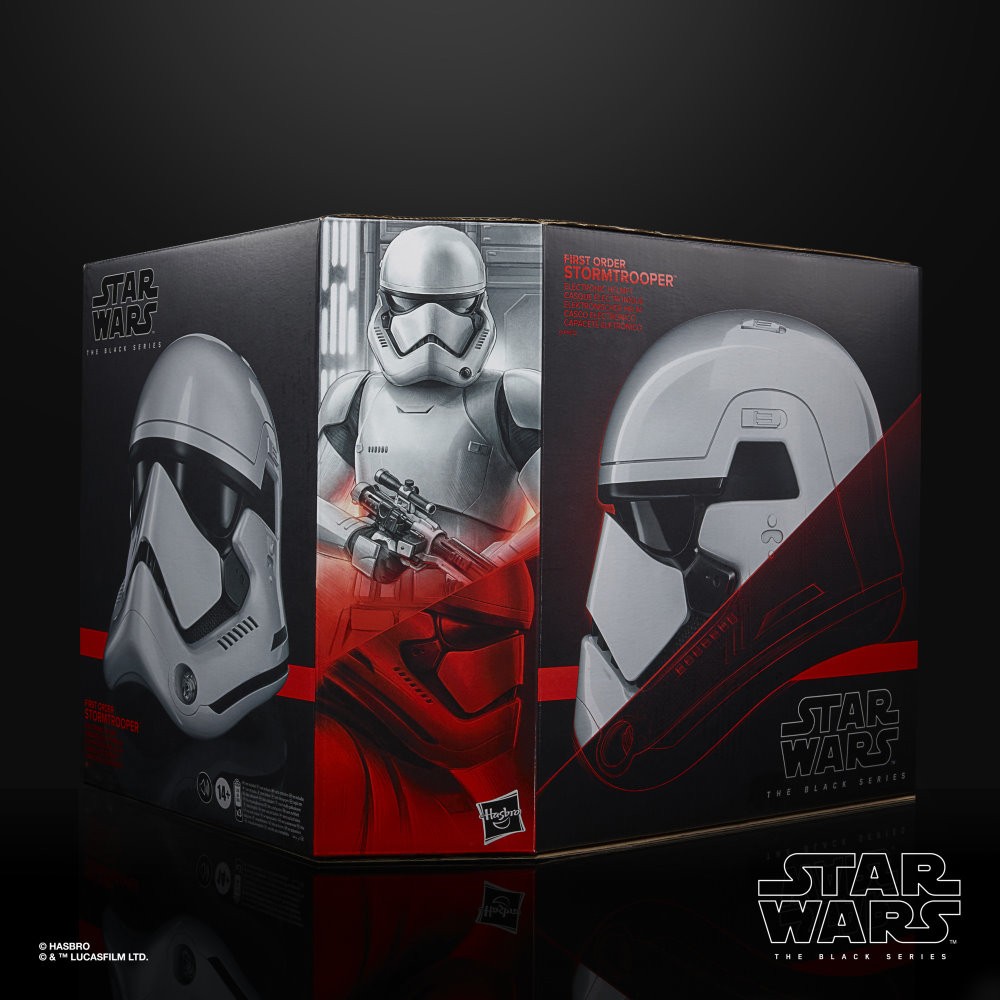
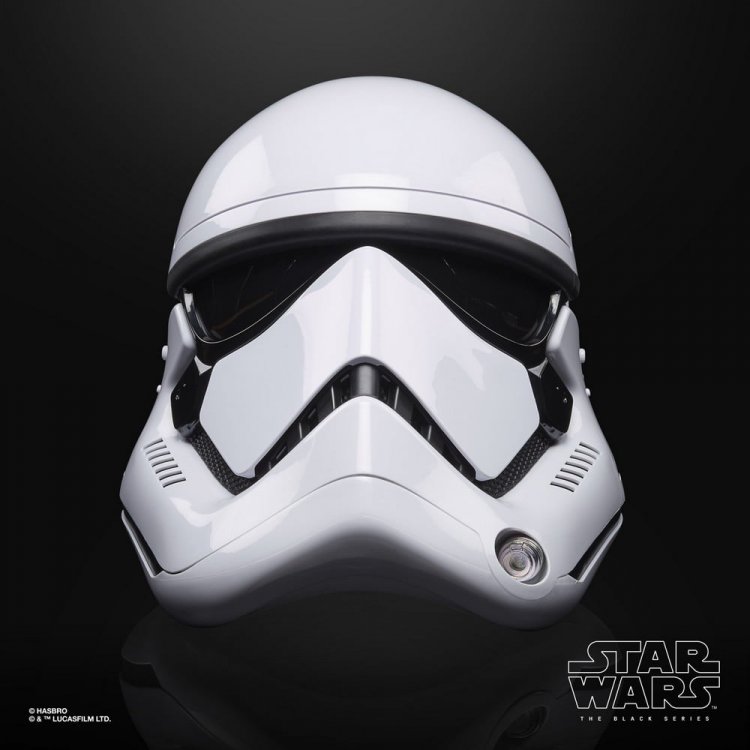
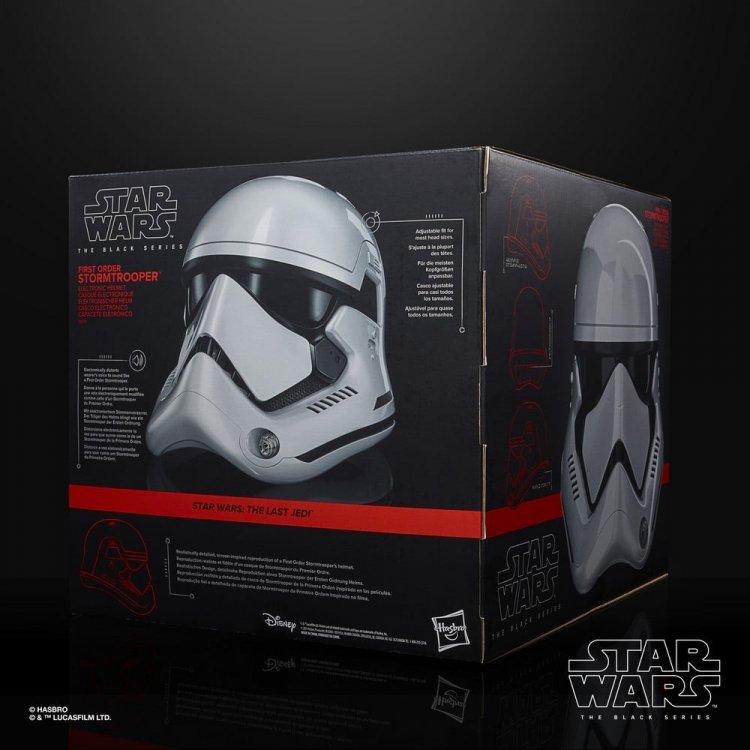
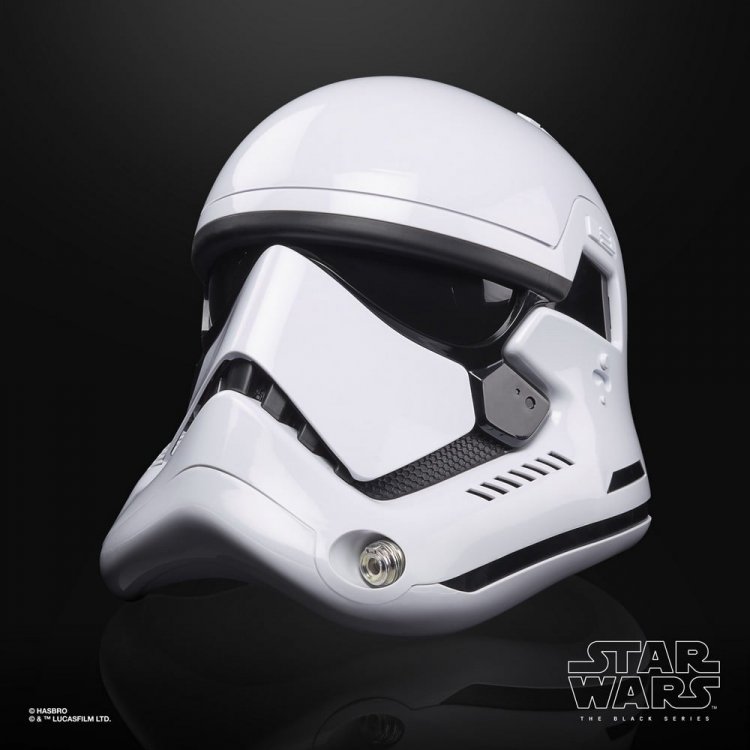
Hasbro reveals the new Star Wars Black Series First Order Stormtrooper Helmet, available in the Spring. $99USD. Available to preorder Thursday Feb. 25th at 11AM PST.

 1 point
 -
Thanks brother. Can’t wait for your kit.1 point
-
Troopers!! please welcome to the ranks Centurion # 493- KC Grim TK 57899 of the Southern California Garrison . Congratulations! Just 7 to go !!1 point
-
Went to get my mail today and realized I forgot the key It’s ok... I have a blaster..1 point
-
Yup already on that. Going to trim the clips. And I will rotate the TD so the donut shows more. To do this I will have to cut down that area too to allow for tit to rotate a little. Possibly right at the first screw holes and drill new holes. Thanks for the input. Looking at my side pics the TD wasn't slid all the way onto the belt.1 point
-
I love the inside of your helmet. That's what I am wanting to do with mine. Black it out and add that extra padding.1 point