Leaderboard


Popular Content
Showing content with the highest reputation on 02/23/2021 in all areas
-
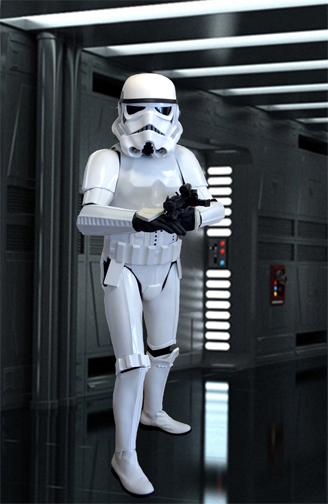
Here is Eric Dyck's helmet history up through AM 4.5. Armor-wise, I know they updated the chest and back for accuracy, and I think the belt, after there were early issues with the 1.0 for getting to Centurion, but the new kits have no problem getting to Centurion. Most of the changes were the helmet:2 points
-
Hi Steven, Most of the screen seen Stormtroopers had this section of the shoulder bridge removed, so we strongly suggest to trim off or half that section for higher levels. As Arthur mentioned before, also "That depends on how "far" the piece reaches down the back plate", the ends of the bridges should ride much higher above the O II plate below them. Reference images Note that we are talking only in the back section. To the front , the tab is totally accurate . Hope this can help you.2 points
-
Yeah, they are some smart people with awesome contingency plans. They have duplicates made, and are remaking them now. The temporary studio is already up and running.2 points
-
And another... Sent from my iPhone using Tapatalk2 points
-
Hey Bill. So my reasoning for fitting/mocking up the entire helmet prior to any painting was that with all the handling of the pieces I'd be doing, I didn't want any paint on there to scuff up or chip. Started with mock up, then painting, then finished with lenses and frown mesh and Hovi tips. I'm sure there are 101 different ways to go about it, but this worked for me and I'd more than likely do the same on the next one.2 points
-
Here I am again. I was first approved back in 2017 with a First Order Stormtrooper and given my 501st number. Over the years and other kit builds later here I am again, a newly approved with the Imperial Stormtrooper (ANH Stunt). During that time with many troops under my belt my journey has me living my dream and seeing the smiles that I can bring. It has been a totally awesome ride!
 1 point
 -
Hey folks! Well I just got notification that my BBB has flown its way halfway round the world from Walt’s Trooper Factory to Sydney, now it has a quick 300km road trip south and we’re off! I have spend the time since ordering, preparing and accumulating bits and pieces, my boots from imperial boots are here, a little on the snug side, but I’m working on that... bucket electronics from ukswraith are on their way, belt and neck seal from trooperbay. I think I’m on the right track. I can’t wait to sink my teeth into this build, it has been a long time coming. It’s a real bucket list thing for me as I’m sure it is for many of us! Anyway, pics will come when it all starts happening! And thanks in advance for all your assistance! Cheers Sam Sent from my iPhone using Tapatalk1 point
-
Copy that1 point
-
Perfect, thank you!1 point
-
{Not talking about screen accuracy here) That depends on how "far" the piece reaches down the back plate. In your picture I say you can have the block removed completely (or half at least) since there is enough length left for the elastic to hold on. Just my $0,5 there. May be one of our DO can provide a better answer.1 point
-
You are my hero today! I couldn't find the instructions for the magnetic closures on the shins.... then I remembered you put them here. Thanks!1 point
-
After time of absence, where my thoughts were by my wife and i don´t even think of anything else, back to work and starting with my canvas belt. After i orderd some fabric samples, my decision was this: https://www.tolkostoffe.de/catalog/product/view/id/182884/s/schwerer-canvas-baumwoll-polsterstoff-in-wei-188040/category/41 As you can see in the further description it´s a more heavy fabric. Ross´s belt has cutlines nearly 8mm in width, so it´s in the range of the crl. How i started? The fabric is 150mm long and nearly 100mm in width. First of all i cut 4 lines of fabric each 150mm long and nearly 10mm in width. Before i sew them together i made two testpieces. One with three, the other with four layers of fabric. As you can see the four layers are obvious thicker and very strong, using a little trick when i ironed them together. I use this hemming web so the layers stick togehter after ironing. You can use this one without a wet towel on it, but it won´t be wrong to use one. After repeating this three times ... ... you will get something looking like this: After this step i sew the layers togehter with a simple overlock stitch. As i said Ross´s belt is nearly 8mm in width with the pre-made cut lines. Becuase i take 10mm in width, i took 5mm from one side, cut it of and sew it again with a overlock stitch. Mark your cutlines so you got nearly 8mm in width and repaet it. Choose your favorite overlock stitch on the sewing machine and sew both sides of the canvas. Et voila ... Next step will be, sewing the velcro. Greetings Wolfgang1 point
-
Great News Sam, congratulations !! looking forward for your advances . Remember "Measure twice or more, cut and glue just once" post tons of photos ,we are here to help.1 point
-
Thanks boss, I can’t wait to get my teeth into it! Sent from my iPhone using Tapatalk1 point
-
Oh happy days, the excitement then the panic sets in, looking forward to seeing your build, don't be afraid to ask questions, good luck.1 point
-
Well it’s here! So impressed with the armour from Walt’s trooper factory, I have done lots of Sintra 3D print and foam work in the past but this is my first step into vac formed armour and I’m impressed. So quick refresher on trimming and return edges, and I’ll make a start on the biceps tomorrow night I think. Wish me luck! [emoji1787] Sent from my iPhone using Tapatalk1 point
-
Really appreciate your reply and comments.. Will get to work on the modifications soon.. Can’t wait for the coveted Centurion badge! Woohoo!1 point
-
Yeah Tony, about two weeks ago. They’re working out of a different shop for the time being. They’re hoping to be back on track in a few weeks. Not sure how long that means mine will take. I have a Tusken I’m working on, so I’ll focus on that to keep me sane. I do have some questions for you tho. About sound stuff. I’ll hit you up on Facebook tomorrow, buddy.1 point
-
Interesting, i must experiment with this rather than the Plasti dip. I have had issues with Velcro sticking so could be the better alternative by the looks.1 point
-
I have not ordered from Quest myself, but that’s the one I would personally go for. I’ve looked at everything available out there. And like you, I cannot break the bank to buy more Star Wars stuff. Just not feasible at this time. If I could afford it, I would go with Blaster factory, but the cheapest kit on there is $400. That’s a bare bones blaster. Of course the one I want is 1600$ I’ve also seen the rubber ones that look ok until you realize there’s no Hengstler counter on it. Not really accurate then, in my book. Then the ones on Etsy can be a shot in the dark and they want 200 just for a kit and then 500$ for completed and weathered. I don’t really trust Etsy anymore. Builders in there take forever and it’s never exactly what you wanted. Like a better but still crappy eBay. The only place I’d trust on Etsy is here. But the 3D printing is very obvious. I would only get the kit and primer all the lines out. 3D lines just really look terrible. ------------ The only other place I would try would be 3D-Props. They make anything you want. A little more expensive but you can get a Bapty or regular E11. Any blaster really. Your choice. And they come recommended. 3d-props.com I know Tramp is making a blast-x version of the E11 with a SDS blaster but that’s no where near accurate. Troopercoola on Facebook is about to start releasing a kit he’s making. Metal parts and resin. Reminiscent of the doopy doo. Doopy-doo by the way, has a lot of customers waiting for their kit for over a year now. Not sure they’re reliable anymore. These are just some places I’ve seen. If you do go with Quest, please hit me up. If I can get a few pennies together, maybe I can order one too. Either way, let me know how you made out. I’ll do the same .1 point
-
Wow wasn't aware RS had an incident, tragic on many fronts1 point
-
Sorry to hear your commission was destroyed, hopefully RS will be up and running at full speed again soon.1 point
-
Sniper Knee: Thigh ammo attachment: Thanks Mario1 point
-
Hey everyone. Been waiting for the RS sandy to come in. I was notified about three weeks ago that it would be sent out at the end of the week. I was so excited, I felt like a kid about to have Christmas. The next week was the fire at RS. I waited to hear from them but never did. It’s been three weeks, so I had to message to see if mine was sent out before the accident. Unfortunately the area that took the most damage was the packaging area. So my entire commission didn’t make it. At least no one was hurt. That’s the important part. I’ve been working on a Tusken to help pass the time until the sandy got here. So I guess that will be my first submission to the 501st instead of the sandy. I’ve been wanting to be a Sandtrooper since 1977, so I’m sure I can wait another couple months... Still gonna cry a bit tho. Just saying.1 point
-
Pre approval submitted. Once approved then on to basic.1 point
-
Fantastic job Ken, good luck with your application.1 point
-
I would recommend, start your Build thread with this info. This helps new members who are starting their builds, to see the prep work and the forethought put into simply getting the plastic and getting a E11.1 point
-
Probably still a little premature for a build thread, but I'll share a quick update. Still on the ATA wait list and should be 2 to 3 weeks out before I'm up. I have a completely empty/unused bedroom to use for this build and have set up a 30"x72" table as a work space. This past week I have gotten all the elastic, strapping, and velcro I should need for this build. I have also picked up a bunch of snaps, rivets, tools for both, clamps, new razor and hobby knives, steel rulers, Goo Gone, E6000 adhesive, china markers, and acrylic scissors. That table is filling up fast! Things I have on order: Hellhound: E-11 blaster so hopefully that will be here in a few weeks. UKswrath: Audio system with voice modulator, cooling fan system and TD clips which should get here this week. Trooperbay: Paint and paint brushes, helmet decal templates, holster, gloves and hand guards and a neck seal have also all shipped I believe PilotBay: TD kit (wanted one larger than the ATA 2" kit) Applied Magnets: 20 each of 2 sizes of rare earth magnets. Should be here this week. Thinking I might need more if I do magnetic closure on the calves/shins. Amazon: Airbrush kit - Delivery tomorrow (Yes... I know it isn't needed, but I don't want to use decals and my painting skills are sadly lacking) At this point, the only things left that I know I need to order are the boots which I can order March 5th apparently and a canvas belt but I want the waist measurement from my armor after it is cut and shaped so that will wait. Might also order a garter system... still mulling that one over. All in all, I think I'll be ready to hit the ground running once BBB day arrives.1 point
-
Thanks!!! I'm starting on the thermal detonator just to get used to cutting and gluing. Next will be gloves - all the low hanging fruit. Chest and abs will be next.1 point
-
Hi Ken, Thank you for your EIB app. I have added it to the processing line. One of us will be with you shortly. Meanwhile, could you please add the following photos? 1. Close photo of your sniper knee both sides and front Crl: Sniper knee plate must be aligned with the ridges on the shin. Sniper knee plate must not have visible rivets or fasteners attaching it to the shin. 2. Close photo of your thigh ammo belt both sides outside and both sides inside to see the rivet type. Crl: Thigh ammo belt is attached to thigh with a solid head rivet, painted white, in the upper corner and fastened to the lower thigh ridge. The rivets used shall be single cap, double cap or split rivets. No pop rivets allowed. Rivet should be approximately 5/16" (8mm) in diameter (exterior). Thanks1 point
-
Squeeks in the armor sound about right?1 point
-
With the exception of one costume I've pretty much have built every other. There's something satisfying about doing it yourself then taking it to L2 and L3, very rewarding. This is strictly my opinion of course. The FISD will support you either way you decide to go.1 point
-
I posted that info in his build thread and an etsy seller1 point
-
Better to have those separate.. they are made from the real sterling mag... Its a problem shipping over seas and to some states. As far as the cost of the vintage mag and the time it takes to make those 90.00$ i think is fair. If you are comparing the level of detail to a resin version, granted there are many. My Aluminium parts are highly detailed and with the proper builder can be extremely realistic. If your going to have a negative attitude about what i do then STOP FOLLOWING THIS THREAD. My parts are not for all builders , there is plenty of cheap stuff available. I dont do this for a living , I do this because I want to build GREAT props that are as true to the real stuff as i can. Maybe before you judge my stuff with a NO THANKS ,,, Maybe you should know the differences in quality and realize that i use real vintage found parts to laser scan a replicate these in metal... And make them functional, movable, and they disintegrate when they get in the sun ... Just because you do not think its worth the money don't put down the people that enjoy this level of prop making!!!!! MERRY CHRISTMAS1 point