Leaderboard


Popular Content
Showing content with the highest reputation on 11/27/2020 in Posts
-
Had to remind the youngling... “it’s that time of year, and Anakin is always watching!”2 points
-
Now that I've finished my 4th OTTK Centurion approval... and my ROTK is nearing completion approved... if only I could find something... maybe a new build... to keep me busy during the holidays/continued lockdown... MORE TO COME SOON!1 point
-
I decided to work out a complete, comprehensive list for those about to start an OT TK armor build (ANH Stunt, Hero, etc,) to help get everything in place for when "Big Brown Box" day arrives! This list does not include soft parts, (neck seal, boots, etc.) but focuses on the hardware and supplies for building the armor itself. However, a list of soft parts can be found HERE I believe I have covered most items, but would appreciate additional suggestions/corrections to add, and will keep it updated as such. Yes, it looks a bit daunting, but some of the items you will already have, and the rest can be purchased at major home improvement stores, online, or borrowed from a TK friend! Plus, it gives you something to do while you "hurry up and wait" for your kit! This list is includes items used for the EIB and Centurion programs, (marked with double red asterisks)**. These items are not required for initial TK approval, but I encourage everyone to consider them as an option. Hope this helps, and best of luck on your build! PLEASE NOTE: Some kits come with all the hardware you will need to build to Centurion level, i.e. split rivets, ear screws, TD screws, etc., however, not all armorers supply the correct ones. If you are (hopefully) planning on aiming for level 3, please check with your armorer to see if they provide these. You can also reference the photos below to see if they are accurate. These supplies are based on using the snap method for connecting the armor. Example photos are shown at the bottom for many of the items, but not all. (Everyone knows what a hammer looks like). Items with photos have a notation. 1. E-6000 glue- Great for almost everything, and removable if necessary. Highly recommended. (Pick up some wooden tongue depressors as well, makes spreading it easier)! (Photo 1) (Please see updated information on E-6000 below, after #50 before purchasing). 2. Binder or notebook- To keep notes on your research. 3. Dremel or rotary tool- A "must have". (Photo 2). Be sure to get the sanding drum attachment and extra sanding drums (Photo 3). I suggest the 180 grit type. 4. Small plastic containers- Keeps everything organized. 5. Lexan scissors- Curved and straight, for cutting ABS. (Photo 4) 6. Small spring clamps- For holding things in place while gluing. You can't have too many! (Photo 5) 7. Line 24 snaps- For strapping. You will need at least 30, and do NOT "cheap-out" on these, but purchase quality ones. (Steer clear of Wal-Mart snaps). Tandy is recommended. Tutorial located here: https://www.whitearmor.net/forum/topic/44617-snap-setting-101/ (Photo 6) 8. Snap setting tools- There are 2 types to choose from- One is a two piece set (requires a hammer) (Photo 7) and the other is the pliers style (Photo 8) 9. Hammer- For setting snaps if you use the 2 piece style of snap setter. 10. Pliers/vise grips- 11. Screwdriver- Slotted head. 12. Rivets-** 5/16 (8mm). (Photo 9) Round head bifurcated/split rivets with washers. You will need 9. (3 for the kidney, 3 for the ab, one for the cod piece, 2 for the thigh ammo pack). You will also need 3 speed (Chicago") rivets to attach your ABS belt to your canvas one. These are attached by hand and not to be confused with the aluminum ones listed below (#19). Some like to use the screen accurate single cap rivets (Photo 10) to attach the ammo thigh pack but these are not a requirement. 13. Elastic- 1 inch wide black for shoulder bells, etc. (4 ft.) 2 inch wide white for ab/back plate shoulder connection (1 ft.), 1 inch wide white for drop boxes, (1 ft.) 1/4 inch wide white** (1 ft.) for shoulder straps. 14. Nylon strapping- 1 inch wide black, at least 6 to 8 ft. long. 2 inch wide black (48 inches) for high tension areas if you are using the double snap method. (NP) 15. Exacto knife/extra blades- For cutting, trimming, cutting nylon strapping. (Photo 11) 16. Heavy duty razor knife/extra blades- For cutting cover strips and scoring around pieces that will be removed. (Photo 12) 17. Heavy duty scissors/tin snips- For (carefully) cutting large sections of ABS. (Photo 13) 18. Metal ruler or straight edge- (At least 18 inches long). For use as a cutting guide, especially cover strips. 19. Hand Rivet gun/aluminum open end blind rivets- For putting your helmet together. Available for about $10-$12.00, EASY to use! (Photo 14) 20. Metric Ruler- 21. 2 x 2 or larger piece of carpet- Protects work surface, keeps dust down, and stops small parts from rolling away. 22. Rags/paper towels- And plenty of them. 23. Blue painter's tape- 1 inch and 2 inch widths. For keeping glued parts in place and dry-fitting your armor. 24. China marker/pencil- For marking cut lines. 25. Sandpaper- I highly recommend Sandblaster Pro Flexible silicone sanding sheets from 3M, 220 grit. You will never use anything else, I promise. They last forever! 26. Sanding block- The sponge type, 120 grit. 27. Band Aids- You will need these. Might as well keep them handy. 28. Rare earth magnets- (10 minimum) SUPER strong! I use the 20 mm x 3 mm round ones. Cover them in blue tape to prevent scratching your armor. You cannot have too many!!! Tutorial located here: https://www.whitearmor.net/forum/topic/44619-magnets-101/ (Photo 15) 29. Butane Lighter- For sealing the ends of nylon strapping. (see # 44 below for a better option) 30. Large "half-round" file- For smoothing out edges before sanding. I used this a LOT, especially in the curved areas. (Photo 16) 31. Small "Needle file" set- Very inexpensive, comes in 6 different shapes, and is perfect for the teeth and eye openings on your helmet. (Photo 17) 32. Foam padding- 1 inch thick. Great for helmet and armor padding. Available at craft or fabric stores. 33. Velcro- 2 inch wide black (various uses) and 1 inch wide white, for calf closures (about 36 inches). Go for the "Industrial Strength" kind. 34. PAINT: Satin Black: Humbrol # 85 or Testors # 1747 for vocoder, trap/ tear drop/ear bar outlines/stripe(s), ROTJ and ESB frown, TD screw heads. Gray: Humbrol # 5 or Testors # 1138 for trap/tear drop/ear bar background, ANH frown and ab-buttons. French Blue: Humbrol # 14 or Testors # 2715 ForTube stripes/ab buttons. Mediterranean Blue Humbrol (Tube stripes alternative color) Testors: No exact match Gloss white for all rivet heads (excluding cod rivet). Mineral spirits for brush cleaning 35. Goo Gone- Citrus based solvent that will remove latex and enamel paint and NOT harm your armor. (Photo 18). 36. Small paint brushes- Assorted sizes. Try to buy quality ones.. Cheap brushes =cheap looking results. I suggest picking up a "filbert" (Photo 19) style brush (photo 5) as well, as it's rounded tip works great for painting the ab plate buttons and vocoder. Another GREAT way to get clean, crisp lines on the ab buttons is to use Testors Micro-Sponge brushes (Photo 20). 37. Wire or fiberglass mesh- (Window screen). For inside the "frown" of your helmet. A piece 3 x 8 inches will work fine, and you can trim it as needed. 38. Safety Glasses- It never hurts to be too careful, especially when using a Dremel type tool. For your Thermal Detonator, (TD) clips: (Note: There are some GREAT pre-made TD clips you can buy on this site, and some kits include them, but you can use the following 5 items to make your own. 39. Aluminum strip- 1 inch wide 40. Screws- Size #6 pan-head slotted screws **, 1/2 inch long, You will need 4. (Photo 21). NOTE: The CRLs have been updated and round head screws are permitted, but they must be the slotted (not philips) style. 41. Hacksaw- For cutting the aluminum strip. 42. Drill- Electric or battery operated, with various size bits. 43. Vise grip OPTIONAL ITEMS: 44. Heat sealing iron- For making return edges. Not normally needed, but there are some great tutorials on this here on FISD. Try it on a scrap first, though! 45. Soldering Iron- For making holes in nylon strapping and sealing the ends. Pretty inexpensive, and worth the cost! (Photo 22) 46. Plasti-Dip- A black rubberized coating you can spray inside your helmet, (also available in a brush-on). Or, you can use spray paint. Just remember to sand and prime first! 47. Heat gun- Not normally needed. For shaping ABS. Use this CAREFULLY, and practice on scraps first until you get the hang of it. These things can reach 1500 degrees and melt your armor. 48. CA (super) glue- Not recommended for first time builders, as it is PERMANENT, and you can't fix mistakes. Also, if it drips on your armor it is nearly impossible to remove. It can also become brittle over time, causing connections to fail. 49. Acetone- For use ONLY in making ABS paste for filling small gaps, (see tutorials). Do NOT put this directly on your armor, as it will melt it. 50. SUGRU- This is an easy way to attach the lenses in your helmet. Tutorial located here: https://www.whitearmor.net/forum/topic/44593-how-to-attach-lenses-using-sugru/ 51. Respirator- An informative post was made by Clint, (cm325i) concerning the effects of E-6000 glue on some individuals. Definitely worth a read: http://www.whitearmor.net/forum/topic/33347-e6000-warnings-read-them-and-wear-a-respirator/ 52. Cut resistant gloves- Especially helpful if you are prone to cutting yourself. Available online for about $12.00 (Photo 23) E-6000 update: Please note that there are certain online retailers (including those in Europe) that are selling FAKE E-6000 or "knock-offs" like these: The genuine product is clearly marked Made in the USA, and has a batch number on each tube. They do not sell to distributors in Asia, so if you try to save a few bucks by ordering from a seller there it is not the real stuff. If you have any doubts, you can contact the manufacturer at www.eclecticproducts.com, and they will let you know where to get it. The fake stuff is garbage and will not hold up. 1. 2. 3. 4. 5. 6. 7. 8. 9. 10. 11. 12. 13. 14. 15. 16. 17. 18. 19. 20. 21. 22. 23. IMPORTANT UPDATE! To make life easier, Ray (Dieltski) made this into an awesome Google spreadsheet, which you can download to keep track and add notes! Just click here. Thanks, Ray! .1 point
-
Yoke is one of the areas which take a lot of strain, Tony @ukswrath has a nice kit for strengthening that area https://www.whitearmor.net/forum/topic/44120-fs-ukswraths-fotk-shoulder-bell-and-yoke-brackets/ I've noticed having a look over a few of Jim's kits that they do suffer from cracking in quite a few areas appears it's a downfall of the flexible fiberglass, pieces can be quite soft and if you leave them on their sides they can oval over time just from the weight.1 point
-
Few minor crack repairs should be easy for you to accomplish, the repaint will be more work though.1 point
-
Very nice work Mark, best of luck sir.1 point
-
Great work and thank you for sharing, you could also post these in the 3D section https://www.whitearmor.net/forum/forum/202-3d-file-depository/1 point
-
Painted the grey on the ears and upper back areas. currently working on the teeth (which have been a pain to tape off), then to paint the brow and neck rims black (I'll post pics once both are done). Also, I'll be releasing the Rogue One inspired versions of the helmets for free, which were modeled for me by my friend Skylu3D. Use and edit them how you like, but remember to credit Once everything with my current helmet file is figured out, that will be released (either for buying or free). Phase 3 Rogue One v1: https://drive.google.com/file/d/1hn6QW9nAtP4bhwhC6u8QJ_XPwJKvFmqX/view?usp=sharing Phase 3 Rogue One v2: https://drive.google.com/file/d/1a0L2xgB-zXguqfX7KxO4bOqxAoYOJ2Lp/view?usp=sharing1 point
-
You're on a TK roll Justin.1 point
-
Psh, even I didn't necessarily know it was coming! hahaha I told myself I never wanted to mess with gaskets and that I wouldn't, but I was starting to run out of white armor to noodle with and I don't think people want to see an ROTJ as much as they do an FOTK! I came across this great deal when I wasn't even really looking and it was too hard to pass up. Hey, it's white and shiny... but I don't want you guys drawing colored lines on it and I think some of the paint is outside the lines :P1 point
-
Hi all, this week I decided to buy a RS Kit. I have ordered today. I was waiting for black Friday :). So the decision is finaly made1 point
-
OP (MV) Post #39: Imperial Dentistry To continue with my helmet I began the teeth-trimming process using the screen-used references from the Frown Part Gallery as well as the aforementioned resources linked again below. ATA ABS Helmet Assembly by pandatrooper (Print PDF) ATA Stunt Helmet Assembly by Ales (Print PDF) My process first began with drawing a minimal outline within each tooth gap, which would serve as an initial guide for my drill bit. Having only used a sanding drum on my dremel once before (on my TD), I opted for the drilling method. First I created several holes in the caps, and then connected them by cutting with an xacto hobby blade. I then continued with the xacto blade and expanded the teeth holes further, as shown in the process compilation below. I then proceeded to expand them further with sanding needle files, and below is where I currently am. I think I've done a relatively good job, but I'm not totally sure about the tops and the bottoms, as well as the two end holes. Might some more experienced eyes be able to provide some additional insight? Here is what the inside behind the teeth currently look like. Obviously once I'm done I'll sand or cut off the excess hanging pieces. At this point I will wait for feedback and continue with other portions of the helmet before proceeding with final sanding and painting of the teeth. Thanks in advance for all your continued guidance, FISD! MV EDIT: Below is a photo of the tools I used for the past two posts. The rotary tool at the top was for initial eye cutting, and the xacto knife and needle files were for the teeth. I did not photograph my drill.1 point
-
Glad you're finally conquering the tube paint. Curious about the velcro you want to add on the shoulder elastic. How do your shoulder bells attach currently? I have snaps on mine. Or are you worried about stretching the elastic? I keep the arms detached from the body when not being worn. I found that the elastic I used on the shoulder bells stretches out if I leave them on the bicep when stored so those are disconnected when not in use too. Sent from my sorrosuub C1 comm link device using Tapatalk1 point
-
Nicely done!!! Congratulations1 point
-
Gentlemen, I thank you very much for all of your assistance and encouragement! It has been a very edifying and rewarding experience. I will work on these suggested adjustment today and submit my Centurion app by tomorrow. And I won’t be touching my wife’s kitchen shears [emoji6]. I’m still getting the stink eye over the strainer lol. I also want to thank fellow Garrison mates [mention]David G [/mention] and [mention]A.J. Hamler [/mention] for their inspirational EIB submissions. I’ll be using there Centurion apps as a guide as well. And fellow Garrison mate, [mention]gatetrooper [/mention] . Andrew was instrumental in guiding me through this process and helping me bring my kit up to snuff prior to submission. Thank you Gentlemen!1 point
-
Congratulations Trooper !!1 point
-
Congratulations and welcome to the EI ranks trooper1 point
-
Ugh... life has been a bit rough these past two months and progress has slowed to a crawl. I am not very experienced with painting, so I’ve ended up doing and redoing the paint on the helmet a few dozen times trying to get it right, namely the tube stripes. I’ve went through two different sets of stencils I’ve struggled with the traps and tears as well. After off and on work, I think I am at the point where it could possibly pass for basic approval (hopefully), but my end goal is still making it Centurion. If I ever work on another ANH stunt helmet, I think I’ll just do stickers and maybe paint over them for higher levels. Anyways, here are some pics of some of the progress I’ve made. One thing that I tried doing that isn’t helmet related was redoing the shoulder bridges. I’ll probably add velcro to ensure that the white elastic holding the arms doesn’t slide out from under bridges due to the arm weight. My next step tomorrow will be painting the inside of the helmet with flex seal, I believe I’ve seen other troopers doing this but it has been a while since I really looked into it. A question I would have is if I should use Flex Seal Spray, or use a can that I have sitting around. I also plan on installing a dual fan set up and if possible, installing an icomm setup all in the helmet. That is the current plan at least, and I’m completely open to feedback and concerns!1 point
-
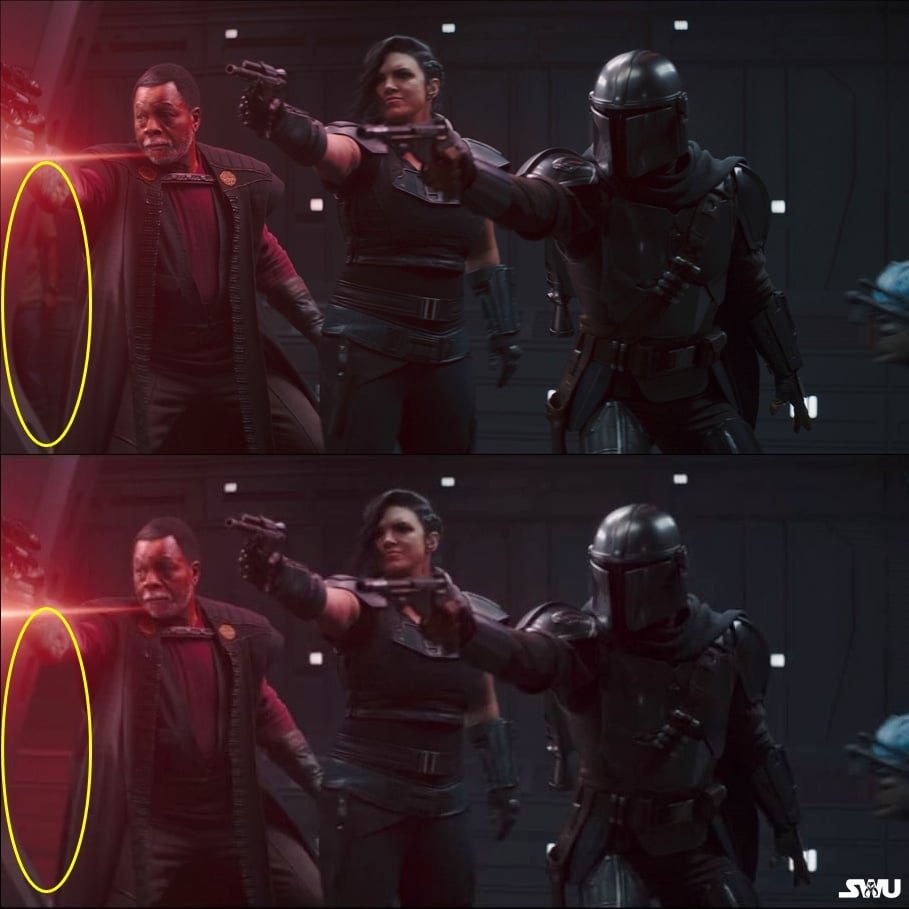
What, they digitally removed him wheres the sense of humor Disney! we love the fact sometimes things aren't right, it's always been part of Star Wars, like gaffer tape.1 point
-
Bad news, he's no longer canon RIP JEANS GUY: The now infamous "Jeans Guy" blooper in Chapter 12 of 'The Mandalorian' has been digitally removed
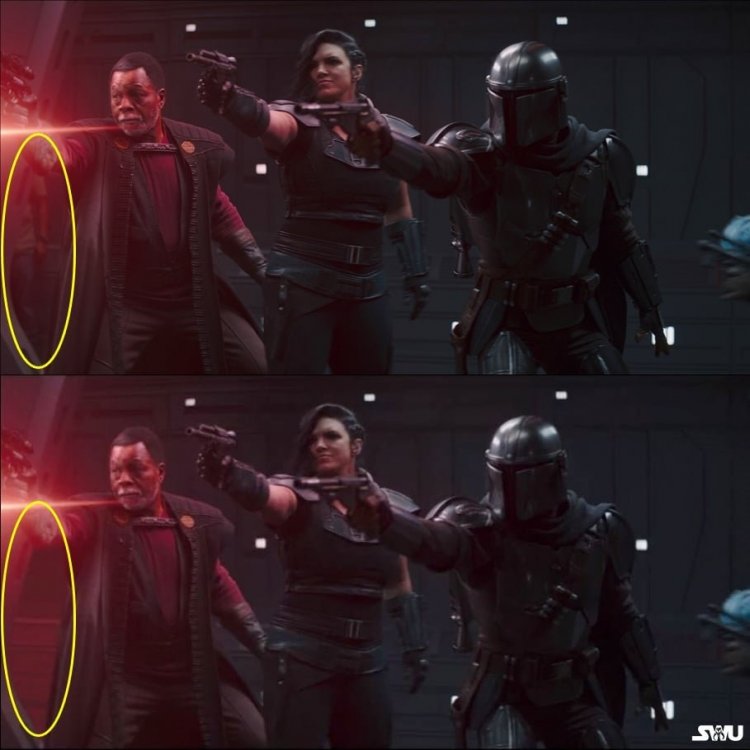 1 point
 -
Great job!!!! Mark (AP)1 point
-
Not much here, but I got the gloves and gauntlets sorted out: I was going to glue these to the gloves, but it wasn't going as planned, so I went with velcro tabs in the fingers and knuckles. It works; when I curl my hands it pushes on the velcro. Speaking of velcro, I ran velcro tabs along the gauntlets and they can slip on and off. A downside to this set up is the abs gauntlet is thin and feels like it could tear if yanking at the velcro a lot. Once sized, it should cling to the gasket at my elbow. Test fits felt good! Next up is the shoulder gasket and shoulder rig.1 point
-
Hi Dennis. If I can make some comments about. The pencil marked area for trimming is just right to meet the L3 requirement , Reference Images I would suggest also to reduce the 3 square buttons return edge to make then more flat and move then closer into the belt, as the references. Reference Images1 point
-
*raises fist to air* Autocorrect!!! Thanks mate! Sent from my Imperial Comlink1 point
-
Michael Lederer 11312 EIB letter size Joseph Thank you in advance. My pleasure... here you are! http://www.whitearmor.net/eib/certificates/11312-eib.png1 point
-
Congratulations you two. keep em coming in folks we will be celebrating again in no time1 point
-
Happy to be here among the elite! Who else is going to join us?1 point
-
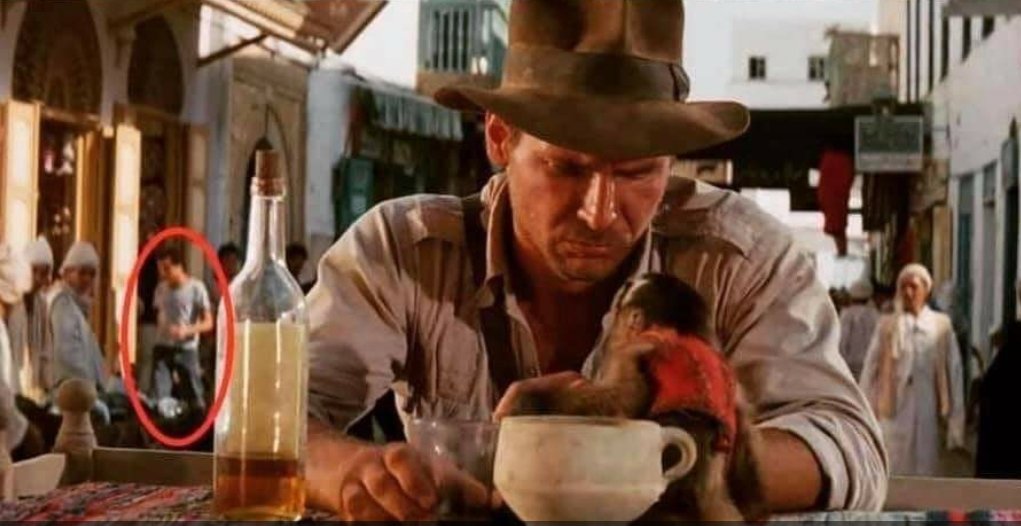
Apparently the guy also appeared in Indiana Jones
 1 point
 -
Some references1 point
-
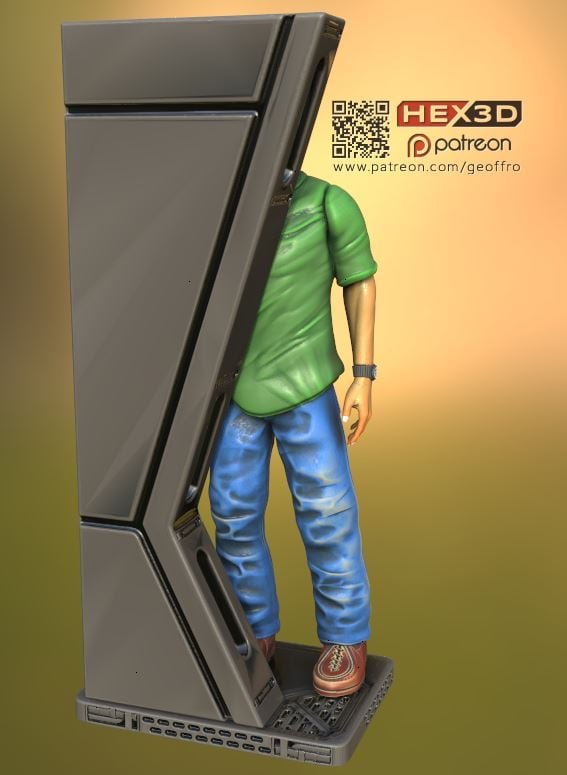
And Hex3D on FB is working on some 3D files for those action figure collectors, based on Matt the radar technician
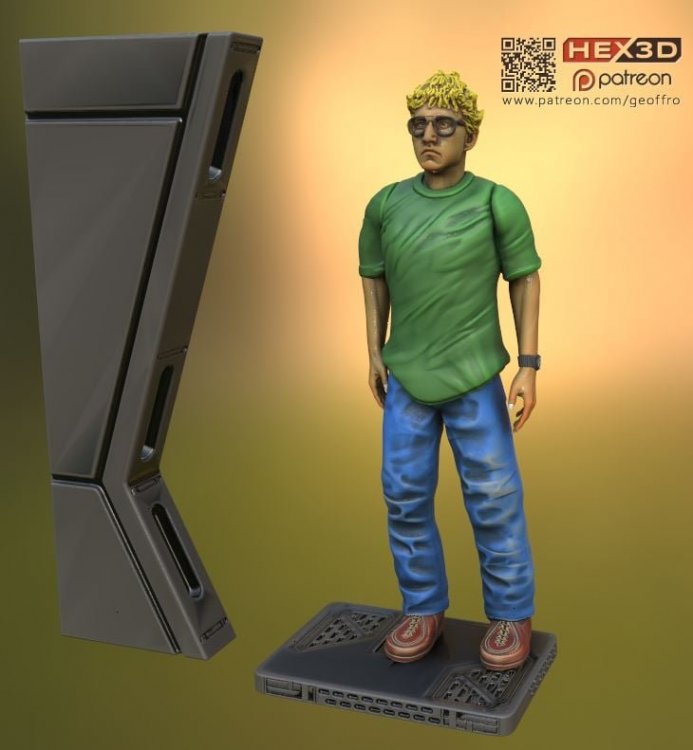
 1 point
 -
That's so exciting, I'm EIB#982 and Centurion#482 such an awesome coincidence. I'm so happy to have made it to Centurion. Of course, I didn't get here alone. Thanks must go to everyone who's offered advice along the way to get me here. You all make this community a spectacular place to learn and grow. Sent from my sorrosuub C1 comm link device using Tapatalk1 point
-
Hi everyone! Thanks for the feedback. I went ahead and worked on everything today and got suited up for a second round of pictures and updates (noted accordingly below). Rather than replace the entire first post, I’ll just put everything here again in one place in this followup post. Personal Information Name: Alex Cardenas Height: 5' 11" Weight: 185 lbs. FISD Name: Cardena5 Legion ID#: 55105 Profile Page: https://www.501st.com/members/displaymemberdetails.php?userID=31330 Garrison: Florida Garrison / Everglades Squad Build Information Armor Maker: AP (Authentic Props) Helmet Maker: AP (Authentic Props) Blaster Type: E-11 Hyperfirm Boots: TK Boots Canvas Belt: AP Hand Plates: Silicone plates from JustJoseph63 Electronics: Aker 50W Amp, TrooperTalk Neck Seal: Darman's Props Holster: AP EI Submission Centurion Submission Photos Armor Photos Full Body Front Updates from EI: Shortened shoulder bell straps to pull shoulders in closer to chest. Raised belt slightly higher to match screen references Full Body Back Full Right Full Left Right Side Detail Update from EI: 1. Corrected alignment of kidney and ab plates Left Side Detail Rivet Detail Abdomen Detail Update from EI: 1. Reduced size of ab button strip and made corners rigid instead of rounded. Interior Strapping Shoulder Straps Cod Piece Sniper Knee Thigh Ammo belt Ammo belt Update from Centurion Round 1: Made adjustments to further align the boxes with the edge of the belt. Thermal detonator Update from Centurion Round 1: 1. Originally, in lieu of disassembling my original TD to cut down the control panel and/or remove and reinstall the clips, I instead submitted for Centurion with a spare TD unit we had that was more in line with Centurion requirements regarding the control panel positioning. Unfortunately, the 1/2” gaps and the screws were not Centurion approvable on this spare TD. So I have switched back to my original TD after I was able to safely remove the control panel, trim it, and reinstall it so that the control panel was more visible as required. Gloves Neckseal Blaster left side Update from Centurion Round 1: Reduced weathering on handle/grip Blaster right side Blaster D Ring Helmet Detail Photos Front Sides Update from EI: Trimmed brow strip ends per recommendation Update from Centurion Round 1: 1. Rounded out Ear Detail edges Back Hovi tip detail Update from Centurion Round 1: 1. Narrowed bottom of Vocoder and added more white to Hovi tips Lens color (Backlit if necessary) S Trim Detail Action Shot1 point
-
@11b30b4 Please add Sheev's Emporium to the soft parts vendor list at your convenience. They have started consistently providing undersuit gaskets and they look excellent! https://www.facebook.com/sheevsemporium1 point
-
Just saw your other thread re: ear placement, David. Although we prefer them to lay completely flat against the contours of the sides, as seen in the reference images below that just wasn't the case for many seen in the OT (Original Trilogy). ANH was made on a budget, and apparently the prop masters were not too picky, lol. Having some kind of gap is not the end of the world and actually sort of adds to their charm.1 point
-
+1 more. As others have said, Dave has taken over selling AM Armor. AM has a long history and is extremely high quality - few other makers have as sharp of details or similar bright white, thick ABS. Their tooling is impressive and you get a ton in the box for your money (ie, ANH and ESB harndguards, TK and TD sniper knees, etc.). I have built several and they are one of my main recommended makers, especially for bigger guys. The kit even comes rough trimmed out of the box. Absolutely a quality vendor, just a newer face taking the reins. Buy with confidence.1 point
-
Dave's Darkside Depot is who I am using so I can vouch for them. If you do a search for AM armor you will see lots of 501st members swear by it. He recently took over sales I believe but AM armor has been around and is reputable. Right now I think its the AM 4.5 armor being offered so it has been getting better and better. I received my helmet kit very promptly and they are currently customizing my body armor for the height. AM armor is also a good option for taller or larger individuals because I believe lots of kits out there limit you on having to be in a certain height range. The shipping times have been fast, and one of my favorite things about this process has been that Dave himself allows you to text him questions and he is usually very quick to respond and give advice/help on your build. Also, the AM armor is thicker and more robust than lots of kits out there that are thin and crack easily. So in summary, I would have no qualms going with Dave's Darkside Depot. He is a member of the 501st and knows his stuff. Here's a photo of my AM armor helmet which he and some youtube videos assisted me with. I am still finishing it up but its coming along. Thats another thing, Eric Dyck on youtube has a collection of videos helping with assembly and his videos are putting together the AM armor which is what Dave's Darkside Depot is selling.
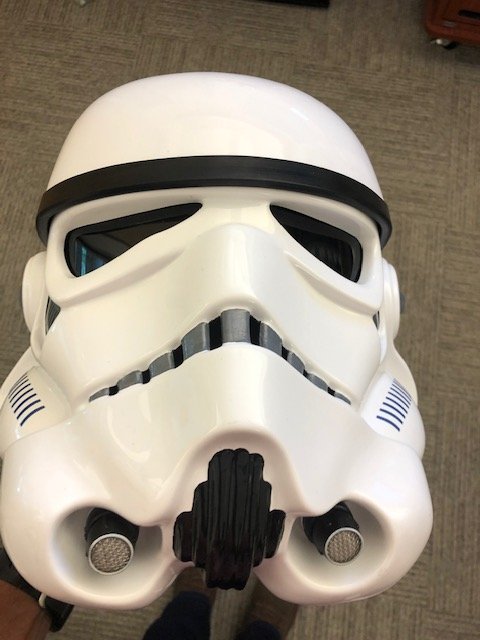
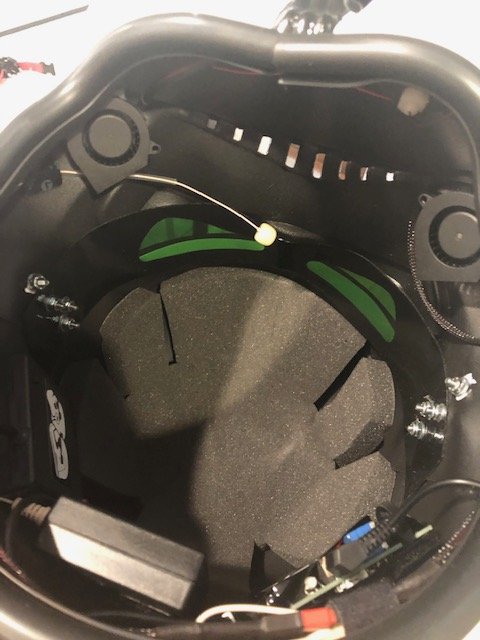 1 point