Leaderboard


Popular Content
Showing content with the highest reputation on 10/08/2020 in all areas
-
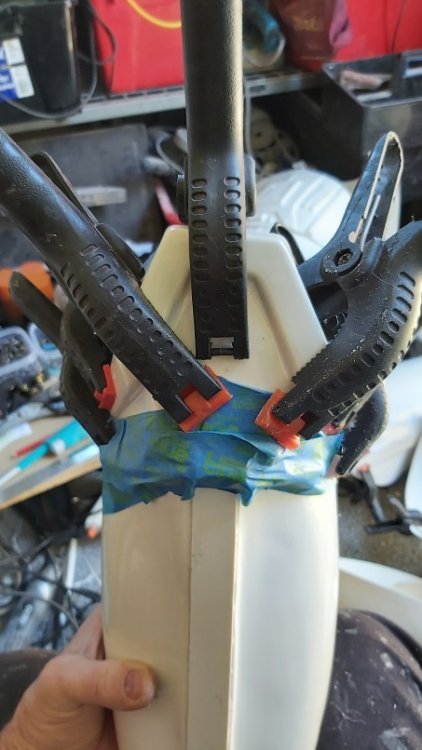
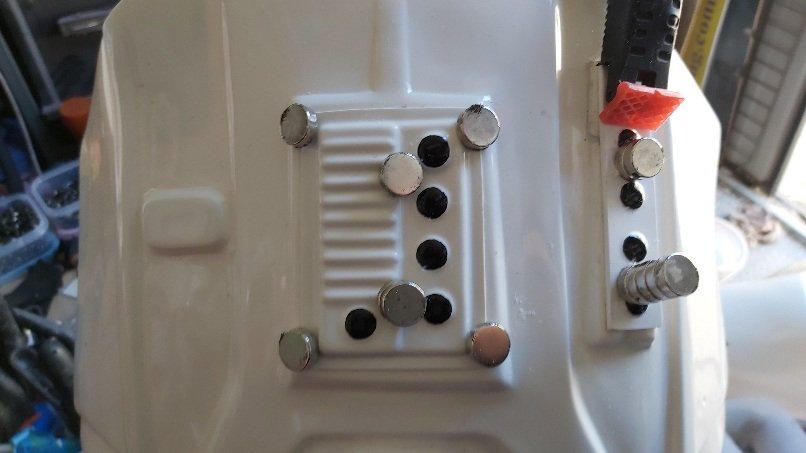
Looks good, plenty of clamps help
 3 points
 -
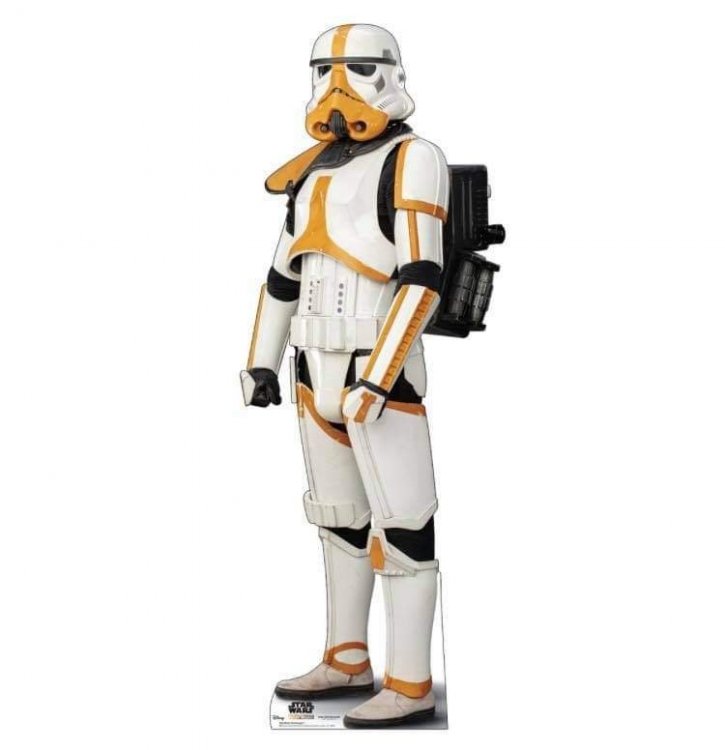
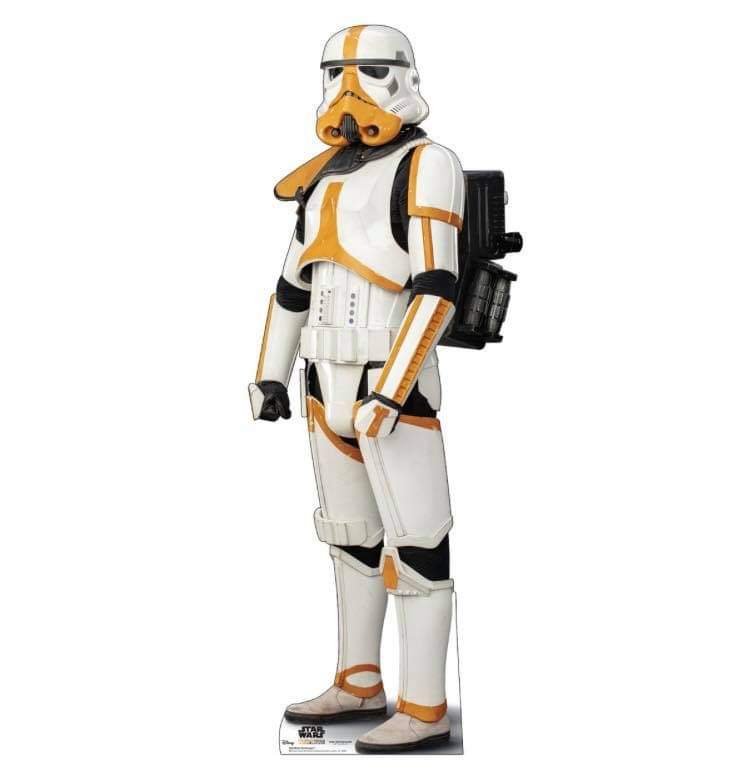
The Mortar Stormtrooper was a specialized variant of stormtrooper that specialized in mortar weaponry. The stormtrooper was equipped with stormtrooper armor, albeit with yellow markings, a yellow pauldron, and a military backpack. The style and position of the yellow markings on the Mortar Stormtrooper were identical to the red markings of the incinerator troopers deployed by the Imperial remnant led by Moff Gideon.
 2 points
 -
Attaching drop boxes: Using 2” wide black nylon webbing, we removed the outermost square boxes from the belt. We cut two 7” black nylon straps then punched holes in the webbing with a hot soldering iron to allow the bolts to pass through the webbing. The drop boxes were originally just over ½” deep. One of the issues I have experienced with my drop boxes on my Jim kit is that they rub on the top of the thigh armor and wear away the paint. I later backed the drop boxes with white craft foam. Knowing this, we got some ¼” thick white craft foam and cut 4 rectangles to fit inside the drop boxes. Next, we cut the drop boxes down to be a little over ¼” deep allowing the second foam rectangle to protrude from the back of the box by about 1/16” once glued in. So, we glued the first foam rectangles inside the drop boxes using hot glue then aligned the 2” black webbing and glued it to the back of the foam. Next, we glued the second foam rectangle on top of the black webbing (sandwiching the black nylon). Lastly, we mounted the webbing and top box back on the belt. There is a ¾” gap between the top box and the drop box. Forming the back belt: We formed the front belt using the same manner. First, we measured and cut a flat piece of .125 thick HIPS (Black) to 3 7/8” x 23”. Next, using gloves, heat gun, and a metal cylinder surface, we shaped the back belt. In this pic we are using a roll of metal wire mesh as the forming cylinder. Once we hade the overall shape, we used a large metal pot as the forming cylinder to finalize the shape. Lastly, once we measured the center of the belt, we mounted the Thermal Detonator. We are still working out how the back belt will mount to the front belt and torso. Most likely it will be a combination of Velcro and snaps. Kyle continued sanding the helmet and is almost at the point to assemble and fill the seams.2 points
-
That trimming looks excellent, and will definitely be approvable through L3! The only thing to note is that@CableGuy would encourage trimming the side edges all the way vertical, as shown in the marked photo below. It’s one of those small details that some builders address, and others don’t. You’re definitely on track with matching the plate return profile with the shin. Sent from my iPhone using Tapatalk2 points
-
It has begun!!! Made the first official cut on my AM Armor. Listening to some Amon Amarth (A Melodic Viking Death Metal group. GREAT stuff!) while I get to work. Sent from my iPhone using Tapatalk2 points
-
Your bicep look too big they should fit snug around biceps this will also help shoulder bells sit properly, AP biceps are bigger then original to accomodate most but to be movie size accurate you need to completely trim the raised areas on both sides and reapply strips of course if they will fit you that way but thats teh accurate look. Mark (AP)2 points
-
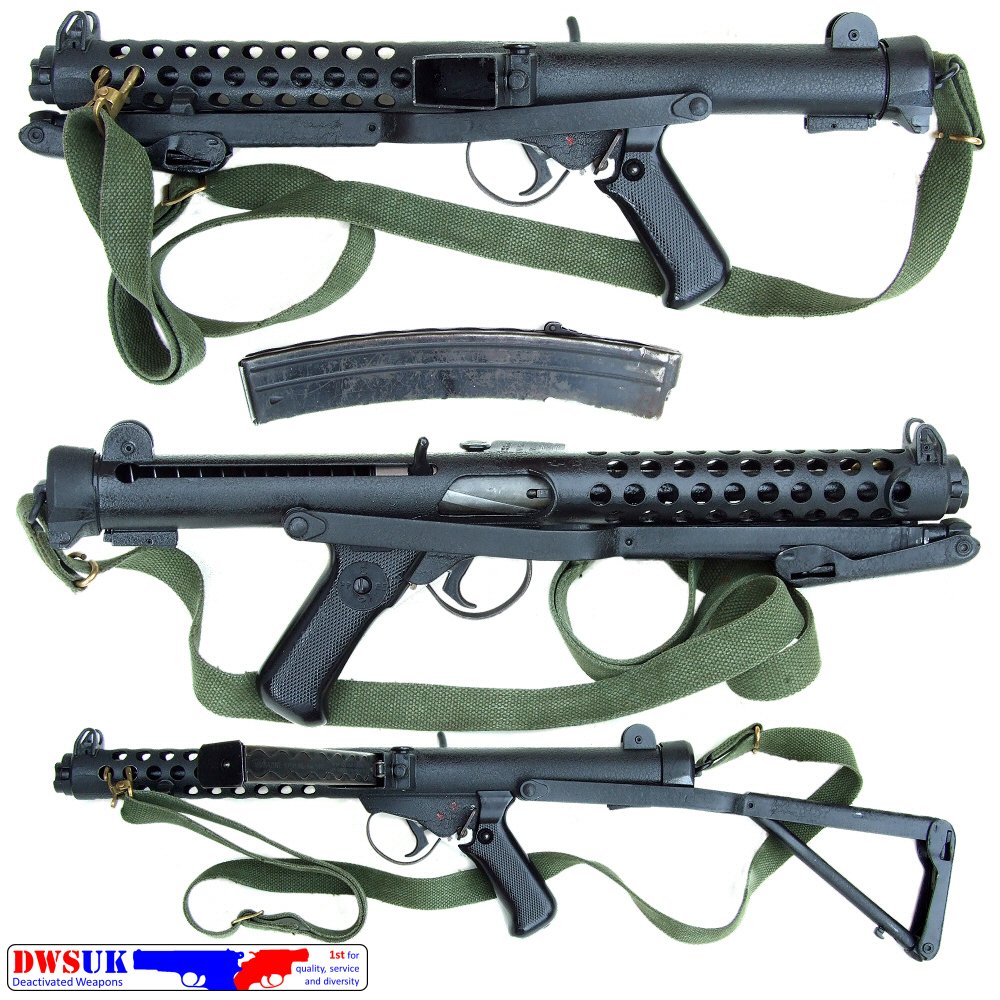
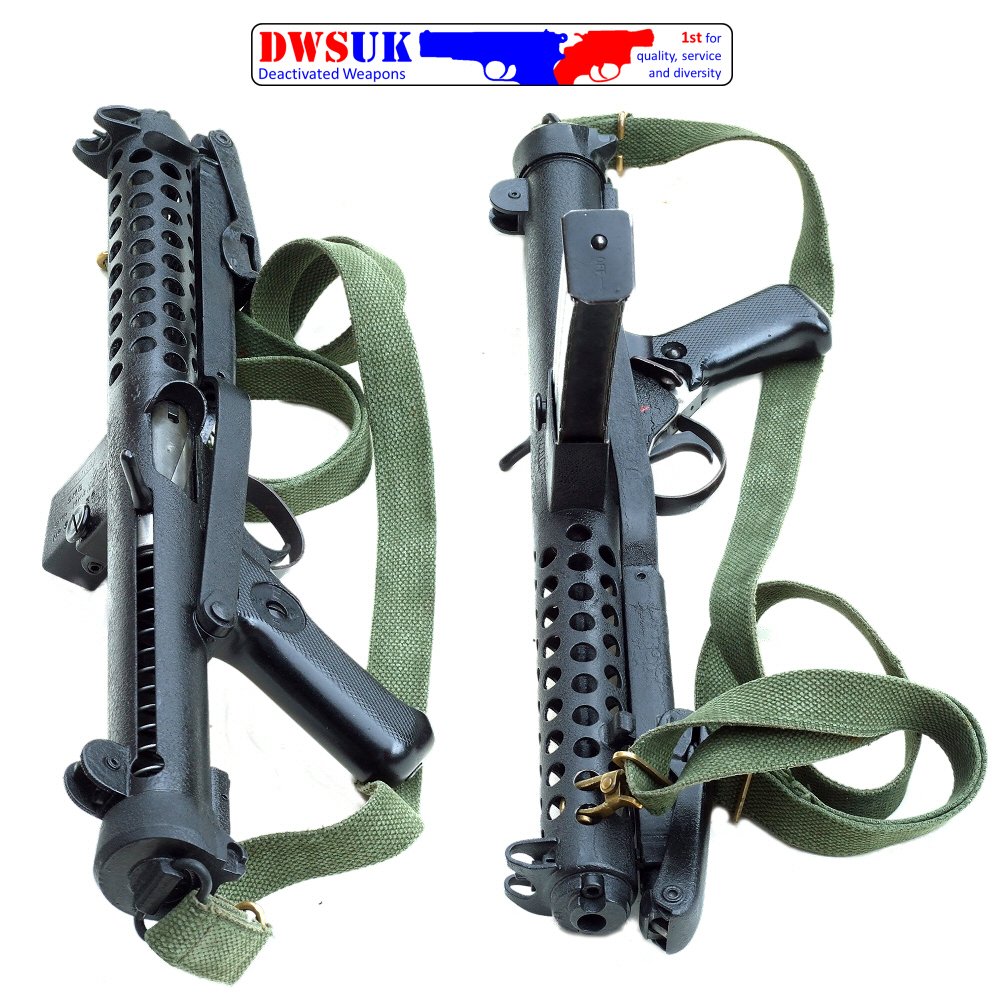
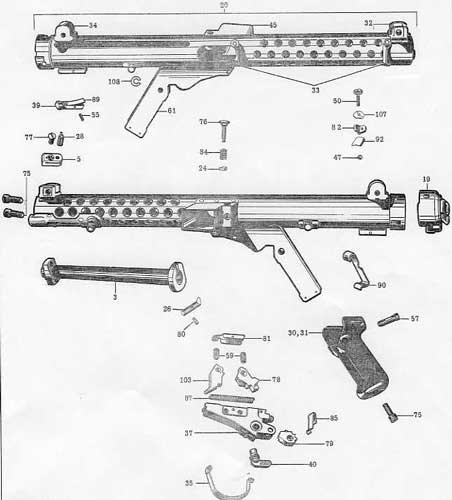
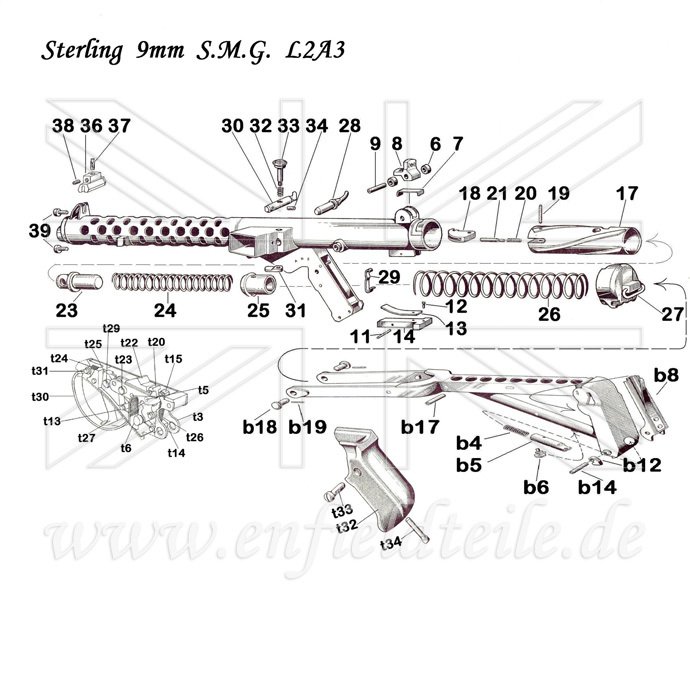
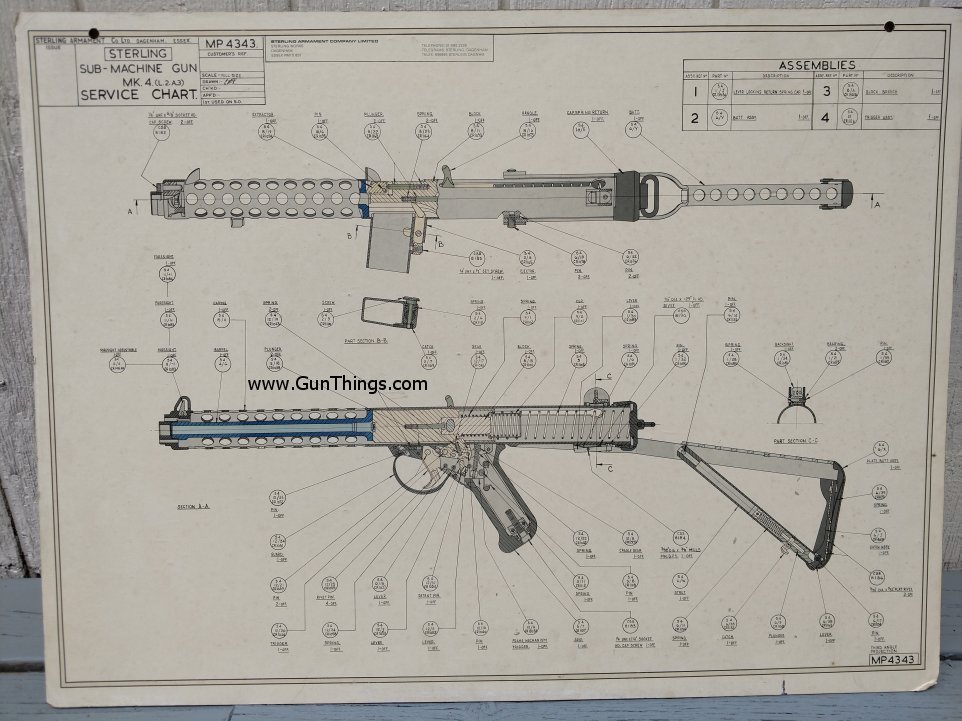
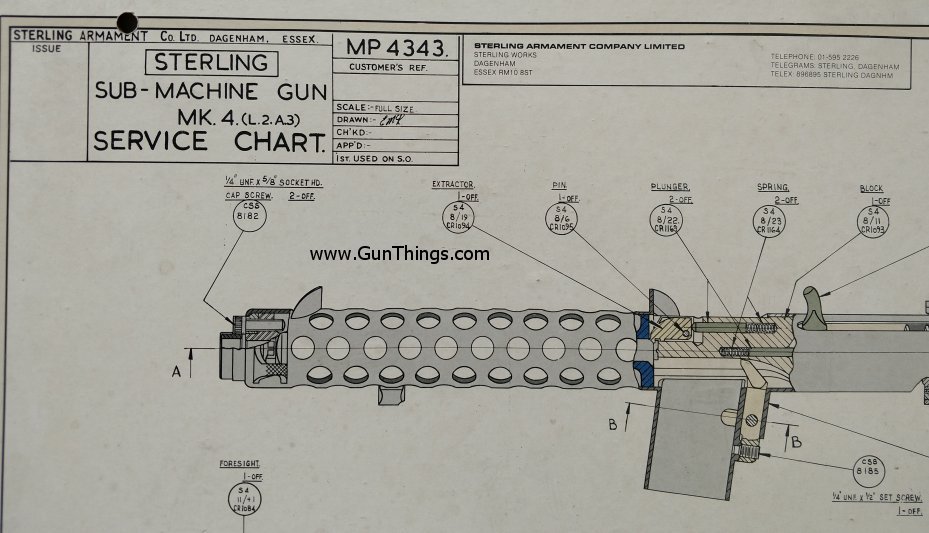
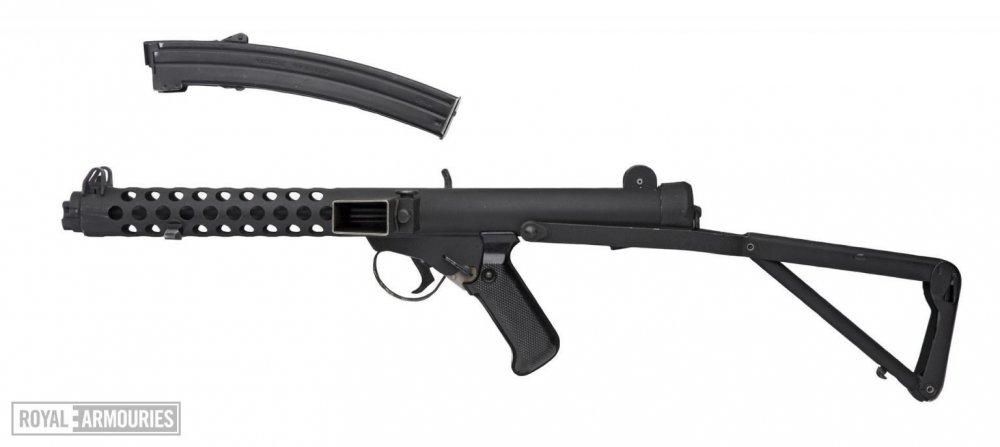
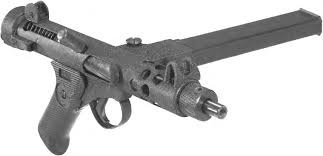
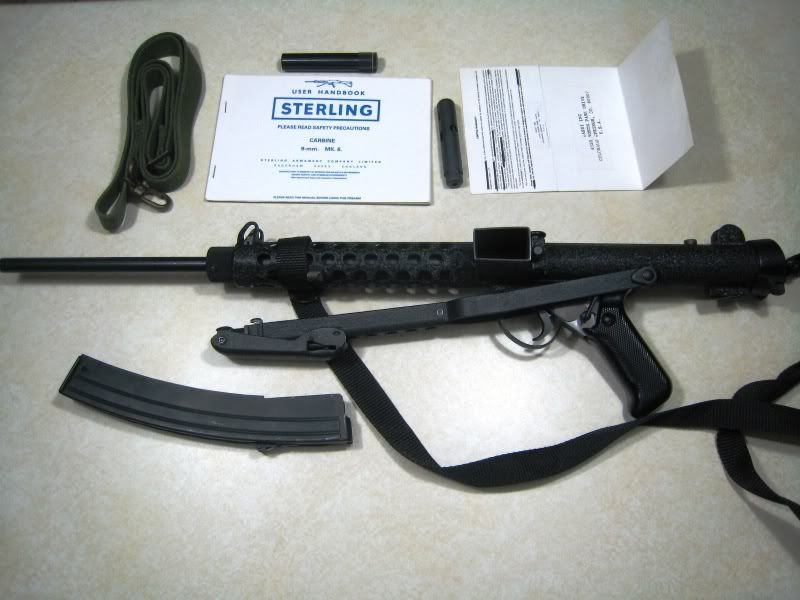
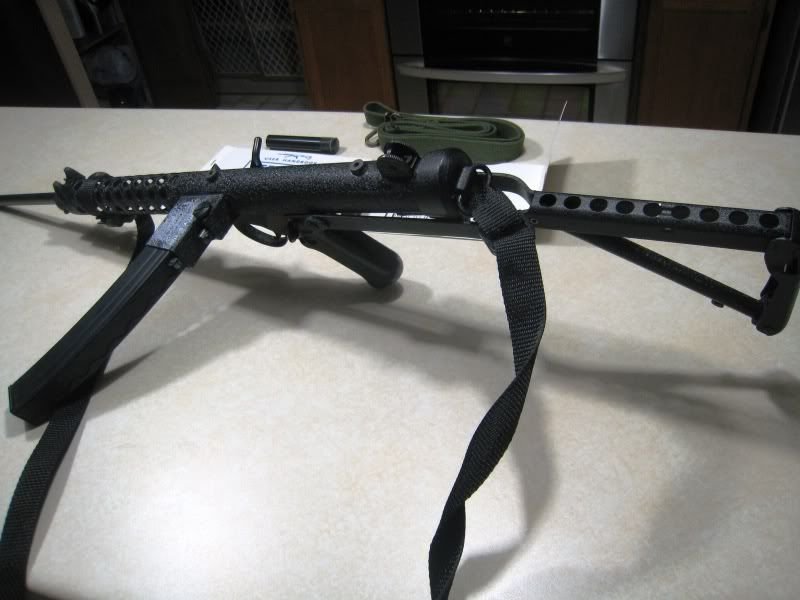
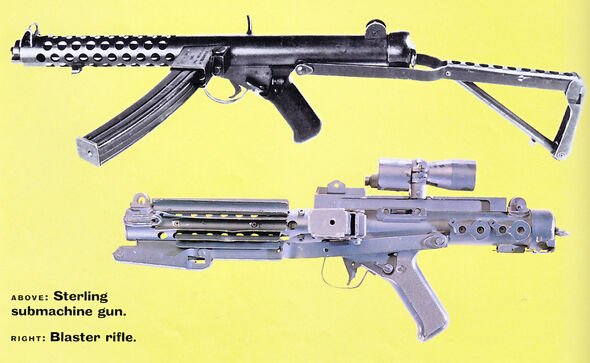
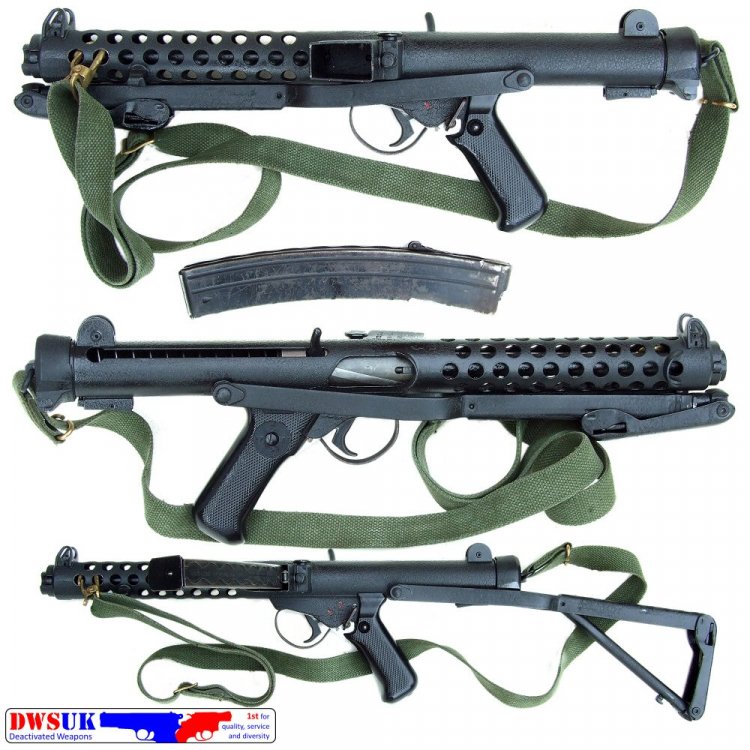
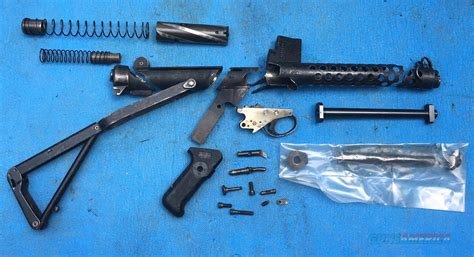
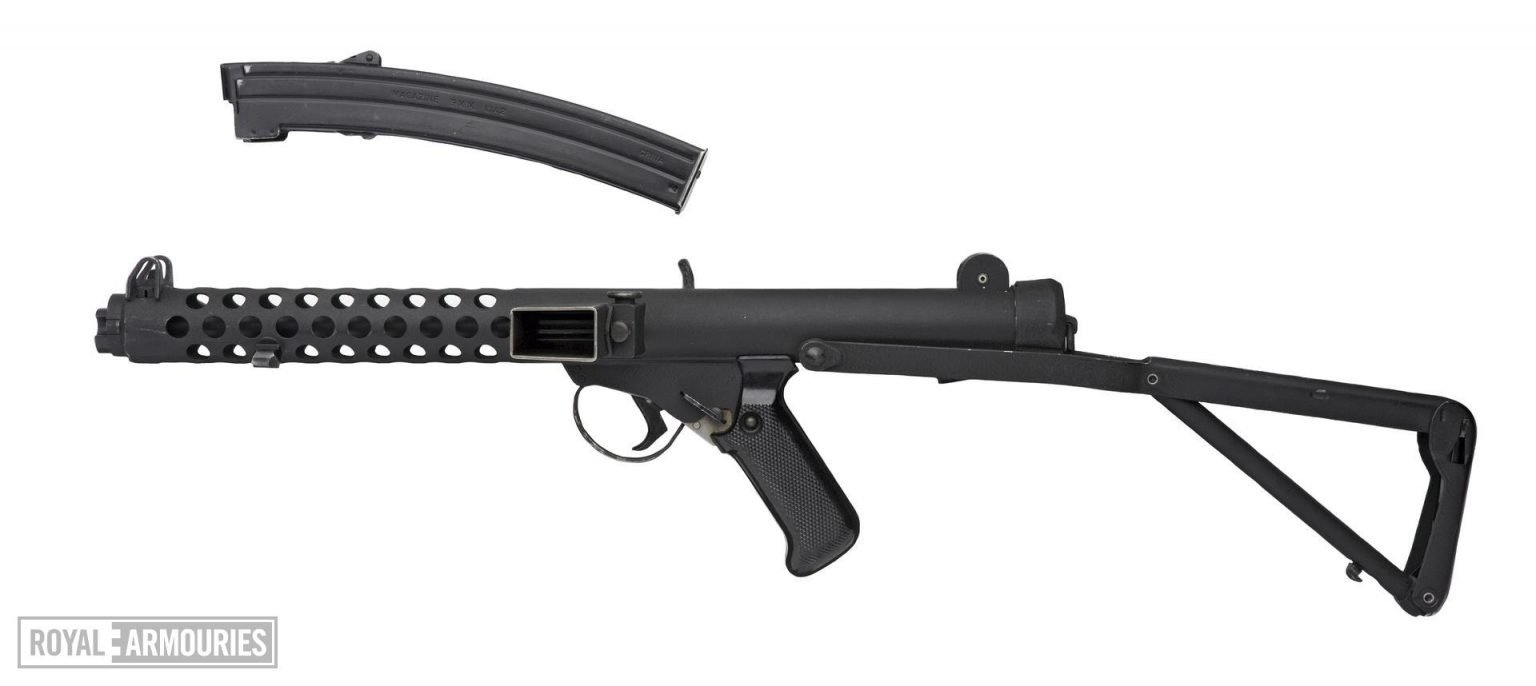
Handbook PDF http://pdf.textfiles.com/manuals/FIREARMS/sterling_mk4_smg.pdf L2A3 Sub Machine Gun PDF http://sterlingl2a3.com/wp-content/uploads/2012/10/KokalisL2A3.pdf STERLING TYPE I, TYPE II & TYPE III SEMI-AUTO RIFLES & COLEFIRE MAGNUM SEMI-AUTO PISTOL Owners Manual PDF https://www.centuryarms.com/media/Rhet/Resources/Post/Attachment/2802744720062.pdf
.jpg.081fe7fe78eff74dc493d36ccfb624b8.jpg)
.thumb.png.fbeefbaf1c9c685a66a202c4ea13a4ed.png)

.thumb.jpg.c0d888b159b4148c4b4c2d0365f900d5.jpg)
.jpg.4a94de38fee519c39f936618e51d66ff.jpg)
.jpg.d82f2310ee196fec8daa3b3d5c9b4a03.jpg)
.thumb.jpg.dd651031008eb2592795e29081368ceb.jpg)
.jpg.1b4a75d4119c595b0f44665985570bb6.jpg)
.thumb.jpg.911c60f37fd6de8c49ce75d8a5ace5dd.jpg)
.thumb.jpg.53532265537be327210b6c72e8d8b13f.jpg)
.jpg.3d427cd125add60e6dd4bd8b55c9060b.jpg)
.jpg.d305c873072ab0c8ea4847e5947ec094.jpg)
.jpg.aa23b55e7846793d8648c12c2b0a8118.jpg)

.jpg.f3b05be3c68dc569b0e2c65a54324ead.jpg)
 1 point
 -
Hi folks, Checking in today and I’ve just noticed I’ve reached 3000+ posts on this wonderful forum!! Wowza... For me, this all started back in 2017. I wanted to renovate my yellowing SDS helmet and stumbled across “whitearmor” on google. I followed some excellent videos by Mike of Trooperbay and resprayed that helmet. Following that, I read more and more on white armor and, not too far down the line, I bought my first helmet kit from Ross at RWA. I documented that here on FISD and received excellent support and advice. That was a big part of the build, helping and supporting the build. After finishing the build, along with the armor kit, and clearing it up to Centurion, I was asked if I’d like to join the Imperial Attaché team - “HELL YES”, I said. :-) I later joined the DO team, helping troopers reach THEIR goals of EIB and CENTURION. If it weren’t for the changing of the guard that year, I’d have likely carried on in the role, along with the legends that are Joseph and Tony. Alas, things changed, however, this year the FISD is back on track under the exquisite leadership of Andrew. Anyway, enough waffling from me. I just wanted to say a huge THANK YOU to the FISD community. I won’t get into shout outs as I don’t want to exclude anyone, however, I’m pretty sure many of you know who you are - people that have made this forum, this community, so welcoming, supportive, and knowledgeable. Keep up the great work, everyone.---------- Best wishes Dan / CableGuy1 point
-
I'm sure its well deserved recognition. You were one of the members who welcomed me from day one. Now if I can just get my garrison to be that responsive lol.1 point
-
So, it has taken a while to get the fit sorted. When I’d made an adjustment at one point, it affected all others, but I think it’s getting there or thereabouts. Any comments before a start fitting the leg armor would be welcome. Sent from my iPhone using Tapatalk1 point
-
I think we are in business. This is coming together nicely. Keep an eye on the side pieces, in the pic where the armor is stand off your shoulder, the front of the side piece is protruding from the bottom of the chest armor.1 point
-
Looking good, we did discuss adding to the CRLs that the webbing for the drop boxes is mounted between the top box and the belt. I assume he discussion of the width of the webbing overtook that discussion and was what got added to the CRL. Regardless, you are correct, the webbing is mounted on top of the belt between the square box and the belt. Keep up the great work.1 point
-
On the wrist end of the forearm you should follow the red line and make sure there is absolutely no return edge for L3. @justjoseph63 has an excellent return edge tutorial thread. On the elbow end of the forearm you can trim to comfort. Sent from my iPhone using Tapatalk1 point
-
I think around 4.5 lbs. Really solid and great to hold. Makes me feel like a stormtrooper for sure!1 point
-
Great advice, thank you! I'll make those trims on the sides as you suggest. [emoji846] Sent from my Imperial Communicator1 point
-
NEXT! I'm waiting for glue to dry on my shins, which means this weekend I look at... *ominous tuba* ... the sniper knee plate. First question: how does this look for trimming?1 point
-
Thanks Q. [emoji4] Sent from my iPhone using Tapatalk1 point
-
Look at what showed up! A fully painted/built @fieldmarshall e-11! This has seriously just become my best Star Wars collectable I own. My family is getting tired of me running around the house saying 'Pew Pew' Thanks so much to Chris for all the effort and dedication in reproducing such an amazing prop. Now I just need to get my armor done.... More pictures here: https://imgur.com/a/xmPMKSZ1 point
-
1 point
-
I got a lot done over the past few days! I figured I'd combine it into one post, since a lot was redoing stuff... I finished the trauma plate! Snapped it on the barrel elastic straps and stored it in my footlocker. I probably should've started the TD earlier in my process, since there's SO MUCH to it. I spread putty and then wet sanded it to 220. My buddy printed the painting pyramids for me! I wet sanded the ammo boxes since they had a lot of runs, some stuck cardboard (from resting them directly on boxes for painting), and a spot that wouldn't take paint. I sprayed them gloss white again and they're good! 2 more days and I'll E6000 (I think) them to the belt. Something I noticed (that I don't think anyone mentioned) is that the drop box elastic comes out from between the outermost ammo box and the belt. These pics show that the elastic is on top of the belt. So I'll probably E6000 the elastic to the box, and then E6000 it to the belt. The thighs have been a huge pain! I sanded the gray chunks of spray paint off and sprayed again. At one point the can started doing it again, but I stopped immediately so only 1 thighs got messed up. I wet sanded to 220 later and sprayed it again. I think they're finally done now! Tomorrow I'll stick velcro on the back and trim out some 1" webbing to hang (with a clip, wrapped in elastic, per the new CRL). Hopefully they fit alright, or I can add foam strips in some places, because I DON'T WANT TO cut off the cover strips! Today I somewhat taped off the white parts of the TD. I wasn't too worried with perfect taping, just with simplifying my future sanding. I then sprayed gloss gray and it went very well! In 2 days I'll tape the gray parts and then spray gloss white...1 point
-
You may find your strapping between the cod and butt plate is a little tight, as it appears to be pulling the butt plate in which is causing the overlap to the kidney.1 point
-
Finally just caught up on this thread, as I was about 40 posts behind. With your post lengths that was quite a read. Fantastic progress and excellent documentation! This will sure be a helpful resource, along with Jeff’s and Justin’s threads, for future builders! Our of curiosity, what files did you use for your Mando helmet and the E-11? It’s possible that I simply missed that somewhere along the way. =) Sent from my iPhone using Tapatalk1 point
-
Wow Sha Sha, you were right and I have no idea how I missed that. Just went through it and cleaned it all up. Thank you for catching that. Ardeshir1 point
-
Pretty excited to see this completed, that incinerator trooper was awesome on the show!1 point
-
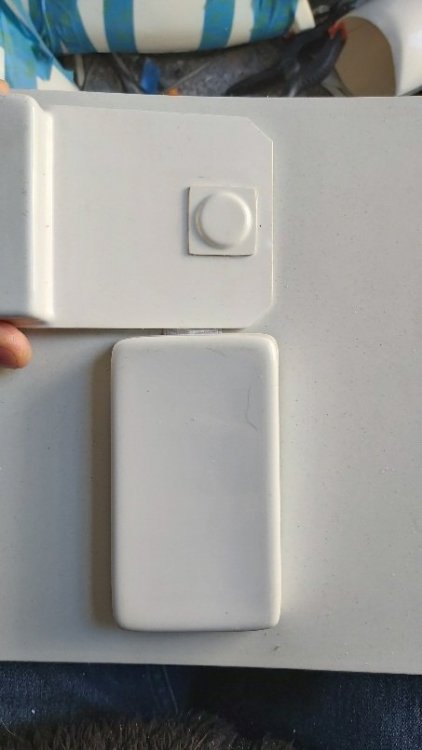
Boring stuff, cleaning off excess E6000 Angle cut belt corners AB button plates glued
 1 point
 -
Thanks Andrew Snaps added to belt, also added one to the center with nylon since there is no middle button cover Button covers applied Drop boxes trimmed, backs and elastic added and glued to belt Shoulder straps test fitted, tape guide to follow and glued in place Strapping applied and tested AB buttons before and after WOW these RS sniper plates are annoying, hopefully the clamps work Harness strapping finished, has home made adjusters on the belt, can be moved along the belt as long as adjust height1 point
-
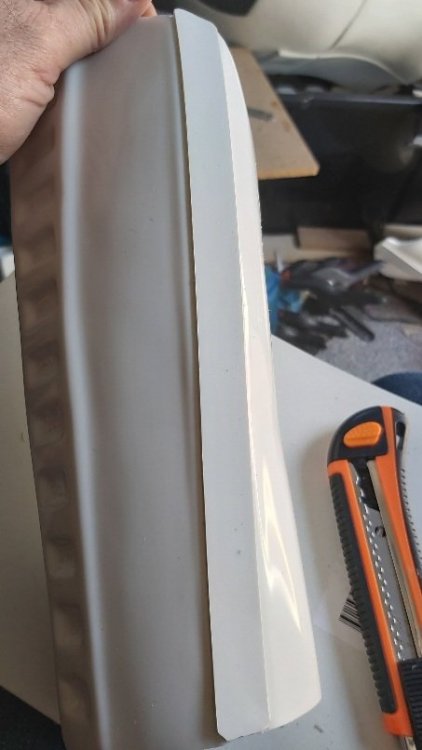
Armor trimming all sanded and ready to proceed. First trim and check alignment for kidney and butt plate which need to appear as one piece Inside looks good. Apply some superglue gel and kicker which helps quicken the drying and also expands the glue Waiting for the ABS paste to soften then applying along the join seam Next on to the belt, going to leave this longer than a standard OTTK, the TFU has a longer belt Cover button close to the end as well Measure for snap hole And drill Now to bend, I usually just clamp two metal rulers either side and then apply a little pressure on either side and bend Worked well On to some cover strips, remember one side of the ABS sheet is usually gloss, the other not Score and snap works the best In no time your done Use some coarse sandpaper on the back to roughen, will help the glue adhere to it Using velcro on the back of the shins, draw a line slightly off center as a guide, measure the velcro and carefully cut Apply glue to the velcro side Apply the velcro Then clamp down upside on board to dry Now we fast forward, I got a little carried away and didn't stop to take photos, but you all know how it goes You can never have enough magnets or clamps, painters tape helps too Hopefully be dry tomorrow to finish the other sides1 point
-
Thanks Andrew. All the velcro inside is dry so fitted the fan and foam, also made a template for the lenses, marked and cut out, I use a little hot glue just to hold them in place than apply some black silicon around the edges, I like the darker look inside. And fitted. Don't be too concerned if you have small gaps, does help with air flow Time to add the decals, yes I'm going to cheat and not paint, my hands are no longer up to painting fine lines after 2 finger operations and arthritis in a few knuckles. Dave M decals, a little expensive with shipping but a must if you can't paint and want to go L3. Make sure you have the correct tubes stripes on the right side (or left ) You want the tube stripes falling forward at the front. If you look at the image bellow you can see the front leans forward ie: front \\\\\\\\\\\ back Should be a pencil width from the cheek. As I guide I like to use a piece of masking tape the same size as a pencil Trim to size and apply I like to pull away from the decal as I find it doesn't pull the decals off while removing the top sheet. Repeat on the opposite side. On to the tears and traps, I find it easier to trim the decals down to size and test fit, adding a little tape in places is a good guide. The decals don't fit all helmets perfectly so you may need to trim down slightly, using a permanent marker is a good way to restore any missing black lines you may have to trim off. Any air bubbles just a very impolite person with a pin and push the air out. No this is not how the brow trim looks finished, it was pulled down to apply the decal And helmet is done for the time being, I'll apply some light battle damage/weathering once the armor is complete, I like to do it all at the same time so you get a consistent look.1 point
-
It’s here. I just finished unwrapping all of the packing material off of it. I noticed my faceplate had a weird bubble under the left eye. But it will be replaced with a new one. More pics to come soon. I’m very excited to start putting it together, and begin another armor building journey. Sent from my iPhone using Tapatalk1 point
-
I have Ukswrath's audio system, hearing assist, and fan kit and I recommend them all, especially for having a clean, self-contained helmet. I'm still working on the hearing assist, when I use it with the fans on it tends to buzz just loudly enough to drown out what's going on outside the helmet, I'm going to install some padding to dampen/isolate the fan vibrations though. Should fix it right up. I love the audio kit too. For crowd heavy troops I'll run a splitter and an Aker under my chest plate for more volume but for a majority of the troops the audio kit is more than sufficient. Here's how I stuffed everything in my AP helmet. It gets a bit tight going on or coming off, but once it's on, I have plenty of room. I glued each component on some scrap ABS as a mounting bracket/surface and used the ear screws as main mounting points. I backed the brackets that go up into the helmet with industrial Velcro to support the weight and to keep them from flopping down. I did find that it made a noticeable difference to aim the mic directly at your mouth for the most volume possible, so I used Velcro to secure it like so:1 point
-
I would recommend it. I'm building my kit currently, but I knew I didn't want to be wire connected. Also, I liked the idea of the sound coming from the hovi's instead of an external speaker mounted behind the chest plate. As for wiring inside, it's really how you lay it out. I may adjust mine a little more on the inside. (I have a few other items inside as well. )1 point
-
The Anovos kit will automatically come with all those items, and I believe the whole belt will be pre-built. (I may be mistaken on the pre-built part, though). The only thing you should need for it are some pop rivets to attach the new canvas belt. You can use their existing Chicago screws The drop boxes may need to be assembled (easy). For screen accuracy, I would also trim down the top and bottom of it (to the point just above and below the boxes as seen below) and then add new 45 degree angles on the corners. Screen used belt1 point

.png.3bbb12b25d70c0f1f239c8d4e569cb23.png)
.jpg.3a83d2f7ffcb0e23e4271199601e0c03.jpg)
.jpg.bd88d45e8e838859c82d073a7353f1a9.jpg)
.jpg.0657e864c7e7db3040351331d62e805c.jpg)
.jpg.bfed3c6436539dbf265fc7d409f73bbf.jpg)