Leaderboard


Popular Content
Showing content with the highest reputation on 09/12/2020 in all areas
-
3 points
-
After skulking around in the shadows for the past week or two I am introducing myself. I’m Steve, from Hereford, England. Über-excited about starting my first build soon enough using RWA kit. A WIP will follow over on UK Garrison.2 points
-
Welcome to FISD, Jim! You’re in the right place for this undertaking, and we’ll all be here to help you along the journey! To answer your question about video tutorials, there are several other series out there other than RS, and TB (CableGuy comes to mind), and well-documented build threads will also be an excellent resource. If you haven’t already checked it out, ukswrath’s Avovos thread is FANTASTIC. I have an All-In-One TK Resource thread linked in my signature that might be helpful, and ukswrath’s build and video series are linked there. Along with MANY other helpful threads. Again, welcome! Sent from my iPhone using Tapatalk2 points
-
Making more m19 screw you find all these scope and accessories here http://www.warmachinepaintball.com/replica-scopes-and-mounts/2 points
-
You might want to think about trimming off some more of the bottom of the sniper plate. This may give you some "wiggle room" to straighten it out a bit as well as reduce the gap between it and the top of the the calf.2 points
-
The positioning looks pretty close. Trimming the bottom return edge will allow for easier adjustments when you heat it up. The trick that worked for me is to get it to fit as best you can by heating it up and shaping - then glue one side and let cure for about 48 hours (assuming E6000 is being used). Then grab a bunch of clamps and glue the other side... it will take some persuasion. Looking good!2 points
-
Thanks all for the help, yeah I’ve shared this information with the owner so they can know where to go from there. They likely bought a set of decals and didn’t realize there were tons of differences worth noting.2 points
-
Busy day. Here are the ears. Two coats of paint plus clean-ups. Phew - time for a Bespin Fizz!2 points
-
After waiting for what felt like eternity with everything going on, I finally received my BBB, and with the help of my local garrison mates, I’ll be inducted into the legion in no time! (Hopefully)1 point
-
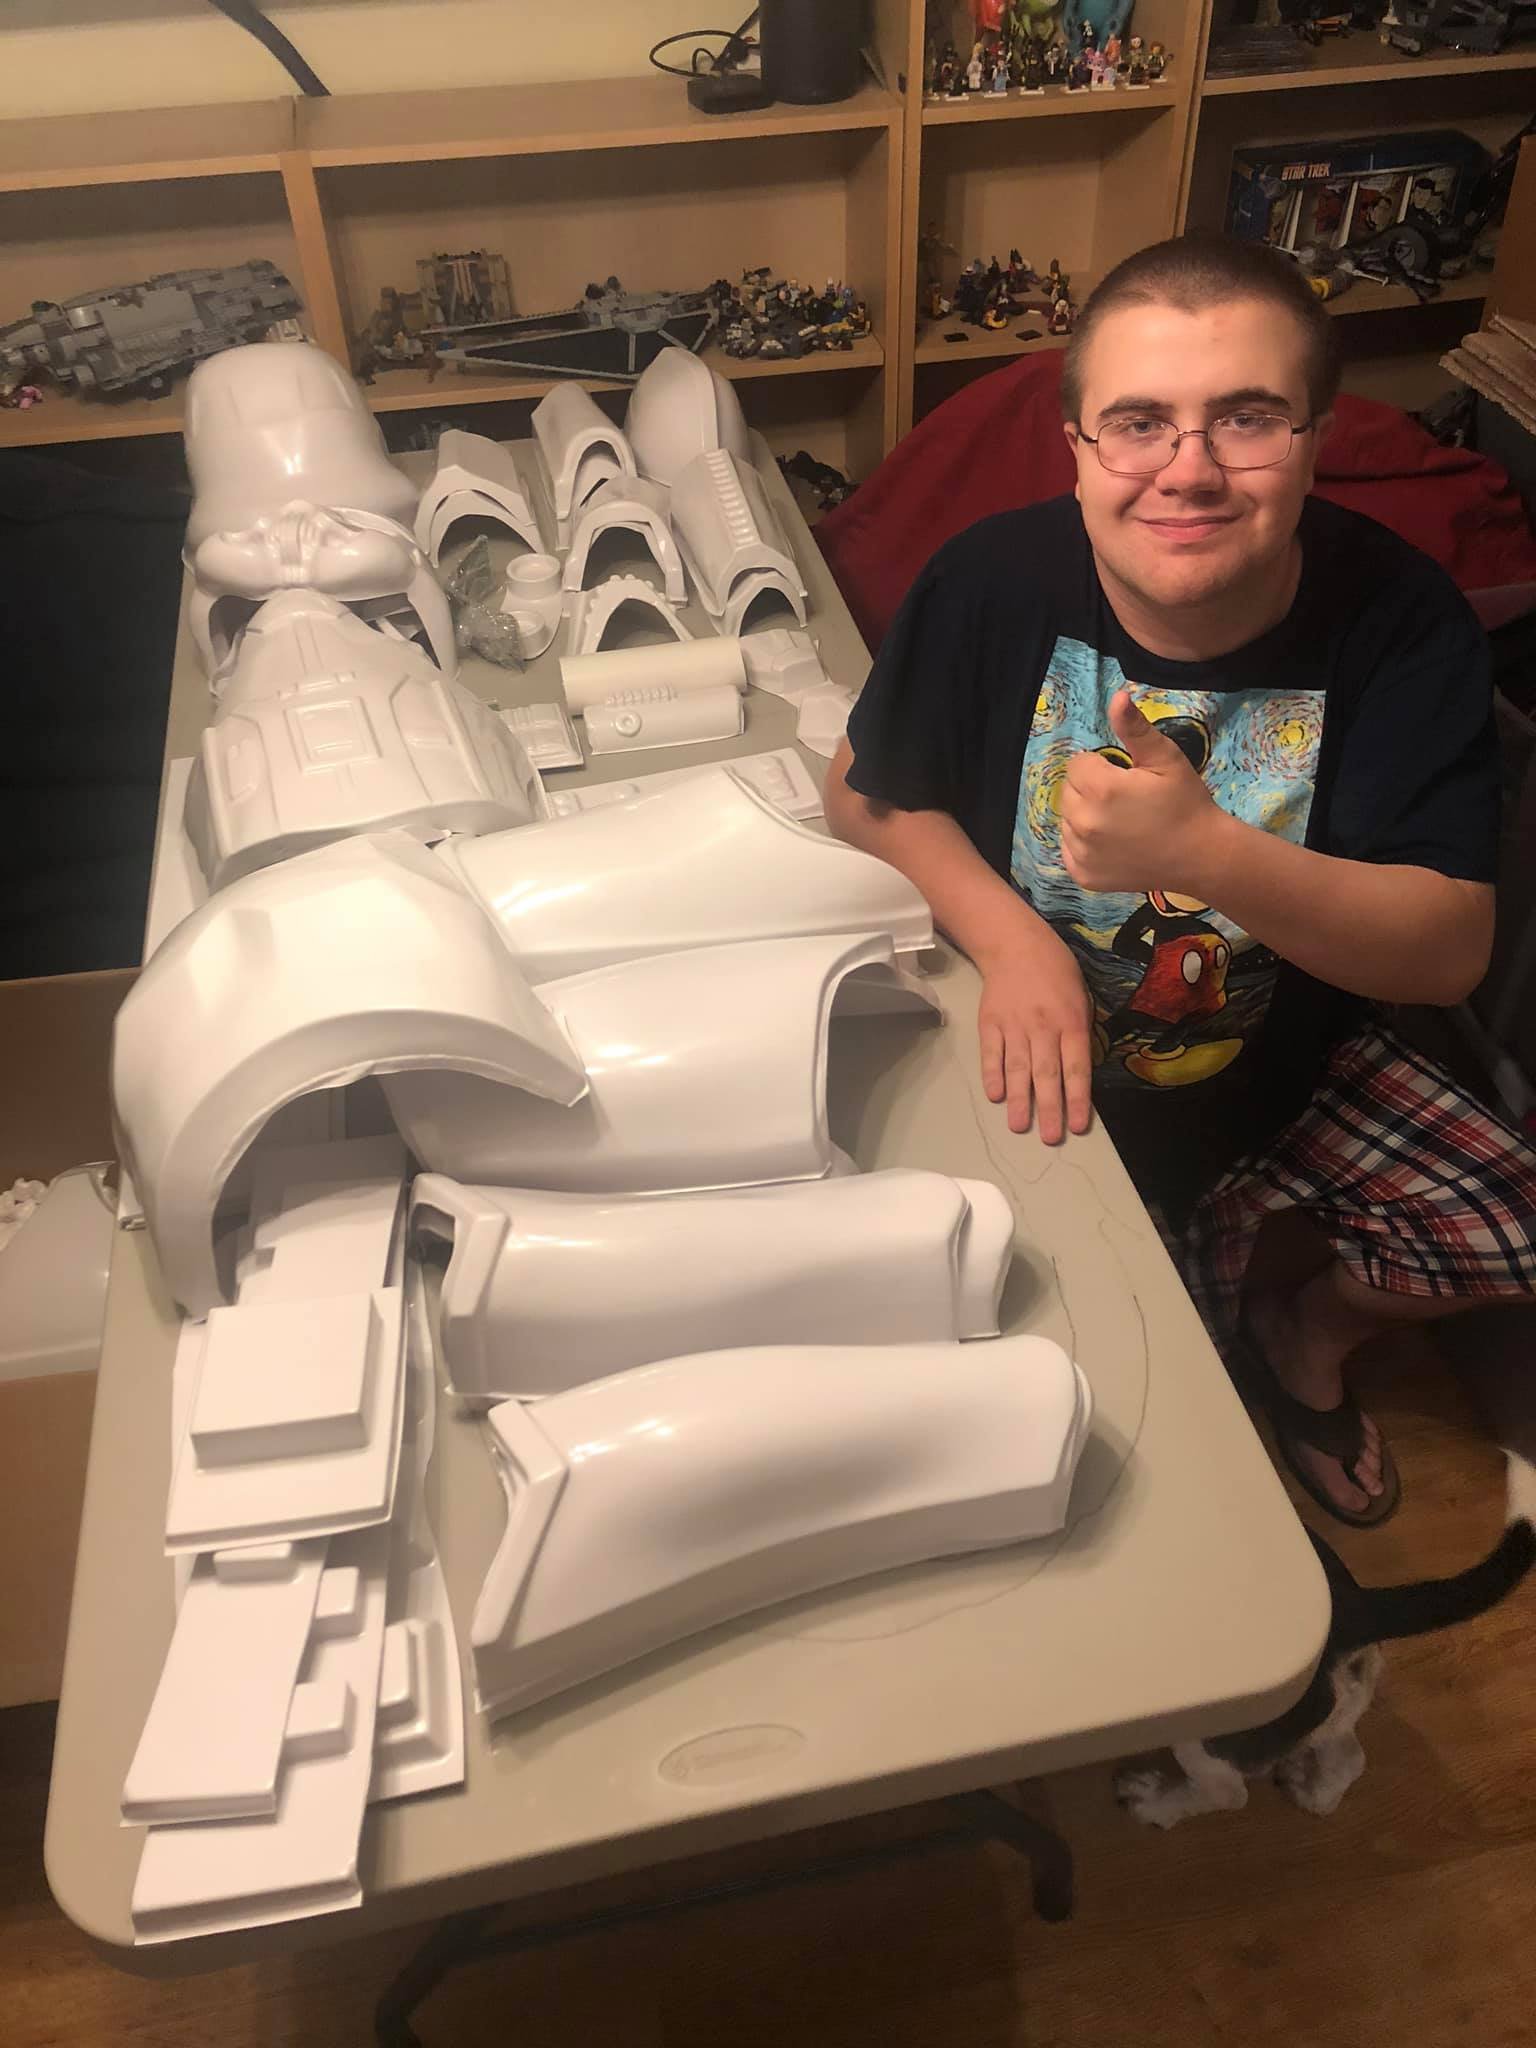
Hi all, It begins. It is an understatement to say I am overwhelmed by all of the information here. Our armor kit arrived yesterday from Walt's Trooper Factory. I am building this kit with my 18 year old autistic son, and he is eager to get started, but he also doesn't understand the concept of research before cutting into anything, especially with the investment made. I've run the list of tools and consumables posted, and did a big Amazon order yesterday. I've started reading as much as I can here in the forums, but there is so much information, it's hard to find the answers to specific things quickly without stumbling onto another interesting topic and falling down a rabbit hole there. Then an hour later I am no closer to my answer, so I'll ask you here: QUESTION: Is there a preferred set of YouTube videos that document the build well? I've seen RS Propmasters in UK, and I recently found a set of videos from Trooperbay as well. Are there other, more reliable, or accurate, or compliant video tutorials out there that has consensus within the community as a preferred standard? Any recommendations would be GREATLY appreciated. And, certainly there will be more to come! Many thanks!
 1 point
 -
I can't wait for COVID to end so we can have another mass gathering of TKs. Thanks for the reminder of happier days.1 point
-
No original trilogy Stormtroopers wear pauldrons, it's only Sandtroopers that do. You can (with your garrisons approval) wear a pauldron at non cannon events, many troopers do. An oldie but a goodie1 point
-
Welcome to the FISD, Steve. I found it really handy, as you have, to sign up on both the UKG and FISD forums. Just adds extra knowledge. Any questions, don’t hesitate to ask. :-) Dan1 point
-
I had to look twice to see that , but you're right! Looked like shade to me.1 point
-
Thank you for all the detail you've put into this, Caleb. I'll be starting my build this weekend, and tackling the TD first. As I also have an ATA kit, this will be a very helpful resource for me.1 point
-
Time to finish calves How's the position of this sniper knee look? I noticed most AP builds seem to have a slight lean. Will just need heat up one side to push it down slightly. Should I trim the return edge on the bottom of the knee plate for a closer fit? Sent from my SM-A520F using Tapatalk1 point
-
Nice to hear you've been doing your research, many don't unfortunately. When in doubt ask or check the Gallery sections, lots of great references there. Looking forward to seeing the progress, good luck1 point
-
Thanks Glen! Since I already have some rust-oleum gray self etching primer, if I'm not able to source the gray pipe, I'll probably go this route. I have read the return edges 101, along with most of the 101s to be honest. All great info. I've pretty much decided on removing most of the return edges, except where they are required to remain. But I will most definitely re-read it prior to trimming. And I'll be sure do "rough" trimming first and throw photos up here for comments before getting carried away!1 point
-
This is awesome.1 point
-
The teeth aren't painted yet, so painting them black makes it a ESB helmet!1 point
-
ok, so... as I stated before I was going to do a BlastFX, but seeing as how this thing is SOLID parts. I chose to start making a 3D model of some potions to help me replace them if I where to just destroy them. OR, maybe I would use the 3D printed versions if I needed space inside. this is the part I started with. I build a 3D model of it. adding details bit by bit. I haven't done anything more with this part since, and with my changes of plan, I may just need to print the end cap, if I overly damage the real one while trying to removing it to hollow out behind the LED windows.1 point
-
Hey Those are ESB decals and not approvable for ANH so you are correct, every stripe need to be separate1 point
-
S trim in on. Just need to fix 1 decal, add som padding and get some more white paint for the screws. Can't seem to get the R ear any closer even with targeted sanding. But believe that was ok based on previous posts and being able to drive bus through the gaps in some of the original helmets. Sent from my SM-A520F using Tapatalk1 point
-
David Gdula TK-15028 EIB Letter Joseph Thank you! http://www.whitearmor.net/eib/certificates/15028-eib.png1 point
-
Great to see you worked through your little setback. As to the S trim, make sure you cut it longer than you need and when placing it on feed it around the helmet and really push it in. Mine and I know many others are simply pressure fit in that way and where they do come off sometimes, it's not a frequent occurrence. You want to make sure once you are getting close to meeting the other end that you have an extra cm or so, so you really need to force it along to get a nice tight fit. if you have too much just trim a touch more off the end but it is surprising how you can cram that last little bit in and it holds firmly in place.1 point