Leaderboard


Popular Content
Showing content with the highest reputation on 08/25/2020 in all areas
-
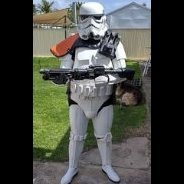
Hey! I'm a newbie to the concept of trooping, but am very much looking forward to applying my passion for star wars into something productive. So, here is a preview of my heavy weapons trooper from battlefront! About 90% done, I just need to modify some sections so they fit me better. I'm keen for the eventual completion and the very real possibility of other projects [emoji1] Sent from my SM-G920I using Tapatalk2 points
-
welcome to the forgetfulness club , those things happens to me every time. Please add some more white to have a more accurate finish please. Reference Image2 points
-
Since I was reprinting larger forearms, I decided to also print out a larger set of shins while I was at it. The current shins fit fine for now, but I can tell that those are going to be the next parts that the boy will eventually grow out of. My plan is to have a batch of parts ready to paint so I can maximize use of the expensive 2K Gloss. I also printed out a new cod that reflects the TLJ cod much better. Here is some of that batch of parts, all spot puttied up. I love how nicely spot putty wet-sands, so I coat it all over when I can. Ignore the Sandtrooper backpack greeblies. I'm working on that as well (it's for my eternally slow RS Sandtrooper conversion!). This morning I remembered that Germain mentioned something about the TLJ forearm cut (TLJ pic on the right). I figured that now's the time to take care of that detail! I penciled in the cut line at the top of the forearm where it looked like the cut should go. Then lopped it off with a cutoff wheel and smoothed out the edge with some sandpaper. Pretty easy mod to add a little accuracy. It's raining today, so no painting. Tomorrow looks like the sun will be out though... fingers crossed that I can get everything painted soon.2 points
-
Definitely! Sorry, I’m not entirely here right now. Spent the entire night doing research on the forums and checking pre-approvals and going over centurion submissions. I need sleep lol. I’ll be sure to make another progress update before I do anything too drastic. Slow and steady wins the approval.2 points
-
Thanks a lot, I'm happy to pass EI! I'll take all advices I can get, so one time I fixed all the little points I'll apply for Centurion. I already started cutting out the arms, trimming the thighs and re-work the blaster. As I read the crl and totally understood it, I really don't know how this mistake with the belt could have happened, but I'll fit that! Chreers, Alex2 points
-
Ok, third times the charm (hopefully). I shaved back everything I believe to be the return edge. It feels and looks completely flat now, and smooth to the tough (no bumps). Would this be correct?2 points
-
Today was a good day. I received my E-11 from Quest Design and I couldn't be more pleased. I will likely paint the bolt and install a spring as well as apply some weathering, but for now, I hope as it stands in this state it is enough for EIB. I also finished the install of @ukswrath's TK audio and fan bracket. I also installed a bluetooth receiver for TK chatter. It's a little tight getting this baby on and off. and I may be able to do some tweaking to give more room, but I haven't figured that out yet. Any suggestions on better placement would be welcome. For anyone not familiar with the products he offers, here's a one stop link to all of his products, tutorials, and build threads.2 points
-
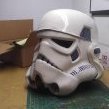
This is my 3D printed helmet. I decided to lead with this, because there's going to be a lot of boring 3D print talk before I get into the fun stuff. I guess throwing the helmet up there gives you an idea of what we're building up to. SPOILER ALERT... I had to repaint my helmet after I took this picture; we'll discuss that another day. Also, I was originally going to post this in the 3D Parts and Technical forum, but ultimately, regardless of the method, this is a ROTK build, so here it lies. Throw my name in with the other ROTK threads, but let's do this with a 3D printer, and finish the project. This should be fun. About two months ago I started searching the forums for complete 3D Print builds. This started somewhat out of curiosity, but honestly I think it really started because my wife asked if it could be done. Right off the bat, I found a few threads that looked promising, including Andrewhitc's 2017 thread where he was designing some pretty awesome ROTK models, and most notably, Cricket's Kid-sized FOTK build. After reading through miles of forum posts, I decided that I was going to 3D Print a full ROTK set and see if I could get it approved. Not to sound too cheesy, but this is my journey. I'll try to update this as much as possible and use this forum as motivation to complete everything by Halloween. I started by researching full armor builds on YouTube. Of course I ran into some interesting videos, but noticed that everybody seemed to be printing the same file from Thingiverse (https://www.thingiverse.com/thing:391664) While a fun prop, it just doesn't look very accurate and all the results I keep seeing seem somewhat fake, if that makes sense. They looked 3D printed. In my searches, I came upon the Galactic Armory videos, which I thought were great. Though The Big Baby sticks to clones (which I'll build next) his Coruscant Guard build was pretty impressive and was ultimately what led to his 501st approval. Additionally, in one of his videos, he mentioned NerdForgeDesigns which brought me to this: Not bad for an $8 STL file. If you're interested look here https://www.etsy.com/listing/808047010/ro-style-stormtroop-helmet?ref=shop_home_active_4&crt=1 The designer was very helpful and worked with me when I ran into a few issues. I highly recommend them. After dropping the 8 bucks, I fired up Meshmixer, Simplify3D, and the CR-10S and got to work. For this print, I'm using Inland PLA+ and ABS in 1.75 from Microcenter. Here's a look at my settings: These are basic nozzle/ layer height settings. I've fiddled around with everything up to a 1mm nozzle @ .5 layer height, but haven't been pleased with the results. Until I'm done with this armor, I'm sticking with the .4 @ .2. I like to slow down the first layer height in order to assure proper adhesion. I typically "babysit" the printer for the first few layers. I experimented with rafts and immediately threw away my prints. Building a brim seems like a great approach. This teamed up with the helper discs I'll show later almost guarantee proper bed adhesion. Standard infill settings Supports are tricky. In the Max Overhang Angle, I currently have this set to 70, but I'm almost always generating my own supports. I'll explain this later. Temp is where this starts getting fun. I'm pushing my filament out at 225 which is the max advertised for Inland PLA+. Check your filament specs, but I've found that if I'm pushing out higher temps on both the extruder and bed, adhesion isn't an issue. Another approach is to run the first layer higher and then settle down a little lower for the remainder of the print. I tried this and had some good results, but if the filament can handle higher temps, do it. Of course, this all needs to be monitored. If I start running into misprints or shifted lines, this and speed are typically where I make adjustments. Cooling is pretty much standard. No G-Code changes Standard Script settings. SPEED, SPEED, SPEED. Nicco Industries did a great video on speed settings. Check it out here https://youtu.be/UJF7vnJ1rNg Essentially, he found little difference between 60mm/sec prints and 180mm/sec. Basically, with the amount of filling, sanding and painting you're doing post-print, the quality differences are negligible. Ok. Now that the boring stuff is out of the way, let's start making some armor. I'll start dropping pics like they're hot soon. SECOND SPOILER ALERT... I'm currently printing out the last two pieces of the entire armor set and ordered most of my soft parts. Additionally, I've already reached out to the community with general questions and others regarding sizing; everyone's been super helpful and incredibly friendly. The reason I'm saying all this is because with the entire armor set completely printed, the only reason I won't finish by my self-imposed deadline is if I lack motivation. I know that 3D printing isn't for everyone, but I haven't seen many threads where someone actually completes one of these projects. Additionally, If I can contribute to the community in some way, I'll be happy. I'll add more later.1 point
-
AND, actually trooping tomorrow as one of 6 TK's in a fan film being shot here in the ATL area. TK-714681 point
-
So, you are tackling that ROTK and you hit a snag. How to do this or how is everyone doing that. Well this is the place to ask and respond to others so that we can all share knowledge with out having to read every build thread to find that answer you need right now. Let’s keep it productive and if someone has a different method to do something, please keep in mind that there is more than one way to skin that cat. Further, it is still a good idea to read through the build threads. We need to support each other and keep everyone motivated. This thread is simply meant to be a quick reference. I will start it off with a few tips. Masking tape- Although you will need a lot of standard blue painters’ tape, when painting the smaller detailed areas on the helmet and abdomen, I recommend you mask these areas off with smaller width and higher quality masking tape. Tamiya is what I use. Tamiya is model masking tape and comes in small rolls with widths between 2mm through 18mm. You can get Tamiya masking tape from Amazon and most hobby model shops. I normally use the Tamiya to mask off the detailed areas like the teeth, tears, traps, and ear bars then use the blue masking tape to bridge between the Tamiya tape and whatever you use to cover the larger areas (plastic bags, paper, etc…) https://www.amazon.com/s?k=tamyia+masking+tape&ref=nb_sb_noss_2 Needle Files- If you going to cut out your vents on your helmet, most of us will use a Dremel to do most of this but then you need to clean up these cuts to make them uniform and smooth. Needle files are the way to go. You can get a set of these small files from Amazon, Harbor Freight, and hobby stores. https://www.amazon.com/Hardened-Strength-Barrette-Crossing-Equaling/dp/B07PPYWSCY/ref=sr_1_10?dchild=1&keywords=needle+files+set&qid=1598290682&sr=8-10 Adhesives- For those of us new to cosplay, you will see people mention CA and E6000. So what the heck are these? CA Glue CA is short for CA glue or commonly known as Super Glue. The CA is the chemical abbreviation for Cyanoacrylate Acid. So yes, that stuff that will make you fingers stick to each other and tear off skin is what a lot of us use for building costumes. In addition to basic CA glue, it also comes in a variety of thickness formulas and you can also get an aerosol can of CA glue accelerator to make the glue instantly set. Another trick to use with CA glue is to apply a bead of the CA glue to a crack in plastic then drizzle some baking soda on the wet CA glue. The baking soda with cause the glue to instantly cure and the baking soda creates a plastic that will fill the crack. You can sand it and paint over it. We use this method to fill gaps and fix broken parts of costumes. Obviously, you can find CA glue everywhere, but the accelerator may be a bit more difficult. Try searching on Amazon or google for Name brands like 2p-10, Zip Kicker, Loctite, and Stick Fast. E6000 E6000 is a perchloroethylene adhesive. Its application is very similar to silicone adhesive and provides a few characteristics over CA glue. This is from the product data sheet and can explain it better than I can. E6000® is a unique SELF-LEVELING, non-flammable industrial adhesive formulated to meet high-performance requirements. It permanently adheres to more surfaces than virtually any other adhesive, providing exceptional adhesion to wood, metal, glass, fiberglass, ceramics, masonry, concrete, asphalt, leather, rubber, PVC, neoprene, vinyl and many plastics. E6000 maintains its flexible bond in extreme cold temperatures, will not crack or become brittle and is excellent for bonding items subject to vibration. For applications that are exposed to direct sunlight, paint over E6000 after curing or use E6800 UV formula. So, the big thing here is that it is flexible, that means you can use it on armor in places you want to flex and where Ca glue would crack or cause the armor to crack. Its also safer to use on plastics than CA glue which may weaken or melt the plastic. The trade off here is that E6000 needs time to cure and must be clamped in place while curing. When you look at someone’s build thread and you see several round silver things suspended on the armor, almost always they are rare earth magnets that are on the inside and outside of the armor holding things together while the E6000 is curing (normally 24 hours). So, with adhesives, there are a lot of options, but these are just two examples of what most of us use. One type of adhesive may not be the most ideal for aspects of your armor and you may want to consider using different adhesives for different parts of the armor. Ok that’s what I have for now. Toss out your suggestions and questions and lets find those answers.1 point
-
I've always been a huge fan of things in actual printed form, but just seeing this handsome devil alone is worth the ink it takes to print it.1 point
-
1 point
-
Decided to dirty it up after all1 point
-
Thanks guys. Cleared that up1 point
-
I'll do that tomorrow as it's midnight over here. And first I have to get paint remover without acetone. Thanks for your patience so far1 point
-
1 point
-
Great work !! So fast. I think it only remains to update the painting of the frown and we are ready to proceed.1 point
-
Freshly painted layer with white acryl paint.1 point
-
In regards to your last suggestion, since COVID hit the States in early March I've rewatched the Mandalorian series a second and third time, Gallery (Mando) for the first time, the Galaxy's Edge Special and Empire of Dreams on Disney+, the Prequel Trilogy, and now I'm continuing with the OT. I might have even squeaked in RO somewhere in there. All while working on build or FISD stuff in the early hours of the morning. I really should get back to my real life new job search...1 point
-
I love seeing PRINTED reference folders, as I have four or five of my own! I may be obsessed, as it is an ever-growing collection. Below you'll find some images of my folders from my ANH Stunt and HWT builds. In case you'd like additional print resources, I've been compiling helpful (to me) threads into PDF format, and I have links to them on my All-In-One reference compilation thread. Links to PDF filess are marked in yellow. Keep up the great work with your build!1 point
-
I guess the best thing for me to do is to get rid of most of the return edges then, except for the bottom of the chest piece though. Pretty sure I need that thickness there lol. Sounds good! And apparently according to Joseph’s link, I have the option to trim the knee for a better fit should I need to.1 point
-
2020 bump for new recruits. Haha, jk. I'm actually posting to share my most recent PDF compilation of this thread. Your work continues to amaze me, Dan, and I'm sure many more of your future posts will warrant being added to my All-In-One Resource Compilation thread. Keep up the great work, Sheriff!1 point
-
Some stuff came in the mail today! Woohoo! Got my support brackets in the mail along with some Ukswrath swag. Thanks ukswrath! You're helping me out a lot, brother! Been following your build, definitely going to copy your yoke support brackets My belt pouches and undersuit arrived too! Unfortunately, the undersuit doesnt exactly fit right now...I'm a couple of inches too big in some places I'm hoping things will change in a couple of months as I slim down. I've been on a strict 1200 cal diet and lost 4 pounds so far...but this is what will make this build take a while. Dragon*Con is not happening this year, thats a big bummer! Had to get some Dragon*Con swag to feel better about it. Yeah, they are going virtual...but its just not the same! So after work I went at the yoke with a dremel and right as I finished it rained on me so there goes the rest of my dremeling for the day. Took a file to smooth things out but when putting in the support bracket it was a little stiff and wasnt really fitting right cause the bracket was so flat but the yoke is curved behind it on my kit. Took some pliers to the support bracket and carefully bent the body and the smaller tabs more and this helped tremendously! I was about to go at this with some JB weld but then I figured maybe I should wait till i get the snaps that go on these support brackets. So I'll be paying JoAnn Fabrics a visit tomorrow! I marked where im going to be cutting holes for the strapping too, this should be about right. I'm a noob but I'm aiming for EIB out the gate and doing come centurion prep too. Apparently this is a TFA thermal detonator. I penciled in some missing detail that I'll need to cut in later on but right now I'm wondering how I'm going to fix that huge hole on the side. After cleaning it up I'm thinking of slapping some ABS on there and calling it a day. Still waiting on my stuff from Imperial Boots, and got some gaskets being made too! Cant wait for another mail drop!1 point
-
Hey Anthony! Great to see your Centurion application. Your forearms look better but there's still some return edge that will need to be removed. I've indicated the areas I can see in the photo, but definitely take a close look all the way around and make sure the return edge is completely gone - the plastic shouldn't curve inwards at all. Reference: If it helps, here is a photo from my own Centurion application with the WTF kit. I actually ended up using Lexan scissors to carefully cut around the edge of the forearms. You're almost there.1 point
-
I pulled the clamps and magnets off and the E6000 seems good! In response to @11b30b4's question, I was able to step into it when the snaps are set to the tightest. It was snug when pulling up, but the elastic stretched fine, and I can loosen the snaps if needed, especially once I put the undersuit on. The sides looked BAD. I wet sanded to 1,000 and I'll spray another coat of gloss black tomorrow. I also got some gloss white on the belt. Pinholes, still... But my notch fillings worked out unnoticeable! I fitted the barrel with the suspenders and E6000'd the snaps on. It was a pain getting the magnets to hold right, but I think it's all setup right. I'll check on it tonight, but hopefully they cure properly and I can wear it tomorrow!1 point
-
Finished the helmet (with some minor detail work left). Below are the photos showing the painting and the removal of the tape. Finished Helmet: Next I will begin the chest armor, yoke and backpiece.1 point
-
Yea that was fun, first of it's kind. It would be a great if it could somehow be done again.1 point
-
Great job Paxton, welcome to EI1 point
-
At some point I just gave up on getting all of the pin holes covered. Glazing putty on them then sand and apply primer and damn if there wasn't more pin holes. I don't know if the glaze got sanded out of the holes but I worked for several days to get as many covered as I could but in the end, my armor still has lots of them. On the positive side, you really have to be searching for them to see them. Keep up the good work.1 point
-
Welcome! If you need help/advice on choosing some armor, let us know your height/weight. Check out the getting started section: https://www.whitearmor.net/forum/forum/38-getting-started-read-this-first/1 point