Leaderboard


Popular Content
Showing content with the highest reputation on 06/07/2020 in all areas
-
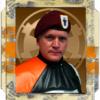
Hello, fellow troopers! I’m thrilled to be here. My hands still hurt from holding the Lexan scissors too tight and cutting through 2mm acrylic-capped ABS. Do you feel my pain? Ha ha! Anyway, I can’t wait to get out there and troop! If Only You Knew: Well, I thought I needed to buy everything under the sun to make this kit, and after buying way too much stuff, I realized, man, I only need glue, my dremel, some sandpaper, blue tape, and some magnets. A few clamps, too. But I just had way too much stuff lying around that I never, ever used. In that case, I made the job seem harder than it was because I thought I needed all this “stuff.” Top 5 things I learned: 1) Take your time. Accomplish only one “big” thing each day. Today I’m working on the right shin. That’s it. If you go too fast, you will screw up! 2) Don’t start without mentors. Make sure you have some guidance from experienced troopers and send them pictures as you build. 3) Listen to your mentors. If you ignore them, you will make mistakes! Stubbornness does not equal screen-accuracy! 4) Your family may not be as excited about you getting your thigh piece to fit as you are. Don’t be disappointed. Once they see you fully suited up, your appearance will blow them away. 5) When using the dremel and sanding roller, hold the piece tightly against your chest and use smooth, light strokes. Ignore the dog licking your leg no matter what. Oops!: My kit was a little big on me, and after fitting it, the entire torso was sitting too low and the thighs had no room to move. I had to redo my shoulder straps (tighten them up), and cut the neckline on the chest plate to give myself more room, and then take a full inch off the backs of my thighs to get them to fit properly. It was a pretty big challenge, especially when I thought I was nearing completion. Time to "embrace the suck" and take a risk! And so I did... Warnings I received were mostly about being too OCD versus screen-accuracy. Sometimes the screen-accurate way looked ugly to me, but in most cases I got over that and learned to love the asymmetric and wonky nature of these kits. A funny thing happened on my way to the Death Star: I decided to become a stormtrooper after teaching a Star Wars class at the University of Central Florida: https://news.cah.ucf.edu/news/star-wars-telep/ https://www.fox35orlando.com/video/637681 I invited the Makaze Squad to visit my classroom and talk about the 501 and about trooping in Central Florida. After hearing the fun and inspirational stories, I couldn’t help but want to be a part of this great community. That was last October, so it’s been an eventful eight months to say the least. My armor did take a long time to reach me (ABS plastic shortage when I ordered) so I was taking pictures of myself looking like a James Bond henchman from a 60s movie, LOL. I kept telling my friends, my armor will come soon! This is the best I can do for now: Shout Outs: I received great tips and advice from my armor builder, Troopermaster, who treated me like a good friend and answered all my questions as though he was standing by his phone, waiting for me to ask. This was a GREAT first experience with an armor builder, and that made it even more memorable. I also received incredible help from Gary Collins, Sr, his son Gary, Derek Zink, and Daniel Branton. All of these generous troops spent a lot of time answering my questions, sending me pictures and videos, and trying to put me at ease as things didn’t come together as I’d planned. Of course my family put up with me and with stormtrooper parts lying all over my kitchen and formal living room. The place looked like a plastic warehouse and smelled like E6000, ha ha. Finally, I’m really excited to be here, to start trooping, and to put some smiles back on people’s faces during a very challenging time in this world. In that way, I guess we are entertainers and should help make people forget about the cares of the world, at least for a little while. TK-33348, ready for duty!2 points
-
Here's my current workstation. I've been using a camera tripod to help with helmet stuff since it's conveniently sized and allows me to position & tilt the helmet as necessary. Dremel is hanging on the key holder. Easy access to an outlet and lights directly above. Overall a decent setup. This is not really applicable to a clean ANH trooper, but I love the look of those pauldrons, so I got myself one for funsies. I will very likely be making a dirtyboi at some point as well, so we'll just say I'm prepping for that. Purchased from TrooperBay. This arrived in a folded, but otherwise mostly flat state. When doing test fits, the sides kept popping up... ... so I used an old blown out hairtie to help shape it. I'm guessing the orange part is painted on due to the couple orange smudges on the black parts of this. I'll have to figure out a way to get that stuff off gently. Moving along to the Vocoder. Humbrol 85 Satin Coal Black. Using a rounded brush tip this time. And so we begin! Reference ever present in the background. Going about this again by hand, no masking off. I started off with the helmet on the tripod, but moved along quickly to holding it with one hand or resting in my lap at every varying angle (from the front, from the side & upside down to anywhere in between). Made the mistake of turning the helmet upside down when there was enough excess paint to run up past my paint lines on the left side. Used a cotton swab with a little paint thinner to clean up the area. I did this a number of times when the paint went past where I wanted it to go. Pausing to check reference, where do I put the paintbrush? Where else but in my mouth, geez. Oooor I could rest it on those pliers. More progress pics: Initial outline going to the mould edges, then expanding the middle three up. Extending the next ones out upward a bit more and painting the middle three through to the neck at the bottom. Expanding upwards a bit again. This is where I left it since parts were starting to dry and it was getting a little harder to work the edges. Overall shape is looking ok, but there are a couple edges that I will likely clean up, mostly the right side (left from the front) That corner looks too squarish. going to even that out next go-round. Looking at the helmet from a bit of a distance, it actually looks like the vocoder is at an angle to the vertical line of the helmet. Taking a close look at the original helmets, this indeed seems to be the case. I don't think I'd noticed this before!2 points
-
OP (MV) Post #23 More RAW UNCUT photos incoming. For those of you who don't know, ATA helmets are bumpy in the same fashion that the screen used ones were. Most helmets from approved vendors are like this, with a few exceptions where the armorers have smoothed out the details. Some of the bumps on the last two profile-angle shots below will also be invisible due to being covered by the ear pieces. Now, commence transmission. Qty 2 Sets of Stunt Ears (included by default) Included Hardware TD End Caps Qty 2 Extra ABS Sheets Helmet S-Trim Brow Trim That's all for now. Just a quick photo dump to document out-of-the-box pieces.2 points
-
Doo doo dooo, ok. what's next? So while I was working on the other bits of the helmet, I have also been working on the Mix-Tips on the side. (CRL) Survey Says: ..."with the rim of the mic and the inside white or painted white." The RS Kit that I got came with the Mix tips painted black on the outside and with the mesh already installed with the inside of the tips being unpainted resin. Considering the comment above, we need to fix that. There's that HOVI-MIX Pa2. - But the paint job.... It was flaking off right out of the box. So these meshes were already glued in place. How to remove without deforming the mesh too much? The first one I ended up bending a bit getting out, the one on the left in this picture. I think I just tried using my fingernails to pull it up in places. I noticed the bending and switched to a utility knife. For the other side, I popped a little utility knife under one of the more open edges and kind of popped up the ends of the wires one by one until I could fit the blade underneath and then held the mesh on top with one finger while I pushed up with the flat of the knife on the other side. This way I was able to keep the mesh flat & reduce deformation significantly. The inside was a bit dirty, and I needed to remove that glue. I used a paper towel to wipe out the inside with my finger. Used the utility knife to scrape gently around the inside edges of the rim which did a good job of chipping away the glue, being careful not to dig into the resin. Resulting in nice clean surfaces to paint. For the meshes, a few times, the little wires would pop out of place or completely off. I was able to put them back into place with my fingers, matching the weave, then used some wide & flat pliers to squish and flatten everything together a little better - I also used this to flatten the mesh that I had bent trying to get out. Sometimes when handling the mesh, it was loose enough that the shape became more oval and the square gaps of the mesh became more like diamonds, but when putting them back into place, they went back to being square-shaped. This isn't the greatest picture for silhouette value, but if you look close, you can see one of the wires is out a bit. Side note: I have "rediscovered" the timer function on my camera, so maybe I can stop putting pencils in my mouth now. I figured for the painting, I could install the tips into the helmet as a place to hold them while I painted and stay there to dry. This is the first coat, wet. First coat dried. There's still not a very good consistency, so I'm going for another coat. I planned to work on the helmet while these dried, so I took the tips out to do the second coat. Once done, I rested them off to the side in the tape roll set at an angle so they wouldn't fall out. Later I upgrade to a piece of cardboard +++. I used a flat, angular tipped paintbrush and Humbrol Gloss White for this. Using the paint on the cap was enough to coat both the tips. I'll be painting the outside after this, so no precision is needed here. You can see there's paint over the edges. I expanded it to make sure I'm not leaving any more big paint lumps on the outside. Aiming to coat the entirety of the inside and along the rim edge. This is a half-and-half pic. Coat #3 applied on the left side of the picture, and the result of coat #2 on the right. Here's the result of coat #3. I used the bottlecap to keep my meshes safe while they were waiting. And hey look! I've got a little helper now! The paint is pretty decent, though it looks like it could use another coat. I decided to check out how things looked with the meshes in place before going for another coat. In place, even up close, unless you are trying to look inside, you're not going to notice the slight variation of the white, so I decided it was good enough to reinstall the meshes. This is a test fit. This is one of those original Lego stormtrooper guys that came with a head, but no face... Because, I mean... Stormtroopers are a faceless foes? But with helmet on, this guy reminds me of Gomez Addams. To get the meshes back in, I aimed to place one corner (one where there were lots of wires converging at the same point) onto the little ledge and held it in place with one finger while I poked in the other edges with my fingernail. This process took a while to narrow down because at times, the mesh would fall into the tip, or didn't want to push down past the rim, but I was eventually able to get things situated correctly. Some of this took a little bending and pushing one of the wires that was poking out too far on one side with the help of the pliers. This is one where the wire is out of place on the left one which prevented the mesh from sitting fully inside the tip. I took it out again and adjusted things. Now it's sitting correctly. Both meshes are below the rim & sitting nicely. I got smarter for the gluing and painting phase. I stuck one of the drill bits though a piece of cardboard (9/64") and screwed the mix tips in place. For the gluing here, I used some Gorilla Super Glue Gel. This has a thicker consistency than liquid super glue and allows for the use of a toothpick to apply the glue with precision. Going all the way around the edges and making sure that I don't create any little windows with the mesh (where the glue completely fills the gap). I dragged the toothpick across the top to pat down any excess glue that was poking up. Looking good. I just tested both of these after ~24 hours of cure time (inadvertently - it cures faster than that) - using a toothpick and gently trying to pull on the mesh to see if it would release, there was no movement. These guys aren't going anywhere. While the glue sets, I moved on to painting. I used the same flat, angle-tipped brush that I used for the inside. This gave me decent control and I was able to get good coverage. I rotated the tip around by spinning the screw from the bottom. This helped me hit the sides of the tip all the way around without running into the other tip. Using Humbrol 85 Satin Coal Black. Here's the right side started. And here's the end result. This was done by hand. No masking. Whenever I blipped the black paint too far up, I wiped it off with a cotton swab. If I feel like it, I can do a lil' touch up later on. From the top: Here's more of an edge-on view after they've had plenty of time to dry. Was surprised at how reflective this paint came out, but unless the lid was switched out before being shipped to me, this should be the semi-gloss.2 points
-
Thank you for your words of comfort and encouragement- they make me feel a bit better. I am very happy with how things are progressing so far, but I think I have to be done for tonight and do a bit more research before I proceed.2 points
-
Surprise, delays. Decided to sand the inside of the shins where they overlap to try to get them to sit a bit more flush. Especially since I have that ultra thin Velcro, I'm hoping to minimize visible gaps. Some if the parts just didn't line up 100% right, but they were a little better after dremeling/sanding. I ended up exposing a bunch of low spots and pin holes, so I felt the need to fill those. I also noticed that the bottoms of the shins were a bit long as well, so I trimmed and sanded and bondoed those edges... then of course sprayed the whole thing white over again. Similar setback with the thighs - I had previously repaired a small crack at the top of the inner thigh with super glue and thought it was fixed, only to have it open back up again. I ground it out and filled it with two part epoxy and sanded again... and sprayed white... again... Same as the shins below. Bonded: Sanded: Almost disappears with paint: Fiddling with the last little imperfections on the helmet too, finally pretty happy with it. Found some pinholes I didn't notice before along the neck seal edge, so you guessed it, I filled and sanded those too. The interior unfortunately had some white overspray from some masking tape that failed, so I sprayed it with one more coat of bed liner. Masking makes it look like a luchador mask haha Also started prepping the vocoder, almost forgot about it! The ab section also developed a couple weird tiny cracks, probably from flexing it "open" too wide while sanding. My bad - it'll flex but don't go crazy. I just filled these with filler, I hope they'll be okay. Too hard to get shots of it. Sorry, didn't take too many photos. More little fixes this weekend then I swear I'll get to final paint soon... Rushing causes problems! Hopefully getting my HWT Centurion app in this weekend too. Did my first "virtual troop" this week and my first in a couple months! We got to crash an elementary school STEM class's Zoom call and in costume, then suit down and talk about the club's charity work, Galactic Academy, costume building techniques, and STEM skills. Was a blast!2 points
-
Old whitearmor forum member here, but not 501st member. Still I donated a small amount of $ to help.2 points
-
As we continue to improve our support for the FOTK we've comprised a list of all the Hard & Soft goods vendors to help you with your build. We will continue to monitor and update the list as needed. Just a reminder the FISD does not endorse any particular vendor, nor is responsible for any transaction between you and the vendor. Please do your research before purchasing. Armor/Helmet: Jimmiroquai - Origin PHILIPPINES: Kits are partially assembled/fully trimmed lightweight fiberglass (ready for rigging and painting). No issues with quality or service reported. Contact for delivery times/price details. FB Link Here, Email Here or send a private message @jimmiroquai Imperial Surplus (Kevin Weir) - Origin USA: Kits are made of ABS and require trimming and assembly. Armour kit is vac-formed with ABS and cast detail parts and decals are included with the kit. Quality has been solid, communication and service good. Kits ship out in 4 weeks or less Link Here WTF - Origin USA: TFA and TLJ new kit awaiting member feed back and reviews for quality etc. Kit made of ABS with some resin parts. Link Here Denuo Novo - Origin USA: Purchase Anovos and are now supplying kits are made of ABS and will need to be trimmed and assembled. Website Link Here KB PROPS Unavailable Origin USA: Kits are made of ABS and will need to be trimmed and assembled. No issues with quality or service reported. Contact for delivery times/price details. Link Here, Email Here Armoryshop Props - Origin RUSSIA: Supplies a range of First Order Armour and Specialised 3Dprinted Helmets Link Here No longer Listed 850 - Origin USA: Kits are made of ABS and will need to be trimmed and assembled. No issues with quality or service reported. Contact for delivery times/price details. Link Here No longer Available Anovos- Offers a "Pre-order" FO kit at this time, but due to legal issues and extended (1 year plus) wait times is no longer recommended or available Soft goods vendors: Soft goods assorted (Soulart) - Origin CANADA: Neck seals, Harnesses, Shiny biker shorts, First Order gaskets, Phasma capes. Link Here Soft goods assorted (Imperial Gaskets) - Origin USA: Rubber gaskets, Pauldrons and Waist belts. FB contact Soft goods Rubber gaskets (Thorsson Associates Workshop) - Origin USA: Link Here Email: [email protected] FB: https://www.facebook.com/Thorsson-Associates-Workshop-112076042142986 Soft goods assorted (Trooper Bay) - Origin USA: Link Here Under Suit - Stormtrooperundersuit Link Here link not working Gaskets - Sheev's Emporium - Link Here (Facebook sales page) Belt - Trooperbay Origin USA: Link Here ?Belt - Belts of the First Order (JAFO)- Origin AUSTRALIA: Link Here Boots - Keep Trooping (formerly Imperial Boots) Origin CHINA: Link Here Crow Props Origin Ecuador South America: Link Here Gloves - Keep Trooping (formerly Imperial Boots) Origin CHINA: Link Here Endor Finders Origin USA: Link Here Trooperbay Origin USA: Link Here Neck Seal - The Dark Side Closet Link Here (Facebook sales page) Sheev's Emporium - Link Here (Facebook sales page) Suspension - Awaiting vendor Waist belt pouches - Trooperbay Origin USA: Link here Hardware vendors: Holster - R2Dan. Origin GERMANY: Other hard accessories available by application. V2 Link Here Hand Plates - As above Shoulder bell supports- (Accuracy upgrade) - ukswrath Origin USA: Link Here Waist belt center box base (Accuracy upgrade) (Empire 3D) - Origin AUSTRALIA Link Here Machined metal components - Justin Morrison Origin UK: Parts for Blaster rifle and pistol mounting, Resin holsters and other greeblies, machined metal components and more. Email Here FB links https://www.facebook.com/groups/1654472361474254/user/802819468 https://www.facebook.com/kingleezard Helmet Lens - OPLE props Origin GERMANY: Link Here Accessories: Pauldron - Denuo Novo (No stock currently) Pauldron - Trooperbay Link Here Riot Shield - Awaiting vendor Tactical Vest - Awaiting vendor 3D files: 3D print files TLJ helmet (Sano) Sanotized Creations - Link Here 3D print files F11D (The5thHorseman) - Link Here 3D print files SE-44C (The5thHorseman) - Link Here Holster 3D files: 3D print files Holster (TheRascalKing) - Link Here Commission builders: Crooknight - [email protected] dbetters - [email protected] Building Guides/Thread,Tutorials & How To: Please refer to Building guides ... Weapons: General - Link Here F11D - Branfurh Studios (Etsy shop) Link Here Executioner Laser Axe - Armory Shop (Facebook sales page) Link Here / Etsy shop Link Here 3D print blaster kits - The Imperial Factory - ( Facebook sales page) Link Here Email Link Here Electroprod - (Empire 3D) - Email here. Link Here Picatinny rails: Purchase: F-11D/E-11 Picatinny Rails - (justloseph63) - Link (purchase) F-11D/E-11 Picatinny Rails - (evike.com) - Link (purchase) F-11D/E-11 Picatinny Rails - (m416gelblaster) - Link (purchase) Free 3D files: F-11D Picatinny Rails - (themaninthesuitcase) - Link 3D files E-11 Picatinny Rails - (TK14082) -Link Part of Rogue One 3D files Tactical Vest 3D files - Tactical Vest Slider Buckle Link Please refer to Vendors weapons list for up to date links/info1 point
-
Name: Peter Telep TK-33348 Forum Name: 4Runner Florida Garrison, Makaze Squad Armor Maker: TMprops Helmet Maker: TMprops Cloth Belt Maker: Rob Kittel (Imperial Issue) Neck Seal Maker: Darman’s Props Boot Maker: Imperial Boots Blaster Maker: Pretorian Blasters Holster Maker: Darman’s Props Height: 5’ 10” Weight: 165lbs TK Type: ANH Hero Mentors: Gary Collins Sr. Derek Zink Gary Collins Daniel Branton (UK Garrison) Added weathering to tips on helmet: Thanks so much of your time, help, and consideration! Respectfully, TK-333481 point
-
And one more part - the full wipe tube as a 3d printed part. It is 200mm tall to match the height of the button box and modeled to match the game with the full height faceplate but also has four holes for screws/rivets like on the CRL. I know finding cleaning wipes can be very difficult with the coronavirus going around so I went ahead and made a file for anyone that can't find an off-the-shelf tube to use. Or if people just want to print one for style points or because they don't want to buy one or whatever. It is in three parts for ease of painting: body, lid, and faceplate. The back of the tube has a flat section to make screwing it onto the pack straight much, much easier (similar to what I did on the upper section of the drop siphon).1 point
-
If you wanna wear a pauldron without building a Sandie, you can convert your TK to a Heavy Weapons Trooper (HWT), and actually switch back and forth. Basically you just need to make a backpack, get some ammo pouches, and slightly adjust the belt. I’m actually doing that myself right now, in case you wanna check out my HWT thread. Great job on your build so far! Sent from my iPhone using Tapatalk1 point
-
Looking Great Trooper !! if a can make a suggestion, as per the crl states for level 2 for ANH Hero : Correct Aerators/Hovi-MIX tips are present. Screens used shall be of a wide type mesh, with the rim of the mic and the inside white or painted white. You may want, in advance to the D.o. to review your application, to paint the rim of the hovi mic and the inside white. Good luck Trooper !!1 point
-
Thanks for the feedback! I've been busy with other things the last few days but I'm almost ready to start printing my second batch of parts. I figure a week or two of printing, tweaking my files if they need it, and then they'll be released. I have slightly changed the lower radio box panel to match the game a little closer. The square on the lower left corner is now raised with holes in it for rivets or screws. I'm saving the original files that more closely match the CRL images for anyone that may have issues getting it past their GMLs or for personal preference. The radio is the least game accurate part I have so I may come back and revisit it later but I'm really not that worried about the discrepancies thus far.1 point
-
Funny seeing all those pots of water on the stove. That’s gonna be me here before too long. Did you let the water get to a full rumbling boiling roll? If you keep having to do two batches of boiling to fill a bucket, you may consider purchasing another bucket to nest with the half-full one. That way it may act a bit as an insulator—having two buckets together. I haven’t tried it, but it may be worth a shot. I know Walmart has buckets cheaper than Home Depot. As for keeping the armor pieces together, I’ve definitely seen lots of people put containers or jars inside the pieces. You may also try wrapping rubber bands on the outside, if they’re needed to keep two parts from separating. I’ve found that thick rubber bands from grocery produce are the strongest, and I also plan to use them to form my TD plate onto the tube (and shoulder bridge piece onto the tube for my HWT). Sent from my iPhone using Tapatalk1 point
-
Great work Jeklyn, the best part, after days of hardworking to complete the armor, is when you see a smile in a child's face, (and parents too), when you visit a hospital or help some fundraising event and obviously, feeling cool while wearing an Imperial Stormtrooper Armor. keep on doing a fantastic work.1 point
-
Navigate to each individual’s’ profile page here on FISD (using the links Joseph provided), then click the message button on their pages. Sent from my iPhone using Tapatalk1 point
-
Looks great, Emma! Any not-perfectly straight cuts on the top and bottom of the ABS portion of the belt will be virtually hidden once it’s set on the fabric belt. But if you really want to try to straighten them, you could lay a long piece of sandpaper on a flat table and rub the belt on it. This will help produce an even sanding surface over a long stretch. Keep up the awesome work! Sent from my iPhone using Tapatalk1 point
-
Those turned out incredible, Jellyn, AWESOME job!1 point
-
Getting there Emma, great work1 point
-
Nice job so far Emma, keep up the great work1 point
-
Finally finished the 76% scale F-11D. I didn't do as much post processing (sanding, filling, etc) as I typically would on a full-sized piece because I know I'll be making a full-sized one at some point to replace it. But in the meantime, this is good enough for playtime and trooping! I still need to paint the holster bracket silver and install clear lenses into the scope. I'll mount the bracket screws once I get the thigh bracket installed. And I almost forgot the decals! Those will get printed up soon.1 point
-
So I managed to finish off my clone. Also finished my TIE pilot stuff, which left the tk bits staring at me asking to get Done. I was fortunate enough to pick up some moulds off a local member for some of the armour parts but there was no helmet. Decided to fix up the files for a 5th time and have printed out the faceplate now. Sent from my SM-G950F using Tapatalk1 point
-
Credits sent1 point
-
Credits Sent1 point
-
Wanted to drill out the holes so I had an option to see red light (very small amount), not cannon but cool and can turn on/off as needed. Whoops! Replaced with brass tubing Gutted! Pew Pew button Now with more pew-pew1 point
-
"The time has come!" My Headshot Props R1 Bucket arrived today. I'm very satisfied with how it was packaged and molded, everything looks clean and in place. The work it needs is exactly as advertised. The last puzzle piece! On the right is the Hasbro Black Series TK helmet.1 point
-
Spent some time on the Anovos helmet today, and think I got it to a place I'm happy with. I knew I'd need to update the ear screws, remove some over spray, add in the outer teeth, and paint the inside of the hovi mic tips based on all the reading I'd done. I decided not to mess with the ear position as just too many things could go wrong and my understanding it this doesn't need to be done to meet Centurion. Here's what I did and the final product: First, updated the ear screws. The ones on the left are the new ones, the ones on the right were what came in the helmet from Anovos (these were repurposed to the TD as mentioned earlier in the thread). Painted them white and good to go: Next up the eyes: First I trimmed them back (forgot a before picture) to clean them up as Anovos had left a lot of extra in there! Next I made templates of each eye using an index card and tracing from the outside. I added about 1/4 inch around the trace line and cut the lens from the supplied Anovos one. Using the Sugru method as described by @justjoseph63 in his "how to" thread, I used white sugru to affix the lenses to the helmet. The sugru seems really strong so I didn't complicate it by adding any screws, etc. as I've seen some others do as this seems like it will hold just fine. Since I'd bought the combo black/white pack of Sugru, I used that to attach the frown as well. Next I replaced the Anovos mic tips. I was going to just paint the inside, but I knew I was eventually going to get the speaker mic tips from @ukswrath so just went ahead and did that now. Super simple. Quick unscrew of the Anovos tips, widened the mounting hole with 1/4 drill bit, and popped the new ones right in. 5 min tops, and they look great. Finally, cleaning up the teeth. This was the part I wasn't looking forward to. I masked each tooth off with painters tape and used a Qtip and isopropyl alcohol and just rubbed gently until it was gone. Had a couple areas to touch up and added the two outside edges to the frown (I actually like it better without them but I suppose accurate is accurate) and now I believe the helmet is complete!1 point
-
Its BBB day from 850 armorworks!1 point
-
Did I mention how happy I am with how it turned out cuz I'm really happy!1 point
.thumb.jpg.77bd551337f7adc46a4b151e703df6be.jpg)


.thumb.png.69856e02550a2e6d07e44a2b1bda020c.png)