Leaderboard


Popular Content
Showing content with the highest reputation on 12/17/2019 in Posts
-
Walt does full kits or helmets I should know. He. Is. Me!3 points
-
Thanks for clearing that for me. Where I am from, we are only 2 TKs. Sent fra min SM-G960F via Tapatalk2 points
-
Thank you have decided to to do 10mm off the thighs and 5mm off the shins for a better fit and make the gap between sniper knee and thigh Sent from my iPhone using Tapatalk2 points
-
Hey from the Australia aswell as the SCG forums finally decided to start a build thread on here even tho I have nearly finished my AM armour. Here are some of my photos I sent for my approval (Basic/level 1) These are the main issues brought up by my GML for what needs to be fixed before I can be approved. My belt still has some pencil lines on it that are having a hard time to come out of the belt. As well as my thighs resting on my shins because they are to tall on me. I didn’t have my armour align correctly when taking photos as well as biceps cover strips need more trimming Shoulder Straps one was back wards this has been fixed Helmet has a lot of the issues. My brow is to short for my helmet and needs to be extended to the traps. My helmet screws are to off white/cream (getting new paint for them tomorrow) And my teeth area which I have been working on today to go from this To this Any help or suggestions for my armour is much appreciated. Sent from my iPhone using Tapatalk1 point
-
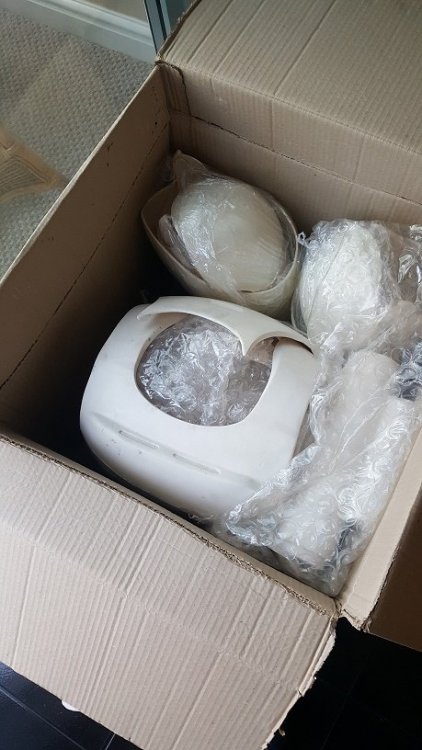
Hello fellow troopers, Been meaning to post something for a while but work and life seem to always get in the way - so apologies. I will start by saying that I have completed my build and had clearance approved by my local garrison but I still wanted to drop some notes in here on issues I came across / experienced along the way in the hope that it may prove useful or even just interesting to others on this journey......I will also include a bit at the end on some minor upgrades that I have completed and plan on completing, I'm also looking forward to seeing what other bits you guys can suggest to improve my build......... I will break up the build thread so its not just one long post and I will try to post updates as often as possible, but please dont expect anything like the quality of the build threads that ive seen from others, I'm just not that good .....tbh I forgot to take pictures a lot of the time!! So to start the list of bits / kit - Jim's TLJ fibreglass kit - think this was v4 - more on this later.... - Boots from Imperial boots - so comfy...... - Gloves - as above Imperial Boots - Belt - one of Darrens fantastic belts (Belts of the first order) - a work of art. - Undersuit - think this was from stormtrooper undersuit.com with shiny stictched in crotch area (ooer) - Gaskets - Geeky Pink - Neck Seal - Geeky Pink - Harness - home made - Blaster - originally from Heston studios but gave that to my son to play with and went with JJ industries 3d print (with my own electronic bits) - Aerator - 3d abs print from a friend - looks brilliant - Lots of sandpaper of various grades - Filler primer - P38 filler - Various webbing / elastics - Snaps - Small Files - Various screws / ball bearings for holster Pic below is from my BBB day, packaged extremely well and came within a matter of a couple of weeks after placing the order.... Note - Ive posted this in the WIP section but if any Mod feels it needs moving to the general TLJ area then please move ....
 1 point
 -
For strength you could use either a fibreglass mix, comes the same as auto filler, 2 part and is a little stronger, or use some JB weld, it is sandable but does take a little longer to dry. Auto filler will adhere to plastic so you may be ok, just don't go bending bits afterwards Shame the poor quality of the print but I'm sure you'll be able to save it1 point
-
Well then.. guess I’ll just get to work on my ramen noodle shield parts and disregard my concern! Sent from my iPhone using The Force1 point
-
Both CRLs are being addressed. The TFA is essentially finished, the TLJ is next to be updated. Sent from my iPhone using Tapatalk Pro1 point
-
I wasn’t aware there was a difference in the screen used riot batons. Hmm.. then maybe the CRL needs to be amended? It states it needs 5 bands. The Hasbro has 4. And here’s the thread I mentioned: Sent from my iPhone using The Force1 point
-
That is correct for TFA but the marketing fit the Hasbro is clear that it is a TLJ model, as we see used by Finn. Sent from my iPhone using Tapatalk Pro1 point
-
I thought the Hasbro toy version was not CRL There was a post on another thread that compared the Hasbro version to a more screen accurate 3D printed one. I don’t have the photo saved anymore but the Hasbro version doesn’t have the bands on the extendable part. Sent from my iPhone using The Force1 point
-
Firstly, that is done of the ugliest 3D printing I’ve ever seen. Very disappointing. It can be salvaged with a lot of work but I’d be embarrassed to send that out if I was the vendor. Secondly, why don’t your baton be approvable? You’re doing TLJ, right? The BS Riot Baton is the TLJ version. You should be fine. Sent from my iPhone using Tapatalk Pro1 point
-
Interested as well, I’m about to start an FOTK build myself1 point
-
Of course!1 point
-
Think thats it for todays update....I will post some more up tomorrow (if anyone is interested?"!?)1 point
-
Not to derail the topic, but I also believe you want to be careful on how you store it or on long troops as I think PLA is heat sensitive. I have not done this technique, but here is the link: https://rigid.ink/blogs/news/how-to-anneal-your-3d-prints-for-strength1 point
-
Hi, the CRL doesn't indicate an ecxat meassure for the elastic or nylon strap for the belt boxes. What it's needed is that they cannot be seen.1 point
-
The present belt position will definitely get you to EI, but will need to be raised a bit if you are (hopefully) aiming for Centurion.1 point
-
Yes and yes. Leg cover strips should come in around 22mm. Only exception is the back of shins (calves) which is 25mm. I would also recommend using “inside cover strips” on the front of shins as well! And yes, remove all the return around your ankle. That will allow it to sit closer to your boot, and help you in the fitting.1 point
-
No that has been printed without enough wall layers. On smaller items or narrow items they should be printed for strength either solid or with at least 4-5 wall layers thick. From that image it looks like it was printed with only 2 perhaps. Sent from my iPhone using Tapatalk1 point
-
That last photo reminds me of something. I really enjoyed following this build right from the start and can't wait to see you add the missing items to complete this crazy detailed beauty. Do you really plan to troop with this blaster? Do do we get another thread soon with a separate build for that?1 point
-
This is true. Least I’m making it into a Sandtrooper. That first gen armor! Lol1 point
-
Looking good trooper, a few tweaks and you should no doubt be good to go1 point
-
So I’ve started to work on these shield pieces.. it seems the PLA strands are all that hold these together. It’s not really a solid object I can sand down to get a smooth finish. As I’m reading, it seems PLA isn’t the best printing material and it’s hard to get a good smooth surface, especially with severe printing striations. Also the triangle piece is sorta hollow. I’ve been reading a little on finishing PLA parts and so far it seems XTC-3D is the way to go. Gives the part a sandable later of epoxy to work with. These parts aren’t highly detailed, so this looks like what I need to do. Can anyone chime in on if I’m heading in the right direction? Are PLA parts really meant to only be a skeleton to work off of? Sent from my iPhone using The Force1 point
-
Great news, congratulations trooper and welcome to the ranks1 point
-
Excellent build thread, its getting close to completion and can't wait to see you kitted up in the final result.1 point
-
My pleasure trooper, good luck this time around1 point
-
Update time! Today I redid the snaps (right this time) And glued on the new left strap: Also glued on the female snaps on the right side: Then I remembered; I hadn't put in the ab to belt snaps! That was a right pain to do this late. I also made holes for the cloth belt to the plastic one: And then I followed your advice @justjoseph63 and made some nylon straps for the posterior to kidney. I couldn't put them exactly were you showed because of the brackets and I don't have that wide nylon, so I made four straps and put them a bit to the side. I will add the male snaps later. Is it ok?1 point
-
CONGRATULATIONS!!1 point
-
Great work Mike looks great!! this is mine.1 point
-
Close! Don't have the strips longer than the armour.1 point
-
So I finally got around to changing out the interior of my bucket, going from the hard hat liner to padding. The military padding alone wasn't doing it for me, so I bought a motorcycle helmet liner that also came with cheek pads. The liner itself didn't fit that great, but it was perfect in my wife's helmet, so she got that for her padding. But I was able to use the cheek pads - after a bit of turning the pads in different directions, I found one that worked. I'm not sure how the cheek pads are actually supposed to sit in a helmet, but this way I'm able to slide the helmet on with earbuds on if necessary. I did remove the hearing assist for now, and I'm going to be ordering a fan bracket soon, so the look of the interior may change a little again. I also velcroed a challenge coin (still in a plastic sleeve) to the interior of my bucket just in case I get challenged while in armor. Better safe than sorry!1 point