Leaderboard


Popular Content
Showing content with the highest reputation on 09/27/2019 in Posts
-
Love it! Great work!2 points
-
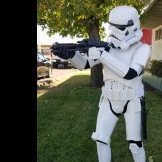
Obligatory "I've gotta put this stuff on to make me feel good" Photo. Don't mind the angle, it was taken by a 4 year old I still need to trim the thighs. That's the same as everywhere else though with about a half inch gap right? I tore apart my shins and reassembled them differently after looking at several posts, EIB and Centurian applications where it looked like the inside of the left shin had the lesser degree up angle of the two "right" sides of the shins. This came about after having a downturn on the inside section and slight up bending of the knee plate when I tried to force the knee plate to match what was there. And lastly I've strapped these together.2 points
-
Also! Want to remind everyone safety safety safety! Whenever using sharp cutting tools or power tools, and even when you're snapping plastic, remember to wear protection! That means safety glasses, no-cut gloves, and appropriate clothing. What is appropriate clothing? Remember back to your science lab days... cover as much of your body as possible, do not expose your skin. That means long sleeves, long pants. If you're working standing up, close toed shoes. When necessary, wear a fumigator or heavy duty face mask to minimize fumes and dust. Make sure it properly adheres to your skin, depending on the size. That means for the smaller ones, no makeup and no facial hair. I made the mistake of wearing a t-shirt while sanding, and now I have a bunch of little nicks on my arm and on my cleavage. So attractive, a nicked decollete. Think I'll pick up anyone this weekend?2 points
-
Hi, Last year with the presence of 501st members at Solo and Tokyo Comic-Con, it gave me the final push to pursue my own armor and membership. I've spend two month obsessing over the forums, CRL, and Youtube to decided to order a trimmed AHK TK kit from Authentic Props. Being a Canadian living in Tokyo provides some challenges but I have found support from local members already which has been great. I'm a very detailed and nervous guy, part of my profession, so it will be measure twice, write it down, measure again, question the accuracy of measuring concept, then maybe ask everyone to confirm my measurements. This might take a while. Armor : Authentic Props Arrived Soft Hand Guards : Authentic Props Arrived TD Clips : Authentic Props Arrived Holster : Authentic Props Arrived Gloves : Authentic Props Arrived Belt : Authentic Props Arrived Neck Seal : Trooperbay - Arrived S-Trim : Trooperbay - Arrived Comms: Ukswarth - Arrived Boots : IB - Arrived Undersuit : Uniqlo E-11 Blaster : 3D print project - Started assembly Fans: Still researching Mark from AP endured many emails from my timezone to his and was very helpful and supportive. The BBB has started the journey and with email updates set on the tracking number I will follow its progress up to the minute. I figured once I had the tracking number I could start this build log and have some of you wait along with me in anticipation of a show.1 point
-
Brian George TK-10770 Armoredfist5 Garrison Titan armor - AM bucket - AM blaster - Praetorian Blasters holster - Trooper Bay canvas belt - Imperial Issue neck seal - Geeky Pinks electronics - UKSWRATH/Henry’s helmet fans1 point
-
Moving along, nice work1 point
-
Removed a bunch of return edge. Will test for tomorrow.1 point
-
Rob, I do vaguely recall reading a discussion about it that hints at what you're saying, but this is copied from the CRL for Centurion level: Ear bars have only one bump painted in black (rank stripes). That's it. Basic says: The “ear” bars may have three or four bumps and are grey or painted grey, with a black outline. Painting the bumps with a rank stripe (highlighted) in black is optional. It feels good to be closer to completion. I've almost completed the neck seal (and it's possibly "good enough" right now), and based on my experience over the last three days, JUST BUY ONE!!! But I'm a glutton for punishment, I guess. I still need to come up with a way to cover the zipper in the back, but that should be relatively easy. Finding good reference photos might be harder, other than the one side view of Han in the Death Star that sure looks like a cover. This was made with heavy weight spandex, rubber weatherstripping from Home Depot, and a felt-like "Absorbent Super Shammy" from Amazon. The idea is that the material is breathable and will help with cooling.1 point
-
1 point
-
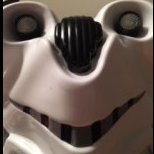
Hello, everybody! I hope you're all having a wonderful holiday. I can't tell you how excited I am to finally be making a build thread! My name is Brendan. I'm 22 years old and I live alone with my cat, Raz. I've loved Star Wars forever and have always like dressing up in costumes. In high school, I got involved with some local Star Wars costume groups and met a lot of really great people. Unfortunately, they each came to an end because of leadership issues. Determined not to let yet another folded group mean the end of my access to Star Wars costume-y goodness, I finally decided to look into the 501st. Before this, I had always viewed the 501st and the Rebel Legion as an amazing, yet unattainable for me, calibre of cosplay. This totally changed when I found my way to whitearmor.net and saw how constructive, helpful and involved all these troopers are in elevating each other to success. Not only did it make the task seem much more approachable, but it cemented for me that this is a community I dearly want to be a part of. You guys ROCK! In August, I placed my order with Authentic Props. Besides being endorsed by countless troopers, a Canadian vendor was desirable for me because I live in Southwestern Ontario. Since then, I have had plenty of time to devour others' build threads and assemble all the tools and soft parts I would need. My boots came in from Imperial Boots, my blaster from Quest Design Canada, my neck seal from Geeky Pink, and other assorted goodies from Trooper Bay. I also ordered helmet electronics from Ukswrath on Etsy. I am super pleased with ALL of it and I highly recommend each of these vendors. With my shopping list completed, and my brain full of other troopers' great ideas, all I had left to do was wait for that beautiful big brown box—which arrived on Christmas Eve! Mark must have shipped "expedited parcel via reindeer". Ho ho ho! Without further ado, let's get to the building part of this build thread. As many have suggested, I'll be building for Centurion from the get-go. A quick note; I will try my best to give credit to the troopers whose threads gave me many of the methods I'll be using, but because I have read so many threads over the past few months, I fear I've lost track of some of my sources. If you see something you came up with and I've not given credit, please do chime in so I can say thanks. :-) I decided to start with the helmet—I reckon that looking at it will serve as motivation as I work through the rest of the project! My first step was trimming and sending the back edges of the face. I know they won't be seen, but it gave me an opportunity to practice with the dremel. As others have suggested, tracing the guidelines with a pencil helped a great deal. Same thing with the back of the bucket. Then came the teeth. My oh my, this part stressed me out. I was afraid that, in my newbie hands, the drill bit was going to fly off in another direction and carve Joker-style scars up its face. I practiced on the scrap ABS first and, thankfully, I completed the dental work without injury (to myself, or to the mask). After drilling a hole in each indent, I used needle files to finish the shape. After that came the eyes, for which I first drilled, then cut with scissors, and then filed. I struggled with these a little. The OTTK's canon asymmetry will be an ongoing relief for me throughout this project, I think. Next I set about attaching mounting posts for the lenses. I used Chicago screws for this, super-gluing them directly to the inside of the mask (after sanding it a little). I'm aware that, lots of times, this isn't enough to keep them secured, so I used PlasticWeld to further secure them to the inside (pictures later on). I saw this on SlyFox470's thread. I cut the lens shapes from Trooper Bay's dark green lens, fit them to the screws one at a time, marked, and drilled. Here's a picture of the PlasticWeld securing the mounting posts. As also recommended in SlyFox's thread, I used some to reinforce the inside of the chin recesses since the plastic is a little thinner there. And that's where I've gotten so far! The PlasticWeld is currently curing. After that, I'll be coating the interior with PlastiDip. I am extremely eager to get your input and feedback as I work through this. As a first-time trooper, I'll need all the help I can get. Thanks everyone!1 point
-
Thanks guys!!1 point
-
Yes sir I have been measuring 3 times before any cutaneous just to make sure before cutting Ect. I will be readjusting my snap setup this weekend as there are some week spots and parts that don’t sit how I want them to Sit.1 point
-
TK 13180 please approve1 point
-
Thanks you very much to everyone guys, it feels so good to be centurion!! I hope i can provide some photos from troops soon!1 point
-
Ok, will do Sent from my iPhone using Tapatalk1 point
-
Yeah Brian!! Looking Great. I would suggest to add your EIB application link at the begining for reference to the D.O. team. Good Luck Trooper your Centurion badge is waiting for You.1 point
-
Great Work mate!!!1 point
-
More armor build progress pics, left shin done with the rear strip attached. Left shin trimmed and glued on the front. Making good progress, will be able to start painting soon. Sent from my SM-G960F using Tapatalk1 point
-
Great mindset1 point
-
Tubestripes look really good - great job. :-) Best of luck for L3, and well done for returning to it and making those tweaks. Centurion is not far away. :-) Best wishes Dan1 point
-
Everything's been properly labeled as L or R, and I've rough trimmed one and a half shins (pics tomorrow, getting tired). The second shin has been going much more smoothly and quickly than the first one as I gain confidence. Going to have a fun and busy weekend trimming and gluing. Having read all the build posts, studied all the photos, and watched videos numerous times has really helped me be positive and jump right in.1 point
-
DO IT DO IT1 point
-
Awesome job on the helmet1 point
-
take it one step at a time and remember measure twice and cut once and always cut smaller because it cant go back once its off.1 point
-
1 point
-
Glad it helped, Troopers Helping Troopers1 point
-
Looking forward to your builds1 point
-
2 more days right ? Lol till the end of Q3 Sent from my iPhone using Tapatalk1 point
-
The Shock Trooper armor build continues with the right bicep now fully assembled and the left shin trimmed and assembled at the front. Sent from my SM-G960F using Tapatalk1 point
-
Was really excited to get my BBB And then had to haul it on the BART soon as I got home I took an accounting of all the pieces, relying heavily on the images on Imperial Surplus's page I'm... a little concerned about how much trimming is going to need to be done. Landroomie thinks I should have ordered kid's size XD Armor and bucket from the wonderful @kwdesigns of Imperial Surplus II. Receive BBB A. Armor 1. body a. chest plate (omg the chest is so big, no wonder the Ladies Legion talks about hiding food and water bottles in there!) b. back plate c. abdomen plate (Ladies Legion calls the groin "the violater" and not to be afraid to trim the heck out of it) d. kidney plate h. 2 shoulder straps 2. Body additional a. back panel b. thermal detonator (pipe, 2 end caps, greeblie) c. belt (front, back, box greeblie) d. 2 ammo pouch covers 3. Arms (everything in pairs) a. shoulder b. bicep c. back forearm d. inner forearm e. forearm cover f. glove plate (I know there's a better word for it, I just can't think of it) 3. Legs (everything in pairs) a. outer thigh b. inner thigh c. knee d. shin e. calf B. Strapping System (in a zip, look at later) C. Helmet 1. top 2. face 3. back 4. faceshield 5. browpiece 6. rim piece 7. decals and attachment system D. Extras: shoes + pauldron Here's everything laid out!1 point
-
I. Get Supplies First off, want to give a shoutout to @justjoseph63 for their great post on Supply List for TK Builds. Obviously the majority of us have read it, but still pretty awesome, and credit where credit is due. I took that base, and spoke to @shashachu and @Navajo Bro to tweak tweak tweak. Since the Fem7 is not going to be 501st approved and is a bit of a speed build, I am opting to skip certain parts that are not necessary, such as the rivets and paints. A. ABS manipulation 1. E-6000 glue > got at local Ace Hardware 2. Rotary tool > received from Amazon 3. Scissors > I have regular scissors, will see if I need sheers later, but I know my local Ace has them 4. clamps > received from Amazon 5. magnets > have some, left over from name ID's from a party. I think I might be able to get away with it, we'll see 6. hammer > I own, but I'm actually considering getting a small hammer because I worry it's a little too heavy 7. Exacto knife and blades > received knife from Ace, got extra blades from the packaging team at work 8. Metal ruler > took one from work, packaging team was dumping scuffy ones in preparation for a VIP visit B. Attachings 1. Tandy Line 24 snaps > received from Amazon 2. Snap setting tool > received from Amazon 3. Industrial strength low profile velcro > got a roll in White from Amazon C. Safety first, and extra useful things 1. safety glasses > Amazon 2. cut resistant gloves > Amazon 3. respirator mask > I own... I lived in China during SARS. I don't think I'll ever not have N95's on hand. 1. Painter's tape > I won and picked up extra 2. pencil > own 3. hand files > received from Amazon 4. Sandpaper > got a sandblock, but can grab from Ace if needed 5. sandblock > Ace hardware Still need to acquire [edit: done!] 1. Nylon or Elastic > there's so much chatter between the two... 2. foam padding part 2 and part 3 after getting some advice from @justjoseph631 point
-
Just got the call that they're shipping my BBB. *screams at decibels only audible to dogs*1 point
-
I have a feeling we can get to level 21 point
-
Hi Matthew, looking good. here's a reference photo for TD to guide you. Cheers,1 point
-
Hi, everyone! I hope you all had a safe and happy New Year! After a night of festivities it is back to business today! The stripe paint finished drying, and I removed the stencils. A while ago, I read an awesome idea about painting a coat of the surface colour (white for tubes, grey for traps/tears) over the stencils first to seal in the edges and prevent bleeding. Unfortunately ... I forgot about this idea until this morning, when I peeled the stencils off. Whoops! Not a huge deal! It just means some extra time tidying it up with a toothpick dipped in paint thinner. For the traps and tears, I went back with a small paintbrush and grey paint to correct the black stripe bleed. Well worth the effort. However, for anyone who may be reading this in preparation for their own build, learn from my oversight and put down that base-colour coat first. I'm sure it's a time-saver! In addition to the stripes, I also created the "phantom teeth" on my frown as Q suggested. To do so, I extended my frown and then used the toothpick to erase a small section near each end. Here's my result! Finally, I attached the TrooperBay S-trim around the under-ridge of the helmet. I didn't end up having to cut mine down at all—by installing it slowly and sort of pushing back on it as I did so, it snuggly fit all the way around at met back under the chin. You can also see my electronics installed inside. Man, there is even less space in there than I thought there would be! Fitting it all inside was a challenging, but rewarding, puzzle. I have a little more tinkering to do, but I can put it on my head (sideways and twist). The installed electronics are Henry's helmet fans, Ukswrath's hovi-tip speakers, hearing assist and power amp, and an iComm. And—I think—that's a wrap on my bucket! It's been so much fun to work on so far. I'm very much looking forward to tackling the rest of the armour. As always, if you guys catch anything that needs fixing or improving I really appreciate your feedback. I think I'm gonna do the thermal detonator next. We'll see! Til next time. :-)1 point