Leaderboard


Popular Content
Showing content with the highest reputation on 02/25/2019 in all areas
-
I just posted a ton of pics in my pre-approval request. I was emailed by my GML who said it should all be a go but he wants some clearer pictures. I'll have to take the actual shots of me wearing it tonight, In the meantime, I whipped up a mannequin out of ABS pipe in about 30 mins: (the left hand slipped...need to make it better next time I put the armor on him!) Material List: 3" ABS pipe - 12' 2"'ABS pipe - 6' 3" ABS "short" elbow - 2 3" ABS T - 3 3"-2" Reducing Flange - 2 2" 45 degree elbow - 2 Zip Ties to connect torso to shoulders Cut List: 3" Pipe: 4" x 2 (shoulders) 5" x 1 (waist) 17" x 2 (torso) 33" x 2 (legs) 10" x 1 (neck) 2" pipe: 8" x 2 14" x23 points
-
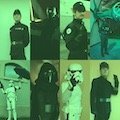
General Info · Name = Maria Katrina Maloom · TK ID = 18112 · FISD Name = Architect18112 · Garrison = Philippine Garrison Body Type · Height = 5’4” · Weight = 56 kg Costume · Armor Maker = AP · Helmet Maker = AP · Blaster Type = Doopy Doos Full Resin Kit · Boots = Imperial Boots · Canvas Belt = DIY · Hand Plates Type = Trooperbay ANH Stunt White Rubber · Electronics = None · Neckseal Maker = Darman Props · Holster Maker = Darman Props Photos Full Body Front – Arms at side Back – Arms at side Left – Arms raised Right – Arms raised Right side detail – Arms raised Left side details – Arms raised Action Shot Helmet Off Armor Details Abdomen Details Cod and Butt Plate Attachment Interior Strapping Shoulder Elastic Straps Kidney Plate Notch Ammo Belt and Holster Forearm Details Hand Plates Thigh Pack Attachment Knee Plate Split Rivets Abdomen to Kidney Plate Abdomen Plate Helmet Details Front Sides Back Vocoder / Teeth Details Lens Color Backlit S-Trim Blaster Details D-Ring Accessory Details Neck Seal Thermal Detonator – Front Thermal Detonator - Back Thank you!2 points
-
Thanks for that, Lou! Building the little bits and pieces out of plastic and foam isn't all that difficult, actually. (Besides, I don't know how I feel about making casts of things that I didn't build myself.) A little more progress has been made today! I'm so excited about this! Or maybe it's just the fumes from the contact cement that is making me so ecstatic... This is the foundation for the stock part of the T-21. I was going to tackle this using my 1" thick sheet of EVA foam, but I realized that I couldn't slice it in half. I need to put some sort of stabilizing material along the middle inside of the foam. I brainstormed that it would be possible to stack up thinner layers of EVA foam instead. I really like how dense the 8x10 sheets of 6mm craft foam are (found in 10 packs over at Amazon), so I decided to stack layers of that together to make my stock. Each half is built of 8 sheets: four across, with two layers. The sheets are glued together with contact cement in a staggered tile-pattern for extra strength. The contact surfaces and adjoining edges are coated with contact cement. See the pole in the pic below? That's an old super-light aluminum golf club handle that will run inside the length of the stock. Next you can see how the first half is complete. I placed the 1:1 template on top for scale. There will be a channel carved out of the middle of the EVA stock to allow the aluminum pole to sit flush inside between the two layers. This pole gives incredible strength to the foam and keeps the stock super lightweight. Second half coated with contact cement! And done with the second half. Considering how much stress that will be on the handle of the blaster, I will probably add an additional piece of pipe or something to the handle area behind the trigger. I could cut another small section of aluminum pole from another old golf club, drill a hole in the main aluminum tube, and insert the small piece there- like in a T formation. That should work, but if anyone out there has a better suggestion, please chime in! I'm not concerned with the seams at all. I know how to hide them, but they really won't be visible anyhow with all the greeblies that will be attached to this blaster. The next step will involve rough cutting the blaster shape, carving the channel for the aluminum pole, then gluing both halves together with the pole inside. Stay tuned!2 points
-
redid the TD.. think the left end cap needs to be shrunk a bit more..2 points
-
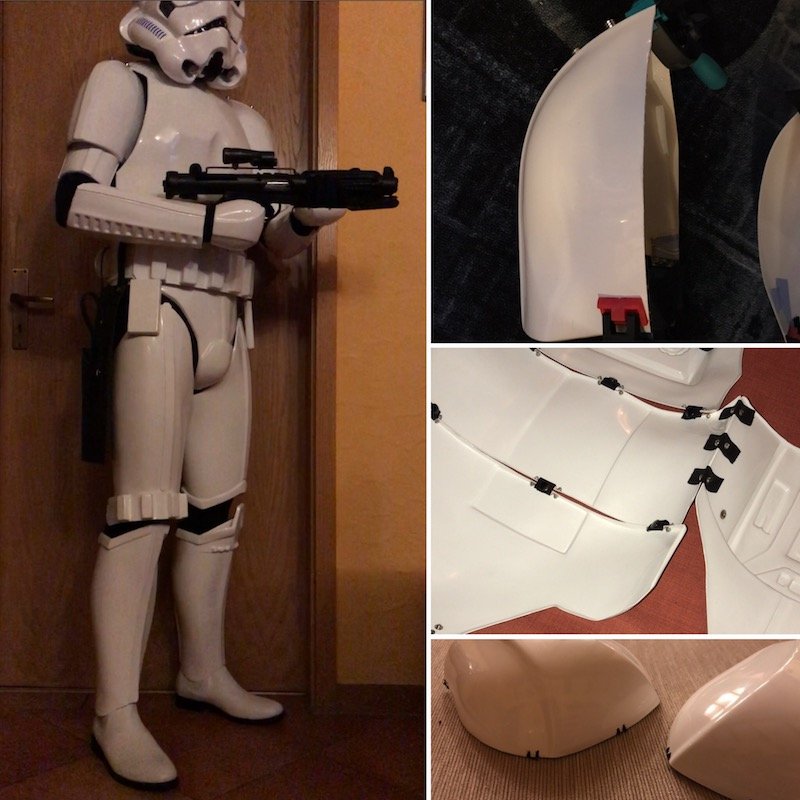
Ok some updates... Done the Shins.. Shaped and trimmed.... The sniper knee was a bit of a pain I do have another one just in case.... Will glue in the elastic and hooks 3x per shin shaped to fit my weird shins measured with my imperial boots on. next up shoulder bells.. x4.... I have two sets, I messed up on bell by trimming to much.. so I got a replacement set but the plastic is a bit different color..... Elastic and popper attached as per Ukswrath tutorial As you can see the colour is slightly different I got some novus so I hope it will buff up any tips?? Did the forearms and biceps.. return edge removed and shaped and sized for my arms Thighs.. I also wanted to tidy up the helmet so frown repainted.. I am waiting for masking template and paint from trooperbay before I do the tubes Belt was a pain to do but after a clean up and polish I hope is ok. My Chicago screws arrived today not sure to use these or the rivets thru the poppers Kidney part.. had to shape this quite a bit to bit me. pan of hot water did the trick. need to do final shaping and then some repair on some thin parts and clean and polish. shaped the top part to fit me better with the hot water in the pan trick. Bottom.. only one popper so far measured the second ready TD.. Used hyper X glue from japan which was horrible... Cooked the ends for a bit and sanded the edges of the tube so it fits very tight to the tube. needs really good clean and polish. chest and ab started.. will do the belt fitting and holster fit next.2 points
-
Yeah mine were a fail too - Also AP. I've seen the 2-part CA glues with an activator work well but you need to make 100% sure your placement is perfect. I've had to order another set from Mark...2 points
-
Minor setback... Did you scruff up the underside of the hand plates? That helps. I also used gorilla glue and clamps with mine. Seemed to stick better. Sent from my iPhone using Tapatalk2 points
-
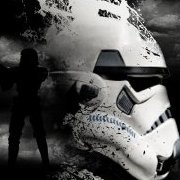
I decided to go FO, I acquired some Anovos Alpha armour, The abdomen needs adjusting which I will do soon1 point
-
But I am removing the lens again cause I need to finish cleaning up the eyes. Sent from my iPhone using Tapatalk1 point
-
I modified the angle and it fits nicely now. I even got the rubber on and the lenses. Thank god for Sugru for the lenses. Sent from my iPhone using Tapatalk1 point
-
Even cheaper because I work at Rona lol.1 point
-
Congratulations1 point
-
Hi, Candi.... Casi lo tienes bro..... Un saludo Enviado desde mi iPhone utilizando Tapatalk1 point
-
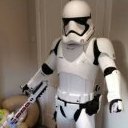
Hello at all, last weekend I had the first complete try on of my TK. I have to finish now the strapping and the shoulder armor. Here are some pics of my current status. Thanks for your support
 1 point
 -
Congratulations Trooper!1 point
-
Hey Lars Like others said, thank you for your EIB application Just wanted to let you know that I’ll will fire up the computer and get to work on it1 point
-
Dismal failure Sent from my iPhone using Tapatalk1 point
-
Good work Candyman!! You won't have many problems with the Centurion level. I'm proud of you!! See you soon with your new rocker! Buen trabajo Candyman! No tendrás muchos problemas con el nivel Centurión. Estoy orgulloso de ti!! Te veo pronto con tu nuevo rocker! Enviado desde mi Redmi Note 4 mediante Tapatalk1 point
-
Trimmed some of return edges down. Still might take off lower edge to biceps more as have 5-7mm left of edge and might open it up a bit. Was going to reduce width of lower arms but now I’ve tried parts on with under suit it makes those gaps not seem as wide1 point
-
Thanks! It was awesome!1 point
-
Two rings become one. Unable to pull them apart, stronger together than they were individually. Appears dichloro will make a fine chemical weld for the blaster.1 point
-
Don't worry about the rivets. You can use nuts/bolts in there as they will not be seen. Your brow looks a touch high. Try lowering it and adjusting the angle, then tape the ears on and post a few pics. Worst case you could always trim more off the brow if you had to.1 point
-
Congratulations trooper! Welcome to EIB.1 point
-
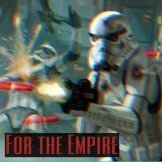
Meanwhile... Yeah, I know it's not part of my TK build, but while I'm waiting to submit we finished my wife Sally's Imperial Line Officer and I just had to share. A.J.1 point
-
New to the legion costume info although I'm not sure they would allow dogs1 point
-
Congratulations trooper and welcome to the EI ranks1 point
-
You could call them TK9 units!1 point
-
Congratulations James great job and welcome to EI brother1 point
-
Congrats and welcome to EI James. Sent from my 5054N using Tapatalk1 point
-
I am very down for Trooper Dogs! Any plans for animal CRLs?? ... Anyone? No..?1 point
-
Even adding a little E6000 around the hole can help prevent snaps pulling through1 point
-
Nice start! One word of advice from me would be to work on your sniper knee alignment before doing anything else to your left shin. In your picture it already looks offset. In general on the legs you want to make the mouldings line up at the knee end.1 point
-
Awesome start! Welcome to the FISD! Post lots of photos and ask plenty of questions. I'm sure your squadmates IRL will be instrumental, also. Take your time and have fun with the build! As a side note, being a lefty is going to be an advantage for you as an ANH TK. I'm right-handed, and during my first troop, a fellow TK (teasingly) took hold of my E-11, turned it around, and put it back in my hands in a left-handed position saying "There you go, now you're screen accurate!" Still getting used to it! It's not actually a mandatory detail, but you'll already have it going for you.1 point
-
How about using them for a mold and casting out of foam? This I can help with to begin repayment on helping with my build (troopers helping troopers). Just picked up supplies for my droid build from the engineer guy1 point
-
I've recently been diving headlong into a T-21 build, and it occurred to me that I've been neglecting to finish this kit. I am super close to finishing, and I suddenly realized that I have been actively avoiding working on it. Which got me thinking, "WHY???". It's been a dream of mine to have a Hero Luke suit, so what was going on?? I am sure that at least one of you out there knows the feeling when you feel that you just can't do something without screwing it up. And looking back at my progress, I see what caused me to stop dead in my tracks and make all sorts of excuses for why I didn't have time wasn't making this a priority. It was the grappling hook box. I had no idea as to how I was going to make it work on my kit. I was terrified that I was going to screw up a $300 prop (yes, I paid a little over that much for the box...). So with that, I just decided not to work. Period. I'm crediting my husband for reminding me about my kit-in-progress. Actually, it was a comment he made last night as he looked at the floor of my nerd-room, which was covered with a 1:1 scale printout of a T-21, a large log of EVA foam, and various cutouts of styrene and PVC piping. Photo taken while the floor was still in its "clean" state... "So how are you able to get to work on your stormtrooper with the floor covered in all this?" A nice reality check for sure. As I sat on the floor and looked around, I realized that there was nowhere to walk on the floor. I had (intentionally?) built an actual barrier to my TK with another project. And that's how projects never get finished! Sooooo, today I decided to put away all the T-21 stuff and get back to work on my Hero build. And I'm committed to stay focused until I'm done! I pulled out the grappling hook box and decided that the safest way to bend the side tabs would be with boiling water. I pulled out a heavy duty roasting pan and filled it with water. The extra large surface area allowed me to submerge the tabs and still give me lots of room left to work. Here you can see how straight things were before the hot water treatment: I had to remove the round hook holster and left side belt clip, but this was an easy task- they were fixed on with e6000 (yay!). I used large paint stir sticks to help keep the tabs flat because I only wanted the bends to occur near the box, not on the tabs themselves. It took me about 30 minutes, but it worked! My grappling hook box now fits nicely along the kidney. Some before and after pics: I still have to glue the left side belt hook and grappling hook circle back on. I'm going to give the whole thing a few days to dry out before I tackle that part. But at least this hurdle has been cleared, and I can now confidently wear the grappling hook box without it looking 'off'. I'm excited to finish this build now. Whew! Oh, and my new Praetorian Blaster E-11 arrived in the mail a few days ago, and it is gorgeous! (I will probably do a little weathering to it to make it look a bit more battle-worn, but it's still beautiful.) The detail in that spring element alone is stunning! I gave my Hyperfirm E-11 to my husband for his RS TK... which caused him to revert instantly back to a 10 year-old boy, running around the house with it, yelling, "Pew! Pew! Pew!". He can't wait to be a TK.1 point
-
Hey Pascal You will find out when you size the bells with the torso, there should idealy be minimal gap (Centurion) between the bells and the chest/back and the top of the bell should be touching the shoulder bridge . When trimming the bells note that the originals were trimmed at a curve and not straight Pics from Lucas archives for the Court case with SDS. Original to the left Original to the right Just some Trooper-motivation1 point
-
Its been a while since my last update, but I'm still at it. I ran into a bit of trouble over the past couple of weeks wherein the temperature in my garage dropped below freezing - that makes it tough to get much done in one push, and then I discovered that E6000 doesn't like working at those temperatures either. I was able to move parts of the operation requiring gluing into the basement and keep things moving along. It is fun to finally reach the point in the build where I'm installing the strapping and its actually looking like a suit of armor, rather than a haphazard pile of plastic. Yesterday I tried on the upper portions, mostly so I could figure out how low to hang the thighs, and that was quite an experience. I think I'm going to need a squire to help me in and out of this! In any event, there is still a lot of little things to do: Adjust strapping so things fit correctly. I see in my photo that my right shoulder bell is out a bit and my right forearm needs to be lower, things I didn't notice when I had it on. Painting screw heads and rivet heads Install velcro into calves - I'm going this route until I know for sure if I need shims or not Finish painting shoes - I used up one can of white leather paint on them, but they still look a little cloudy The damn belt - I mentioned above that I had a whole host of issues switching over to my Kittle belt, and when I put this on one of the rivets pulled loose. For the photo I grabbed that loose hanging end (my left side) and shoved it under the elastic of the drop box, that's why it is not lined up right with the ab buttons. I had lots of trouble when putting the belt together due to low quality rivets where the shanks kept ripping in half. I'm going to just pull it apart and re-do all 3 rivets with better quality ones. Not looking forward to that, but at least this time it is glued with E6000 and not that hard-as-nails epoxy Anovos used. I'm going to attempt a re-do of the sniper knee Figure out what I'm going to do for gloves I haven't even begun to start on the helmet....1 point
-
Nice work, Pascal! (Don't forget to paint the rivets on the thigh ammo pack).1 point