Leaderboard


Popular Content
Showing content with the highest reputation on 02/23/2019 in Posts
-
You could call them TK9 units!2 points
-
Moldmaking done :-) I will cast the first helmet tomorrow. I need some practice to make the black insert piece, though. I just made one, the mesh itself came out perfect but it was a mess lol I still expect to ship the first kits out next week2 points
-
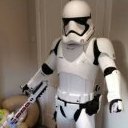
I decided to go FO, I acquired some Anovos Alpha armour, The abdomen needs adjusting which I will do soon1 point
-
Ola troops... I can't find the topic with the infos for the forum support ( $ for the FISD )....I have too much dollars Can anyone help me please?!? Thx in advance. Cheers...1 point
-
Looking good Kris1 point
-
Thanks for your time. I have updated the original post to include the two pictures showing the inside of the ammo pack. Thanks1 point
-
I’d recognise that luscious carpet a mile away. ;-) Welcome matey. Looking good. :-) Dan1 point
-
Ummm, lol1 point
-
Looking good1 point
-
I think I see a problem.
 1 point
 -
The goal were met last year. But I guess now the election is over, there will soon be a call for support.1 point
-
Hi Brendan, Time permitting, can you include the following pics: 1) Gloves and handplates 2) Closer pic of the Front Shoulder Straps 3) TD pic with measurement. thx1 point
-
AWESOME! It might just be that you have to shorten the strapping holding up the thighs, but the thigh/knee/shins all look a bit squished together. Otherwise a great start!1 point
-
I did a small test of the dichloro methane and it made a junk piece of PLA both smooth and added a bit of shine. For welding pieces together I was able to join some flat junk pieces together so it shows some promise as a glue. Another test on more junk pieces and I should be ready to start joining the real thing. Also the cheap brushes leave bristles in the PLA that if not removed become permanent. Went to the store and bought some better brushes.1 point
-
Woohoo!! Congrats on the first cut! The rest are all much easier from now on. You're going to want to take a little more off of the wrist edges, including that little bump where the track of recesses is. Here are mine for reference: The butt-joint connection between pieces looks REAL clean! Nice work. Before you start gluing pieces together, tape them up and try wearing them while bending your arms. The return edges on the elbow end look pretty thick and, while I don't think is an approval/accuracy problem, could hinder your movement or pinch your skin. Keep it up!1 point
-
The time had finally come to start trimming and cutting my AM armour. So looking like a poor excuse of Bain from batman I set to work. I’m starting with the arms. With shaking hands I marked a trim line on the wrist end and carefully trimmed the return edges. Being AM armour, the width of legs are arms are big so I’m trimming from the inner arm as the outer arm seems to run straight and central to my arm. I had been advised to always start with the showing edge and trim bit by bit from the back to get the fit. Bit more scoring required to get a clean snap but finally went and I breathed a sigh of relief that the first cut had been made. We’ve officially started!!! Sent from my iPhone using Tapatalk1 point
-
As it stands Sent from my LYA-L09 using Tapatalk1 point
-
Great job and good luck.1 point
-
Great job, Trooper.1 point
-
Hi James, Thanks for your patience! Great to see a fellow short trooper applying for higher levels! I know first hand how challenging it can be to fit an armor meant for someone 5' 10" onto a smaller frame. CRL and EIB Application Requirements: All required photos are now in and, after review, we are pleased to welcome you to Expert Infantry rank. Congratulations! Other-Armor Fit/Assembly; In this area we review observations made by your fellow troopers and the DO team. Some observations may lead to suggestions to improve the overall look of your armor. Starting from the top, I understand that Anovos helmets come pre-assembled, but a few paint touch ups could really clean up the look. First, although there was a ton of variation in the frown paint, the teeth paint could be filled in a bit more. Additionally, it might be just the angle of the photo, but the shape of the vocoder looks a bit soft and couple be sharpened. Reference Images: hel Lastly on the helmet, from studying a lot of reference images, the DO team has realized recently that the ears on the stunt helmets tend to be aligned with the edge of the trap, rather than positioned vertically. Since the helmet was pre-assembled it may not be possible to reposition the ears, but for those troopers willing to go the extra mile, we do like to point it out as a suggestion. Reference Images: Moving down, I studied your shoulder/chest area for a while. Your shoulder bells have a tendency to ride up higher than your shoulders, so I'd check to see if maybe they're getting pushed up by the biceps somehow. But I believe that one bigger change you could make that would really improve the look of your upper armor is to shift your entire chest piece up. On my kit I had to trim back the neck area so I could move the chest high enough. Comparing your armor to screen reference, notice how the > < indents on the chest hit quite a bit lower, causing a noticeable black gap between the chest and shoulder bells, even though your shoulder bells are strapped very closely. Additionally, your neck line sits quite a bit lower compared to the reference images, where you can't actually see any black between the helmet and the chest. Finally, notice how the bottom corners of your chest are much lower than the bottoms of your biceps, while in the reference pics, they are roughly aligned. These are the problems of shorter troopers. Reference Image: In the same area, I'd watch the alignment of your bicep/forearms. Ideally, the cover strips should be aligned vertically. Could be a dressing issue, or might require a slight strapping adjustment. Just a small detail that really cleans up the look of the armor. Reference Image: On the back of your shoulder area, again watch your shoulder bells riding up higher than your shoulders. Finally, your shoulder bells may actually be a tad large, as they're overlapping your back piece. You could consider trimming them back just a touch, or it could just be a dressing issue. Reference Image: A tiny detail worth mentioning is that the corners of the TD clips where they meet the TD panel should be squared off, not rounded. Reference Image Finally, a few small details on your lower body. Your posterior armor seems a bit wide for your body. Some heat bending and/or trimming should make it fit you better. Additionally, I'm not 100% sure what those white squares I'm seeing are; maybe inner coverstrips? If so, that would be worth trimming back both for looks and for comfort. Reference Image: As pointed out by your fellow troopers, your sniper knee is tucked behind your thigh armor. Putting some foam on the front of the shin and/or the back of the thigh should prevent this from happening. Additionally, the gap between the two halves of your thigh armor is a tad wide; filling it with ABS paste or even gluing a small square of ABS behind it would hide the black. Reference Image: Finally, this is almost certainly a dressing issue, but your calf closures could be lined up better: Centurion Suggestions:In this section we prepare you for Centurion. More photos may be requested in the future that allow us to make better decisions on possible adjustment etc. If there are any areas of concern they will be discussed here. Because Centurion photos show much more detail than EIB, items pertaining to Centurion might be seen there and not here. We try to point out all we can from what is seen but the final accuracy is the responsibility of the trooper. It's a bit hard to tell in the photos, but it looks like both your left and right ab/kidney connections might be overlapping when you're wearing the armor. While at Centurion we require no ab/kidney gap, they should not be overlapping. Additionally, it seems that your left side might get out of alignment while you're wearing it; this is especially obvious on the left side because you should see the rivets lined up, while I can see in the photos of the armor when you're not wearing it that they are indeed aligned. This might be a simple case of adding some foam padding to 'bulk' out your midsection to prevent the overlap. (Note that only fixing the left side overlap is required, but I'm recommending you try to fix the right side overlap as well.) Reference Images: And that's it! I want to commend you on a fantastic build, and we'll see you at Centurion!1 point
-
Yes, sir. I'll get you a picture tomorrow showing the rivet without the black felt.1 point
-
Hi Brendan. Thanks for your patience. I’ll be doing your review and will take me a few days but just wanted to say you did a great job and should be proud. Hold tight Trooper.1 point
-
Even adding a little E6000 around the hole can help prevent snaps pulling through1 point
-
Hi Brendan! Thanks for the awesome feedback!! That's a great idea with the ABS in between the elastic, I think I will go that route when I use snaps. I feel your pain with trying to set snaps through plastic and thicker material, I have also broken quite a few snaps on other projects, I might just have a heavy hand with the hammer LOL. Haha, I think I should make him his own armor!1 point
-
FANTASTIC! Thanks for the photos and specs. Great information here Teresa1 point
-
Congratulations Mark, sorry for the late. Well deserved EI badge.1 point
-
Hi and welcome aboard! Looks like you've been doing plenty of research and asking lots of questions, which is undoubtedly the recipe for success. The awesome folks here at FISD will transform the huge, daunting project into an attainable and enjoyable ride. Keep in touch and post lots of photos! My order of building went from head down to toe—bucket, arms, torso, thighs and lastly shins. I also installed strapping as I went, just for some variety from all the ABS trimming. It will work in any order, though! And yes, you can do away with all of the return edge on the wrist-end of the forearms. For L3 this is required, but I also found that it made them way easier to slide over my hands. Turns out a few millimetres makes a huge difference. Return edges everywhere else are up to you—the simulated "thicker armour" look is definitely cool, but it can compromise comfort and mobility. I ended up doing away with most of mine. It's easier to remove them than to add them back on, though, so you may want to test-fit and evaluate as you go. Good luck and have fun! We'll be here.1 point
-
Brilliant, thank you so much for sharing this info and photo library, you are an inspiration.1 point
-
Special features info Canon shots which I drew reference from for cape and proof of TD details. On the short side of cape is also a 1-1 1/8” seam to match red stripe side. For the cape attachment and details, Please look closely here. There is a tiny acorn nut and bolt that I’m sure attached through the Armor to keep cape in place. Also allowing the full side to swing forward and back with ease. Without choking her Sent from my iPhone using Tapatalk1 point
-
General strapping, most use elastic with snaps (if you double snap you have a spare in case one fails) other glue directly or use Velcro, I like the snaps so when the elastic stretches over time you can just remove and replace. Snap placement https://www.whitearmor.net/forum/topic/24487-diagram-of-snap-placement/1 point
-
Build Update: FOREARMS: Sized up my forearms for each side and blue taped together: Cut the cover strips, sanded, glued, clamped, magnetized, and hydrated : 24 hours later: Forearms Ready! LEVEL THREE REQUIREMENT - No return edge at wrist: Now to add the elastic between the biceps and forearms.1 point
-
For when this happens.1 point
-
I've recently been diving headlong into a T-21 build, and it occurred to me that I've been neglecting to finish this kit. I am super close to finishing, and I suddenly realized that I have been actively avoiding working on it. Which got me thinking, "WHY???". It's been a dream of mine to have a Hero Luke suit, so what was going on?? I am sure that at least one of you out there knows the feeling when you feel that you just can't do something without screwing it up. And looking back at my progress, I see what caused me to stop dead in my tracks and make all sorts of excuses for why I didn't have time wasn't making this a priority. It was the grappling hook box. I had no idea as to how I was going to make it work on my kit. I was terrified that I was going to screw up a $300 prop (yes, I paid a little over that much for the box...). So with that, I just decided not to work. Period. I'm crediting my husband for reminding me about my kit-in-progress. Actually, it was a comment he made last night as he looked at the floor of my nerd-room, which was covered with a 1:1 scale printout of a T-21, a large log of EVA foam, and various cutouts of styrene and PVC piping. Photo taken while the floor was still in its "clean" state... "So how are you able to get to work on your stormtrooper with the floor covered in all this?" A nice reality check for sure. As I sat on the floor and looked around, I realized that there was nowhere to walk on the floor. I had (intentionally?) built an actual barrier to my TK with another project. And that's how projects never get finished! Sooooo, today I decided to put away all the T-21 stuff and get back to work on my Hero build. And I'm committed to stay focused until I'm done! I pulled out the grappling hook box and decided that the safest way to bend the side tabs would be with boiling water. I pulled out a heavy duty roasting pan and filled it with water. The extra large surface area allowed me to submerge the tabs and still give me lots of room left to work. Here you can see how straight things were before the hot water treatment: I had to remove the round hook holster and left side belt clip, but this was an easy task- they were fixed on with e6000 (yay!). I used large paint stir sticks to help keep the tabs flat because I only wanted the bends to occur near the box, not on the tabs themselves. It took me about 30 minutes, but it worked! My grappling hook box now fits nicely along the kidney. Some before and after pics: I still have to glue the left side belt hook and grappling hook circle back on. I'm going to give the whole thing a few days to dry out before I tackle that part. But at least this hurdle has been cleared, and I can now confidently wear the grappling hook box without it looking 'off'. I'm excited to finish this build now. Whew! Oh, and my new Praetorian Blaster E-11 arrived in the mail a few days ago, and it is gorgeous! (I will probably do a little weathering to it to make it look a bit more battle-worn, but it's still beautiful.) The detail in that spring element alone is stunning! I gave my Hyperfirm E-11 to my husband for his RS TK... which caused him to revert instantly back to a 10 year-old boy, running around the house with it, yelling, "Pew! Pew! Pew!". He can't wait to be a TK.1 point
-
Well the finish line was pushed back further than I expected. Not long after this post I fell down the stairs at work and had to spend 3 months in a knee immobilizer and on crutches/in a wheelchair. I'm in physical therapy and now able to work on my armor again so I'm chomping at the bit to get finished. Since I cant work on the thighs and legs I figured it was time to go back and work on the cod and ab sections. I trimmed and sanded down the cod piece to where I felt it was close. Then came working on strapping to attach the cod to the ab sections. It was at this point I remembered I had to melt the nylon around the edges before the cut piece unraveled and became useless. Now before for my ab sections I had magnets installed, and these weak magnets ended up snapping and falling out. Which was a blessing in disguise because I did not like the weird gap they created. So instead I went with white industrial strength velcro. Now everything sits more flush. In this photo you can still see some of the damage left by the magnets. I forgot to take a picture of the attached snaps to the cod. I'll be working on getting the cod and butt plate attached and ready soon. I've been bitten by the armor bug because I've been stuck in a bed all this time and I've had time to watch all things Star Wars. I've ordered a WTF set of First Order Snowtrooper armor and joined Blizzard Force, and I've got all of Sean Fields amazing Shoretrooper and Tank Trooper files so I'll be 3D Printing those. First up to finish are these two armors. I'll get done with all of these projects eventually!1 point
-
Hello there, my amazing friend from the north! I am so glad to see you here.1 point
-
1. You can remove the return edge on the butt plate if need be. Doesn't look too bad to me. 2. I don't have any additional feedback for you for this unfortunately! 3. We'd have to see where the chest plate sits on you to really give any advice on this. You're wearing the ab at the right place - as high as you can get it! Chest plate just needs to stay overlapping.1 point
-
Sent from my iPhone using Tapatalk1 point
-
This should be fun….demonstration some other day1 point
-
Posing with the boss at Scifiworld Stockholm. Shout out to Andreas @Coil for giving me this awesome patch, thanks again Also finishing this build off with a walking video seemed only fitting, didn`t know my son was filming but apparently he was And a short clip from Lego League -FIN-1 point
-
Having a blast rocking the FOTK at First Lego Legaue tournament in Borlänge Sweden Lunch break now so decided to share, back at it in an hour1 point
-
Submission has been sent! Some minor dressing issues but overall I´m happy with how it turned out1 point
-
Thighs are painted so time for strapping, holster hardware is yet to come. And some assorted pics1 point
-
Had time for a little session today as well so sanded the biceps and added more paste and put some on the ab/kidney to then sat them aside and started on the forearms. KB updated the molds so they are now 2 pieces instead of 4 and apparently makes them a breeze to build - sounds good Identifying the parts that go together, this is the right. Ref pic The smaller piece goes inside, no trimming done yet though This made me nervous upon receiving the kit but according to KB you cut that off and that would look similar to ref pic above, the whole side was also paper-thin, almost see-through KB for reference, looks wierd but really don`t have an option but to cut. So that`s what I did - not liking the look of this…. The back side offers some option to size, not to much or they won`t line up properly as you can`t trim from both sides. Will look inte that more later. Rought trimmed the left and it was in "better" shape, also thicker, so did a gradul cut and to me that looks better so decided to rebuild the right with some abs but that`s for next time.1 point
-
I think this will work The TD is painted so that’s why the color differ1 point