Leaderboard


Popular Content
Showing content with the highest reputation on 01/31/2019 in all areas
-
One of the most important things to remember is that it needs to fit you. Forearms are always fun. Just make sure it fits and that the cover strips are universal size, and matches all around your armor. For Instance: Front Portion of Armor is 18mm (Forearms and Biceps) The rear is 22mm (Forearms and Biceps) This size should be close to your lower half as well when you get to it. Hope that makes sense. As long as it all looks the same in the front or back. Just be consistent.2 points
-
Thanks for the feedback! I can assure you that when I have the kit on, the back plate sits right at the edge of the kidney (no overlapping). It doesn't look the same on a hanger. I'll get proper pics soon. The RS kidney is super wonky! It is not even from one side to the other at all. I have not shortened the kidney returns on this kit. It is taller more on one side than the other. The bottom of the back plate is not even, either. In order to keep the OII box straight and fitting well to the kidney, I had to cut the bottom of the back at a slight angle. With my previous RS TK, I shortened the kidney by almost 2 inches. I made sure that the kidney was straight and even on top and bottom once I was done. I also made sure the back returns were straight as well. Since I'm not going there with this build, I'm having to deal with things looking different. Annnnnnnyhow, OII box on the back plate is now straight (but cut at an angle), wonky kidney (untrimmed) floats in the middle, butt plate (untrimmed) is straight. Overall the kit is straight in the back, but if you really look at the middle, it looks "off". It's kind of like one of those Topsy-turvy cakes. If I had trimmed the back plate to match the top of the kidney, the back would have ended up really crooked. Does that make sense? And thanks for letting me know about your grappling hook box. Sounds like bending those flaps may be in my future!2 points
-
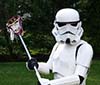
Current progress pic:
.jpg.7c829910827342c060b77c2e7a4c63d4.jpg) 1 point
1 point -
Thanks for the input. Sent from my Pixel 3 XL using Tapatalk1 point
-
Maybe i won't have to trim it then. I haven't really trimmed either of the bridge pieces and I've left the return around the front neck edge. We'll see... I won't cut anything down till i get some strapping in place and find out what i can get away with xD. Thanks for the input!1 point
-
Open up your bucket opening a little at a time as you can't go back. I'd keep it as tight as possible so that people and especially kids can't see up into your bucket while you are wwearing it. You could also try mounting your headset in your bucket, or wear earbuds and have a wireless mic in your bucket. It's really nice not to have a wire to worry about when you are getting dressed or undressed.1 point
-
Hey Chris - I trimmed a bit off my AP helmet opening. Just take a little bit off at a time - it doesn't take much to make a difference. I still can't get my bucket on while wearing a headset - I had to opt for mounting the mic in the helmet which makes getting kitted up a pain (have to feed the wire down the neck seal and get it plugged in behind my chest plate while wearing most of my armour - boo). And, oh yeah, I've removed and modified many cover strips. I'll never use anything but E-6000. I didn't realize that there is a shiny white side to the cover strips until I was done all my arm pieces and half way through my thighs. Oops. Good luck on your build day!1 point
-
OK - Time to get at 'er. I'm taking a mental health day today, and plan to spend it on my armour. I'm going to glue some cover strips and hopefully get my belt and gloves done too. I've cleaned up and relocated my work station (my wife wanted the dining room back LOL) so I am now in the family room. I'm going to put Solo on the screen to start and get to work. Wish me luck, and watch for posts! Thanks again to everyone for your support. I'm already planning to make a build guide for future troopers with all the questions that I had and advice from all the mistakes I have made and will inevitably make moving forward!1 point
-
Great, thank you! I will do as much as I can, to get the Helmet more accurate, but as stated above it will be some work, to correct the eyes. I need to remove the sugru and most of all, bend the acrylic lenses into the new form, which will be a bit of a hassle, to get them to sit flush at all points.1 point
-
The only areas required are those listed under the "Centurion Suggestions" section however, Centurion is the elite, the top of the scale, closest to accuracy without getting into prop replication. At this level we want every trooper to look their very best. That said, the accuracy of your armor is ultimately up to you1 point
-
Oh dang, I'm also 5'6" 165 and went for TM. I'll remember that for next time and I'll let you all know how the TM goes!1 point
-
Thanks, yep still to take off the return edges at the wrist which should buy me some more space, just wanting to know if i was one the right track before trimming more off the biceps and forearms?1 point
-
More from Carida-land... re: back plate flare The back plate sits very flat against your upper back, but the connection as it stands may be pulling the top too close to your back, and forcing the bottom to sit further out than it should. If you relax the shoulder connection to the chest plate, would that let the upper portion sit out a little, but not too much, and allow the lower portion of the back plate to slide closer to your back, thereby bringing those wings more in line with the kidney? I found personally that when I stand with my shoulders back, the natural curve of my upper back makes the back plate sit a little more In line with my kidney.1 point
-
Okay, thanks! I figured that there was some room, but I wasn't sure.1 point
-
Nice work, looking forward to seeing some pre approval photos, good luck1 point
-
https://www.whitearmor.net/forum/topic/43831-tk-pre-approval-program-overview/1 point
-
Thanks. Yeah, there are SO many images. I've seen others who went 20mm on the arms and got Centurion as well, so... I'll work on centering it better. It's not really a build until you've ripped off some E6000, right? Also - Is it common to trim a larger opening in the bucket? Mine's SUPER tight going on since the S Trim went on. Hopefully I have enough S trim if I do enlarge it.1 point
-
Yeah couldn't get in there without my face on em I think the biggest thing I wanted to add was that speed controller,1 point
-
Congratulations on EIB!1 point
-
Congratulations on EIB1 point
-
Removing all the return edge at the wrist side is not only recommended for situations like this it is mandatory when shooting for the higher levels of accuracy. 15mm cover strip is what is recommended for the arms however in some circumstances 18mm could fly as well.1 point
-
So, this is quite a bit different than I envisioned. Also, I know I missed some things, read on and I'll explain At first this was going to be a more dynamic, action-pose type of thing...it looked completely different. But I decided to pare it down a bit. Full disclosure: I'm not an expert on embroidery or patch design; my strength is in designing shirts as you can probably tell So I don't even know if this will work, but it's at least done 100% in vector format, so digitizing it shouldn't be too big an issue if it comes to it. It can be rearranged quite a bit, at any rate. I know, I totally missed the note about the shape. Sorry. And the date. That can be added later of course. Easily. So, even though this is my "entry," I'm now aware that it won't work. Well, it would make a cool shirt I think. Even though I don't love the banner at the top. Anyway, maybe it could be a starting point. Any ideas?1 point
-
Thank you! 1. Here is the amended small ab plate. 2. Here is side photo of sniper plate1 point
-
Update!1 point