Leaderboard


Popular Content
Showing content with the highest reputation on 09/15/2018 in all areas
-
Trooping my Sandtrooper for the first time. About to suit up and hit the floor again5 points
-
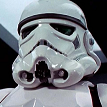
Continuing..... First pass of satin black on the vocoder. Still need to straighten the lines a bit on the second pass... I haven't done the extra tooth yet, Daniel. Then I decided to do something a little different for the ears. Since the decals for the tears and cap are so clean, I didn't want to mess things up by trying to free-hand paint a black border around the grey of the ears, so I decided to try pin-stripe tape for cars. I imagine it should stick pretty well. I started by painting the ears grey. I used a pencil to follow around the edge first so I knew where to stop painting. The thinnest black pin-stripe tape I could find was 1/8 inch and I think I'd want closer to 1/16 of an inch. I pulled out about 5 inches of pinstripe tape, leaving the backing on the tape. I placed the tape, face down, on my cutting mat and put a piece of packing tape over top to hold it to the mat. The packing tape stuck to the paper backing of the pin stripe tape. I then used a knife to cut down the centerline of the tape vertically, cutting it into two long strips. It's ok if the cut wavers a little because the same thing would happen if you were free-handing the paint job. The black lines would be slightly thinner or thicker. I peeled off the packing tape and peeled the pin stripe tape off the paper backing. Then I wrapped the tape around the grey of the ear. It even covers up any slight imperfections you might have in the edge of the grey. Then I cut one more short strip and left it at 1/8 inch thickness and used that for the ear bar. I'm pretty happy with how it turned out. Way better than I could do by hand. Mark3 points
-
Made alot of progress this week,,,, next week ill do the trigger2 points
-
Thanks Dan2 points
-
You are right about that My son to the right2 points
-
Hi Aaron, Mark’s right - you can get much better blasters from other sources. Based on your location, I’d perhaps check out Praetorian Blaster, Quest Design (Canada), Hyperfirm or (if you fancy a DIY build) the DoopyDoos kit. :-)2 points
-
There was a recent question that asked how to remove split rivets and thought I would share my method, as well as encourage other troopers to post their methods here as well in order to help others that need to tackle this problem. Tools: - Diagonal Cutters "Side Cutters" - Needle Nose pliers or standard pliers depending on the application I prefer using the Diagonal Cutters / "Side Cutters" as the edges of the cutters catch the tails of the rivet without damaging your armor. Using the cutters, squeeze the tails together. Then use pliers to straighten the tails out for removal Good luck Troopers, and many thanks in advance to those who post their methods here. Troopers helping Troopers WHOOO-WAHHH!!! [emoji38][emoji106]1 point
-
ABS paste how to here1 point
-
A great informative build to follow is Tony’s (ukswrath), step by step so I’m sure you’ll do fine, can find it here Also step by step guide building butt join and cover strips here Also post 2 in this thread here1 point
-
I am. I actually attended their last armor party and got so much done. I'm just hoping another one gets set up soon.1 point
-
Become a empires governor/warlord, have your own imperial garrison, and take over and rule South Carolina is no option?1 point
-
You really do a great job, Chris. I hope it pays off at the end and you don´t sit on countless blasters.1 point
-
Fantastic!1 point
-
Awesome job, nice pics. Damn money, mates.... Cheers from Spain. Enviado desde mi SM-T365 mediante Tapatalk1 point
-
Well, I had my first (unofficial) troop last week with the wonderful folks with Garrison Excelsior! I had a blast! Was nice to get out in public fully suited up. They even helped me take some pics to send to the GML. And just last night got an email approving my 501st application! I am beyond PUMPED!1 point
-
Looking superb!! :-)1 point
-
Looking good! Sent from my iPhone using Tapatalk1 point
-
First time i've actually used masking tape for its intended purpose I love it! Got a lot of bleed when using the decals to paint the rear stripes and tube stripes. I wanted to do the "light layer of color underneath" to avoid bleed, but the decals didn't stick too well and left a much bigger gap. It would've bled anyway.. But I just touched it up after. And some glory shots of the helmet Also received my package from Burkbench and wow this belt is nice! Much thicker than most of the belts i've handled. According to him this was made the screen-accurate way with white denim front, duck cloth interior, and satin back. Also correct right down to the stitch length he says. I haven't researched it that much but it certainly feels 70's His holster is also really nice Gonna wing it now and hopefully have approval photos in on Sunday! Also seems like Praetorian Blasters will ship my E-11 soon1 point
-
^THIS, THIS, THIS^ Sent from my SM-G950F using Tapatalk1 point
-
Good luck trooper.1 point
-
Nice work trooper, you don’t need me to say good luck, looks like you have that covered1 point
-
Yep normal1 point
-
A bit hard to see but looks like there`s a cutline molded in? If so I would start there. Normal You can trim it or leave it - either way is fine1 point
-
As the title states, here is my un-boxing of the new imperial boots! outer bag: inner bag: Shoe box: Boots! I can't wait for the rest of my stuff to arrive!1 point
-
I would think TK's just talk to each other directly. One on one when together on DS. Like the two thinking " it's a drill". They have no need to have chatter. Sandy's on Tatooine are a police force and spread out in all area's. They're relaying info on the spot as it happens. Which would come across as chatter. I would think they (TK/TD) have different channels of communications and procedures. I use the chatter loop in my HWT backpack. I use my phone and throw it in the radio. It's nice background noise and helps the illusion of being part of something big and sounds cool coming from radio.1 point
-
Yeah I’m happy how it turned out, it was one of those ”hmmm I wonder it that would work-moments” that really paid off And I might drill some holes to have some tubing and wires comming out, that’s my original plan but leaving it for now. And I just have to say that it doesn’t look like a rubber mask at all and could easily function as a display piece, atleast I think so but I might be biased And beeing the swell chap that I am I can trade you for yours1 point
-
I need a beer1 point
-
I'm in Columbus Ohio so if your heading this way might as well pick me up and we can all enjoy some cheese steaks and chit chat about chatter1 point
-
Well...the Sandtrooper already has alot of accessories with the pauldron, field pack, extended arsenal etc but I figured having some more wouldn`t hurt And...I´m pretty sure this is a droid we are looking for!! I need a net bag to finish this of so I can carry it in my hand or strapped to the pack on those non-formal troops or when I´m attending as Joe-public As a nice change of pace I won`t say anything, just show how I did - feel free to ask if something is unclear though1 point
-
wow Antonio. Great job so far. Some very nice ideas here. Love the end cap low tech milling method. Following your progress. This one is gonna be interesting and fun. Cheers1 point
-
Got the "Deployed" artwork curtesy of the MEPD to their Police Officers - loving it! This ones background is curtesy of Wook1138 (thanks Greg) - loving that as well - going to make both into Posters1 point
-
Update 09: - armor in the box For those who are wondering, if and how the TK with standard strapping fits into that box, here is how I pack it for a troop. Tetris level 1 Everything fits fine into the 113 liters box, including helmet, boots, blaster and the voice amp. Between some armor parts, there is still space left for food and drinks, emergency repair kit and spare clothes. Because the box is pretty full, you can store it vertically without everything getting mixed up inside - always good when using an elevator. Maybe this helps a few other troopers here in the decision process…1 point
-
Speaking of which my new Praetorian R1 blaster should arrive today. Cant wait to compare.1 point