Leaderboard


Popular Content
Showing content with the highest reputation on 08/30/2018 in all areas
-
I don't have a horse in the race because I cancelled all ANOVOS orders a while ago, but I would highly recommend not making this a 501st thing. If people want to complain, that's their choice, but a large 501st-driven complaint campaign might not have entirely positive effects. There are already a lot of fan campaigns out there ("Fire Rian Johnson", "Remake The Last Jedi", "Fire Kathleen Kennedy", etc) so I think this should be simply customers complaining about the retailer and not come off like yet another sect of fandom who "demands" action. So I would remove references to whitearmor.net and also encourage people to write their own note and keep it more personal. Just my thought on it.5 points
-
I would wager that there are far more people buying TKs from Anovos that are not trooping than are, plenty of people buy them for cosplaying or to put in their mancaves/theater rooms.3 points
-
Better3 points
-
iiiiit's HERE!! Here are the obligatory contents pics. The bucket is reverie-inducing-ly beautiful. And it has one tiny, tiny spot on the nose. I love it. This kit's name is now Smudge, I think. I'm beyond thrilled, but it does all look so, so big for small me... this is gonna take some serious work. But I got it.3 points
-
Time to make some strapping for the posterior plate Center snap is for the belt The belt will "rest" on this ledge so using that as a guide Simply but carefully set the plate up against the belt, you feel when it`s in place Using a pen to mark the ends and glue them down, I only glued a little to begin with for those "just in case-moments" Time to test and all was good, feelt good and then glued the straps in full2 points
-
I'll probably get slapped for saying this but build it to Centurion standards and if you're not finished by Halloween just use white gaffers to tape to hold together whatever's not completed. I mean you're in your neighborhood, no one will know or care how imperfect you may look . You're a Stormtrooper that's awesome enough lol . After Halloween's over continue building it the correct way. Just a thought2 points
-
At the end of the day, one of our primary goals is information transparency. As Tony rightfully noted it's not a detachment's place nor charter to promote or denigrate one maker or another. It is our job to ensure that people have transparent and accurate information from which to make their own choices.2 points
-
As planned my 16qt pot and shin magnets showed up yesterday. I finally got to start working on the armor and... the power goes out. We were having a thunderstorm but it wasn't anything out of the ordinary for a storm and as the surrounding area has buried power lines, outages are extremely rare. Anyway, I wasn't dealing with that. I grabbed my LED lantern, filled up the new pot, manually lit the stove, and got to work. Giving the parts a hot water bath actually turned out to be a lot easier than I thought and my worries of somehow messing up the parts quickly went away. I did the shoulder straps first and then hit the thigh ammo pack: Feeling more acclimated to how the process worked I tackled the shins. Much better. Even velcro wouldn't have a hard time holding these closed now.2 points
-
Yeah, I was planning on making an inside tab to keep the right side closed. Pandatrooper gave me the idea. Thanks!2 points
-
You must be some kind of good luck fairy or something because right after I read that I found this: Snagged it up (last one!) Always wanted Husky bins as they look so darn cool, but shipping out of the US was always insane ($170'ish). So thank you! And yeah looked at the stunt build1 point
-
Congratulations Laura! Welcome to the ranks! Have fun out there!1 point
-
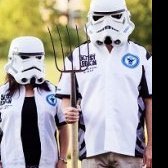
A guy with a stick lol1 point
-
Unfortunately what Anovos or any other armor manufacture does can not be control by the 501st, FISD or any other costume club and/or their detachments. The only control we have is whether to recommend them or not,1 point
-
I don't know about a coordinated 501st cancelation, but I had a very good experience with the inital TK run early 2016 which got me into the 501st. That said I feel like I am being lied to about this one and personally the more it drags on and I have to keep aware of its progress the less I am looking forward to this. Our garrison only has I think 1 FOTK and I have only seen it out once. I am starting some other OT costumes and will cancel this if they delay it again since my frustration with dealing with anovos about this has outweighed the fun I will have putting this together. I will also stop watching/following anovos for any additional new things they come out with.1 point
-
I placed my pre-order way back in 2016 (I think?) and have been waiting patiently. There are other kits out there but they are not as accurate (softer details, hand sculpts etc.) so I've been waiting it out. I fully expect them to delay these kits as they have been sending emails on several products recently - sounds like something happened overseas and they are having to start over here in the USA. I've stopped worrying about it, I have my ANH TK to troop in, when I get an actual shipping notice from ANOVOS I'll go order the rest of the stuff I need and start building, hopefully before Episode IX. And I fully agree with Clint. Be careful though, if a bunch of people start complaining Disney could also just pull their license and then nobody gets anything ever (paranoid maybe, yes, but possible).1 point
-
Congrats! TM makes beautiful kits. Have fun trooping!1 point
-
It's been a while since I posted this thread and I never properly followed up. From my experience, you don't need a primer. I just lightly scuffed up the interior of my bucket with 400 grit sandpaper and then wiped everything out with alcohol. At that point, I made sure to tape off the eyes, edges of the bottom of the helmet and the mouth grill really well with painters tape. I applied a full can of Plastidip, which may be overkill, but it looks and feels great. I applied the first set of coats, about three or so, with about 2 hours between each and then waited about 2 days to let dry before applying the other coats. Apply the very first coat lightly to get a good surface for the other coats to stick. I think total, I applied about 6 or 7 coats. It's going to stink for the first week after application, and DEFINITELY do not put it on your head in that time. The fumes are toxic. I think mine fully dried and no longer smelled after about a week. I troop in my helmet often and it definitely helps to black out your helmet, add a bit of heft and dampen sound to a degree.1 point
-
It`s a lot easier then you`d think, feel free to check my threads1 point
-
As I mentioned earlier I had some plans for the inside and for that I needed some cellfoam After cutting and fitting is was time to remove the backing and I started by peeling a section off and then pushed it up towards the frame Then rolled it from the other end and got hold of the backing Then it was simply a matter of roling it, removing the backing as it Went Magnets are still pretty visible Now they`re not I don`t like the waves of that top part so currently heating it with a hair dryer to try and straighten it some.1 point
-
Thanks man! Hopefully the momentum will pick back up soon [emoji4] Oh man can't I just get approved like this?? Dreading the hand painting [emoji51] Sent from my SM-G950F using Tapatalk1 point
-
Whew, that is comforting. Thank you for letting me know. Looking forward to hearing how things come together when you get them on.1 point
-
Haha! The picture freaked me out a bit too when I referred back to it and even while I was cutting that particular shin down, but it all still seemed to line up the way it was intended. I'll throw the thighs and shins on tonight and check now that the thighs are glued and the shins are shaped!1 point
-
Very wise advice - thanks Clint for adding this.1 point
-
Nice work! Looks great so far. I was looking at the pic of your right shin, and asked myself, "How did we get the line of that shin off center like that?!". Then I remembered that it's an AP kit. Lou was working on his shins a lot at the armor party as well, and I remember that we talked quite a bit about the quirks of those pieces in particular. When you have the shins and thighs on, the seams will all line up in front as well in the back, and that's what counts. We were measuring for things when you had the shins on. But despite knowing this, it's kind of freaking me out a little... please let me know how things are lining up as they're trimmed!!!1 point
-
Great question, canon armor was assembled mostly with elastic for obvious reasons, mobility. For nice tight fitting armor either use nylon or tight elastic. Something to keep in mind any excessive gaps in these areas may be mentioned at the higher levels of approval., so nice and snug is recommended. That said, this is your armor and as Glen mentioned flexibility is key when trooping. I personally use both, most torso connections I use nylon (except for the shoulders), and lower arms are elastic. This allows for a nice tight fitting armor where it needs to be and flexible in those areas.1 point
-
I really wanted to go with Anovos. Actually had the armor in my cart with the card information filled. Then I just let the deadline pass. There are other options out there. Not as many as we would like for FOTK but they exist. About to submit mine in a week or so when I finish a few things. Happy to share what I know over PM. Sent from my iPhone using Tapatalk1 point
-
Here`s some reference for you1 point
-
Nice work trooper, good luck1 point
-
Vamos Trooper que en nada estas sentado en la mesa redonda del FISD con tus hermanos.1 point
-
(My GF apparently logged in on my Tapatalk and I didn’t notice before posting lol) I actually started with magnets, seemed like the cleanest way, but they weren’t strong enough, so I switched to the bra hook fiasco. I was worried about that too, but even with the curve, the rod threads through really easily, the blocks are large enough that they stay lined up Sent from my iPhone using Tapatalk1 point
-
I've been cursed with a long torso and short legs, so I'll try 1/2", but I think I'll have to resort to the 1" trim!1 point
-
Hey Lorelei, cool BBB, looking forward to see the build! I'm right there with you. See you Monday! Jonathan1 point
-
I'll see about adjustments. Thanks! The one thing several people pointed out already is my thighs, recommending that I trim a bit (1" or 1 1/2" off the top to make it easier to walk and climb stairs). I think I'll do that as well.1 point
-
Hey everyone! I'm ready to submit for pre-approval! Here are some of the pictures requested. I'll take some more later today. Thank you to everyone who has helped me on this crazy and awesome journey! Going to finish up the blaster and suit electronics post-haste as well. http:// http:// http:// http:// http:// http:// http://1 point
-
Smudge is amazing, start building! Sent from my iPhone using Tapatalk1 point
-
Let's do this!1 point
-
Thank you Shanester, I am pleased that you like what I have done with my DLT-19. I have a couple more upgrades to do, but it is coming along quite nicely so far. Paul1 point
-
Great!!! Come on!!!1 point
-
Well....when starting to try it on it become clear that more magnets were needed...alot more....I used all 50 in this project, who would have thought I’m going to be a walking magnetic field so Keep your phones and other devices well clear anyway...couldn’t find much quality reference as to how high up to mount it other than this and there’s no way I have that much space to the TD...I think I got the hight close enough though. Mine look more like the toy in terms of spacing or lack there of to the TD And a front pic I shorten the straps to lift the vest up some more and here’s how it turned out, I would like it to sit more flush to the armor but with strapping alone this is as good as I could get it.1 point
-
Incredible what you did in a SDS armor. Terrific work!!! I wait for you in the Olympus of the Centurions!!! Enviado desde mi iPhone utilizando Tapatalk1 point
-
Update… Well Imgur was down yesterday so I could not post pics from Monday until now. Ok so I sanded primed and painted the chamber tubes. Here is a test fit of the bolt already painted with metallic silver. So for the barrel parts and getting the desired milling lines effect. Looks like 80 grit sand paper used on the barrel while it spun on the lathe did the trick. Here are some pictures of the 2.5” conduit tube. And the 3” barrel tube. Barrel parts, I still need another collar, possibly two. As you can imagine, the lines in the tubes are not very deep so I do not know how well they will show once the parts are painted. I may paint them then re-sand them then apply a final paint job to bring them out more. I decided to cut down the outer edge of the cooling fins to allow them to drop inside the 3: barrel pipe. I made the top adjustment knob for the rear sight out of two brass lamp nuts, a small piece of lamp all thread, and a smaller nut that is adhered inside the all thread with PC-7. Once it is cured, I will sand and see this will work. Ok so I have been doing some research and discovered these pictures of aerial Lewis Gun configurations. I am thinking that the tall sight on the Rogue One T-21 is a modified Aerial gun sight. This first picture is the sight I think I will attempt to replicate and modify so that it is not as tall. The rest of the pictures show the vast array of sight options that were used in WWI and WWII. Another thing I am taking into consideration is that most, if not all, the weapons used for Rogue One were built from airsoft guns (E-11, A-180, A-280 CFE, DH-17, DL-44, A-300, MWC-35c, SE-14r, E-11D, DT-29, E-22, etc…), so was there an airsoft Lewis used to make the T-21 and if so, which variant of the Lewis was it? The Uk had Mark I through Mark IV versions with 4 different types of the Mark III. There are other version of the gun as well such as the US versions the M1917 and M1918. To complicate matters, there were other versions made for other countries. Soooo, the version of the gun used would shed some lite in some of these noticed changes from the OT T-21s like how the sling attaches and possibly the sights. Additionally, the configuration of the barrel collars is of interest to me. Different versions of the Lewis had different collars at different points along the barrel shroud. Well that is it for the update. I have DragonCon starting tomorrow so it will most likely be next week before I can make an additional progress on this build. Thanks for the interest.1 point
-
^^^^^^ Yup that right there.1 point
-
Good work! Love the brow trim!1 point
-
Amazing work and great armor!1 point
-
Good job Nacho1 point
-
Good luck brother in arms...1 point
-
Looking good.1 point
-
So.... in anticipation of more disappointment. Does anyone have any leads on anyone else selling these kits? I am ready to move past this. I want to start trooping and enough is enough.1 point
-
The xls is great! We should definitely memorialize it on FISD, right @Ripper_L?1 point
-
Main adjustment for her was the thigh armor...had to cut about 2 inches off of each and re do the return edges. Sent from my SM-G930V using Tapatalk1 point


.thumb.jpg.a76e0f48e0bb54184765760e710c5f96.jpg)