Leaderboard


Popular Content
Showing content with the highest reputation on 07/10/2018 in Posts
-
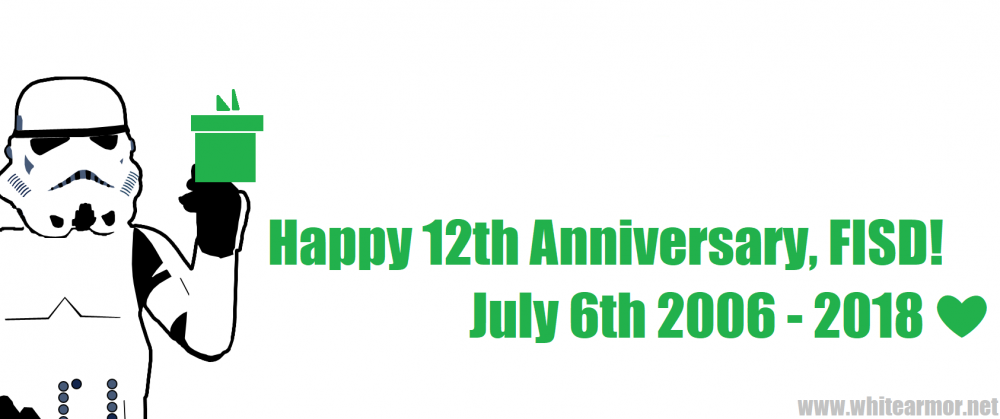
Better late than never but yes, 6th of July marked our 12th anniversary, why not celebrate the whole month. Thanks to Ripper for his quick mock up art work, and here's to the next 12 years "HOOAH"!!!
 4 points
 -
Starsaber25 says he has additional photos he'll post later today, stay tuned3 points
-
Did some more work on the strapping. Glued the snaps in the upper legs And started on the belt to attach my upper legs to: The snap-bands are still quite spaceous, so I have enough space to play around with them.2 points
-
To arms! To arms! -- Part IV The day I've both been anticipating with glee... and dreading: The day I start taking a knife to my pristine, precious -- and expensive -- armor. Believe me, when it comes to expecting the worst to happen I'm Mr. Paranoid. Look up "paranoid" in the dictionary, and you'll see my picture. (Note to self: Ask the dictionary people to update that picture. That must be like, what, at least 10 years old.) But it has to be done, or no Shiny Whitey. So I gritted my teeth, grabbed my knife, and started in with the biceps. To make the straightest cuts possible, and to ensure that I stayed on my cut lines, I placed a sacrificial cutting board -- a square of scrap plywood -- on the edge of my assembly table and clamped the working piece with a metal straightedge on my cut line. One slow, light pass to set the cut. Take your time with this first cut; you don't want to wander off the cut line. Then another pass to deepen the cut a bit; it doesn't take much. Notice here the glove. Do yourself a favor and get a pair of cut-resistant gloves and wear one on your not-knife hand. You don't need one on your working hand, plus I find wearing a glove on my working hand gives me less control of a tool. Give the one you don't use to someone who's different-handed and share the love. After making the scoring cut, unclamp the part and finish the scoring to the ends of the cut line (the clamp pads are covering those spots). With the scoring cut done, just bend the edge of the waste away from the cut line: It'll snap right off. Save the scrap for ABS paste or inner cover strips. Now repeat for the trim on the other side of the part, then do the same thing on both sides of the matching part. The edge should already be straight unless your knife wandered off the cut line a bit, but it will be rough where it snapped, plus there may be a bit of a raised edge on one side where the knife first cut. Smooth all of this out and give yourself perfectly square joining surface by running the cut edge back and forth several times over a fresh sheet of medium sandpaper (120-150 grit). Don't press down so hard on the piece as to deform its shape as you sand, or it won't be straight and square once you relieve the sanding pressure. Just lightly run it back and forth removing any high spots and roughness. Repeat for all cut edges on all the parts. By the way, even though all of this ABS dust would make ABS paste in a matter of seconds if you mix it with acetone, don't be tempted to: There will be grit, sand particles and other contaminants in it. This stuff goes in the trash. OK, let's see how I did on my first-ever, long-procrastinated, paranoia-laden armor cuts. Well, look at that. Am I da Man? Why, yes, I am. Look up "da Man" in the dictionary and you'll see my picture. (It's probably 10 years old, though.) All four parts -- both biceps and both forearms -- came out good, the joints go together smoothly and am every bit as pleased as I am relieved. After all, I'm no longer an ABS-cutting virgin. I've done it, the worst is over and now I can move on apace. As I anticipated and mentioned in the previous post, once taped back up all the parts fit a bit better than they did with all that folded-over plastic making things awkward during fitting and marking; they slip on and off more easily, too. Also, without all that overlapped plastic the roundness of each piece is now easily adjustable temporarily by just squeezing the part while trying it on. Remember that both biceps and one of the arms were oddly shaped in cross-section, and a gentle squeeze was all it took to correct that. Once glued up, a hot-water bath will make these right as rain. I think I might be able to trim a hair more off the wrist ends of the forearms, and possibly shave a tad more off the upper (shoulder) ends of the biceps. Not sure; they all feel pretty good. Doing so will just be a matter of drawing a new cut line on the joint that tightens the openings just a little on the ends that seem roomy, but I'm going to wait for a while before doing so. Garrison Carida has a troop this weekend that, as a cadet, I'm planning to Squire for so I may just take these four parts along to see what some of the guys think. Plenty to do elsewhere on my build in the meantime; I'm thinking it's time to tackle the shins. With that in mind, I'm gonna bring the arms section of my build thread to a close for now and revisit the arms when it's time to start gluing things together. A.J.2 points
-
Hey Sal If possible I would suggest that you reposition the face plate, It looks a bit squeezed...removing the ears and drill out the rivets and then take it down and back as illustrated by arrows will make it look more like reference pic2 points
-
Yes I think I'm going to give it another pass with the dremel when I get home tonight. I want it to sit slightly higher than it is right now. After that, all that's left is to put the two snaps into my butt plate and take some more photos! I need some touch up paint on the helmet and ab buttons as well. I want to define the Vocodor a little better. My friends and I plan to do a little test run wearing the suits this Friday, so hopefully I can identify and address any fit issues after that. Thanks for all the feedback and advice so far! Ill try and post some more photos tonight and tomorrow!2 points
-
Did some more work last night now that the marine grade snaps I ordered came in. I setup the snaps for the shoulders and the back of the ab plate to hold it closed. I've got the connector snaps set for the codpiece, just need to get the strap snaps setup to hold it on. The butt plate will be installed soon and then the thigh straps will have their snaps set for the thighs soon as well. I got a hard hat liner for a welders mask from amazon. It was this one: https://www.amazon.com/gp/product/B004RIFGE6/ref=oh_aui_detailpage_o01_s00?ie=UTF8&psc=1 It sits really well and holds well. I'm going to need to get some additional foam padding to add some distance between the top of the helmet and the top of my head as well as pad the surrounding areas of the top of the helmet around the hard hat liner just for more accurate look when wearing and padding. The shoulder supports hold the shoulder pieces at perfect height. Looking forward to getting my gaskets finished in sizing up and then I can do a full armor test fit. Forgive my sweat soaked shirt, it was easily 100 degrees here and those marine snaps take a lot to get set even with snap pliers.2 points
-
Yeah that’s about as good as you can get. Perfect!2 points
-
When I arrived to the Imperial Factory (work) I decided to change my game-plan and work on the blasters first.....been painting (and sanding) alot of pieces...not finished but started to feel good about myself...but.... .... there’s always more......oh well run out of white paint so I guess that’s a rap for today....(yes I have black paint and pieces that are to be black but choose to ignore that )2 points
-
Well...I sleep way less than I should, just can’t help myself I have a white balaclava so al I have to do is getting some black sunglasses and no one will be the wiser True true2 points
-
1. First/last name: Winston Thompson 2. Future Garrison/Squad/Outpost or local area: Southern California Garrison 3. Armor maker: Anovos 4. Helmet maker: Anovos 5. Cloth belt maker: Home-made 6. Neck seal maker: Stormtrooperundersuit.com 7. Boot maker: Totally Killer (TK) Boots 9. Blaster maker (if applicable): HFX Productions (Hyperfirm – ANH E-11) 10. Gasket maker (if applicable): N/A 11. Height (optional): 6’ 1” 12. Weight (optional): 195lbs 13. TK type (ANH Stunt/Hero. ESB, ROTJ. TFA etc.): ANH Stunt 14. Name(s) of any Trooper(s) who significantly helped with your build: Joseph (@justjoseph63) for answering my plethora of questions, Tony (@ukswrath) for an awesome Anovos guide! Photos: (First set. See 2nd set below) Front Back Right Side Left Side Ab Close-up Helmet Front Helmet Right Helmet Left Helmet Back Extra Photos: TD Top-down View (Because I know the positioning has come up in the past on these posts) E-11 Left E-11 Right Headshot (Blurred because I don't want to include my face until I get approved. Won't blur for actual submission) Action Pose Things I already know will cause concerns or are issues for L2/L3: Helmet Frown needs less return edge between teeth, and maybe slightly less on left eye. Helmet ears are R1 style (ridge around the circular part) Back Plate came a little loose on the left side, creating a gap. (Already fixed, but not until after photos. Will this create basic approval problems if I still use this photo?) Left thigh has gap on back-side at bottom. (trimmed to be a bit larger, haven't yet shimmed the bottom edge/ridge) Left side kidney-to-ab strapping popped when I raised my arm, hence the gap you can see almost covered by the belt. This is not normal, but I know that L3 will want to see a cleaner, more even connection there. Will the current gap cause basic approval problems if I use this photo? The neck seal appears to flare out at the top. This is actually a cover for my upper neck+chin, which I slipped down for the headshot. Not actually a problem, just looks a little bad in this photo. My left shin came undone. Whoops. Will this photo cause basic approval problems? I know some of these points are in the "Well you could've just fixed those as you were taking pictures" category, as well as adjusting the lighting/background. But my "helpers" weren't very helpful... Looking forwards to your feedback! - The Captain 2nd Photo Set! Front Back Right Left1 point
-
Jessie Howe...full suit modification to fit tiny frame I have at least another 4 EIBs to list...standby Kelvin Pham Erik Duane Jesse Terrazas Chris Baker EIB Chris Baker Centurion That makes 5 so far +1 Centurion1 point
-
Alright all here it is. I am asking for your help to let me know if there are any changes needing to be made before I submit for my approval to the GML. Name: Jordan Tindol Garrison: Star Garrison Armor: AM Bucket: AM Cloth Belt: unknown (bought second hand/New) Neck Seal: Darman's Props Boots: TK Boots Blaster: Hyperform Height: 6'1" (186cm) Weight: 215 lbs (98 kg) Type: TK ANH Stunt Super big thank you to every one of you that had a hand in this, both on the forum and in person! ( @justjoseph63 @ukswrath @Pretzel @LTM @TheSwede @Frank75139 @Seansull and everyone else i may forgot to mention (Im sorry))1 point
-
Cant believe how long it has taken me to get here. and what a crazy ride its been. But got 3 costumes approved in less than 2 weeks. that felt great. Now time for EIB and Centurion!1 point
-
Heard back from KB and the helmet molds needed remaking during the next couple of days....just wish he had told me beforhand - would have saved me from popping a few blod vessels in my head….oh well, as the saying goes...all is well that ends well1 point
-
I used screws and nuts to attach the faceplate, so I can pull everything apart fairly easily. I will check where all my drill holes are and see if I can adjust the faceplate without any visible holes. Time for some experimentation! Hopefully I don't end up worse off than before...1 point
-
Aye, that one with the arrow is as good as it gets though. There was a few counters of “it might be a on set repair which as you know we don’t allow for”.1 point
-
The sniper knee plate is the item I am concerned about at the moment, as well as the use of pop rivets in lieu of the split or cap type. The above photo Tony posted of the ammo pack does not appear to be a pop rivet.1 point
-
I’m in favour of the shoulder rivets. There was a thread by CFO when Tim was DCO where I spent a fair while finding evidence. There’s not a lot but there’s a few frames where I believe they are visible. Sadly most shots of TKs are either the wrong angle, too far away or too much motion.1 point
-
1 point
-
Haha, thanks all. and no its been there. but its not as flashy as others. I am waiting to get photos and stuff done to post them up there1 point
-
Ooh, good catch Daniel. That would probably level out the brow issue.1 point
-
The chest looks as if it is sitting right where it should be, (maybe a tad higher if it's comfortable), and a hot water bath wouldn't hurt, especially if you feel that they are strained. As long as you can get at least 3 of the "bumps" and the large bump (no less) glued on to your chest plate you should be fine.1 point
-
Thank you so much.1 point
-
A little gap around the eyes is normal and actually helps with airflow. I also used the existing ear screws. It really wasn't that hard to do. There is a good youtube video out there that shows how to do it - I think is by Mike at Trooperbay. I couldn't find just now, but poke around on google and see what comes up.1 point
-
Updated That forum has a 15 post count minimum. I will look into why we set that number, but in the meantime that's why you can't post.1 point
-
you can contact him via facebook: https://www.facebook.com/jim.tripon1 point
-
Very nice job on your armor. The hyperfirms are notorious for having too much brass color sometimes. You fixed that pretty easily. I see a shiny EIB badge in your future.1 point
-
You nailed it, sir!1 point
-
@justjoseph63 what do you think?1 point
-
Ok I did a little brow trimming this evening and here are the results. The difference is subtle but I think it makes it look a lot better. Any thought?! Sent from my iPhone using Tapatalk1 point
-
Ooooo, delivery from everyone's favorite supplier. Thanks for the silicone hand plates Joseph. Sent from my VK815 using Tapatalk1 point
-
To arms! To arms! -- Part III I think I finally have the forearms and biceps fitted correctly, but it wasn't particularly easy. For those who haven't started your build yet, there's some things you should know about that impede proper fitting. There are lots if things, really, but let me highlight three -- two of which really slowed me down. First, not all armor is the exact shape it's supposed to be. Because of how it's pulled from the molds, cooled, shipped or whatever, even the best armor (and I consider A.M. to be among the best) just doesn't always match the shape of the body part it's supposed to go on. I talked about this earlier with the forearms. The right one was shaped just right once I got it taped up, and it fit the contours of my arm as it should. The left one, not so much. In fact, the left one is way off, and will certainly require a hot water bath to reshape it to my arm. Meanwhile, both biceps were very oddly shaped. Take a look: Taped up, this is what shape they are, which is not how my biceps are shaped. First of all, these are basically very tight vertical ovals. The upper ends (closer to the shoulder) aren't too bad, but the elbow ends of the biceps are both as weird as they can be. Although rounded on the top, it's way too narrow and pinches my arm severely side-to-side. Meanwhile, the underside of my biceps isn't a narrow square -- but that's the shape these are as you can see. It was making fitting/taping so difficult, I pulled them apart and gave each lower section a hot water bath: Taped up again you can see that the top curves are now wider and rounder, closer to the actual shape of my arm. I also got the squareness out of the undersides, rounding those off as well. This fix has made all the difference in getting the taping and fitting correct. A second issue you'll hit when fitting armor is that of necessity you have to overlap the armor since it hasn't been trimmed to size yet, which effectively makes whatever part you're fitting thicker than it will end up. Also because it's not trimmed, the overlap isn't really flat due to return edges, overall shape, etc. There's not a thing you can do about this right now, but keep it in mind as you mark and cut -- even if the fit feels good, it's not quite accurate because of all this extra plastic. This isn't entirely a bad thing, however. When you do trim and that extra overlap is gone, you'll find the part a tad roomier than you thought. Since you should trim slow anyway, taking off less rather than more, this is something that can help act as a safety cushion. The third and final thing to keep in mind, and this has been said a hundred times before but bears repeating, is that it is absolutely imperative that you do any final fitting before cutting with your undersuit on. This makes all the difference. You obviously shouldn't fit armor over jeans or other street clothes, but even over bare skin you won't get the same fit as with your undersuit on. With that in mind, I slipped on mine and checked my last fitting before getting out the knife. Here's the right arm: Feels pretty good. I can tell I'll still need to do some shaping once everything is glued up, as the biceps have less room side-to-side than they do top-to-bottom (they were more or less vertical ovals before the water bath). Plus, I may need to trim the inner edges at the elbow for better mobility there, but I think this works. Meanwhile, here's the left: The fit, I think, is OK. This was the wonky forearm arm, remember, and it will definitely require reshaping once glued up. That's partially why the wrist seems so big -- the end of the forearm is flattened vertically and not horizontally, the way your wrist naturally is. (The other reason the wrist looks large is that I have large hands and need to be able to squeeze them through.) So, what do you experienced armorers think? OK, with everything taped as good as I think it's going to be, it's time to mark the plastic. This is a simple matter of just splitting the difference in the overlap, marking at the midway point on each half of the part. Once untaped, I'll use these marks as my guide to continue the line from end to end, adding a bit of a cushion (maybe, say, 1/4" for safety), and then make my cuts. All that comes next, after a good night's sleep. The prospect of finally beginning the cutting is daunting enough as is, and I certainly want to go forward with a clear mind in the morning. A.J.1 point
-
So here's me outside the local...my snap system gave 8n.so I'm now trying to attach magnets to secure your to chest. Seems to be holding well.i need to trim my thighs..should have done a while ago just wary of cutting. Waiting on pouches from Hong Kong and my fav aunt is 're sewing my Jimi gaskets..hopefully by end of month I'll post my clearance pics .. Sent from my SM-J530F using Tapatalk1 point
-
it will be worked on this evening and will hope to have photos ready to go by tonight1 point
-
Copy Worth mentioning, if you choose to shoot for the higher levels of accuracy with your armor you'll most undoubtedly be requested to update the DLT-19 if it's your primary weapon Don't want you to be surprised later.1 point
-
Here's the Helmet process pics: Post Initial sanding down to 320 grit. These show how I marked the little holes after priming. Those holes I fixed with bondo filler. And the Bondo filler Sanded down the bondo with 320 grit Then primed again: Here's the trimmed leg pieces. I further got the sewing done to fit the gaskets right. Arms still in progress sewing.1 point
-
APPROVED!!! TK-21523 reporting in!!!1 point
-
Interesting work on the magazine. And keen eye with the selector switch.1 point
-
Looks like your aware of all of the issues and fixed most of them already. As for the photo submission. I got shot down for things like pieces not sitting properly. I think all garrisons are different but in mine it had to be perfect. If my thigh rotated I needed a new pic, not just a your good but rotate it when your trooping. Sent from my iPhone using Tapatalk1 point
-
In order to get the most responses, I would suggest this, Jordan: When you click on the photo(s) in your imgur library, choose the "Direct Link" option in the drop down box on the right. This will post them on here so that they can be seen. From the ones I looked at, you have some INSANELY nice connections, brother, (ab/kidney, back/kidney/back/posterior). B E A utiful!1 point
-
So on with the build, I decided the next step would be the greaves - I had to slightly increase the size of these due to having large calves from my days as a cyclist. Next I went to work on Paul Prentice's awesome buckles; cutting out the back and sanding them smooth. } Then I lopped through a section of his straps and bonded in to place. Also due to the support required I went back to using automotive filler rather than wood filler. My local hardware shop had a 30% sale on so not only did I pick up a new batch of Montana Gold Sahara Beige, but also a new paint gun and air compressor! Painting armour is now going to be so much easier! Also my Rebel Art Base shoretrooper trousers arrived - WOOT! Now time for distressing and then weathering! And so did I!1 point
-
Wow can't wait to see your progress in this thread. You're a building machine!1 point
-
Boots arrived today - thanks imperial boots1 point
-
Going all-in, nice. Eyeing that backpack for my build too, let us know how it goes.1 point
-
What else do you do for your 5 year old's Star Wars Lego Birthday Party . . . Pool Noodle Light Sabers !!!!1 point
-
Hiya. Do you have your undersuit yet? Ideally, you want to measure up with your undersuit on so you get the best possible fit of your armour parts. :-)1 point
-
Congrats Carl!1 point
-
Picked up my kit from Walt this morning! This thread is amazing and I can't wait to get home to start! Walt showed us a picture of one of his armor pieces getting run over by multiple bicycles. . . And a car. . .. and it snapped right back into shape! Very excited to get started.1 point