Leaderboard


Popular Content
Showing content with the highest reputation on 06/05/2018 in Posts
-
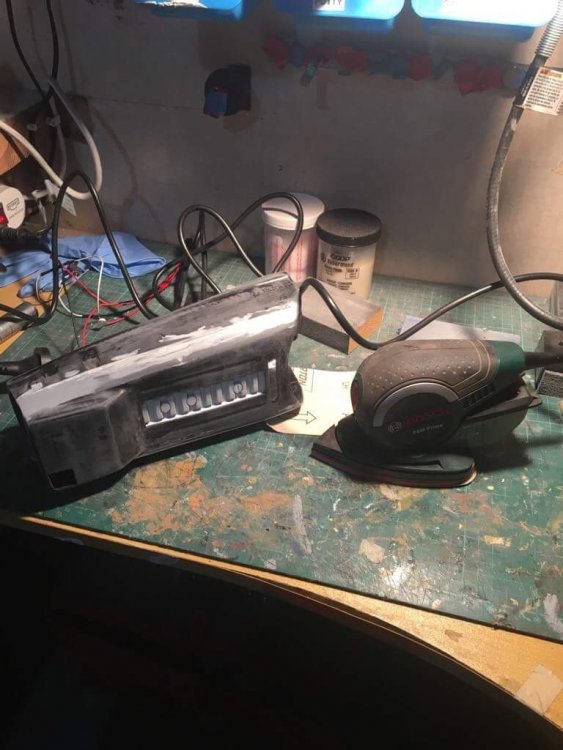
Hello again E-11 Blaster Enthusiasts! I've been on a hiatus this past little while focusing on family, career, and a trip overseas but this past weekend, allowed myself to re-enter my build mindset, especially so as Father's Day is coming up. We gotta give ourselves some allowances once and a while right? Ok - so I got going with a fairly major component of the grip - the selector switch. Doopydoos grip with rotary switch from T-Jay and selector lever. Will install wiring to switch to enable future electronics Tino rotary switch with terminals bent to help with installation into switch housing Bottom plastic ring from Tino rotary switch removed using lexan scissors Plastic ring from bottom of Tino rotary switch removed. Resulting surface smoothed with sandpaper Drum sanding bit and additional bit used to shape depth of hole for rotary switch install Drum dremel bit and spade bit used to create recess for rotary switch housing. Some hollow through to let wires come out the top Carving out channel for rotary switch lever Rotary switch positioned fully inside grip Super happy to see the rotary switch sitting inside the cavity I drilled out, although made abit too wide but nothing a little green stuff can't help fix. I also have some plastic from T-Jay's completion set I will use to close off the open cavity. Although initially apprehensive to begin the task of soldering wires to the rotary switch terminals, I have new found confidence with the task after experimenting with and purchasing the correct solder for the job. I found using lead-based solder works so much better than lead-free solder as it has a lower melting point; enabling me to get the job done accurately and proficiently. Good ventilation is essential in using lead-based ones though; I will have my garage door open. With build momentum on the rise, want to see the BlastFX rumble motor and mode switch installed as well; plans are to get going on these by months end Well...thanks for reading, have a terrific day!3 points
-
Thanks Boys very useful i have seen bits of this over the years but not like this thank you .2 points
-
Hi Colin, welcome and thank you for your EIB application. Let's take a look. CRL and EIB Application Requirements: All the required submission photos have been posted., your armour displays all necessary element as set out in the level 2 CRL, Congratulations on a job well done!. Other-Armor Fit/Assembly: In this section we review observations made by your fellow troopers and ourselves. Some observations may lead to suggestions to improve the overall look of your armor. If any suggestion affects any application, it will be listed separately in the above or below sections. Spectacular build on this ATA armor, sir, and those ab/kidney and back/kidney/posterior connections are amazing! There are a few items I would like to go over to make the overall look even better! The shoulder bell to shoulder bridge connections are spot-on, but they need to sit a bit closer to the biceps. Removing all of the return edge on the bottom will help a lot. (See reference image below). Reference Image Reference image Reference image The top and bottom of your ABS belt could use a little trimming. Not a critical item, of course, but really easy 5 minute fix that will add to your total look,. If you decide to do it, don't forget to re-do the 45 degree angles on the corners. Reference image Centurion Suggestions:In this section we prepare you for Centurion, and if there were any areas of concern they would be discussed here to get you to where you need to be for level 3. Your drop boxes will need to be aligned with the outside edge of your ABS belt. An easy fix!! CRL states: Level three certification (if applicable): Drop boxes are vertically aligned with the end of the ammo belt with minimal gap between belt and box Reference image You will need to change out the screws on your TD, Colin. As stated in the CRL : "Level two certification (if applicable): Clips shall be attached with slotted, pan head style screws, and be black (two per clip)." Reference image Here is a close-up shot of the type used if it helps; An overall outstanding job on this armor, Trooper. You have obviously put a great deal of thought into this build, and it definitely shows. Looking forward to seeing your Centurion submission in the near future!2 points
-
Tapatalk should be working again. -Eric2 points
-
I just got one, smallest I could find here.
 2 points
 -
Thanks Dan! Appreciate it. Centurion application already posted!! Counter numbers ... you know it baby!!!1 point
-
Great job, Colin. Welcome to the ranks. Centurion next? Btw, it’s all about those sexy counter numbers. ;-) lol Dan Sent from my iPhone using Tapatalk1 point
-
I'd specify no paint for the upper right ab snap too, just to be thorough.1 point
-
Over the last few years (and especially the last few weeks) I have noticed that for some reason a lot of EI applicants are painting the rivet on the cod and/or the snaps on the bottom of the posterior plate white. Since this is not permitted for higher levels what does everyone think of the following suggestions, (in green). Not trying to make my job easier, lol, just hoping to save some Troopers the trouble of having to go back and remove it. Posterior armor OPTIONAL Level two certification (if applicable): Two male snaps are present on the lower center tab of the Posterior Armor. Snaps do not need to be functional. Snaps shall not be painted Abdomen Armor Side Rivets are painted white. A single male snap on the top right corner of the ab plate is present. A single split rivet or brad is present on the lower tab of the abdomen armor. Rivet does not need to be functional Lower tab (cod) rivet shall not be painted1 point
-
Thanks so much! Woohoo! And thanks for the amazing feedback!!! I've addressed all the feedback, taken new photos, and all the recommendations are represented in my Centurion application, which can be found here: Again, thanks so much! Super excited!!!1 point
-
Staying under $800 for armor will put you at a price range for any armor and depending on how tall you are you can probably make it work to suit your needs. Since at the age of 15 you can’t be officially 501st yet you could also save money on cheaper boots and maybe homemade soft goods. Does anovos make a shadow? Sent from my iPhone using Tapatalk1 point
-
LOL. That was exactly the pic I was thinking of!1 point
-
Congrats and welcome to EIB!1 point
-
Troopers helping Troopers Hoping to meet you too, heroes comic con in STHLM is coming up in september and shins are looking great1 point
-
Thank You Gentlemen! It's an Honor!! I should have submitted my armor years ago when the strapping was fresh. I think it's time to redo the leg and midsection strapping with fresh elastic.1 point
-
Congrats trooper and welcome to the Centurion Ranks!1 point
-
Alright Carl thank you for your Centurion application. Thank you for correcting your forearms and making the suggested repairs during your EI application. Let's get you approved shall we. CRL and Centurion Application Requirements: All required submission photos are present. Joseph and I would like to welcome you to Centurion. Great job on your AM build Carl Other-Armor Fit/Assembly: Only thing we have to add here is to watch the back to kidney to Back plate, and Kidney to Ab gap. There should be little to no gap. Other than that fantastic job on your build. Time to get out there representing the Empire1 point
-
Yep that works. Word of advice, go to Amazon and buy a pack of 400 grit to finish off areas. If not you'll be lathering your armor with spot putty to get rid of the sanding swirl marks.1 point
-
Hey Colin congratulations, great job1 point
-
Thank you do much Daniel. It mens the world. If we ever meet at an event I would want to offer you a "bæsj" Here are some pictures of the last days work. Front strips are in place. Sniper knee glued in the middle. I will attach the sides tomorrow (allowing for 48 hrs glue drying). And right side back strip is glued on the right shin. So left side back strip and sides of sniper knee tomorrow. Sent fra min SM-G960F via Tapatalk1 point
-
Congrats trooper! Sent from my iPhone using Tapatalk1 point
-
They look complete, look darn good if you ask me Sent from my iPhone using Tapatalk1 point
-
Congratulations trooper1 point
-
Shins complete (I think)1 point
-
Research is the key to any good costume, plenty of build threads here on the forum. Also check out the EIB and Centurion threads, builds taken to the next level, great for looking at particular details. Just remember the golden rule, measure twice and cut once. Looking forward to the progress, good luck.1 point
-
1 point
-
Hello fellow Georgian! You need to reach out to Cricket @Cricket1 point
-
Looking forward to the progress1 point
-
Good to hear you`re still on it but no rush, take the time you need and enjoy the build meaning build when you want to - we`ll be here supporting when you need help/advise1 point
-
Insightful post from Aevith shows the correct position of the selector switch - I will move my switch before final install, thanks for taking the time to post!1 point
-
I don't see why they wouldn't be the same shape, the TFA ones are.1 point
-
I really hope the basic TLJ helmet is the same shape as the premier. All together from them, I'm waiting on an TFA kit, basic TFA helmet, premier neckseal (don't know why I ordered this), white pauldron and a basic TLJ helmet.1 point
-
I got the email this morning like all the others and decided to hit up Anovos support to ask a few questions. Here's the conversation. Apparently I forgot to screenshot this part of the conversation so I'll summarize. I told him that a lot of my friends had cancelled their orders and asked if there was any possibility that those who ordered their kits somewhat later than others could get bumped up in the shipping queue, because of so many people cancelling their orders.1 point
-
Yeah, It's definitely making things look troubling. There are a number of US based suppliers who are selling at cheaper, and even Jim's kits are cheaper with fastest shipping. I will give Anovos this, they look pretty and they've got the Disney/Lucasfilm tag. $900 for a full kit isn't too far off from what I've seen with other vendors and after all is said and done, my armor will be well over that $1100 limit, however I was previously on order with Anovos and my armor upgrades I was getting from other suppliers was putting it above that much. The armor kit alone with helmet is going to cost me cheaper (shipping aside). This also brings to question shipping, I suspect it's probably going to be cheaper within the USA, but yeah. It's interesting to not that. I don't think it's going to be last hurrah though only because their original intention was to offer kits cheap at first and then build price as they became more popular. Problem is I fear that this will drive buyers away as they are currently aware of the flaws with Anovos in shipping times and all. Why pay that much for slow goods and services if you could actually get it faster elsewhere potentially cheaper? I think all vendors deserve support though at their prices, so as long as Anovos get's it's shipping and manufacturing up to par, this will be a reasonable source of armor. It's all contingent on their wait times though.1 point
-
It's because it's an elaborate Ponzi scheme. ;)1 point
-
They raised the OT TK to $900 ($1100 with soft goods) as well, not to mention their $2000 Han Solo ensemble, they've been bumping up prices here and there the past few months. At these new prices they are no longer the best option for a lot of people, but hopefully this is a sign they're getting their business affairs in order and not a 'last hurrah'.1 point
-
Their Shadow Trooper that is now out of future production increased from a $450 kit to $1100 kit as "last hurrah" attempt to sale. So far as I know Liquidation should be cheaper to sale. lol. Hoping this is true and everyone else get's theirs soon. I've refunded and am going through Jim at this point. But still have a helmet on order through Anovos.1 point
-
As did I. It worries me that Anovos seems to be raising prices so substantially recently.1 point
-
I received the same email, glad they are communicating where things are at.1 point
-
I got a couple of emails from them today. Here are the highlights - Armors have been pulled and trimmed Armor ETAs are still the same Pauldron production has been moved to the US, but the ETAs are still the same Pauldron prices are going up for future orders from $119 to $2501 point
-
Hey man, a really good solution for posting photos is: Use Google Photos for free Make sure the photos you upload are all 1280x960 (emailing them to myself, on my Mac, with the "large" setting defaults to that resolution) Create a link for each photo that you can use in forums at https://ctrlq.org/google/photos/ Just literally place the link straight into the forum post. It'll parse it on the fly and embed the photo It's a tiny bit of work, but well worth it. You'll have great EIB submission thread with all your photos hosted. I know there are other solutions, but this is a solid one. Hope it helps!1 point
-
You will need to post separate photos into the thread,.1 point
-
Have not put the pin in it yet to get the flipper positioned correctly but everything looks like it is going to fit1 point
-
Hey Anzo,, i got the Montana Cans ordered and shipped to my house from Blick Art Supply here: https://www.dickblick.com/ . here is a direct link to the product. hope this helps: https://www.dickblick.com/products/montana-gold-acrylic-professional-spray-paints/1 point
-
Update time!! After a lot of smaller units of working on the helmet I have finally managed to put the lid together Had to invite myself to a working session with a friend because he had the necessary rivet gun. So this was our workplace today as it was quite sunny: I decided to just follow Ross' video tutorials step by step as I found them quite easy to follow. So if you ever read this, thanks @Ross8008! First, we put the helmet together with magnets (strength 6 kg). Carried on by putting the first two rivets in: Then I realised that RS give you two extra rivets with the helmet kit, so we put them in where the face and the back of the helmet were quite far apart, mainly to give it more stability and to facilitate screwing on the ears later. Finally we prepared the ears and screws and drilled all the necessary holes, but sadly (well, actually I wasn't sad at all) I got so excited I completely forgot to take pictures, so you'll only get to see the pre-paint finished helmet tomorrow. One single thing that I am not happy with is the pretty big gap at the back of the right ear - what I did was trim the ears along the pencil line which was on the ears when I took them out of the box, and I relied too heavily on this line. So fellow RS builders, don't trust this line, rather check yourselves how much material you can cut off. However, since the RS helmets are really crooked and not perfect at all compared to the sanitized versions I guess it won't be a big deal, and hopefully it won't affect my path to Centurion.. That's it for today, cheers for reading! As promised, pictures of the helmet and the painting process will follow tomorrow Freddy out1 point
-
Hand Plates: The Imperial Boots gloves include velcro on the top of the gloves so I just needed to adhere some velcro on the inside of the plates. GG EZ Knee Plates: Borrowing from Ruthar and Ukswrath I installed the knee plates in like manner.1 point
-
now that i got the guard i can start machining the main parts.... couple weeks1 point
-
So much to post and so little time. I've been plugging along with strapping and plan to provide details of all of that soon. In the meantime however I have a troop next weekend that I'm cramming to finish this by so you only get a couple of teaser photos from my test fitting earlier today. Upper half is mostly done and I'm working on the bottom half now. The little Yoke discrepancy has already been corrected. See you folks on the other side!1 point
-
After a long time out, I've been able to get some help and will again start offering the ANH E11 kits based on castings of my expertly cleaned (thanks @usaeatt2 !!!) parts. Casting is currently ongoing. The kit is all based on a CNC machined 38.1OD Aluminium tube made especially to be as accurate as possible while taking into account this is for replica, and not a real functioning Sterling. My original sales thread is now archived but if you want to see some history: Many molds needed to be redone as they were showing their age and this is still ongoing and I expect to have these finished in the next few weeks. Straight from the casting floor. Once I"m ready I will reopen a new sales thread and let people access a sign up link. Kits will be shipping within 2 weeks of order and orders will go out in waves, so there will be no long waiting list or line between payment and shipment. MTFBWY1 point
-
Just for clarification what you see on these pictures is NOT a vacuum-formed set of armor. It is their 3D model printed (rapid prototyping) at a 1:1 scale to check for fitting issues on an actual human body, etc... in order for them to refine their 3D model if needed, and only then use these updated models to cut (CNC) forming bucks out of aluminum. So what you see in those picture doesn't represent what you'll get in terms of parts. Almost everything such as limbs, detonator, ..., will be break down into several parts.1 point