


gmrhodes13
-
Posts
31,328 -
Joined
-
Last visited
-
Days Won
1,080
Content Type
Profiles
Forums
Gallery
Articles
Everything posted by gmrhodes13
-
File Name: The Mandalorian and Grogu Logo Light Box Designer: Nino Last Update: 21/05/2025 File: https://makerworld.com/en/models/2827854-the-mandalorian-and-grogu-logo-light-box?from=search#profileId-3150424 Description: A light box created using The Mandalorian and Grogu style logo Will require a light strip approx 0.75m to 1m long Images:
-
- 1
-

-
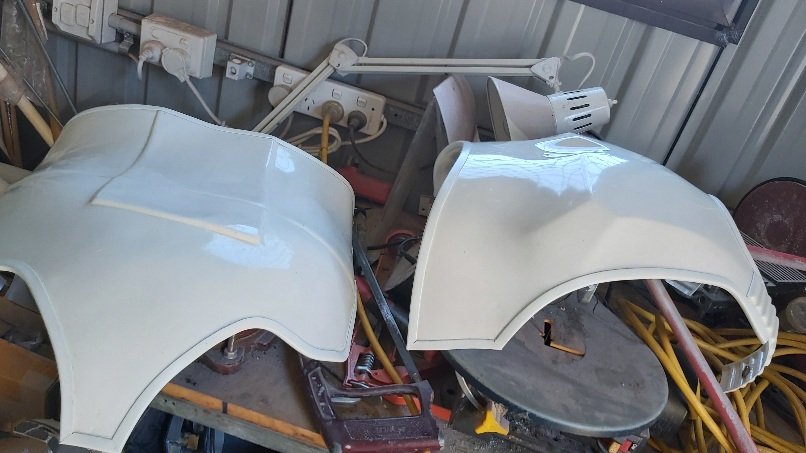
Some heat (hot water bath or heat gun, with practice) and twist the knee plate so it sits a little straighter, but it can common to be on a slant, here's one
-
You may find your local garrison has build days, members come together to work on their own and others armor. You could also become an attaché (once approved) info is in a 501st only area.
-
Nice work
-

My Rubies TK Supreme ROTJ build/mod[*RB]
gmrhodes13 replied to JSmails's topic in ROTJ Build Threads
You have a few things to address Your right rear shin is not closed properly And shins look too big, large space around your legs Thighs should closer outside over inside, your right rear is closing inside over outside. Could also use tighter strapping between backplate and kidney. Same issue on bicep, these also should be glued closed, they don't need to open. Should close outside over inside. All armor pieces should close outside over inside so also check your forearms, just noticed your front of the thighs also are incorrect. Belt is a little high, covering buttons. You could reduce the gap at your elbows, bring forearms up, will give you more gap at the wrists. If you wish to apply for the higher levels you will need other gloves. You have some white showing on your holster, perhaps paint black so it's not as noticeable. A few adjustments and you should be fine. -
Looking good trooper
-
What TK version costume are you making?
-
Hello and welcome aboard, this thread will help you on your journey
-
There's quite a few 3D files available for the e-web https://cults3d.com/en/3d-model/various/e-web-1-1-scale-3d-model-esb-star-wars https://www.etsy.com/au/listing/966396570/e-web-blaster-cannon New England Garrison, 3D printed Empire 3D files https://cults3d.com/en/3d-model/various/e-web-1-1-scale-3d-model-esb-star-wars You may find more info over at Blizzard Force https://www.blizzardforce.com/forum/viewforum.php?f=58&sid=4c63562855ab48a36b7b071f6839e8d7

- 1 reply
-
- 1
-
-
There can be differences in a lot of garrisons, quite common, not all have advisers but that's why we have detachments. Elastic is the best to use as it has some give for movement, nylon and velco can be very restrictive.
-
I eye matched some acrlylic artist paint to match a U trim to armor, it was stark white, I coated in RustOleum gloss clear, it did protect it a bit but any scratches it still comes off. For small areas that would be the cheaper method. For my First Order Stormtrooper I painted it all with automotive acrylic paint, that has stuck really well and I also cleared it. If you don't mind the price the 2K clear paint most use on their Mandalorian builds is as tough as nails, in spray can form you have a button you press to mix the hardener to the paint, down side you have 24 hours to use it or it sets hard in the can. Really depends also on what you are comfortable using as well as what's available and of course price.
-
3D Printed Rogue One TK Build Thread
gmrhodes13 replied to Platinum Lex's topic in Rogue One Build Threads
Hey anything that works I had a droopy feed on one of my machines which would catch when moving long distance, I used some fencing wire wrapped around to hold it higher than the prints. -
Knockerbots AM 5.0 ANH Stunt Build thread
gmrhodes13 replied to Knockerbot's topic in ANH (Stunt and Hero)
Looking forward to seeing your progress -
I've got a large printer so I don't need to cut any files.
-
I've seen that done before. I always add a piece of ABS sheet behind the shoulder straps for strength, they can be a bit flimsy.
-
There is Retr0bright which can return yellowing armor back to white but the issue you have is they are new pieces, I am not even sure if you could color them enough for a Sandy. Painting may be the only option, unless you can fix your broken shoulder, perhaps post up an image or two so we can have a look how bad it is.
-
3D Printed Rogue One TK Build Thread
gmrhodes13 replied to Platinum Lex's topic in Rogue One Build Threads
Looks like it's not printing or blocking on one side -
I use a hard plastic suitcase, and a bag for the helmet. This will give you an idea of packing, I had a fabric suitcase back then but upgraded. Some use the large Stanley boxes, I use one of those for air travel, a lot more secure, although the baggage handlers broke off a wheel. I find these too big for normal trooping, especially if you have to go upstairs. Not my photo Some put a lot of work into their boxes
-
Personally for basic I would think they should be ok, bottom left of this reference shows black side facing out
-
Trooping is definitely different than approval photos, tweaks can definitely help. Not sure if you have elastic from your shoulder bells to biceps, this can help pull them in when moving. Also having the connections further to the front on your shoulder straps elastic can help angle inwards when arms are at rest. Adding velcro or elastic with straps to the inside of the boots and shins can help. Here are just a few mods

-
Please stand by, A.C. will be along in due coarse
-
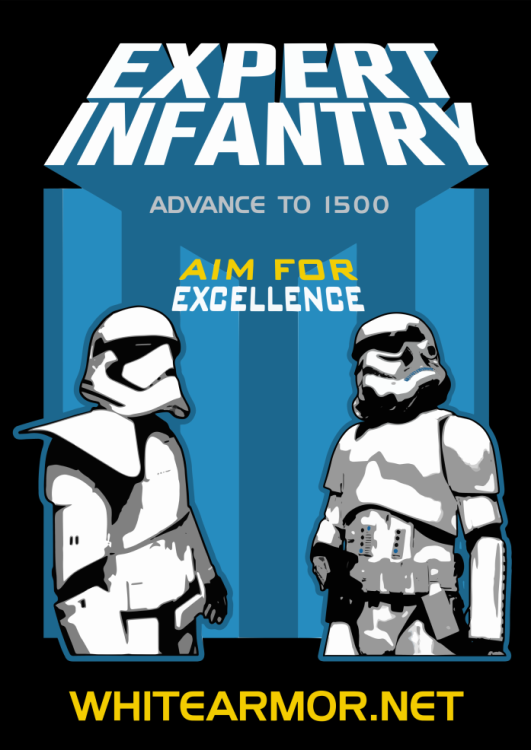
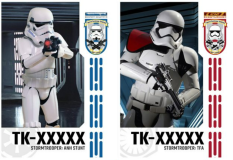
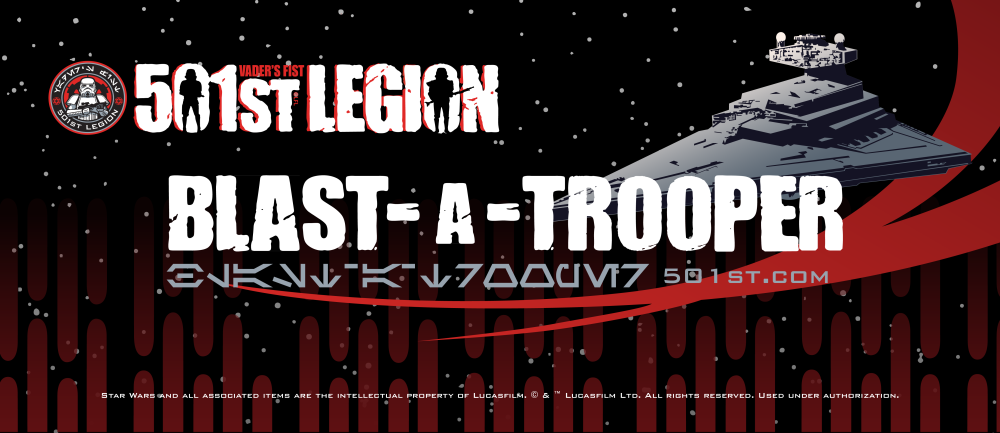
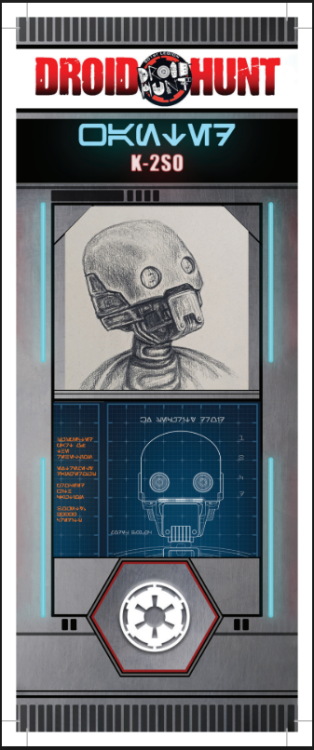
NEW In Memoriam Detachment Leader Merchandise Officer Hall of Fame FISD Meme's Around the Detachment Fundraising INFORMATION & AWARD PROGRAMS FISD Tri-Fold Brochure Common FISD Acronyms and TK Glossary Pre Approval Forum 3D Section Field Exercise Award Imperial Attaché Program Master Armorer Award Fire Teams EIB & Centurion: What do these terms mean? Need Help Ask the Deployment Officers Advance to 1500 Advanced Tactics Awards Social Media Newsletter Editor Staff List 2026 Follow FISD It is with a heavy heart that we must announce that Trooper 12862, Henk Hoomoedt, has passed away. Henk joined the Dutch Garrison in 2013 and was an enthusiastic and warm-hearted man. He helped many troopers with building their costumes and was always there for anyone who needed him. Henk was diagnosed with cancer and even though it gave him a lot of discomfort, he stayed positive for his friends and family to the last moments of his life. He leaves behind his wife Diana and their two children, Michael and Laura. Henk will always remain in our thoughts. Condolences to his garrison, family and friends "Buckets Off" Greetings Troopers, This month has ended on a high! We have just had the May 4th weekend troops, and to really knock up a notch the premiers for The Mandalorian and Grogu. I know a few were lucky enough to attend events for this and I hope you had a great time. The film will be out before the end of the month, so not long before we will know if there are any new CRLs we can be looking forward to. With the new film coming out please remember not all of us will be able to get out right away, so try keep spoilers contained to threads tagged with spoilers. Last month we launched our annual fundraiser. Whilst we got off to a great start we've still got a good way to go. If you have found anything on this site useful please consider a small donation to help us cover the costs Details are here: With Unquestioned Loyalty Chris Pearson TK-10991 "themaninthesuitcase" Detachment Leader Greeting Troopers! Old Business "FISD EIB Coins" I still have a few of the Stepping out Trooper EI coins for new EI members or members the have never bough ten an EI coin. The next EI coin will be a gold version of our 20th Anniversary coin, so if you are eligible to order an EI coin, and you'd prefer not to have an Anniversary edition, grab one of these before they aren't available any longer! In order to buy one, you must have an approved EI costume and you can not have ever bought an EIB coin from any pervious runs. EIB coins are a once and done coin. If you have this one and would prefer one of the older versions, I may have an option for you so please dm me. EIB v11 coin run is still open Pin Run The pin run for Expert Infantry, Centurion and Attaché will begin soon, we are still researching vendors, but we hope to have one selected and get the run open. You can find more information here. 20th Anniversary Coin Run The coin run closed on 9 Feb 2026. We ran into some unforeseen issues with these coins. The actual shipping cost from the vendor to the distribution points was considerably higher than originally quoted, as well as the import taxes (at least in the US). Coins for the UK, EU, Australia, New Zealand and Canada should have all shipped by the time you get your news letter. If you haven't received you coins, please let me know. US Coins will start shipping the week of May 18th. I have unfortunately been out of town for almost 3 weeks for work. By the time the newsletter is published, US/Central and South American members will have been sent an email with the cost for shipping, which will include unfortunately a bit of an extra per coin cost to offset the shipping and import fees. A longer explication can be found on the sales page, but clicking the link below. Updates can be found here. NEW BUSINESS FISD 20th Anniversary Standard Logo Patch run. The patch run opened on May 4th, and will run though June 1st (or until we run out of patches). You can learn more about the patch run here. There is a 2nd 20th Anniversary Coin and Patch that will both be going up for sale after the patch run is complete. So keep an eye on the forum for these items. Also, LFL has stopped approving our merch until after the Mando & Grogu premiere. We have one item that is awaiting approval, and once that is approved, we have a package merch run that we think folks will be excited about. So keep an out for more information on that run as well. And as always, questions, comments, thoughts, suggestions, are welcome, and please feel free to reach out to either Adam or myself! With Unquestioned Loyalty James Silvius TK-12953 "jsilvius" Merchandise & Branding Officer With Unquestioned Loyalty Adam Wolf TK-89400 "Revlimiter" Merchandise & Branding Officer "A stolen SF TIE Fighter crashed here somewhere..." Please welcome TK-64724 to the Stormtrooper Hall of Fame, April 2026! @royal.blue.retta Troop log can be found here. Congrats Retta, what an amazing photoshoot from this event! Those who are interested in seeing more awesome photos, check out the troop log! With Unquestioned Loyalty Jonatan Östling TK-23592 "Nairy" Attaché Ambassador You can find the full meme thread here How to paint button plates Thank you John @JBar TK91213, link here Blast-A-Trooper Finally after many years of asking the Blast A Trooper files have been shared on the legion forum, sharing here for anyone who may have been looking for them https://drive.google.com/drive/folders/1_W3-wBM3Gsp5EN_juDwPSCVYhLcpv_MD Updated image added 05/09/25 https://drive.google.com/file/d/1gUQPWZGdcPmlHIGTgGu0dsV5KyJw28bn/view https://drive.google.com/file/d/1mJdqi4fBeAp5LHPXutWkQrC9vfBmx3MM/view *NOTE* unfortunately for those of you Down Under due to our PLI (public liability insurance) restrictions we are not able to run Blast A Trooper events as the insurer do not allow the firing of projectiles at our members (I know right, foam darts, ouch ) Thread here Droid Hunt From LPRO: "We’re pleased to announce that the Droid Hunt Badge is now officially available in the PR Toolkit for Legion-wide use. Our thanks go to Kimberly Anderson, GCO of Bast Alpha Garrison, and artist Erik Sanders for creating this new format and sharing it with the Legion." Download PDF here Download logo images here Request Edited Signature Banners/Profile pics/Fire Team Logos Troopers! I want to help out the community and the people that doesn't have the time or have the necessary tools or skills to create a cool Signature banner or have the background of your Action Photo removed, or even if you have a request for a certain Profile picture! I don't know how popular this will be, or what requirements I will need, but we will learn as we go and if it turns out to be popular and it gets too much for me - I'm sure that we can find a few more that are willing to help out! Thread here With Unquestioned Loyalty Jonatan Östling TK-23592 "Nairy" Attaché Ambassador Trading Card Archives For those with FISD detachment trading cards please consider sending two to Paul @Daetrin keeper of our detachment archives. Address and more info here With Unquestioned Loyalty Paul Hoeffer TK-8020 "Daetrin" Detachment Founder Keeper of Archives Forum Fundraising It's that time of year where we need to pay our bills. As last year we moved away from the temporary legion hosting and on to our own systems we have an increase in costs to cover. As a stretch goal we have also included a proper backup solution into the costs. Currently this is managed manually and a proper solution would be a great addition. We would like cover the next 14 months of costs if possible. This means next years admin team are not thrown in with suddenly having to run a fundraiser. The idea will be from then onwards it will be 12 months at a time. All members who donate will also have the 2026 supporter banner added to their profile, as with the earlier email costs fundraiser. If you would like to make a donation you can find the fundraiser thread here INFORMATION & AWARD PROGRAMS For a full list of FISD awards programs head here. *Now Available in Swedish* Want to spread the word about FISD?, you can with our FISD Tri-Fold Brochure. Originally these were done in a limited run by the member who created them, but nowadays, we have moved this to a print your own service making them accessible to all countries around the globe. Files are available to all full 501st members on request by contacting our DL Chris @themaninthesuitcase you can find more info here Currently Available languages: English - Spanish - German - Swedish Are you new to the FISD and wondering what the heck all those abbreviations and strange sounding terms mean? To help you @justjoseph63 has started a list of the most commonly used ones that will give you some insight. If you have ANY questions about a particular term that is not listed or suggestions for new ones please contact Joseph. You can find the list here. Pre Approval Forum allows future Troopers the opportunity to submit photos of their completed build to be reviewed by the Staff, Imperial Attaches and others in preparation for forwarding it to their GML for approval. Any and all advice/suggestions given will be specific, constructive, helpful and respectful. Please note that this program will NOT take the place of your local GML, as Detachments are not chartered for costume approval and can not override a GMLs decision, but is instead a peer review program designed to help you look your best and offer guidance and positive feedback. For more information on this program, please visit the link here. Don't forget to visit our 3D section when next surfing the FISD forums, there is plenty of useful information to potentially help you on your next TK adventure. You might be feeling may generous and share with our community a new TK related 3D file and maybe win yourself a 3D contributors award so check out the details below and be part of the in house 3D community. Here is a link to the FISD 3D Contributor program. Don't forget to create a troop log here on FISD and get awarded for your missions and deployment. The list of accomplished troopers keeps growing, so for the official 501st event where you wore your TK! Once you've hit a milestone count, go over to the "Trooper Missons and Deployment -- Post yourget on board and register your troops today Simply start (or update!) your troop log, keep the running total in the title, and post (at least!) a date and name milestones here" thread to request your profile be updated! Simple, right? Also if you would like your troop photos shared on our social media channels please add the following to the first post of your FISD troop log: I give permission for FISD to repost my photos on social media in an appropriate fashion. Award Recipients April - May TK-20188 "mirko_in_action" Mirko - - - - - TK-9572 "Myna Sturnidae" Kimberley - - - - - TK-12045 "Melchiorek" Marek - - - - TK-47826 "CloseTheBlastDoor" Hanson - - - - - TK-54185 "Georgia Haywood" Georgia - - - - - -TK-3260 "g60racer" Brendan - - - - - - You can now also request a letter of commendation, more information available here Are you an approved TK that spends more time on the boards than the average Trooper? Do you enjoy using your knowledge to help out future and existing Troopers? If so, we would like to invite you to join the Imperial Attaché program! Members of the I.A. team are chosen to help out not only those here on the boards, but on a local level as well. Our aim is to have at least one in each and every Garrison, Squad and Outpost in the entire legion to be the eyes and ears of the FISD on a local level. If you are a 501st approved Trooper who wishes to join the ranks of the Attachés, please get in touch with me and/or visit: http://www.whitearmor.net/forum/topic/15252-fisd-attaché-program/ For a complete list of Imperial Attaches, go here. Some of the benefits include: Access to exclusive Attaché merch, including patches. You may also be in the running for an Imperial Attaché Award. An award for those attaché's who have gone above and beyond [minimum 1 year of service]. You can find a list of prior recipients here. Imperial Attaché Outstanding Achievement Award Is the Attaché position vacant for your Squad/Garrison/Outpost? Interested in becoming an Attaché? Contact me by PM or apply in the thread below: With Unquestioned Loyalty Jonatan Östling TK-23592 "Nairy" Attaché Ambassador Master Armorer Program FISD has many wonderful programs to help members build and submit costumes for our detachment, whether it be a classic Stormtrooper, a First Order Stormtrooper, or even one of the new Imperial Armored Commandos. While our Expect Infantry and Centurion programs get most of the attention, FISD staff wants to relaunch the Armorer Program (Currently called the Master Armorer Program). What is the Armorer Program you ask? Well, it is a program designed to recognize those troopers that go above and beyond to assist themselves and others in getting costumes built, submitted, and approved. One of the goals of all the detachments in the 501st Legion is to help members build and submit costumes that meet and hopefully exceed the minimum requirements of the Legion’s CRLs. Currently the Master Armorer program has the requirement of helping a minimum of 5 members achieve Expert Infantry status. The member must have spent at least 30min physically helping another member with cutting, gluing, sizing, etc, just because they want to help (no money exchanged). There are 3 levels of the award, FISD Armorer, FISD Senior Armorer and FISD Master Armorer. The new program will add a 4th level at the beginning called the Apprentice Armorer. The point scale will be as follows. 5 points - Apprentice Armorer 10 points - Armorer 20 points - Senior Armorer 30 points - Master Armorer If you love building armorer and love helping fellow members get their costumes built, then this is the program you’ve been searching for. We look forward to awarding more members with this award as we know how much we all love Troopers helping Troopers. More information can be found here Armorer Rocker Patches Rocker patches are now available for the Armorer Program, there is currently just the one patch, and members are eligible to receive two of them once they reach Level 2, "Armorer". More information can be found here Want to setup a "Fire Team? the Fire Team program is completely optional, and is intended to help form a common identity and spirit of camaraderie among 501st Legion Stormtroopers in the same geographic area/garrison that troop together. Fire Teams are not officially recognized by the 501st Legion nor the FISD, although they will be able to access a Fire Team sub-forum on the detachment website. You can find more information here. For those interested here is the original discussion on the creation of Fire teams here With Unquestioned Loyalty Mark Ryner TK-4584 "captsafe66" Fire Team Relations So what exactly are and levels? These programs were designed for those who choose to take their armor above and beyond the minimum requirements for basic 501st Legion approval. It gives you the chance to show a level of dedication and pride that takes your armor closer to being as "screen accurate" as possible, without as much extra work as you may realize! You can find more information on the programs here. For those unaware it is possible to achieve extra awards at Expert Infantry for each additional version costume you have approved, additional awards are not issued with another Expert Infantry number (you are only issued 1 Expert Infantry number) but you will see a star above the award on your profile and the thread title will show [APPROVED] 2nd, [APPROVED] 3rd, [APPROVED] 4th and so on. Multiple EIB award recipients and info here NOTE If you are approved with a "2nd Version" of a particular costume that you are already approved with you do not receive an additional award, there is only 1 award issued for each costume version ie: only 1 x Hero, 1 x Stunt, 1 x HWT, 1 x ESB, 1 x TFA and so on. If you have a second/additional version costume approved you will see "2nd Version" and [APPROVED] added to the thread title, no additional profile stars (more info on profile awards here) For those of you who have a particular issue (or issues) before or after submitting for Expert Infantry / Centurion level approval, in order to get you an answer faster you can now privately contact the entire Deployment Officer team at one time! Questions about fitting, repairs, CRL standards/requirements or anything pertaining to reaching Levels 2 and 3 are not only welcomed, but encouraged. Keep in mind that no question is too small, and that your queries will only be seen by the D.O. Staff. We are here to help in any way we can, so please feel free to send us a message by clicking on this link: @Deployment Officer Team and we will get back to you A.S.A.P.! More info here This area lists all those who have gone above and beyond basic approval toward screen accuracy and obtained EIB or Centurion or both. FOR April - May the 1st Imperial Stormtrooper Detachment would like to congratulate the following. Expert Infantry Badge Award: None this month - - - - Request your free EIB certificate here. You can find a list of multiple award recipients here. Multiple EIB award info here Expert Infantry Honor Gallery here --------------------------------------------------------------- Centurion Badge Award: None this month - - - - Request your free Centurion certificate here. You can find a list of multiple award recipients here. As always if you have interesting story or troop please share via DM and it may get added to the next months newsletter. With Unquestioned Loyalty Glen "Q" Rhodes TK-85421 "gmrhodes13" PRO, Newsletter Detachment Leader (DL) Chris Pearson (themaninthesuitcase) TK-10911 Detachment Executive Officer (DXO) Andrew Franke (Sly11) TK-11469 Chief Deployment Officer (DCA) Mario Reyes (TKSpartan) TK-48117 Deployment Officer (DCA) José Mª Sánchez (Chemi) TK-30173 Deployment Officer (DCA) Gerald J Gyorffy (Doggydoc) TK-96004 Provost Marshall (DCoG) Steven Sheades (starsaber25) TK-10466 Provost Marshall (DCoG) Caleb Mask (MaskedVengeance) TK-73692 Provost Marshall (DCoG) Arthur Wong (giskard8) TK-39093 FISD Diplomat (DPRO) Tony Jobe (ukswrath) TK-10116 FISD Diplomat (DPRO) Tim Waychoff (Dark PMF) TK-51878 FISD Diplomat (DPRO) Christoph (Danny) Lauber (Ripper_L) TK-55550 Fire Team Relations (DCoG ) Mark Ryner (captsafe66) TK-4584 Merchandise and Brand Officer (DMBO) James Silvius (jsilvius) TK-12953 Merchandise and Brand Officer (DMBO) Adam Wolf (Revlimiter) TK-89400 Trading Card Specialist (DPRO) Eric Ho (Hoda) TK-77520 Newsletter Publisher (DPRO) Glen Rhodes (gmrhodes13) TK-85421 Social Media Relations (DPRO) Luca Hahn (Morgi) TK-66744 Social Media Relations (DPRO) Torben Sobierey (Tall_Trooper) TK-19525 Content Editor Support (DPRO) Jeff Salt (Wingnut65) TK-50297 Attaché Ambassador (DPRO) Jonatan Östling (Nairy) TK-23592 Personnel Officer (DPER) AC (NoVATie) TK-5597 Systems Administrator (DWM) Mathias Rodstedt (Locitus) TK-2959 Systems Administrator (DWM) Eric Brager (Darth Aloha) TK-9674 Systems Administrator/Detachment Founder (DF) Paul Hoeffer (Daetrin) TK-8020 Imperial Propaganda Machine (IPM) Brian Long (Tilheyra) TK-47933 Imperial Propaganda Machine (IPM) Sally Smith (astrosally) TK-76924 Facebook: www.facebook.com/whitearmor - - - Facebook Group: 1st Imperial Stormtrooper Detachment (FISD) Official Twitter: www.twitter.com/FISD501st or @FISD501st - - - Instagram: www.instagram.com/fisd501st Discord: https://discord.gg/FmQZ2qW8gx - - - Bluesky: https://bsky.app/profile/fisd501st.bsky.social On behalf of the 1st Imperial Stormtrooper Detachment Command Staff and the Imperial Propaganda Department


-
- 5
-
-
My Rubies TK Supreme ROTJ build/mod[*RB]
gmrhodes13 replied to JSmails's topic in ROTJ Build Threads
Apologise for some reason I thought you where building ANH -
Hello and welcome to the forum, you may find this thread useful on your journey
-
My Rubies TK Supreme ROTJ build/mod[*RB]
gmrhodes13 replied to JSmails's topic in ROTJ Build Threads
That's a large gap between the end caps and the control panel, really up to your GML if he/she/they will approved as is. Control panel round section should be recessed, may also be an issue for your GML.


