Leaderboard


Popular Content
Showing content with the highest reputation on 02/28/2024 in all areas
-
Just ordered my hard armor! Can’t wait for it to come in and start building! Gotta keep reading and checking out build pages4 points
-
I've had some parts drip, drip, drippin' over the last couple weeks... more to come soon.2 points
-
Life is much more hectic than anticipated, but some things have fallen into place! The snaps have been glued to the abdominal and the kidney pieces: My Crowprops boots also arrived!!!!!!!! Looks like I need to learn how to walk in heels... It may be a bit before I can make further progress. I have a few really full work days and a busy week of travel ahead of me. But I really want to return to this build soon! I can't recall if I have mentioned, but my goal is to have the armor (except the helmet) complete by a local con at the end of April. That still seems like a reasonable goal at this point. Building the helmet and seeking approval will come afterward.2 points
-
[55] Graeme's Run - Katy2 points
-
Jeez James! Hope your finger is better soon. I swear sweat and blood goes into our TK builds.1 point
-
@revlimiter thanks for the nice feedback! Yes I made them available and asked that they are added to the vendor list. The STL or 3D printed version is available on Esty in the Millenniummaker shop. https://www.etsy.com/ca/shop/MillenniumMaker?ref=shop_sugg_market1 point
-
Admittedly I'm on very strong pain meds at this moment. But... were the print files shared somewhere or purchasable? I don't see links in this thread or the Pathfinders one. It's a lovely blaster.1 point
-
oh Yes! , I'm sorry I didn't update the "mm" to cm1 point
-
You can leave 0.75mm of ridge (the cover strip is about 1.5cm) and make the fit adjustment later by trimming the curved side.1 point
-
Excellent pick up - thanks I noted the 12mm from a uTube press and later hunted down and found on Whitearmour a thread where someone kindly listed the strip sizes for all cover strips. TBF it was that thread which gave me the confidence to soldier on.1 point
-
I've always had to leave jagged edges of excess material when trying to get my clippers around curves. I usually go back and cut away almost all of the remaining excess with an Xacto knife and then sand tiny bit of remaining excess away. That is a bit more time consuming than what others do, so many here will recommend a Dremel for that. The cover strips for the biceps are commonly the same width as the forearm cover strips, so 15mm would be the typical width for both. I say that as I see your notes indicate 12mm for the bicep cover strips.1 point
-
I started on the forearms next, still mainly following @ukswrath's build thread. There are a few differences between the WTF suit and the others, such as the back edge on the outer pieces just being rounded versus having an edge. Left and right forearms are distinct from each other as well: According to Walt, the curved side is the one that gets cut. But I think both edges will need to be cut to some extent, because the ridged side has some sloppiness to it from the vacu-form. So I cut off a bit of that just to get a clean edge, but how much of the ridged side can/should be cut?1 point
-
Thanks! Even *I* forgot! I had to go back and look in a slight panic1 point
-
Shoulder Bells, Biceps and Arms: While recuperating from minor surgery, I discovered RS Props, U-Tube videos, I think I've made some good progress - from initial trimming to a point where I can consider cover strips and final sanding and shaping - welcome your thought before I start sticking things together. These bits are hard to cut this way... apparently a Dremel is way easier. I found measuring and ruling the marker line quite effective with good matches when placing the two halves together. Once I found the overall measurements on the top and bottom parts of each (based on a 14 inch bicep) I was away. Trusty sawhorse and a nice thick straight piece of aluminum, plus a sharp knife with clamps, became my best friends. So this is where I'm at today. On the to do list, 1. Rough sanding 2. Remove pencil marks 3. Cut, sand and apply side strips 4. Dremmel / Hamd sand - take out the returns, rough edges etc Shoulder bells I trimmed some time ago - Biceps and forearms fit nicely. Will need to see where the shoulder bells fit into the overall layout. May need an extra trim, though will wait until I've got the chest plates underway. Welcome your thoughts.1 point
-
Posting a build thread is the best way to get feedback on how your build is progressing, at most times someone can chime in if you have questions or if they notice something odd with your build Here's the link to our gallery area One other thing to look at is the various types of TK, with swapping out just a few pieces (and a helmet) you can transfor from ANH stunt to hero and also ESB, here is a sheet on the differences between them And don't forget to follow the CRL's (costume reference library) base legion requirements and higher requirements Expert Infantry and Centurion, much easier to build from the get go if you wish to apply to those levels at a later stage.1 point
-
Addressed page 21 point
-
Would love to see Kanan in a TK! Can you get Ezra involved too?!1 point
-
Thank you all for the quick response. I know it’s an unconventional request but you all have helped me a ton. I was hitting my head against a wall since everything I found was from like 2017.1 point
-
Looks great!1 point
-
Here's the pics of the finished blaster rifle! from 3D print, sanding/bondo/primer/black basecoat/dark aluminum airbrush / black airbrush and scratching/weathering. The few metallic parts are graphite finished. Only M38 scope is brass finished as original part wear out coloring. I also took a picture with my current Sith trooper armor, while the other one is far from finished to give a feel of the size and handling. [url=https://ibb.co/yBNHrSn][/url] [url=https://ibb.co/yBNHrSn][/url] [url=https://ibb.co/d6RGjjk][/url] [url=https://ibb.co/KN4ccGK][/url] [url=https://ibb.co/VHpMqZ5][/url]1 point
-
Congratulations Chris! The first troop is always something you'll fondly remember!1 point
-
Troop 1/21 point
-
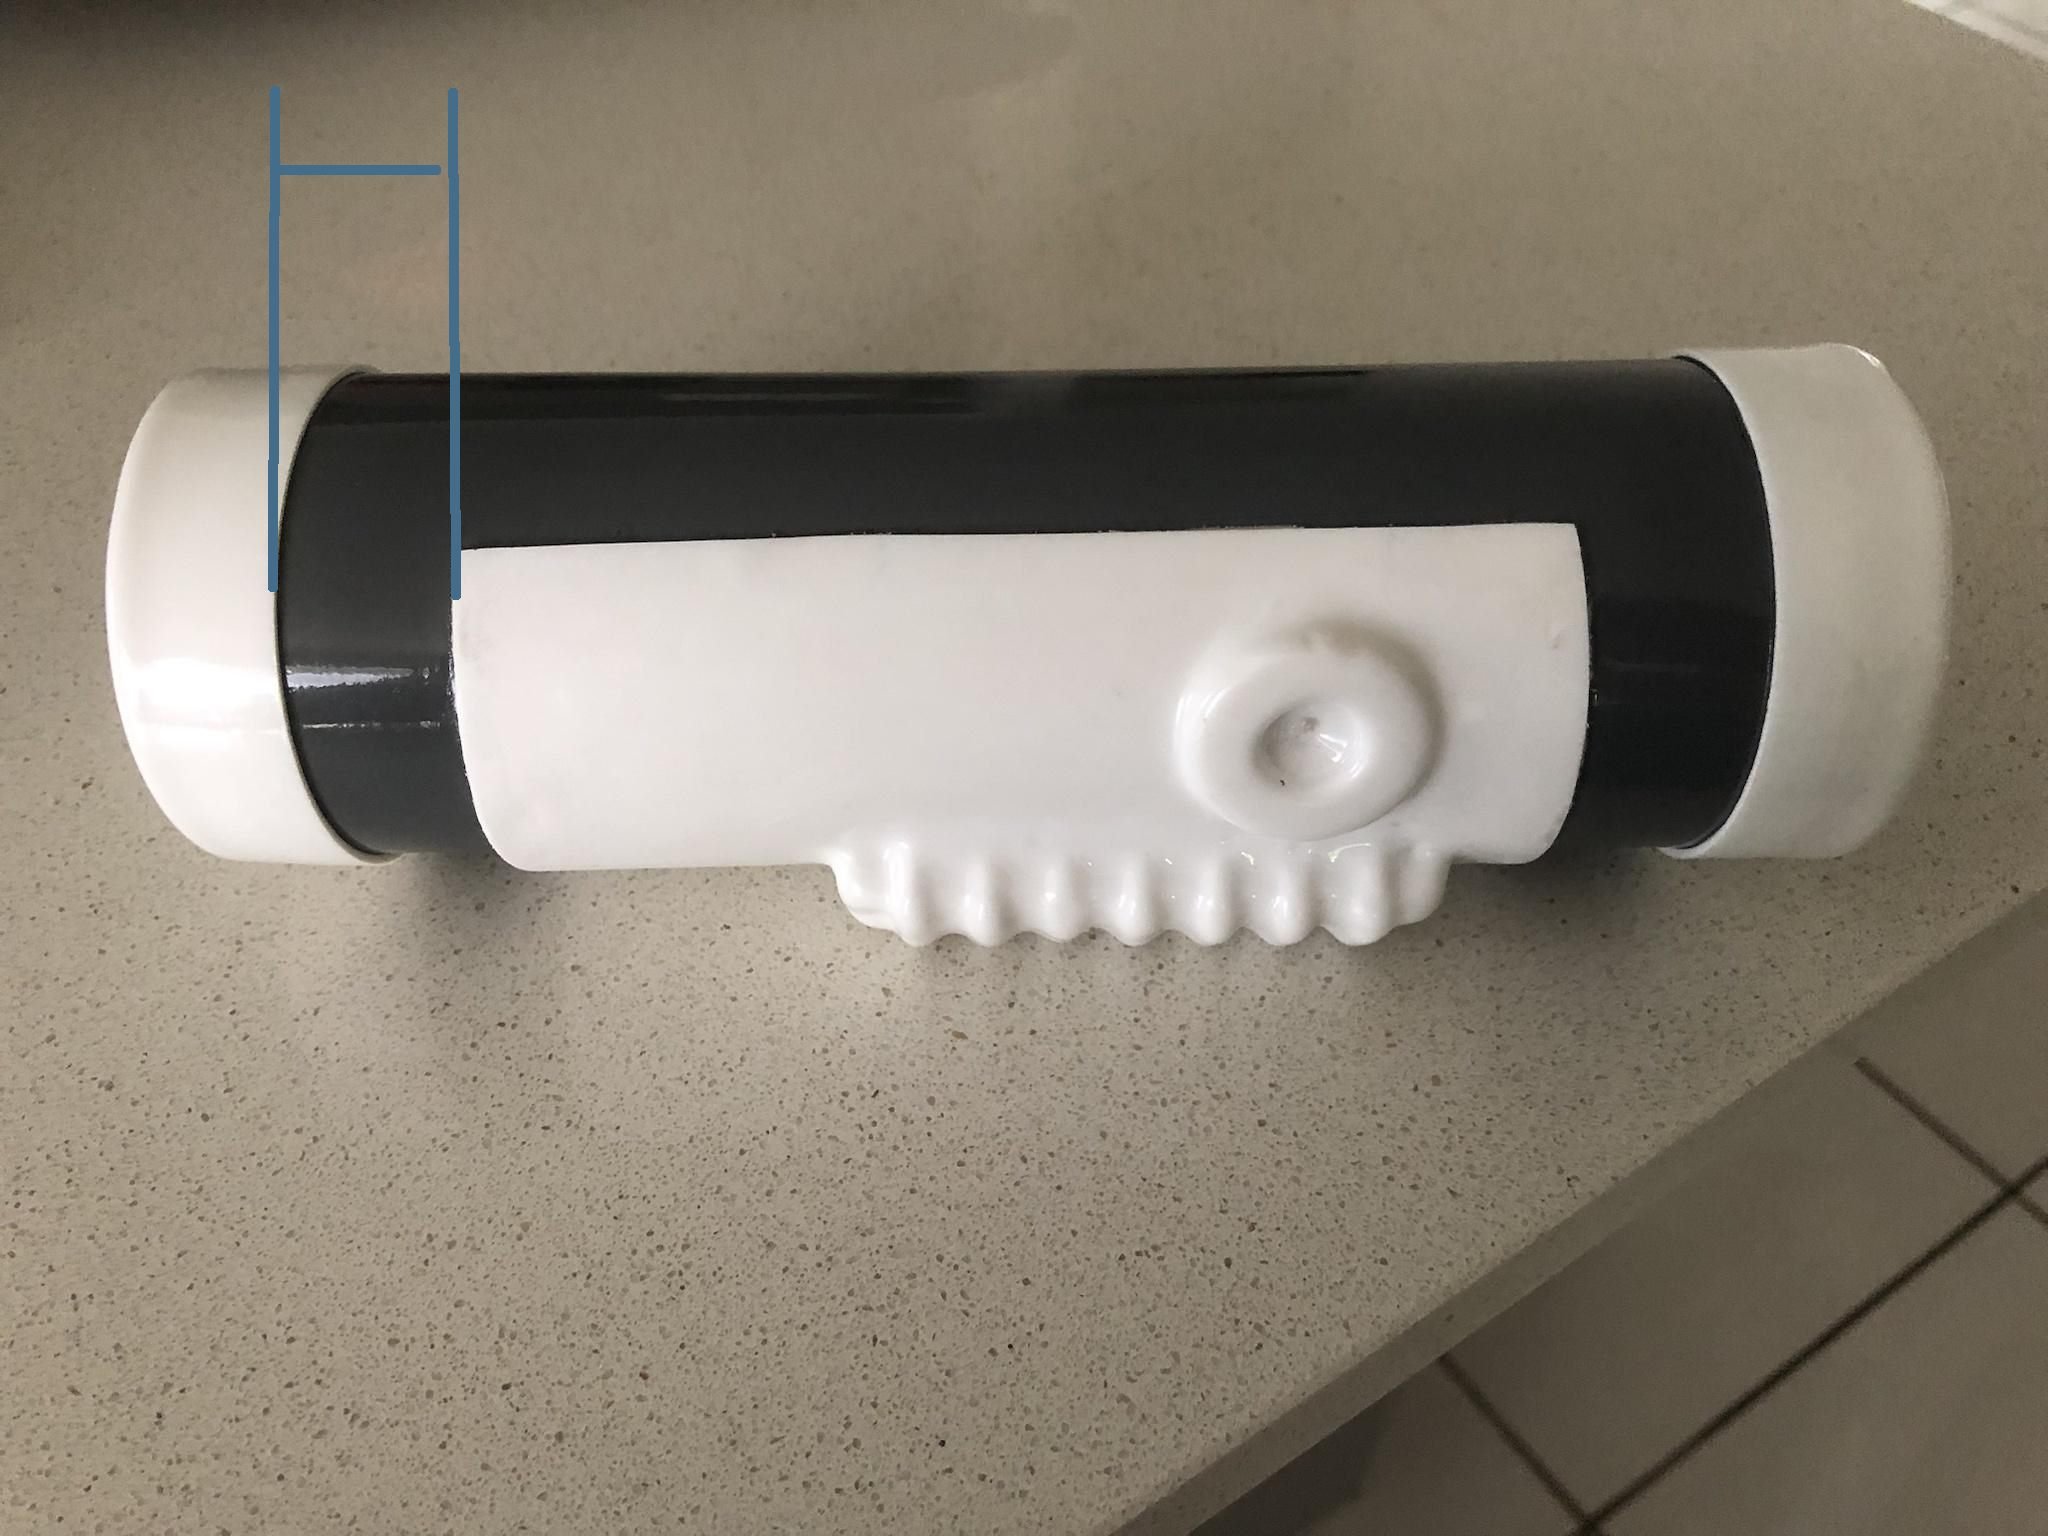
Looks like a slightly bigger gap between the end plates and control panel. A few of the makers use a smaller pipe than others which can make this gap appear larger. Note the 12mm gap mentioned in this reference

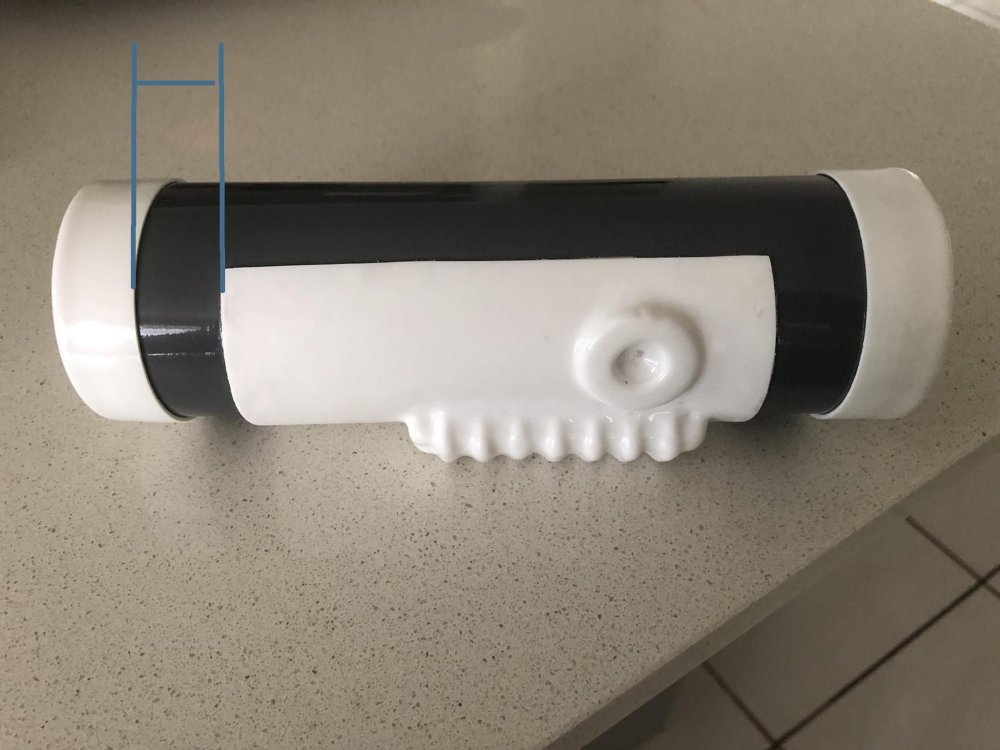 1 point
 -
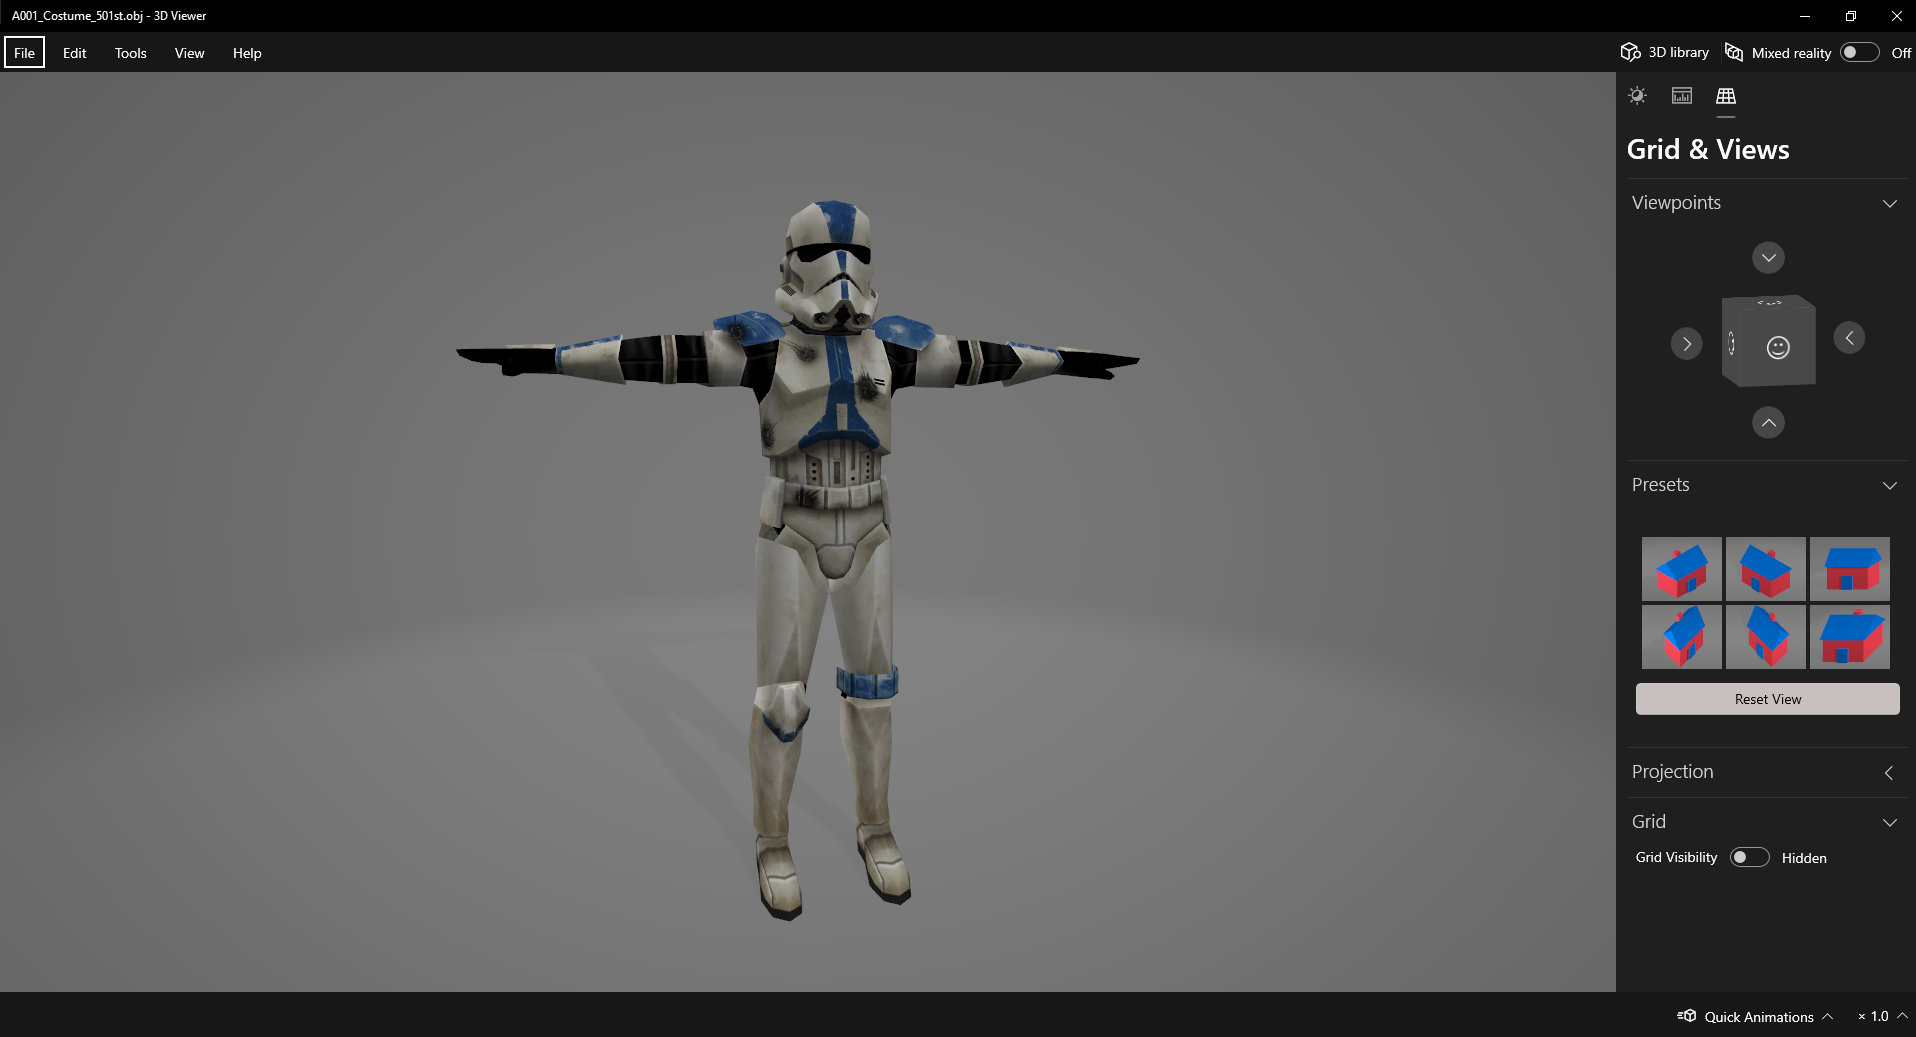
so I just found a full model of the CloneStorm Trooper armor on The Model Resource the model is from the Wii https://www.models-resource.com/wii/starwarstheforceunleashed/model/61071/ I've been trying to find one for so long them the answer was right under my nose I just simply type in Triton Squad
 1 point
 -
Thank you again! You've been extremely helpful, as is the rest of the detachment forum. Can't imagine how we would've done all of these things without everyone here <3 The store did print them, but they are a bit more straight instead of having that handpainted look.* I do hope it's going to be fine, but i found nothing stating otherwise on the Legacy FemTK CRL. So i guess i'll be good. *Edit: Worded it kinda dumb. They do have the curved aspect going on, they are not just straight rectangles. They just all look pretty much alike instead of slightly tilted and more varied as in the linked thread Took some more full pictures (only the thermal det lacks currently) and later on will visit a local nerd store to derp around in uniform and garner some attention for the place. Pardon the lack of updates! I got my foster son over, but no worries he already is on the right track haha. It runs in the family.1 point