

Sithtrooper02
-
Posts
76 -
Joined
-
Last visited
1 Follower
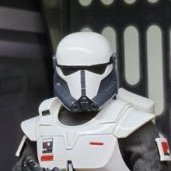
About Sithtrooper02

Recent Profile Visitors
7,264 profile views


.thumb.jpg.dba4f732ba6f5ac0f7702c5484e3bd8b.jpg)
-

Hereticdaves Imperial Armored Commando Build
Sithtrooper02 replied to hereticdave's topic in Imperial Commando Build Threads
I haven’t look with GA design but Big Fred (or mine) is basically just one piece for the front but with obvious separated sections fixed together. Large industrial grade velcros on the shoulders are sufficient to hold the back and jetpack in place (you could also anchor it to your suspenders if needed. For the jetpack, I would recommend to make it as light as possible with 2 walls and minimal/ lightning infill, otherwise you’ll end up with a heavy jetpack that will pull the front armor backwards. You don’t want a hollow jetpack STL design which seem la cool to place light and batteries inside but will double the printed weight. -
Hereticdaves Imperial Armored Commando Build
Sithtrooper02 replied to hereticdave's topic in Imperial Commando Build Threads
Hi, From my screenshot reviews I was not able to see any joint over the shoulders. The most accurate way I have found is to have the top portion in one piece. The screen grab above is most likely some white tape to hide the mic that I have found at sevral places :) The back section attaches to the front just like it is done on my armor in the CRL. To keep the back and front armor aligned, I used velcros, as it still allows for some motion and nothing is apparent on surface. In the reference pictures you will find stunt that have rivets on the top side, but the heroes do not have those. Is GA going to meet the level 1 approval will be up your GML to decide. Nobody has this armor approved yet. It has several inaccuracies, but we tried to have the CRL flexible enough on level 1 to allow an armor that would be close enough to the reference. As Glen mentioned, I used Big Fred as a starting point, but ended up modifying/ redrawing most of the armor, including the chest to several places for accuracy. Hopefully I will convince my girlfriend to finish up all the pieces of the armor to supply the full kit that is level 3 approvable. Several pieces are already available and you can ping me if you want additional mods. Cheers, -
Gauntlet and shin armor latching?
Sithtrooper02 replied to DrMatt's topic in Imperial Commando Build Threads
I have used pins on my imperial commando build gauntlets and one piece construction with magnets for the shins to be screen accurate. PM me if you want the details and STLs of those. -
Here are some additional details with your corrections added: Baton · The baton has a metallic color main rectangular body which terminates with a circular shape · A handle is attached at 90 degree to the main rectangular body. The handle is metallic color and has multiple black ribs · 4 black raised black grips are present on the main rectangular body towards the electrodes · There are 3 electrodes mounted to a central cylinder, each containing 2 mounts. The mount closest to the tip has an additional stabiliser leg. · The electrodes are evenly spaced at 120 degrees around the central cylinder. · Each shaped section is black in color, has 3 facets and multiple raised metallic in color bands and dots · The section where the handle attaches to the main body in raised and black in color · The handle attaches to the main body with a U-shape section, matching an identical section on top where the push-button is located. · The rear section of the main body is raised and black color. The raised section has 4 recessed oblong shapes on each side and multiple raised rectangular shapes on the top · There are two metallic color u-shapes wrapping around the rear section on top and bottom, The top u-shape has holes that wrap around the raised black shapes from the main body. Both u-shapes have side angles OPTIONAL Level three certification (if applicable): · There is a push button above the handle on the main body to switch on/off the electrodes · The electrodes have working lights emitting on the internal sides · The riot shield and baton must both be present. The jetpack must not be worn when baton and shield are present Riot shield · The shield has a metallic color and is rectangular in shape, with a beveled edge all the way around · There is a triangular lens near the top of the shield that is clear with black seal all around · There are four pointed greeblies, one at each corner of the flat area of the outward facing side of the shield. The greeblies have multiples steps and have an inward rounded center · The four corners of the shield are raised near the center and merging down to the same level as the rest of the shield on the periphery. Those corners are black in color · The backside is dark grey in color and is hollow to create appearance of a thin wall shield · The backside shape is matching the frontside of the shield · On the back side, there is: o A large lip overhanging the periphery of the shield and is black in color o A black large seal around the triangular lens o A u-shape rounded handle centered in height o A black strap centered in height OPTIONAL Level three certification (if applicable): · Riot shield and riot baton must both be present. · jetpack shall not be worn when baton and shield are present. image showing the u-shape rounded shape handle
-
Thanks Andrew for corrections and clarifications. I wasn’t sure how much details I should put in the text and omitted several ones like the rear grip details on the baton same for the handle and strap on the interior of the shield, etc… I can certainly add them for additional clarity, as we have some good reference pictures to support. NB The Hot toys has some errors vs the movie references. The design is based on the movie when there were discrepancies
-
Here is a proposal for the baton and riot shield accessories CRL: Baton · The baton has a metallic color main rectangular body which terminates with a circular shape. · A handle is attached at 90 degree to the main rectangular body. The handle is metallic color and has multiple black ribs · 4 black raised black grips are present on the main rectangular body towards the electrodes · The electrode portion comprises 3 shaped sections linked to a central cylinder by two links and are 120 degrees apart · Each shaped section is black in color, has 3 facets and multiple raised metallic color bands and dots OPTIONAL Level three certification (if applicable): · There is a push button above the handle on the main body to switch on/off the electrodes · The electrodes have working lights emitting on the internal sides · The riot shield and baton must both be present. The jetpack must not be worn when baton and shield are present Riot shield · The shield has a metallic color and is rectangular in shape, with a beveled edge all the way around · The four corners of the shield are raised and are black color · There is a triangular lens near the top of the shield that is clear with black seal all around · There are four pointed greeblies, one at each corner of the flat area of the outward facing side of the shield. OPTIONAL Level three certification (if applicable): · Riot shield and riot baton must both be present. · jetpack shall not be worn with riot baton/riot shield combination. Below are the reference pictures along with pictures from the shield and baton realized:
-
Baton, Shield, Blasters, Jetpack References
Sithtrooper02 replied to gmrhodes13's topic in Weapons Imperial Commando
Yes, I have started doing so, I just got caught it other things, I will do the text shortly for CRL submission -
Baton, Shield, Blasters, Jetpack References
Sithtrooper02 replied to gmrhodes13's topic in Weapons Imperial Commando
Here is the shield, this one is big, but not too heavy about 2.5-3lbs, I made it as light as possible. So this should complete the IAC weapons -
Baton, Shield, Blasters, Jetpack References
Sithtrooper02 replied to gmrhodes13's topic in Weapons Imperial Commando
It took a while as I was caught on other projects, but here is the finished baton (Shield is almost finished). The paint turned out well with a very close match. Lights are very bright and although you cannot see the effect here (I placed the lights in steady mode for the pictures) they are blinking to mimic the effect of the sparking. I placed here the originals and the background removed so that you can see the reflection on the table. There is an on/off switch on top exactly as the baton in the reference pictures. It's driven with programmable LED strip. It's a bit purple on picture, but in reality it's a bit more white and blue. I had to dim the LEDs for the pictures to not be overexposed -
Suit from keep trooping is what I used, it needed some tailoring and adjustments to be screen accurate but nothing complex to do. GA is not far off for level 1 approval, as Glen said, you should compare each part to the CRL. The thread here will lead you to the most screen accurate build and level 3 requirements. as needed I can provide you with the 3D parts your GML would not accept to complete your build, just PM me.
-
The second one got even better and weights around 3.3lbs.
-
The first few ab for providing you guys with flexible and very robust material built to last are ready. Here are the details for those interested. I will post the purchasing details on my FB page. The first one below is the first out, but the others are much better (see picture in thread below and the one after) Dimensions 105cm long x 30cm high x 6-9mm thick. There is a lot of material, prep and consumables to create this ab. I want this piece to be available to everyone, so I'm not really counting my time much in this mostly want people to get them as it is really not easy to do. I have tested to wrap it tightly for several days to see if I can ship it in a small footprint and it doesn't deform, so all good. I will probably ship them in a hard 3D printed cylinder to protect that you can use for carrying afterward just like I have. This is a raw casting, you will need to trim it to your size with a very sharp razor blade (recommend that you don't cheap on them and use multiple to trim it completely to your size) The wax used to release the rubber does create a bit of surface finish unevenness, but I have rubbed it on the other casting with some dishwashing soap and it gets way better. I'll try to take pictures of how I added straps and velcros on it. To have a nice joint on the right side to keep them together, I did make a special velcro with rigid sections. The Ab is flexible, but not too much as you don't want any deformation while wearing it. I used a balance between rigidity and flexibility so that there are no 'pockets' while wearing. NOTE: The pictures below are with the worst lighting condition to expose the variations to a maximum, it's way better/ not noticeable with standard lighting, and when it's on you with the armor overlapping. This is a rubber casting so there are always tinny defects (the ones in the movie are way worst from up close :). The color is even everywhere on the casting, but the surface finish variation in these light conditions show like a bit of variation of color but is not showing when wearing . Also, don't forget that the bottom 5cm will not show, as the belt is overlapping it all around, same for the top portion. The dust can easily be cleaned with soap and water of course. Try not to put water on the back side, as the foam rubber is porous and will retain water. Enjoy!
-
Yes, I have a couple of ab in the process of being made that are probably 3-4 weeks out. Once they are done I will take pictures and post them on Etsy individually with specific details.
-
Thanks! It’s going to be very robust. After a couple of troops the urethane foam was having a few dents where the hard armor pinch. This new urethane is really resistant
-
It’s been a while but I finally got the Ab section with a new process done to my satisfaction. It took several trials and several weeks to get it right…! This new method gives an easy an very durable, flexible and lightweight Ab armor. I researched and tested various products to get to what I desired: a method that gives 100% yield with a uniform color so that no paint is required, just colouring. I stayed with urethane formulation as didn’t want to go with silicones as nothing adheres to it afterward( I have molded several parts of my Sith trooper armor and I wouldn’t repeat it ) I tried different hardness of flexible urethane to come up with the Smooth-on Vytaflex 40 as being the right hardness and viscosity to avoid bubbles and be rigid enough. I also have tried using a 100% of vytaflex 40, but it would not keep perfectly its shape without requiring 8mm thickness which would have weighted probably 7-8lbs. So I started using vytaflex on surface and Tuff Stuff 15 foam urethane for the backing. the best formulation is about 2mm thickness of Vytaflex ( with protruding shapes fully filled) and then a 5-6mm backing with Tuff Stuff. The total weight is about 3 lbs. below are pictures of the mold after the Vytaflex is casted, a cross section of the Ab and the finished Ab. I’ll post other pictures when I put on my armor again. I will order some more urethane soon to build at least 2 Ab sections for interested people. I have a trial version with 4mm thick Vytaflex with 5mm urethane foam (which weight about 5lbs if someone is interested by this one.l, it’s available now, just PM me. this is a molded rubber part, so it is never perfectly even surface finish and will have tiny defects, so don’t set the expectations too high. Its doesn’t show from a couple of feet away. I used smooth on mold release 2831 which is wax based. ***don’t use the universal mold release even though they say it’s good for Vytaflex, it will go through the rubber and prevent the foam from sticking to it! I use a full pint kit of Vytlaflex 40 (2lbs) for my mold. The colouring I used is the smooth on So-Strong white and black with 8 drops of white for each drop of black for the Vytaflex. I made the color a little lighter gray to better match screen color versus my previous Ab. Wait at least 16h before pouring the tuff Stuff 15 on it. 1lbs of mix product is enough to get the right height on my 105cmx30cm mold. I color the tuff stuff with a few drop of black, just to give a similar grey finish to match the Vytaflex. ll l

