chris788
-
Posts
40 -
Joined
-
Last visited
-
Days Won
3
About chris788

Recent Profile Visitors
1,926 profile views


-
So... EIB next?
-
Thanks all! Been many moons since I've worn a TK prefix! Thanks, I think getting the legs right makes a huge difference in a kit, so I wanted to be extra careful on them!
-
Requesting Detachment access - https://www.501st.com/members/displaymemberdetails.php?userID=18488
-
Good news! Finally made the required changes, and have just been approved! Little longer than I had planned, but slow progress is better than no progress! Taken on most of the advice here, and am happy to wear the FISD badge again!
-
Keen to watch this one come together.
-
I'm keen to make the improvements, providing some are possible! aha. The shins are definitely oversized in make, I'm concerned if I adjust the thighs, it'll make the shins look worse, so If I can figure them out first, the rest should be a breeze.
-
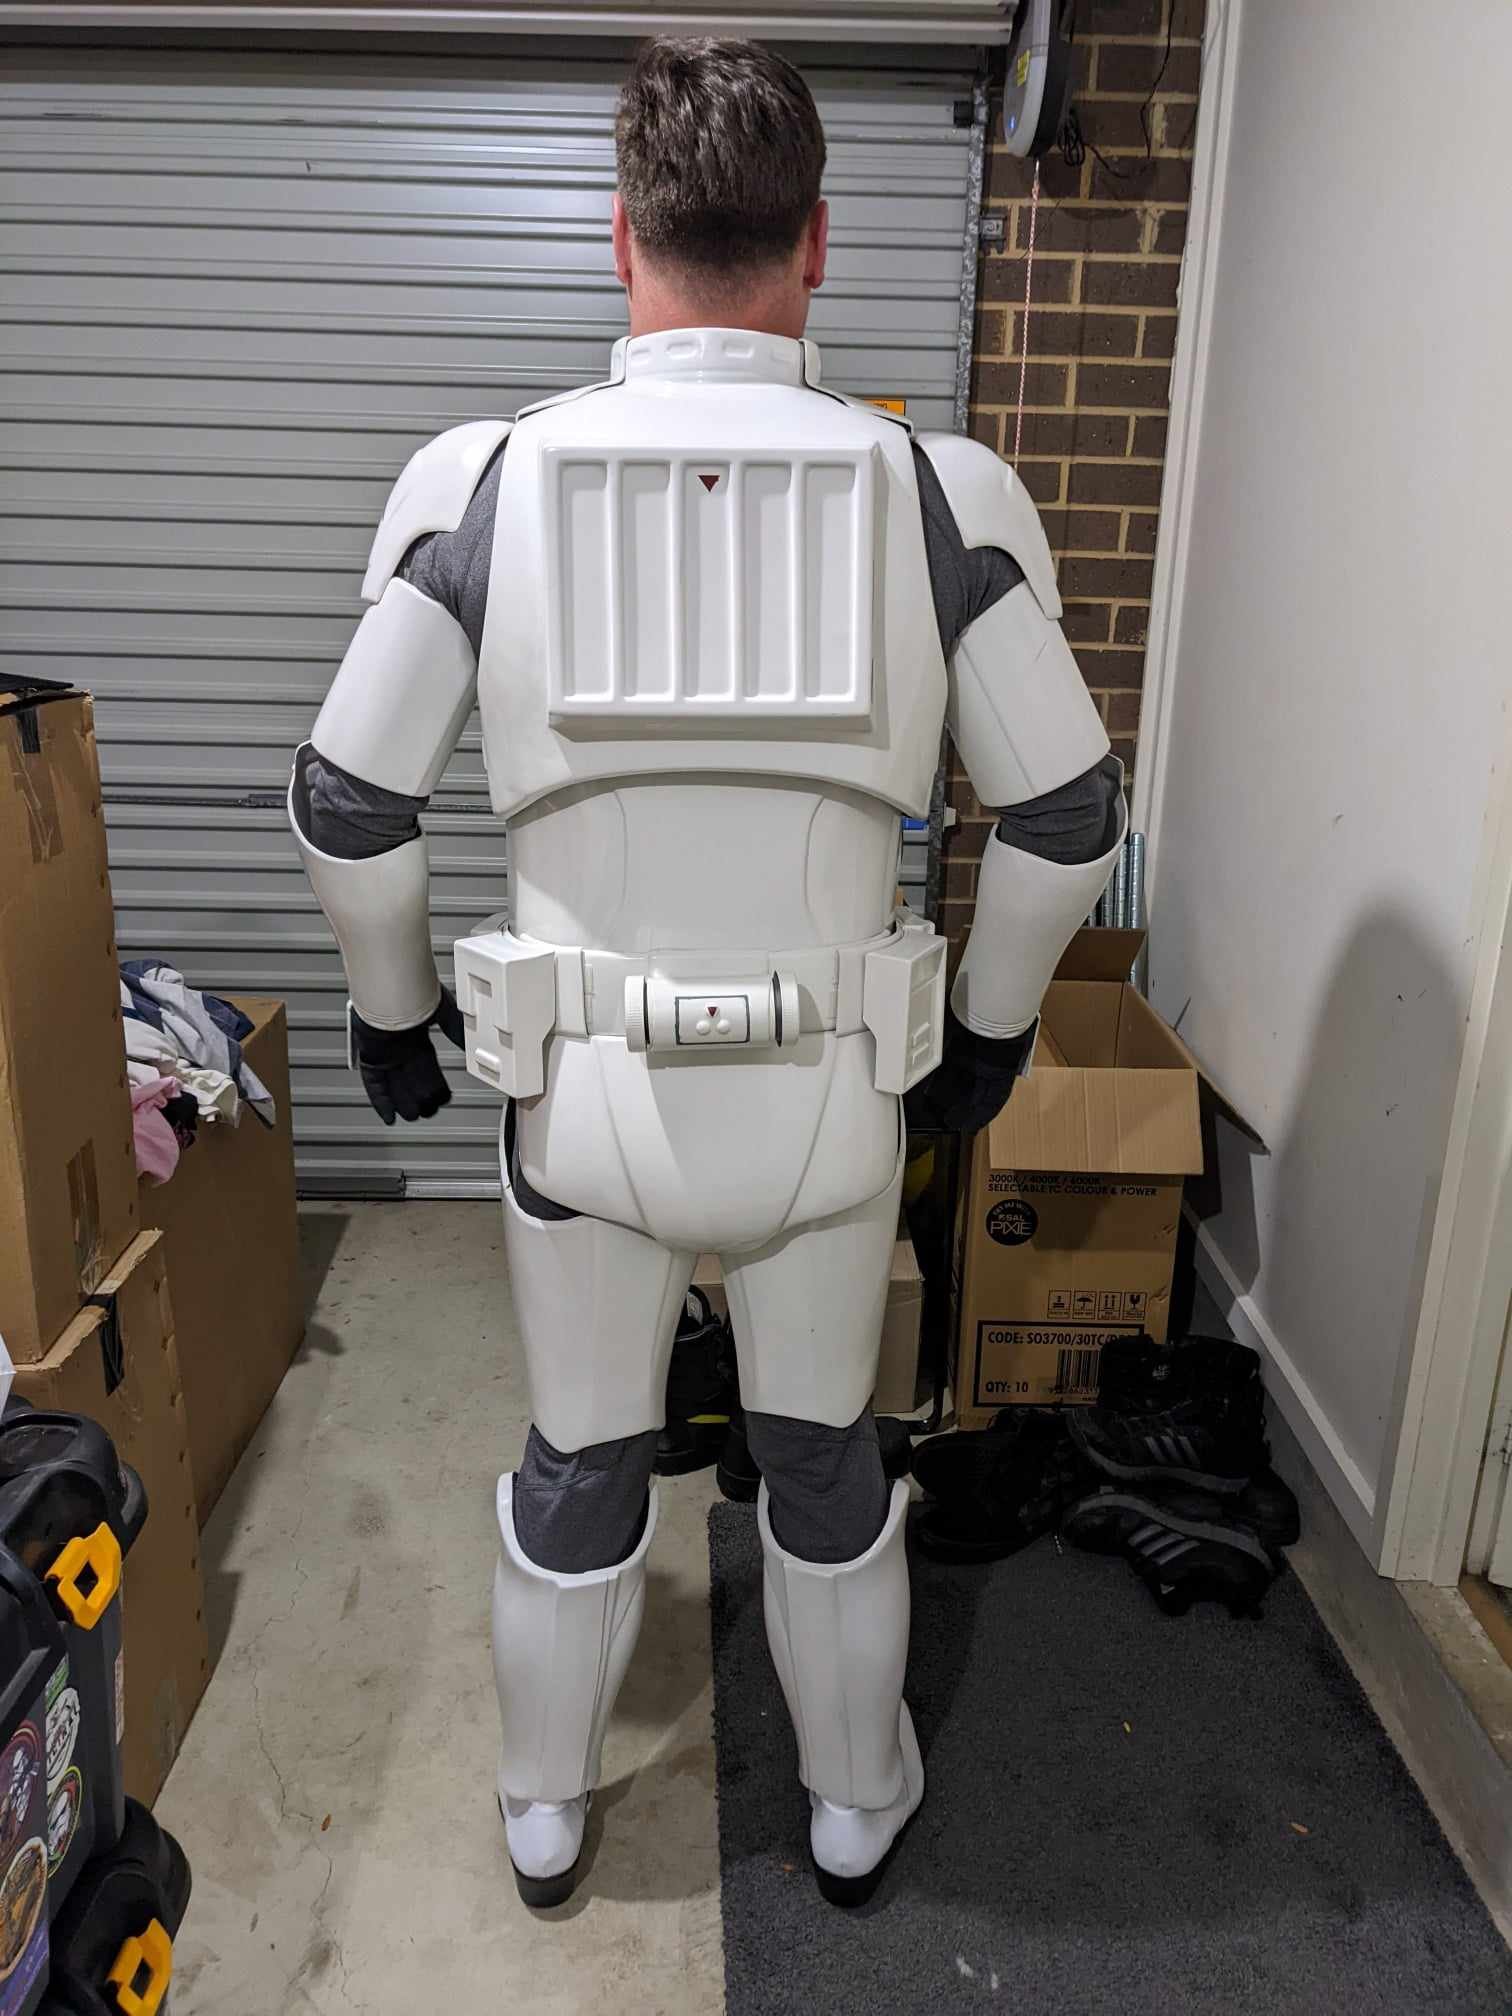
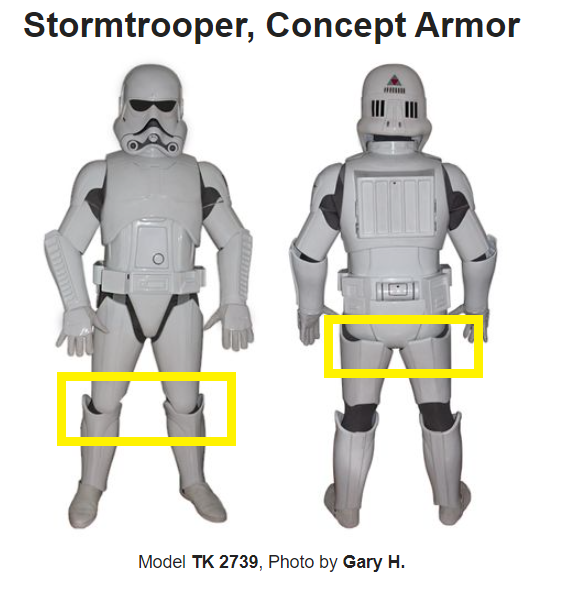
Good feedback. Might have to dig about a bit to see the best method for achieving these. I'd say the thighs are a little roomy, but probably not much room to take in? I'll have a closer look and see how much space could be saved. It will be a matter of taking a wedge out of the side and re-closing/filling/re-painting. No mentions anywhere on size or requirements of return edges, so that's going to be left to interpretation. As for the shins, I do agree with you Sly, I did build to the standard build lines on the armor, I'm unsure really how far I could pull them in without losing any of the factory details as the way that these are made there is not much room for modification. I could definitely reduce the width of the rear closure, which will pull them in somewhat, that's really the only place on the shin to be able to remove material, will definitely be able to reduce the total diameter but wouldn't be enough to bring into line with the bottom thickness of the thigh, and closing the thighs up more will exaggerate this. https://databank.501st.com/databank/File:Stormtrooper_Concept_Shins.jpg This will take some thinking, don't want to rush into cutting the parts until I can get a vision of the end result. I have much more of a gap between the bottom of the Knees and top of the Shin, would love to have them sit with a small gap like the reference photo, I have room to move the whole thigh piece down, which the ab/kidney plate could come down more provided I can get the butt plate to come in with the cod strap fixed. Again no mention of return edges, so the sizing I have is the makers size, and if no return edges are needed I can definitely cut a bit into the buttplate to give some more room, but as it sits at the moment, there is the issue the ab could come down, but currently the kidney could not. Worst case, I could take like a half inch or so strip off the top of the buttplate to help raise it up and create a smaller total buttplate leaving a slight return edge on the bottom side, but can look at that after I get a cod strap fitted and see how it looks.
-
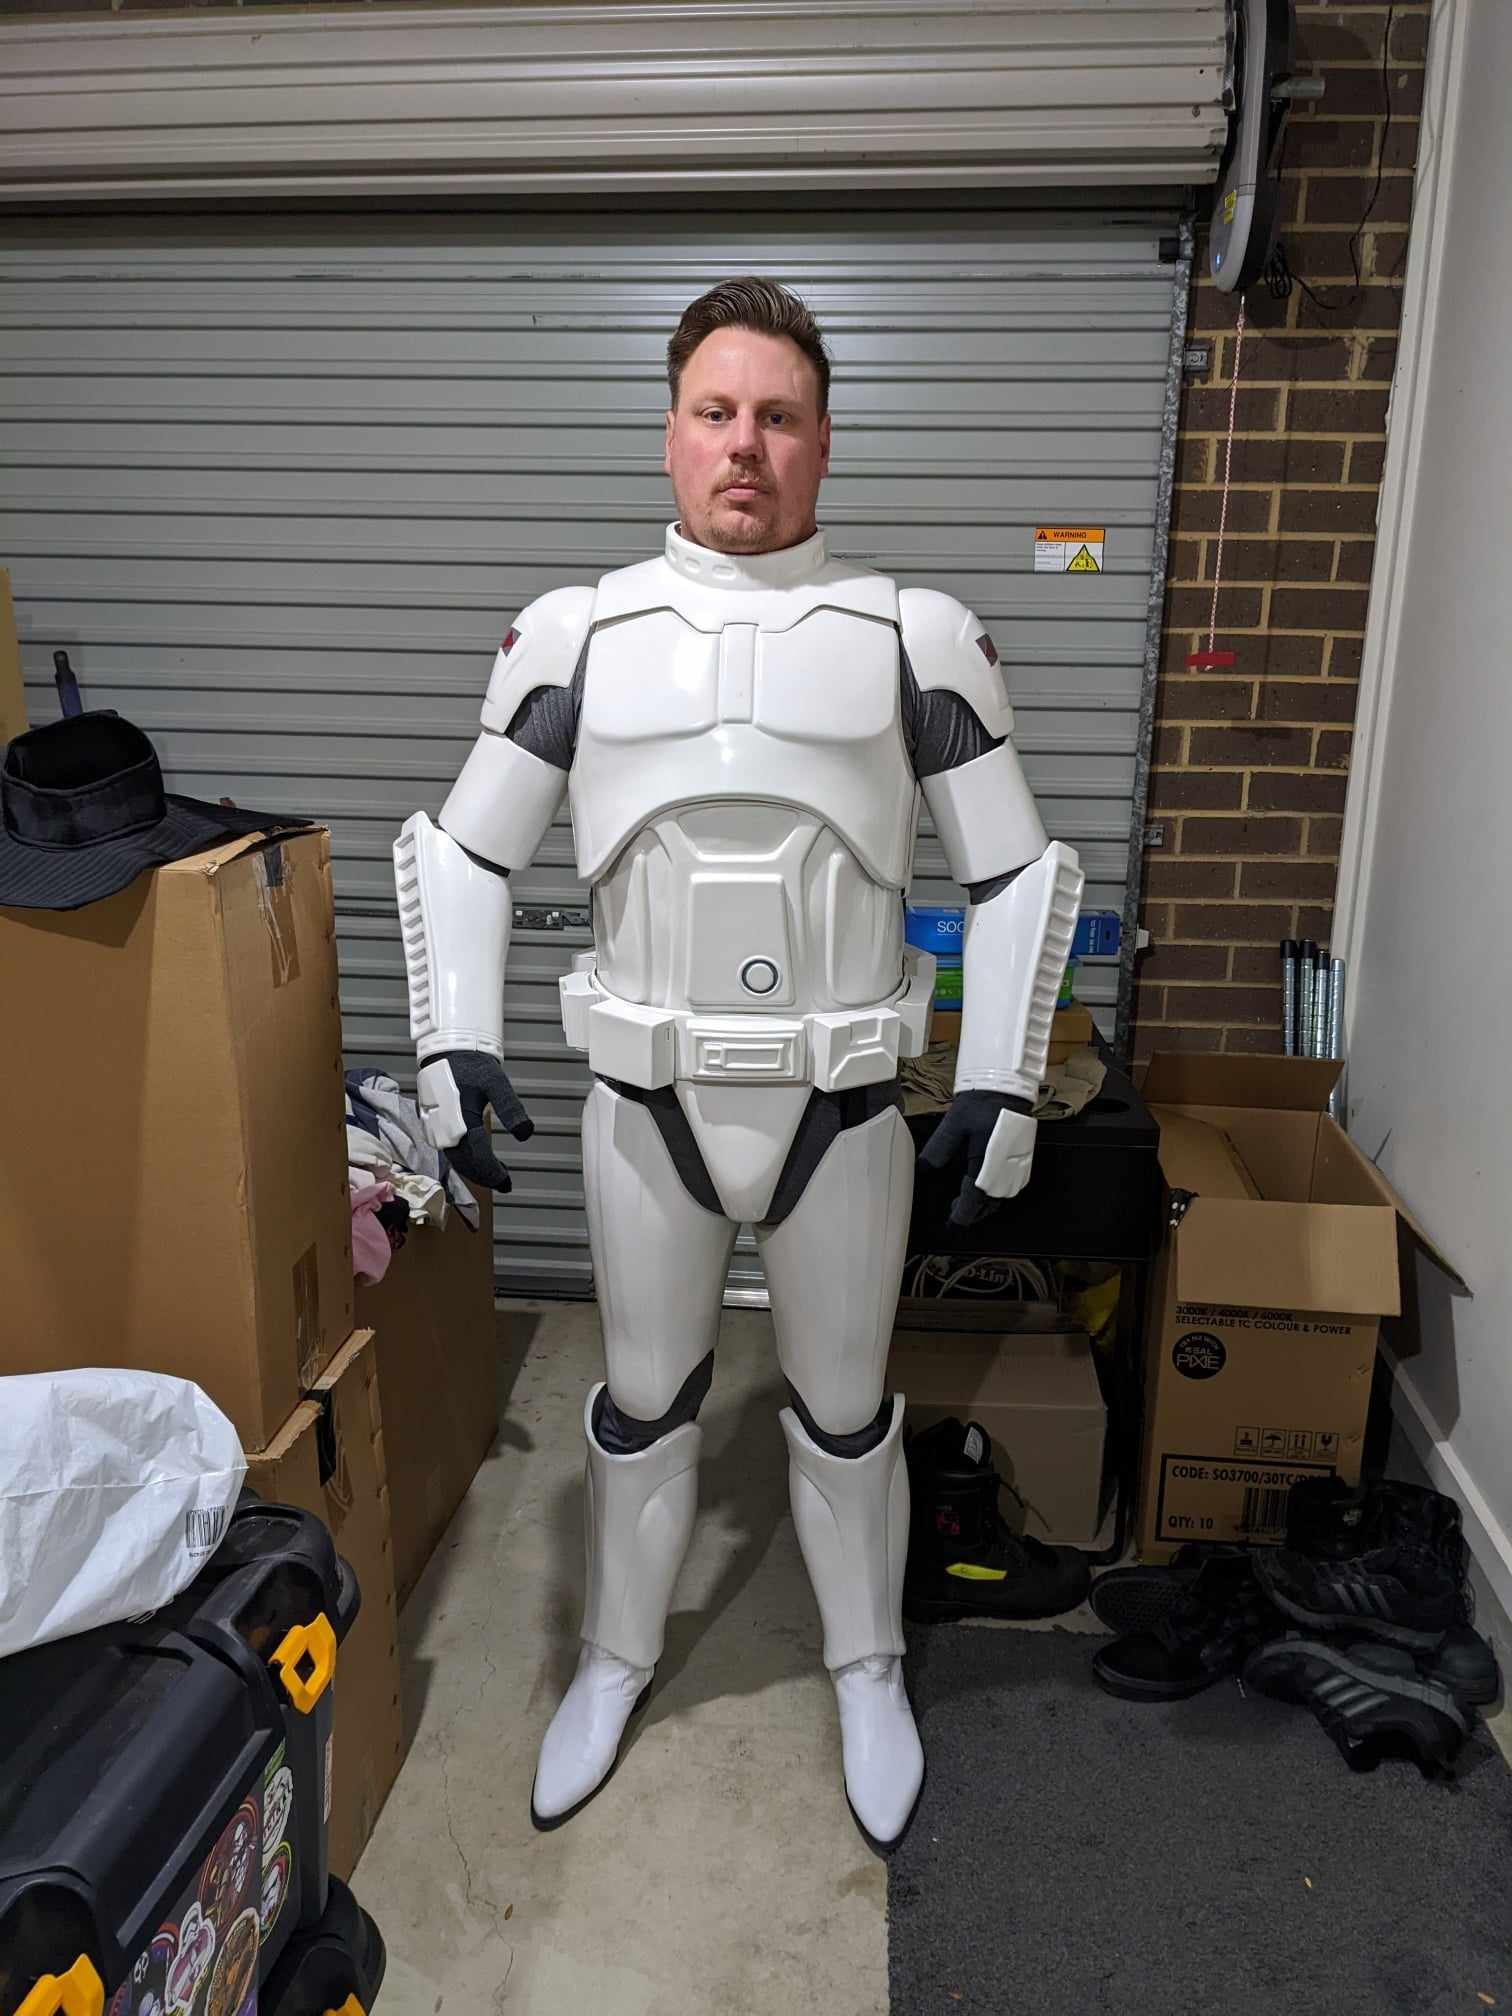
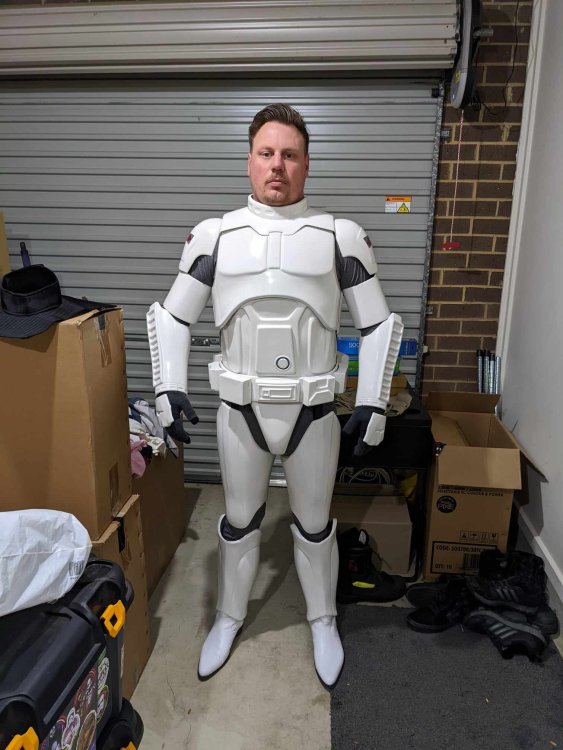
Some actual decent photos to make a list of what needs adjusting before submitting, but welcome feedback too! 1) Change straps to grey. I made these black initially for two reasons. First was, some of the original action figures actually had black under suits, and given I already had an abundance of black webbing and elastic plus an existing black under suit from my OT TK (IMO Should be an option in the CRL). Second was that the original under suits that the original crew used were Nike sportswear which has been out of production for years, and getting a grey under suit was near impossible (it took me years of looking before I stumbled on the one I currently have, and the quality is not great so I cant imagine it's going to last long!) 2) Paint grey detail under arm (between chest and back armor) and on belt (looking face on, left of center belt box small square needs to be painted grey) 3) Add Cod strap 4) Source more accurate boot (+ paint sole white/grey. not in CRL but should be added if CRL updated) 5) Under suit on legs could be better fitted. 6) Feedback from detachment on detail on back of helmet. There is an indented triangle pattern, and as the build/ assembly thread on the concept forums were never quite completed on this helmet variant, seems open to interpretation as to whether should be painted. I'd suggest they're painted black, but would prefer to clarify with detachment. 7) Neck ring/ yoke was initially designed to be separate from the chest piece, then was later updated in Kevs build thread on the RMQ forums in a comment that he changed the design slightly, and suggested glue to chest piece and where connects to shoulders to attach via Velcro. I'm going to glue the two together with E6000 and see how it wears (hopefully sits better and gets rid of the gap between the Yoke and Chest plate) and if no issues, can glue more permanently later. 8) Belt boxes are off in the picture, the initial build instructions showed one connector to fix the box to the belt but that leaves too much movement, so looking to add a second connector on the inside to stop them being able to twist while wearing. 9) Run strapping to the biceps to allow consistent height
-
Thanks, The helmets I believe have been previously approved back in the day, it is one of the Kevin Weir ones!
-
Minor update...

-
Oh gosh I had totally forgot about this thread. I've mostly finished it (was packed away during covid) should hope to post some updated photos soon!
-
Yeah, the helmet construction wasn’t at all fun. But I got there eventually!
-
Well guys, slow progress is better than no progress... This thing sat stale for a while, a long while. Honestly forgot where I was up to with it, but am now back up to speed. spent the weekend making up all the strapping, made a harness to hold the legs up (with some adjustability) Things left to do, Source boots Source grey undersuit Paint grey detail in ab plate, shoulder bells, under arm connection, and back of bucket Glue TD together, glue belt boxes on Put visor in bucket and pad out Put Snaps on butt plate and split rivet on COD plate I think that's about it. Attached some photos, although photos were taken before I made the strapping, so the strapping in the pictures looks untidy Please let me know what you think! 75446669_957369907952284_4334260534451896320_n by Chris Stewart, on Flickr 74620990_401854760481039_8386902223673622528_n by Chris Stewart, on Flickr 74422247_527086371457431_5124552542893637632_n by Chris Stewart, on Flickr 73495034_463625087580964_5257003420132311040_n by Chris Stewart, on Flickr
-
Bit of a small update. Kit sat untouched for a while as I re-located across the state and got a new job etc... Excuses aside, I got most of the parts bogged, just need to tidy them up a bit. I have started to strap the kit, used Velcro dots to attach the front neck ring/ yoke, but I think I will replace the Velcro at the front with magnets to hold them together and get rid of the gap in the front there (see picture.) Here are some of the parts that I have bogged, still need to tidy them up a bit. Strapped the chest to the back with webbing, keeps them together so it doesn't have to rely on the yoke/ neck ring to hold them together. strapped the ab and kidney together (strapped it in a similar way to a classic TK) but alas, my overindulgence in beer and doughnuts has seen my belly to be a little rounder than it should be, so this will look a bit better when I shed a bit of weight. (lighting here was poor, so excuse the terrible photo) Grey undersuit is getting made, along with the gloves. Belt boxes have been made, but need to size up the actual belt (as it is a multiple part plastic one) TD and helmet have not really been touched yet. will throw up some more detailed shots of all the parts as I make them.
-
Alrighty then! Here are a few pictures I have so far. This first one is most of the parts straight out of the box. It took about a week, but I have most of the parts rough trimmed as a start. 20171231_221140 by Chris Stewart, on Flickr 20180107_140614 by Chris Stewart, on Flickr rough assembly of the upper half. More to follow soon. Will keep this thread as updated as possible.