Leaderboard
Popular Content
Showing content with the highest reputation on 12/28/2019 in all areas
-
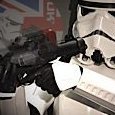
Troop #17 December 18th 2019 The European Premiere of Star Wars: The Rise of Skywalker - London’s Leicester Square I am incredibly grateful to have been selected to represent the UK Garrison at this event. I was one of 16 TKs, 8 TDs, 4 TIs and a whole host of other characters. We were also privileged to watch the media screening the day before. We were in constant contact with Disney and were asked by them to parade the Blue Carpet ahead of the celebrities’ arrivals. Credit on each photo, where applicable. :-)4 points
-
2 points
-
Yeah, I'm very glad that everything is here too! Haha! Yeah, I'm glad I didn't make this my first build, it seems a bit more difficult. Thank you, I will be sure to ask plenty of questions!1 point
-
Happy days, now wait for the sheer panic to set in "I've got to start trimming this"1 point
-
Hey everyone! Something very exciting has just arrived early! The BBB! And here is a shot of the armor, all unpacked. The only things I'm missing is the helmet(which I am told will arrive later) and the TD tube. I will try to update as much as I can, but I will be quite busy leading up to New Years. Hopefully after that I will be able to work on it more and update accordingly. I will also post some closeups when I have more time. Until next time1 point
-
Wow! What an episode! What was is like running around with all the pyrotechnics going off everywhere? Was it pretty chaotic? Those of you who were in the show, have you been able to spot yourself yet? If so, post a screenshot! SB1 point
-
54) 28/12/2019 - New Year Eve Event @ Let's Go Shop (TST, KLN)1 point
-
So the Dremel and I have been really good friends the last couple of nights. The gf had to work a late shift so that left me some time in the garage to get some work done. Got almost everything trimmed up. Just need to do the box of small stuff this weekend. It’s a little nerve racking to start cutting into some of these pieces, but with a little patience and taking the ABS off a little at a time, each one starts to take shape. It’s strangely satisfying.. which is dangerous. This is only my first build but I can see why so many have multiple sets of armor! Here’s a shot for now, should have the rest done and maybe some test fitting of some pieces on Monday. Sent from my iPhone using The Force1 point
-
1 point
-
The FX-BlasterOS story goes on. I've been working on a full feature firmware including improved scope and status bar OLED display animation, idle mode status bar LED animation and for those facing droid problems, the new electrocute droid killer FX:1 point
-
Nice work trooper, a couple of other pics the DO's like are: * Front and both sides of the knee sniper plate * Thigh ammo strip rivets outside and inside * TD showing front panel * D ring on rear of blaster * Close up of ab rivets A few things you may want to address while waiting for the DO's: With your teeth area you could remove some paint from the gums: Frown is painted gray and does not leave the teeth area. You could also straighten the brow trim, it appears higher in the centre Appears your left shin is closing inside over outside so the opening can be seen from the outside, they should close outside over inside You may want to lengthen the drop box straps, they appear tight and push outwards. Also thigh coverstrips should stop above the bottom thigh ridge Belt could come down a little too as it's covering the lower button A few tweaks and I'm sure you'll do fine, good luck1 point
-
1 point
-
Welcome to the FISD! Good luck with your journey, Nancy. I think these are what you are looking for: Jen Gistang Decals1 point
-
1 point
-
OK, the Thermal Detonator is done. Here's what I did to wrap it up. Even after letting the paint fully dry, I wanted to be absolutely confident in the finishes ability to withstand handling. So I gave it a few coats of Krylon ColorMaster - Gloss Acrylic Crystal Clear. I know this stuff. I've used it for years, and it works for me time after time. Then I used E6000 to glue the control panel on. My side caps are a really tight friction fit so I didn't bother adding any glue there. I added some rubber bands and some folded paper to the opposite side so that the rubber bands wouldn't be resting directly on the recently dried clear coat (just in case). Then I sanded the screw heads with 400 grit sandpaper, cleaned them off with acetone, and then hit them with 4 thin coats of Krylon ColorMaster - Semi-Gloss Black Once all of that set up and dried, I took the TD clips from @ukswrath and lined them up on the tube against the end caps and control panel. I used some painters tape to keep the clips in place while I drilled small pilot holes and screwed in the black screws. Below is the finished result: I am glad to wrap up something after having been away for so long. Go go go! -Dana1 point
-
Submitted for Approval: Front: Right: Right - Arms Up: Back: Left: Left- Arms Up: Abs: Stormtrooper:1 point
-
At least you figured it out before cutting down the rear raised edges to 7.5mm. The broader raised edges in the back aren’t that huge of a deal in my opinion. Just keep the cover strips consistent at 15mm is what I’d do there. Also I’d recommend using inside cover strips. They really help to reinforce your armor. You can fully tape your pieces from the outside and not have them shift while you glue the inside pieces. Then remove the tape, and add your outside strips.1 point
-
My first suit was an RS commission. But the study I was able to do with it helped me to feel confident to build 3 clones and a scout myself. And now I’m working on an FOTK. A commission isn’t cheating if it helps you to build confidence to try things on your own in the future1 point
-
Close to complete: still down a neck seal but did an unofficial troop at work (a high school yesterday). Only had a half an hour window, that we stretched to about 45 minutes, so I had to suit-up quickly... and unknowingly had a drop box tucked into my armor. All that aside, here's my favorite photo: and here's a couple photos of me shooting hoops:1 point
-
Hi folks! I've come back from a long hiatus! Life got really busy so stepped away from things to build over the Spring months and got busy in the Summer building a steampunk costume to go Halloweening with my kiddies. I pulled off custom boots, even gauntlets and also made-over a nerf blaster with steampunk color palette. A whole lot of fun but I digress .... My E-11 Blaster! It's been a long haul, a fun one, but I need to finish!! With all parts painted and weathering and sealant clear coat remaining, I am assembling the various parts. Rear of the Exposed Bolt I scratch built my ROTEB (rear of the exposed bolt) to originally accomodate electronics. It is a bit odd shaped with an enclave that was to accomodate electronics coming out of the trigger assembly part. I placed some green stuff inside the enclave so to better stabalize the wood screw that holds the charging handle in place. On instalation, I dare not install the screw to close inside the handle because it narrows quite a bit. Custom Barrel I custom built a barrel to kinda look like the real-deal. As the doopydoos muzzel has the screws poking inside the reciever tube already, I had to pull back the support end from the front of my barrel and pulled it back to around behind the bayonet lug. Spring Cup I'm a sucker for trying to build my doopydoos to closely resemble the real sterling piece as close as possible. I made a spring cup to place inside the ROTEB complete with 'spring' inside. JK, I faked it with an appropriate gauge of solder and curled to correct OD shape. ROTEB Stopper I placed, what I'll call a 'Stopper' for the ROTEB. Again, fashioned to orginally accomodate electronics. I was sure to install the barrel first =) Installing the ROTEB Here is the ROTEB in it's semi-installed state. The whole shows where the wood screw will come up from to grab the charging handle and have it put in place. ROTEB Cover It was perplexingly fun to scratch build my ROTEB cover with clearing strip. Thanks T-Jay for your detailed post =) I cut numerous sheets of plastic to size / shape and glued with E-6000. Metallic paint on-top with the clearing strip sanded down to show wear. The end closets to the charging handle was rounded off so to accomodate the round bottom of the charging handle. The other end of the cover was made a bit short to mimic the lip of the spring cup. Exposed bold Plate My custom exposed bolt with extractor and plunger took a while to get right. Again, was made as a plate to accomodate electronics. I had to bend my alluminum piece just right so it sat recessed, giving the illusion that it can enter the reciever by showing off one mm or so of reciever lip. I refrained from attempting to put in serial numbers on my exposed bolt; didn't have the correct number sizes. Up next ... Grip and Trigger Group Install That's how my build stands at the moment. Grip and trigger group are painted and ready to get on to that reciever tube! Ah, this is the moment when the build really starts to resemble a blaster. Thanks for dropping by; have a great day!!1 point
-
Wow Paul! What a work of art. Without any doubt, this is a very special blaster. Mission absolutely accomplished. Many builders (including me) spent much time in the recreation of fine details. During trooping, they are simply overlooked, as there is so much more to see... With this build, you focussed on the right kind of detail, because 2 displays, the sound and the LEDs in the barrel are hard to overlook. Once you start trooping, I guess many people will be fascinated by your blaster. Gotta go now. Feeling the need to build a new E-11 again...1 point


