Leaderboard


Popular Content
Showing content with the highest reputation on 11/05/2021 in all areas
-
Hey everyone - if you or someone you know has a paid order outstanding with Daniel Hellhounds for a blaster or armor parts, please reach out to me. I'm putting something together and would like to hear from as many people as possible - hopefully it will help. Thank you!1 point
-
Yep. It's on with E-6000 so shouldn't be to much trouble to move it. I will wait to see what they say, but can do as you say. Move it over a little and trim a little. Thanks, M1 point
-
Thank you! It will be coming soon!1 point
-
Congratulations Trooper, Welcome to EIB ranks, hope to see your Centurion App soon!!1 point
-
Congrats and welcome to the ranks! Well done!1 point
-
Congratulations and welcome to EIB.1 point
-
Congratulations Dan!!!1 point
-
Thank you! Thank you! All good suggestions to help get me to Centurion thank you so much. I'll take a look at what's making my helmet ride higher. I don't think I have too much padding in there but I'll double check that. I'll see how much play I have with my right ear and adjust it as much as I can, but I'm not sure how much plastic will be left underneath the ear. Tubes stripes are no problem to fix. I thought I had the fall correct but now that I see your reference pictures that helps a lot! A couple questions about the stripes though, If I put them on backwards but the left side has more room because of the ear's angle, how do more stripes fit on the shorter right side? Because the stripes are not the same quantity on each side correct? Also, are you saying decals are accepted for Centurion now or still painted? Vocoder is an easy fix. So is ab buttons and det. Belt question, There are specific dimensions for where the holster is mounted in relation to the plastic belt, If I cut a little more off the plastic to line up better with the canvas then these dims will change. Is this an issue for Centurion or no because it's only 2-3mm difference? Those are all my questions for fixes for now. I expect you'll see my Centurion application soon! Thank you for your approval and feedback!1 point
-
Congratulations and welcome to the EI ranks trooper1 point
-
Hi, Dan, and thank you for your application for ANH Stunt EI! CRL and EIB Application Requirements: All required photos have been submitted, and on behalf of the entire D.O. staff we are pleased to welcome you to the rank of Expert Infantry. Congratulations! Other-Armor Fit/Assembly; In this area we review observations made by your fellow troopers and the DO team. Some observations may lead to suggestions to improve the overall look of your armour. Note that we consider both text (CRL) and pictures (screen caps/reference images) when reviewing submissions. Super nice job on this WTF armor, brother! Just a few items to go over in this area to give you a better overall look. Your bucket is riding pretty high, and I suspect it's a padding issue. You may have more than you need in the top and it's not allowing it to sit lower. Reference images In the first pic below I noticed that you seem to be looking down. When the helmet is sitting too high it forces you to tilt it forward just to be able to see in front of you clearly. I had the same exact issue, and after I removed the padding in the top I had MUCH better vision. Reference images The ear angle on your left is almost perfect, but the one on the right is at a skewed angle. Ideally, the screws should line up with the angle at the rear of the trap above them. We know there were wonky aspects to many of the original buckets, but to make them more symmetrical/screen accurate we are suggesting that you shift the bottom of the right ear back at least a bit. Reference images 2 quick items on your tube stripes.. The first being is that you have accidentally put them on backward. Not the biggest deal in the world, and we see this often, but as per the CRL and seen in the reference images the tops in the front section should lean forward. Also, the last stripe nearest the vocoder on each side (red arrow) overlap the crease in front of them and should be removed. Reference images (Note the gaps) We always want you to look your best, so when suiting up just ask the person who puts your TD on to make sure the clips are securely all the way down on the belt. Reference images Centurion Requirements; In this section we prepare you for Centurion. Because Centurion photos show more detail than EIB, items pertaining to Centurion might be seen there and not here and additional photos may be required. We try to point out all that we can from what we see, but the final accuracy is the responsibility of the trooper As it says in the CRL for Level 2 "Ideally the tube stripes are positioned a pencil width from the side of the cheek" so no problem for EI. But, for Level 3 we have to ask you to move the ones on the right closer to match the left side. Due to the fact that you have the issues from the first section, we are suggesting that you replace them. Being decals, they are easy to remove, and I'm sure Walt can supply you with a new set. Once you get them, the whole process should take less than 5 minutes! Reference images Awesome paint job on that vocoder, brother.. nice crisp lines, but we need you to grab your brush and extend the paint on the two ribs (shown below) just a bit. Another quick and easy fix! As stated in the CRL, ear screws need to be countersunk/flush. The left one is textbook, but the right one needs to come in a bit. This should be a fairly easy and fast fix! Reference images As you are aware, the large ab-button panel must have at least a small flat edge around it. We see this a lot, and it's honestly not to difficult to remedy in your case. Walt is a great guy, and I'm sure he would be happy to hook you up with a new plate. As Glen mentioned, you can also add an ABS plate behind it, touch up the edges with some ABS paste and sand/polish it. If you want to go that route I will send you a flat ABS plate for free, just PM me. Reference images The 45° angle on the ends of the ABS belt must meet up with the outside edges of the cloth belt. You have a big advantage over some with this issue, as you just need to take a little off the ends. Should take you less than 5 minutes! Reference images And that's it! You have a few items to deal with to get that Centurion badge under your name, but we honestly hope you give it a go. In looking at the suggestions/requirements above, once you have the large button plate and tube stripes in hand taking care of all of those issues should take you less than an hour in total. We are here to help in any way we can, so always feel free to hit us up if you need assistance. After seeing what an fantastic job you did on your build I have every confidence that you can do this, sir, and I look forward to seeing that L3 submission soon!1 point
-
Thanks for continuing to smash these out Glen, I'm in the busiest part of the year for work atm so my forum time has been limited.1 point
-
Awesome, will work on that piece next , I think you are correct that it is a bit loose now that you mention it…1 point
-
Here is a recent picture of my clamshell as requested , I think I have been able to tighten up the straps and attachment points enough to help. I am going to try and tweak my straps firsat before I start cutting :-) .. Anything look off? I think I am at the point now to try and submit an approval email this weekend.. Feeling confident , I have scoured the CRL and several builds and even YT videos and feel that I a, 'buttoned up' ( pun intended :-) )1 point
-
Return edges thread is a great resource Also some references in the Gallery sections1 point
-
[emoji1] leave it with me Although, that's a little small for me! These are more my size1 point
-
Thanks guys!!! I'm far too happy about having a TK number. I got a little more work done. I addressed my thermal detonator finally. First, I unrolled it to get the donut rotation closer to correct. I managed to not take pix of this. Just careful unrolling of the metal clips to an even level and then a bit of bending to remove the arc. And it was great, but the TD hung waaayyyy down under the belt. It wasn't good. The rotation was great, but it was just way too low. So I unbent the metal clips and hammered them somewhat flat. Then it went in my bench vise and new bends were installed at the right height. That's what the above pic shows. Fortunately this metal bends very easy. I can do most of it by hand. But flattening and adding even bends are jobs for tools. YES! Not only is the rotation good, but the det is even on the belt. Wild success! I snipped off the overhanging ends of the metal clips and re-re-re flattened and bent things flat behind the belt. I reapplied the little angles at the tips and re-covered them with fuzzy velcro. Worth the hour or so of bending and hammering. And then I printed a new sticker for my E11 with my TK number on it.1 point
-
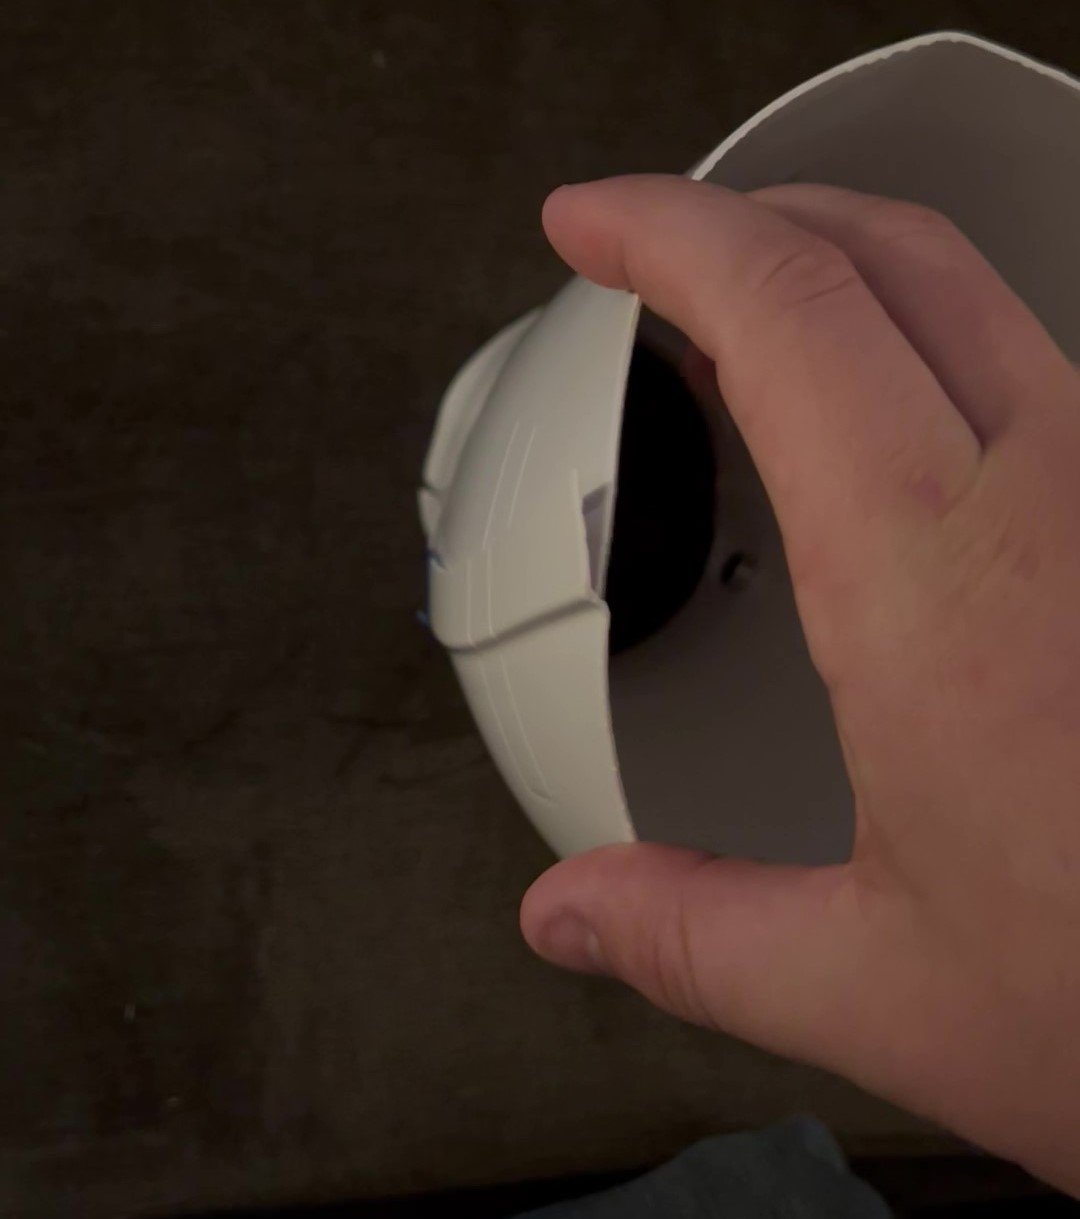
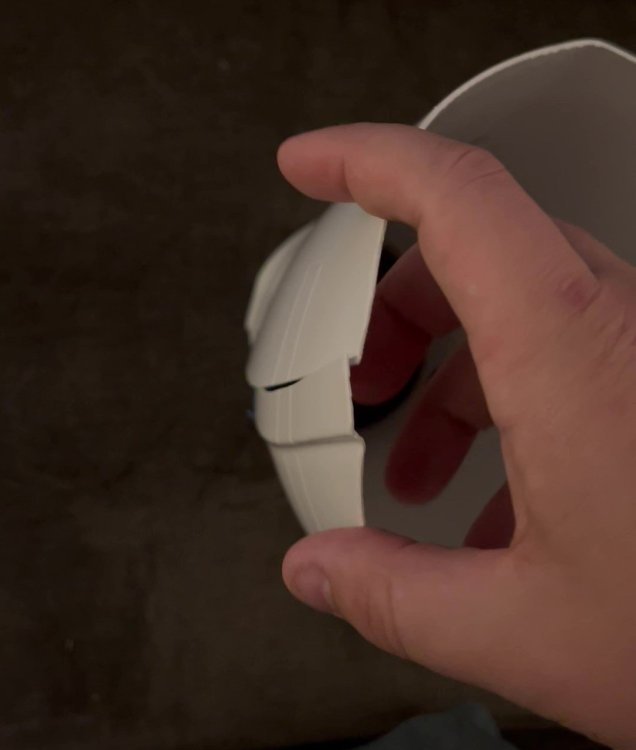
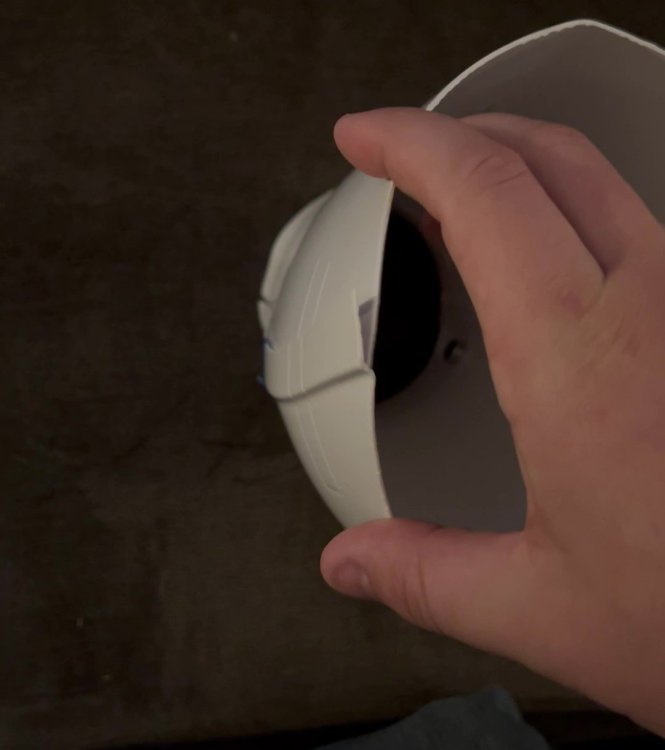
Wanted to post a follow up on this here. I asked RS Propmaster for either a new ear or some scrap PVC so I could get a proper repair making a paste the correct color. I also asked what brand and number of paint they use so I could do the touchup work. They have opted not to go that route and have chosen to send me an entire new helmet. Can't complain about that customer service!1 point
-
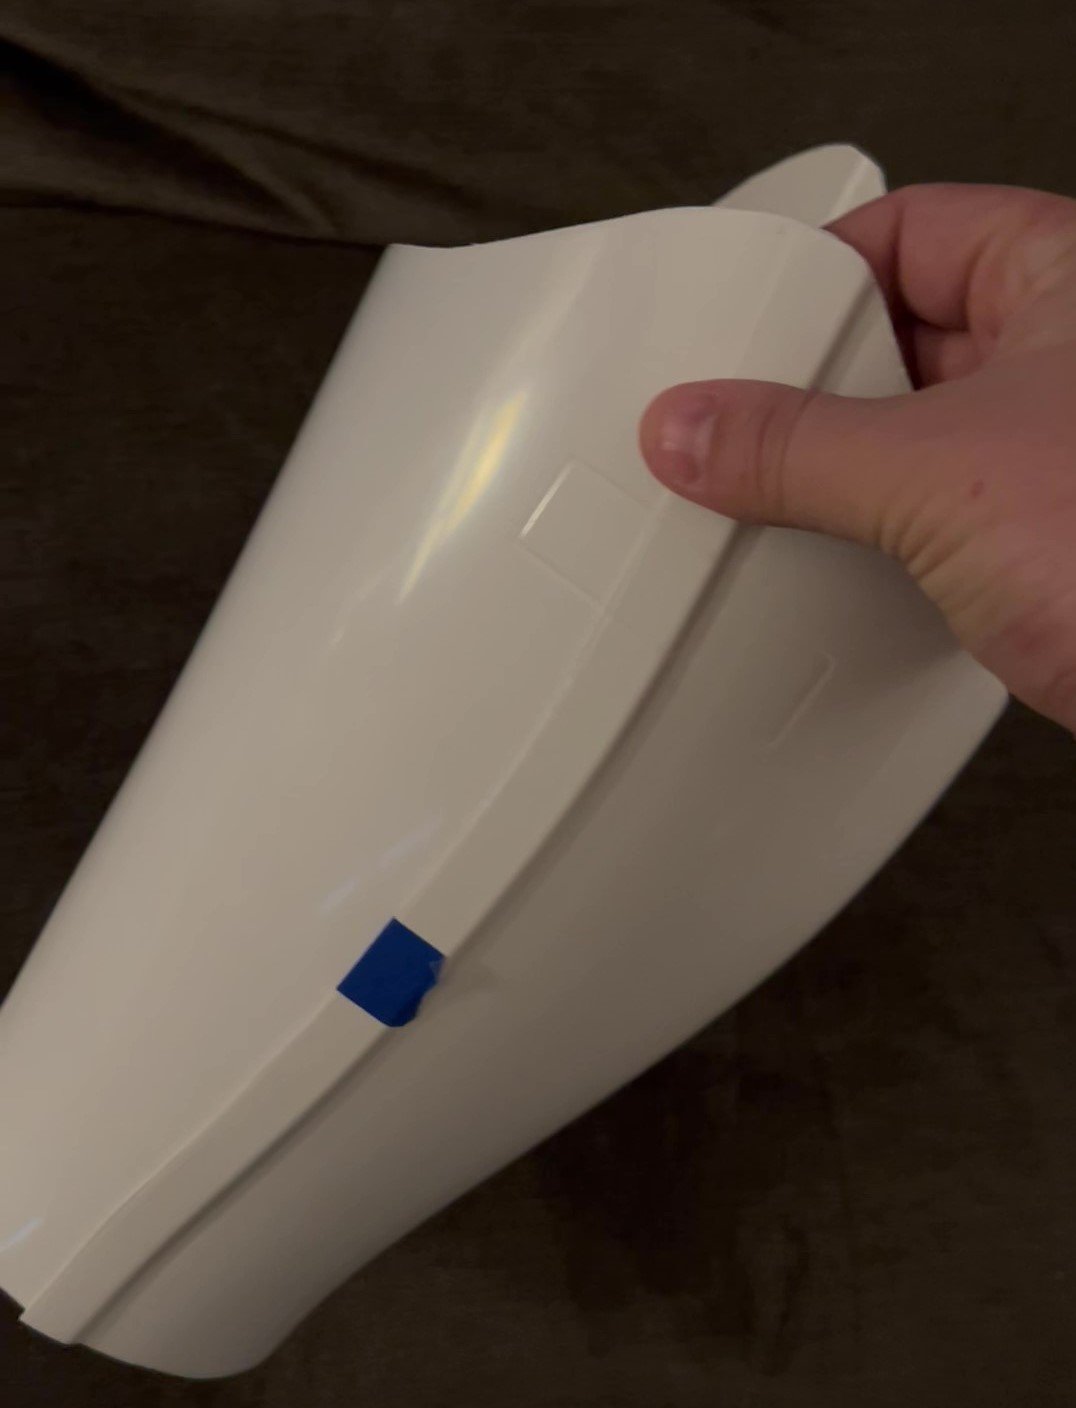
Hi, What I have doing with my shins is just overlap, trim to adjust and apply velcro. I has worked for me to fit better . References Hope this can give some light.1 point
-
What i showed in those photos is the inside of the right shin. The outside looks fine. The CRL photo shows back to front overlap on the inside of the shin piece. Seems awkward. Sent from my iPhone using Tapatalk1 point
-
OK. Next weird detail on this BSP kit - shin closures. After discussions with @DocDan yesterday I realize that this "back over front" closure may be a problem. Does it matter provided I get a good seal and we don't see the velcro peaking out?
 1 point