Leaderboard


Popular Content
Showing content with the highest reputation on 06/21/2020 in Posts
-
3 points
-
I thought that was the case. Just waiting to go through a few bits with my armourer and need to finish off my E-11 blaster. Then I will be putting in my application for basic. [emoji1695][emoji1303][emoji16] Sent from my SM-G920F using Tapatalk2 points
-
Thanks. I know looking at the pieces I trimmed today I have more to take off, but better safe than sorry. I have it as a goal to get this suit to Centurion. (My stretch goal you could say.) Got to say I am very grateful for my understanding and supportive wife. She not only agreed to me spending the funds to finally do this, she pretty much has nudged me to do whatever I need to do.2 points
-
Wanted to share with you all my Millennium Falcon model (don’t tell Vader). Finished it a couple years ago and I maybe obsessed a little too much on getting every detail from the original 5ft ANH filming model. If my house was on fire (knock on wood) this would probably be the first thing I try and rescue lol.1 point
-
Name: Peter Telep TK-33348 Forum Name: 4Runner Florida Garrison, Makaze Squad Armor Maker: TMprops Helmet Maker: TMprops Cloth Belt Maker: Rob Kittel (Imperial Issue) Neck Seal Maker: Darman’s Props Boot Maker: Imperial Boots Silicone Hand guards: JustJoseph Blaster Maker: Pretorian Blasters Holster Maker: Darman’s Props Height: 5’ 10” Weight: 165lbs TK Type: ANH Hero Mentors: Gary Collins Sr. Derek Zink Gary Collins Daniel Branton NOTE: I followed the Centurion photo checklist document for this submission but also added in extra photos at the end to detail my build. Thanks for your consideration! A few extra photos to detail my build: And the team who made it all happen, from left to right: Kendall (photographer), Peter (plastic spaceman), Nancy (the boss!), and Lauren (expert Stormtrooper handler). Pups from left to right are Luke, Khole, and Charlie! Special thanks to Sha Sha and Joseph for expertly guiding me through this process! TK-33348 humbling submitting my application. Thank you very much for your time!1 point
-
You can just purchase elastic locally or online then when you have the desired length cut and sew the ends together.1 point
-
Thanks! That's probably what I'll do. I had wiped it down, but perhaps it wasn't completely dry when I started spraying.1 point
-
I have encountered this before with some enamel sprays I've used, can be the build up of paint, the paint not fully dry but also scratches in the paint which allows the thinners in the next coat to seep into and soften the paint so the sides crack and curl. I would probably suggest leaving for a few days to make sure it is fully dry before continuing. I know from my panel beating days there was a spray that you could apply which would block/seal a layer of paint to help stop anything underneath coming through, may be an option if you don't want to remove all the paint.1 point
-
@MrFlavaFlave I'm starting your review now. In the meantime, do you have an 'action' shot of you in full armor?1 point
-
As I mentioned I was given an older copy of the chest which had holes. However I didn't really like the thickness of the plate as it was uneven and I generally preferred the newer version. Seeing as even the old file needed a fix I went back to the file I started with, and printed the whole thing. To update this to lvl3 I started with the template piece I showed before but made the tubes taller and their walls thicker. I printed a couple of these as they didn't take long. By keeping the base plate thin they are able to flex and conform to the shape of the chest plate. To do the fix the first step was to remove the big lump behind the pills. This was a messy job using a dremel and a sanding drum. The PLA+ doesn't really sand well and sort of melts off rather than sand, but I got there in the end. This was then filled with P38 (same thing as Bondo), took a couple of passes rough sanding with the dremel each time then finishing off with some 120 by hand. I next marked out the dimensions of the hole I needed to fit the replacement. This initial hole ended up being too narrow as I forgot to account for the curve splaying the repair. I drilled a 6mm hole through from the front, roughly cental but exact placement doesn't matter. I then cut close to the line with a coping saw and then used files to get the hole to final size. As I mentioned this actually needed to be a shade wider. I broke the 1st piece trying to get it in, but I had 2 so it wasn't a problem. You may notice I've changed the angle slightly as the hole angled up slightly. I checked reference and it should be horizontal. With a few measurements I verified the angle was wrong and then measured to correct. The part was superglued in from the back, then sealed around the edge with a bit more glue and accelerator. The gaps now needed filling. I did think about using P38 but this seemed like a lot of effort to not fill the pill holes. So I opted to pour in some resin. I chose Smooth-On Smoothcast 66D as; first I had some from a complete project and no longer had a need for, it had a slightly longer pot life and being semi rigid was less likely to crack later. This turned out to be a terrible idea. The resin had gone bad and foamed up when curing. Not a huge issue as such, but there was air bubbles that needed filling. What was more of an issue was the fact it's semi rigid. This made it harder to sand as it would flex a bit and so resists the abrasion. I should have used the 325 which I picked up at first but decided against. 300 would have been better still but I don't have any at the moment. As you can see I wasn't the tidiest! The Smooth-On semi-rigid range has a slow cure profile. Basically this means rather than curing suddenly like most resins, it transitions slowly through a gel like state. I used this stage to drip in a bit more resin to try and fill above the surface slightly to reduce the need to fill. This was when it started to foam a little and so just ended up making a bit of a mess. To clean this mess up I resorted to files. Initially a small 6" file but swapped to the big boys to speed stuff up. I started with a saw-rasp, think 10 saw blades joined together, on it's fine side then moved to a fine cut metal file. The saw-rasp is brilliant and removes a lot of material fast but in a controlled manner. Once this was more or less down to the surface I swapped to some 120 wrapped round a sanding sponge. The foaming left some air bubbles in the surface. These were filled with some 3M acryl filler and sanded back again. This isn't perfect but the rest I'll do when I assemble the chest as that will need a lot of filling. I also have fixed the oval hole in the OII of the back plate. I started by making a plug the size I wanted the final hole to be. This was a simple 3D part with an M4 hole on the back so I could add a screw as a handle. Before use this was waxed so that it would pull free from the filler once it cured. I used some Smooth-On mould wax I had lying about but something like vaseline would work just the same. Ideally the plug would be centred as that would be correctly fixing the skew. However it's easier to just pick one side to redice the amount of fixing needed, and act as a guide for the edge profile. Before filling I drilled a few 3mm holes to give the filler something to grip to. With the plug clamped in place some P38 was pressed in to fill the remaining gap. Once the P38 was cured I used the M4 screw to pull the plug out. The wax stops it sticking and it comes out pretty easily. There was some filler under the plug but this can be sanded out later. I've done a quick smoothing pass to remove the excess, I've not yet corrected what should be a round over. This will be done later once I've made a template to guide me. I am sure that will also need some more filling. Finally the TD uses a TFA style end piece. My initial plan to modle a full replacement core was a bust due to how the model is designed so I had to print it as is initially. I used a hack saw to carefully remove the sticking out section. This went pretty well and didn't require as much filling as I expected. That lip was also carfully removed with the saw and some careful pulling at the layers. This was then filled with a couple passes of P38. Still not perfect but I can address this next time I am using the filler. The TLJ end cap will need to be 3D modelled and glued on. The new part needs to be about 30mm tall, but a paint can cap is about the right diameter so I used one to mock up the look. At some point I may go back and try create a "lose" core style one like seen in the Premier photos but this will do for now. I'll just make sure that the TD can be removed in future and replaced should I chose to. Print progress wise I have completed: The abdomen (still broken but I will repair this, using suggestions from above and some fibreglass) The back plate for the TD The TD Chest plate Back and yoke Posterior Cod All of the Ab boxes Made a start on some of the helmet I have also printed out some rings from the left forearm and biecp to test for fit and sizing. I need to add some card to space these to size. Once that's done I'll grab an undersuit and get some photos for size checks, I have a feeling I'll need to go up a little the same as the armour. On order is a bubble visor for the helmet. I already did a size test for this and used the eye section deliberately so I could measure for the lense. I'll share the supplier and my review of quality once it comes. Current printing focus will be the helmet until I confirm the arm sizing and I will swap to those. I also need to make a start on assembely soon to try age start getting a better idea of the core fit and comfort.1 point
-
Truly sorry to hear that, Leonardo, and hope you are much better! We are ready when you are, sir.1 point
-
And then there were 30... (spots left, that is). Congrats to Leonard Chamberlin (TK 504210- Imc3) for reaching Expert Infantry!1 point
-
6mm will be fine.1 point
-
well done1 point
-
Just checked, the top of them is roughly 6mm accross, is that good?1 point
-
I've got water bathed parts that were already glued, and have never seen the glue melt in them. Sometimes it would separate because of how much I was shaping the plastic, and the glue just didn't hold. So it shouldn't melt, but if it does separate just reglue. Also, if you want your chest plate to overlap the ab plate more while using bracket, make the strap loops in the front longer. This will allow the chest to hang lower over the ab, and if you really need to shorten the strap then you can. On my armor, the ab isn't really supported by the chest, so the chest just hangs and is actually held up by the bracket loop. So, making the loop longer will give more overlap.1 point
-
Fantastic mate.1 point
-
Not only do I plan to, I plan to come with food. (I'm a professional Chef at a pretty prominent local restaurant group)1 point
-
You gotta take advantage of this offer to get together at some point! I’m several hours away, otherwise I’d join the fun! Sent from my iPhone using Tapatalk1 point
-
That part of the ear will probably be covered by the s trim, so it should be fine.1 point
-
Actually about the size of your average pocket knife. I use it at work when I am checking in deliveries to the restaurant.1 point
-
Well on your way, awesome That's a big knife, hoping you're wearing some PPE1 point
-
Looks like you have made some great progress, just remember the old saying, measure twice and cut once1 point
-
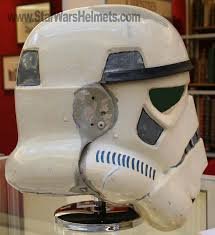
I have 3 ATA helmets and they are all in slightly different spots, never been an issue for approval. You will notice going though reference images they can be before, on top, or in front of the corner of the eye
 1 point
 -
Beautiful work, well done1 point
-
You may be able to apply some ABS paste behind the ear to give a little strength to the area to stop it coming through again. I would maybe have put the screw back a little more central though, looks a little to much to one side.1 point
-
I really appreciate the support, but I don't have a choice lol. I already put the down payment on Jim's armor... And if I don't finish this, then my wife can say "I told you not to buy it"! Can't let that happen haha!1 point
-
Welcome to the Legion fellow TK Hero!1 point
-
couple updates, had a shenanigan that I fixed, the bottom screw on the right ear decided to pull through. Where it should be, Where it is when I tighten it, So I ABS pasted the hole, and since I could reuse a hole I drilled before the ear was fully trimmed I just had to drill one hole. Here is the final product. I also bought a hardhat and have modified it a tad.... Now I can put the important bits in the helmet. I'm planning on using E6000 to glue the yellow mounting points to the inside of the helmet. I guess I could have plasti-dipped the inside after... oh well, forgot about the mounting when I did it the first time , Here is the approximate location (as in, it fits but I haven't measured at all) I also finally finished the snap on the holster, and attached the holster to the belt. I did try and fix that seam on the kidney plate, it's drying right now so I should be able to sand it down again tomorrow or monday, then it should be good to go for sizing, final trimming at the ab plate, and finally rivets installed Not sure what else is on the docket for the night, probably playing a bit of DCS, I might convince the wife to paint a little on the helmet, as you saw before I shouldn't be trusted with the fine details like that. I did get some vinyl stencils to use, so I might put those on tonight, idk.1 point
-
1 point
-
Thank you @TheSwede only those little screws that we are uncertain about, everything else we hope is going well so far. These are all the snaps/straps that I'm replacing on my armour, a heap!1 point
-
Congrats, Jason! When you begin, just remember to save ALL the scraps, as these can be used for interior cover strips on the biceps, forearms, thighs and calves. Do you have your under suit yet? To add to the differences between Stunt and Hero- Each ear only has 2 screws, one above the ear bar and one at the base. For Level 2 (and above) the ear bar can only have 3 bumps, not 4 like a Stunt bucket. Also, the interior of the Hovi tips on the Stunt helmet are completely white. On the Hero version, only the raised portions in the back are white and the sides are black. Hero Stunt Looking forward to watching your build! Don't forget- I'm only 30 minutes away, and I can help you get your entire kit trimmed and most of it fitted in a few hours.1 point
-
So I’m watching Disney Gallery episode 8, and they start talking about the 501st. It brought a tear to my eye. I’m jealous and hate anyone that got to be involved. Nice work, troopers!1 point
-
Congratulations Trooper! Welcome to the rank of EIB.1 point
-
Congratulations Trooper! Welcome to the Legion.1 point
-
Dan Sczudlik 8527 A4 Sha Sha again Es ist mir ein Vergnügen, Bruder. Entschuldigung für die Verspätung! http://www.whitearmor.net/eib/certificates/8527-centurion.png1 point
-
I did just that and it looks great! Thanks for the support and assistance.1 point
-
Can't Wait! Just him my EIB!1 point