Leaderboard


Popular Content
Showing content with the highest reputation on 06/12/2020 in Posts
-
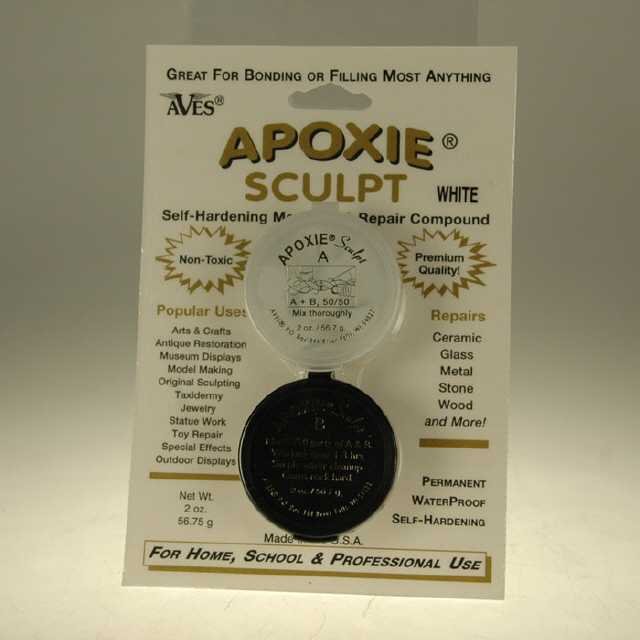
I tried it with abs paste, but I did not like the result...Finally, I used a two component moldable epoxy , and the result was better. After applying it (very easy), I sanded and painted it. This was the result:
 3 points
 -
Hi Emma, great advances , looking good. Looking forward to see the true fitting photos. I would recommend to wait after this fitting to think in trimming the thighs. remember measure twice or more, cut only once. keep on doing a great work, step by step. cheers2 points
-
Did some dental work.2 points
-
Sire thing! Whatever I can do to make it past and make Lord Vader happy! I might try and cut them down to see how they look, if not easy to replace them, thank you!2 points
-
Today's the day when I finally begin to make the armor look more like... armor! I snagged about 30 minutes this morning when the temps weren't too hot and the humidity hadn't creeped up yet to apply two coats of white gloss to some of the parts. It's so exciting to see this part of the transformation. In the pic below, you can see most of the parts painted white. I stuck the primed shins in there so you could easily see the contrast from gray to white. And after two coats applied to the shins... Even though I've applied just two light coats, I'll give these parts a few days to cure before wet sanding with 400 grit- which will be followed by another few coats of gloss white. I really want to get the painting stage of this right, so I don't want to rush things along too much. And I'm out of wire hangers for now. I may end up just buying a few more wire hangers, though. I splurged on a few cans of 2K gloss to apply once the paint is done. I've read that 2K is essentially spray resin, and once I pop the can, I should use it all in one go because of the two-part mix in the can. Anyone know if this is accurate?2 points
-
Made some time to do some painting today. First I started with the scope. A coat of brass followed by some toothpaste to make weathered spots and then some satin canyon black. I didn't like that so much so I toned it down with some matte black. Still seems a little shiny so I may hit it with some plain old flat black in the morning. I also applied an aluminium finish to the entire body. I think I like that much better than the "silver metallic" paint I used previously. I think the softer color and less harsh metal flake is more appealing to the eye. Afterwards I attached my 3d printed magazine well and filled in the gaps with the green stuff.2 points
-
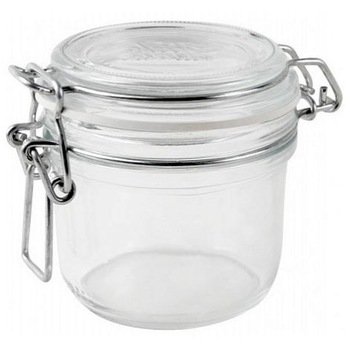
Yes I get that sometimes, a glitch I think with the software. I use a sealable preserve jar, like this which seems to have worked so far
 2 points
 -
coming alone Pura Vida1 point
-
Came out great, nice work1 point
-
Always best when trying on pieces for size you use your undersuit, can make a difference Coming along great1 point
-
looks great .1 point
-
Thank you TkSpartan! A little bit at a time. Also remember how I overtrimmed the rubber S-trim at the bottom of the helmet? My new one from trooperbay came in and it is MUCH smaller than the one from WTF. It's not my favorite, I think I liked it thicker, it hid the bottoms of the ears better that way, but this replacement will have to do for now. Didn't overtrim this time!1 point
-
Today I trimmed some of the last of the body armor- the THIGHS! All I have left to trim is the ab buttons, rivet covers on the belt, ammo pack on the thigh, sniper knee, shoulder straps. Just the little things. But I trimmed the thighs today, comparison pics between trimmed and untrimmed: I removed all return edge from the top, but that was just for preliminary fitting, as I will also be cutting off the tops to trim the thighs height wise. I left some minimal return edge on the bottom (rough cut shown above) which was later refined with the dremel. Here is where I THINK I need to cut to shorten the thighs. How's this? This is based off some research I did. From my understanding I do not want to touch or cut the more vertical scoop portion of the thighs, and just lessen the severity of the curve on the top, and cut out from the backs. I plan on doing a true fitting with my black leggings that I will be wearing under the armor, but I did a preliminary fit just to guesstimate how much work I will need to do: and yes, I will have to shim the thighs. But it wasn't as bad a gap as I thought it would be! And that's with thick sweatpants on, so when I do the proper fitting for width and height, there will probably be an even thinner shim.1 point
-
Thank you for the resource Masked! I've been browsing the forums and have been gathering some of the tools and materials needed for the past couple of days. This will definitely come in handy when the BBB comes round! I look forward to following your build as well! We can compare notes and see what's what lol. Tbh, this is one of the best communities that I've been a part of. It gives me a sense of pride knowing that everyone is willing to help each other out here. I may be new, but if anyone needs help, I'll do my best and try to help out anyway I can.1 point
-
No discussion at all , we are here to help Thomas and every trooper to achieve the best they can do. Thank you @TheSwede,1 point
-
I have GOT to stop watching things like this while I cut onions.....1 point
-
Would you like to share who your flamethrower files are from, no doubt a few will be interested [emoji6] There are a couple of files available that I know if: This is the files I used - https://www.etsy.com/listing/771250168/star-wars-the-mandalorian-flamethrower?ref=listings_manager_grid There is also guy on Facebook who has some nice files - https://www.facebook.com/mmmmystery/ Sent from my iPhone using Tapatalk1 point
-
I knew I forgot something. Picture added to the first post1 point
-
Thank you. Excellent Idea. I’d left them long while I was fitting the lens. Now I think I’m complete, I’ll cut them down to avoid scratches. Sent from my iPhone using Tapatalk1 point
-
Weird... I clicked on the page to write this post and my last post was there still. I guess the forum saved it and forgot that I had already submitted it... eh... oh well lol I glued the shims on with superglue yesterday and today. I had an early morning today so I glued the backer plate last night, and today I glued the visible piece. I think they turned out very well! The seam is visible, and the shim is thicker than the kidney piece as expected, but a tiny bit of sanding, and then a tiny bit of ABS paste and sanding/finishing and I think the seam will disappear nicely. I am probably jinxing myself but I feel like the abs paste won't be a ton of work now. I thought it was going to be a big deal but I guess it's just not as scary with such a nice line to hide. Question on the paste, I have a bit mixed up in a baby food glass jar, but the seal on the lid came off and warped. Are there any better glass jars recommended? I'd hate to have a glass jar full of hard plastic because the acetone evaporated after a few days.1 point
-
Very nice build! Congratulations! Maybe I'll have to go this route in a few years when I'm ready to retire my Shiny.1 point
-
Some info on new CRL production https://databank.501st.com/databank/Costuming:CRLGuide Would you like to share who your flamethrower files are from, no doubt a few will be interested1 point
-
In a word, AWESOME1 point
-
Always hard when painting curves, I do like to use automotive acrylic paints as they are a little more forgiving and dry very fast, but that being said you are getting a nice finish.1 point
-
I'm not crying, you're crying.... move along nothing to see hear....it's hay fever, I'm sure it's just hay fever. That was very touching Christine, your boy has a heart of gold you must be so proud. Thank you for sharing.this amazing story.1 point
-
Thanks guys I've done a bit of additional trimming on the biceps and forearms so I thought I would show you the latest pictures: Left bicep: Right bicep: Forearms - I trimmed out the scoops to fit. I had to take more out of the left forearm as it is a different shape to the right. I can now bend both arms without them digging in at the joint. In the photos immediately below I know I still need to take a little more off the return edge at the wrists... Left forearm: Right forearm: I then thought I would try the forearm wrist sanding technique I saw in @CableGuy's YouTube video - it looked much more appealing than the Dremel and seemed like an awesome idea! Results below: How is it all looking - anything I should adjust before moving on? Many thanks Adam.1 point
-
UPDATE: Thanks to Caleb (MaskedVengeance) I now have the quick links to individual posts working in the main thread. No more having to scroll down to find a particular item!1 point
-
Amazing ! Congratulations so it is worth every effort and sacrifice. We are 501 st. and we are FISD1 point
-
Welcome back to the FISD! Good luck on your build!1 point
-
Congratulations Peter!!!. 5 minutes putting a pair of white elastic bands and you're ready for Centurion!!!1 point
-
Welcome back, Iman! I have a slightly similar story to yours, having browsed through (but not joined) FISD a little over 10 years ago, but only now finally working on my build. TKSpartan provided you with excellent links to sub-forums with great resources, and I'll add my own compilation. This index contains many of the resources that I've found helpful on my journey to the 501st, and perhaps it can be similarly helpful to you! I look forward to following along with your build and crafting our armor at the same time. As others have already said, we're all here to help each other!1 point
-
Welcome back Iman1 point
-
got to paint some parts the clear coat kinda messed it up a bit leaving some drop marks nothing too noticeable not perfect but i am not going to beat myself up about it too much1 point
-
Welcome back Iman Sent from my SM-G960F using Tapatalk1 point
-
Welcome back Iman!1 point
-
Hello and welcome back1 point
-
Hi Iman, welcome to FISD...This time your dream will come true, I'm sure...Nothing better than making that dream come true with your own hands... Don't forget to tell us when your BBB day arrives!!!!!1 point
-
Hi Iman, Welcome to FISD. Glad to read you're finally on the way of make , as all of us here, a Dream come true. Congratulations for your RS purchase, It's a great kit and looking forward to see your BBB day Photos. Once you recieve your Kit , open a Build Thread here in the forum to receive tips and help. I would recommend to browse the Getting Started Section and Build Threads sections for TK and the to have and idea how an armor build is. RS props has also YouTube videos that you can see meanwhile. Cheers and looking to see your thread soon. Cheers and welcome again1 point
-
Aww, thanks, troopers! Still working on filling small spots and sanding armor. It's too hot and humid to paint (grr!), so I get to focus a little on detail prep work. Today I'm working on kneecaps and ab boxes. Nothing exciting, but it's progress. Since I don't have any pics to share of my work, I thought I'd share a video of the event where Cameron donated his armor. This video link was just posted a few days ago, and it brought tears to my eyes. Events like this are the reason why I love being a part of the 501st Legion.1 point
-
Thanks for that tip, Caleb! I've actually already been following along with Jeklyn's thread, and am looking forward to seeing the continuing progress and end product!1 point
-
We're here for you if you need us1 point
-
Thanks and waiting on D Rings to arrive in the mail. Photos soon!1 point
-
1 point


.thumb.jpg.77bd551337f7adc46a4b151e703df6be.jpg)