Leaderboard


Popular Content
Showing content with the highest reputation on 11/07/2019 in Posts
-
Oh, don't worry, the spares are non-existent too so they should match perfectly.4 points
-
This is the way I have found that works really well: I am using your discarded ABS belt as an example- 1. After measuring the width you need, use a metal ruler or straight edge and clamp it down next to your cut line (2 clamps suggested). 2. CAREFULLY using a razor knife, slowly and steadily score along the cut line as deep as it will go. 2 or 3 passes should do it NOTE: you do NOT have to cut all the way through! Once it is fairly deep you can just bend and snap it off. Depending on the length you need, you may have to move the ruler down and re-clamp. IMPORTANT! Don't make all of your lines on the ABS at one time before cutting. Cover strips have different widths for different areas, so measure one at a time. Measure each one to the length you need, sand down the sides and you are done. Hope this helps!3 points
-
Thanks all going to fix those issues this weekend and I'll post the new photos then!3 points
-
Thanks all! I’ve given my belt a haircut and trimmed the back of my thighs which now look and feel much better. Thank you all - hope to see you on future troops!2 points
-
Insane. So you can buy spares just in case you break your non existent armour!!! Fool me once...............2 points
-
Received my orders to report to Japanese Garrison for the glory of the Empire. First troop will be Tokyo Comic-Con starting November 22nd.1 point
-
ANH Stunt joining the North Texas Squad of the Star Garrison. Very excited to be apart of the 501st and looking forward to trooping with everyone.1 point
-
Congratulations and welcome, trooper!1 point
-
Hi guys, This called my attention. I have a couple of observations as ideas for improving size and cost, having worked on stuff similar to this for my degree. you can fit LCD shutters (samsung smart TVs use similar stuff for 3D glasses) on the visor easily enough, with a micro usb camera on the teeth, all wired to a Single Board Computer like an Aaeon UP Squared or an Nvidia Jetson/Xavier (depending on specs I would go for Nvidia because of real-time graphic processing), they can fit on the back plate just the same with a 3Dprinted case and you could have the whole thing working for $500 at 1/4 the size and weight for extended periods of time with a lithium ion battery for power. It could work for an entire troop no problem. size on the helmet would be minimal depending on the camera used because lcd shutters are extremely thin. Let me know if you have any questions and would love to see a prototype. Best Regards Javier1 point
-
The original Stunt helmets (ANH) were made from HDPE (High Density Poly Ethylene). The Hero helmets and all Stormtrooper armor were made from 1.5mm ABS. None were made from fiberglass.1 point
-
They’re selling replacement armour parts to replace parts on armour that hasn’t shipped yet?1 point
-
Well, I am a lot more positive these days. Feel I know what to do and I really do believe i can get there within the next few weeks. Just got the last popper snaps I need (for the cod to back) and need some sowing done before I can install the rest of the strapping. Feel like my last obsticles are getting the shoulder bells to connect tight to my neck and do the adjustments to the belt. A bit scared about cutting in the fabric to get fabric to cover the holes.... Pictures will come during weekend i hope. So now i am actualy thinking about what ID number to put in my application1 point
-
Congratulations Trooper, Welcome to the Legion. !!!1 point
-
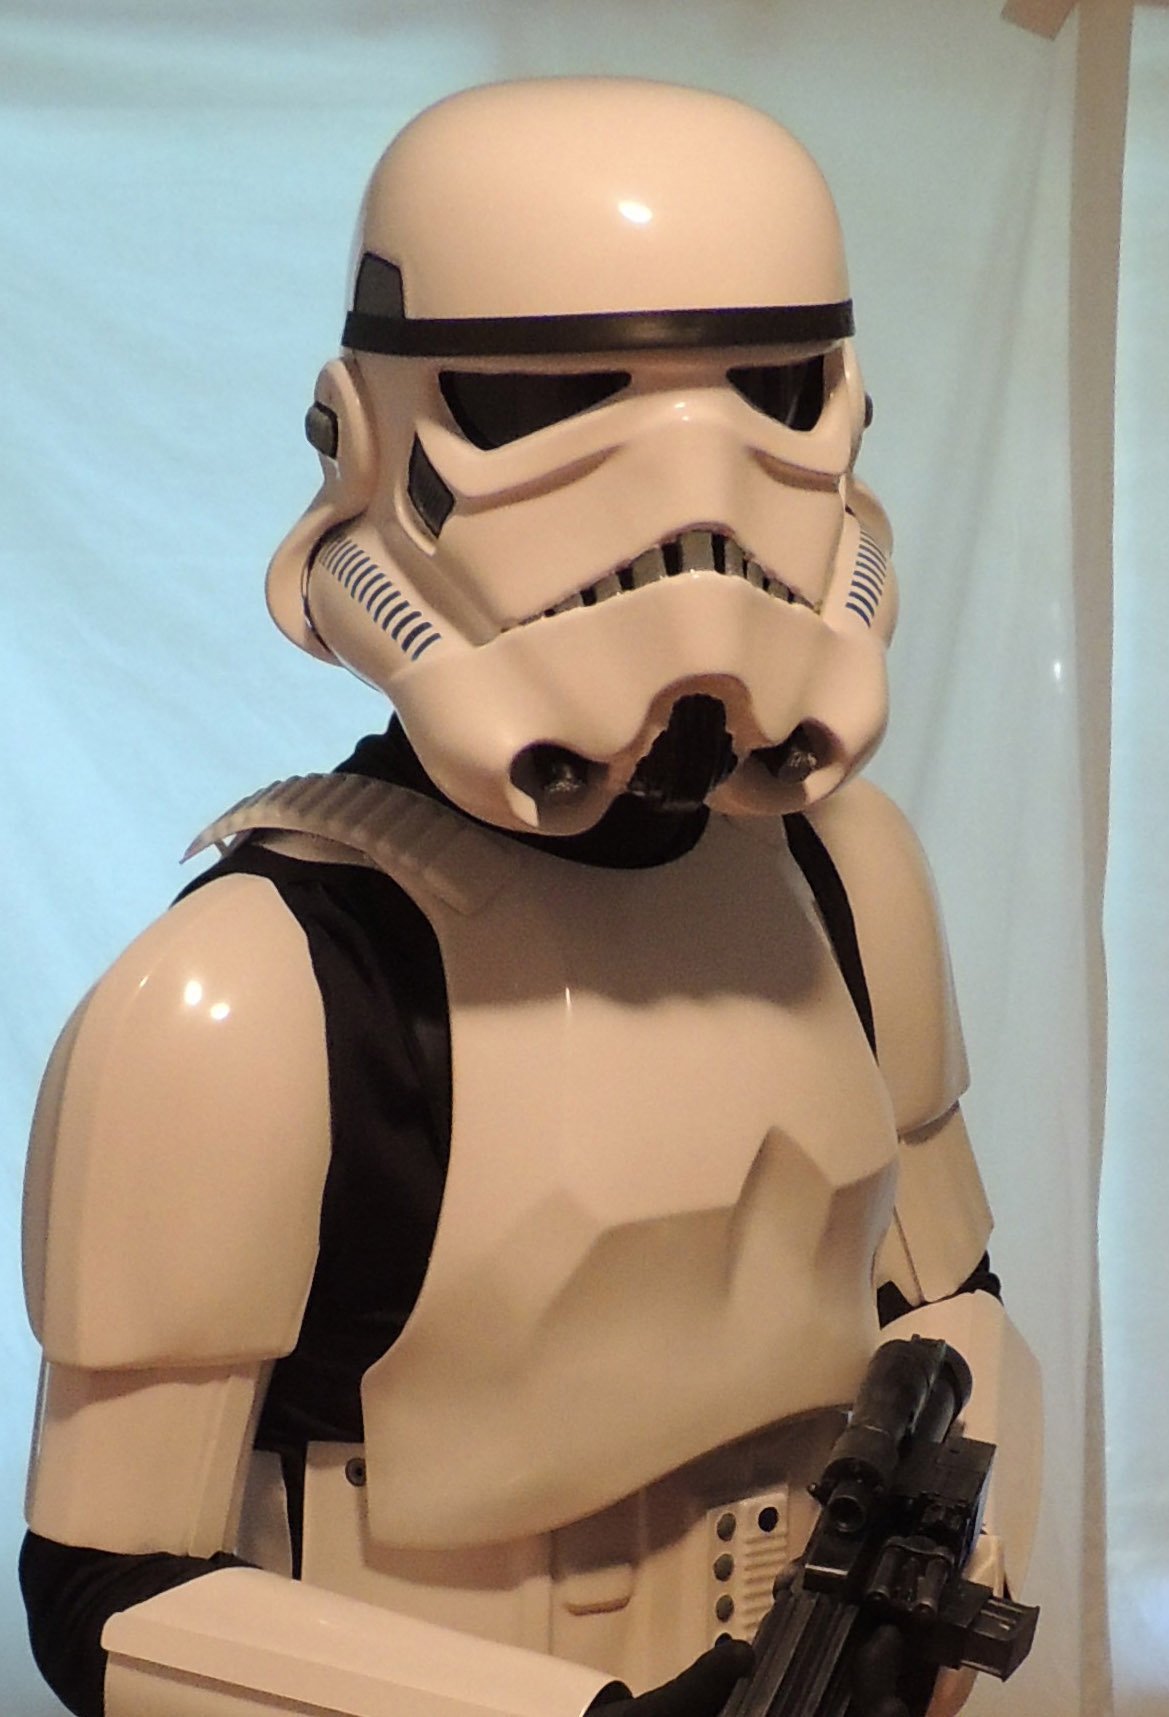
Hi Rob! Thanks for all the additional photos. We're going to have you make a couple more fixes before continuing. First, per the L2 CRL: Correct 'Hovi mic' aerator tips are present. Screens used shall be of a wide type mesh, with the rim of the mic and the inside white or painted white. You've done a nice job with the white rims, but it doesn't appear the interior is white. Reference Images: Next, we're requesting a fix on your posterior snaps. AM armor comes with a bit of a tab/extension on the posterior section, maybe to fit larger troopers better. However, that tab wasn't present on the screen-used suits, and although it's not something specifically called out in the CRL text, the DO team discussed it and we're requesting that you trim off the extra tab and move the snaps. Not only will it be more accurate, but we believe it will probably make your armor more comfortable to wear. Reference Image: You can also look a previous AM approvals for reference. Thanks for your patience; you're almost there! Please reach out to me or any of us on the DO team if we can be of assistance.1 point
-
Congratulations trooper, Welcome to the Legion!1 point
-
Looking sharp trooper, congratulations and welcome to the Legion. Sent from my SM-G960F using Tapatalk1 point
-
Congratulations trooper and welcome to the ranks1 point
-
Yes, they started trying to sell each individual replacement kit back in April. Sent from my iPhone using Tapatalk Pro1 point
-
Thanks everyone for the helpful feedback! It's a bit overdue, but I'm pleased to announce I am APPROVED! Again, this community has made the build process enjoyable, and I'm proud to start trooping with the most active and supportive Detachment around. I'm definitely not settled or done with this armor - already putting some of the fitment changes in place, and prepping to break down the helmet for the L2/L3 applications. That said, I'll be keeping all of that work on my original build thread, so stay tuned- Looking forward to seeing you there soon.1 point
-
Hello, Nik here from Canadian Garrison (GTA area). Extremely happy to be a member of the 501st Legion (been a long "road" for me) Approved August 2018 Fan Expo Troop-am one with rifle


 1 point
 -
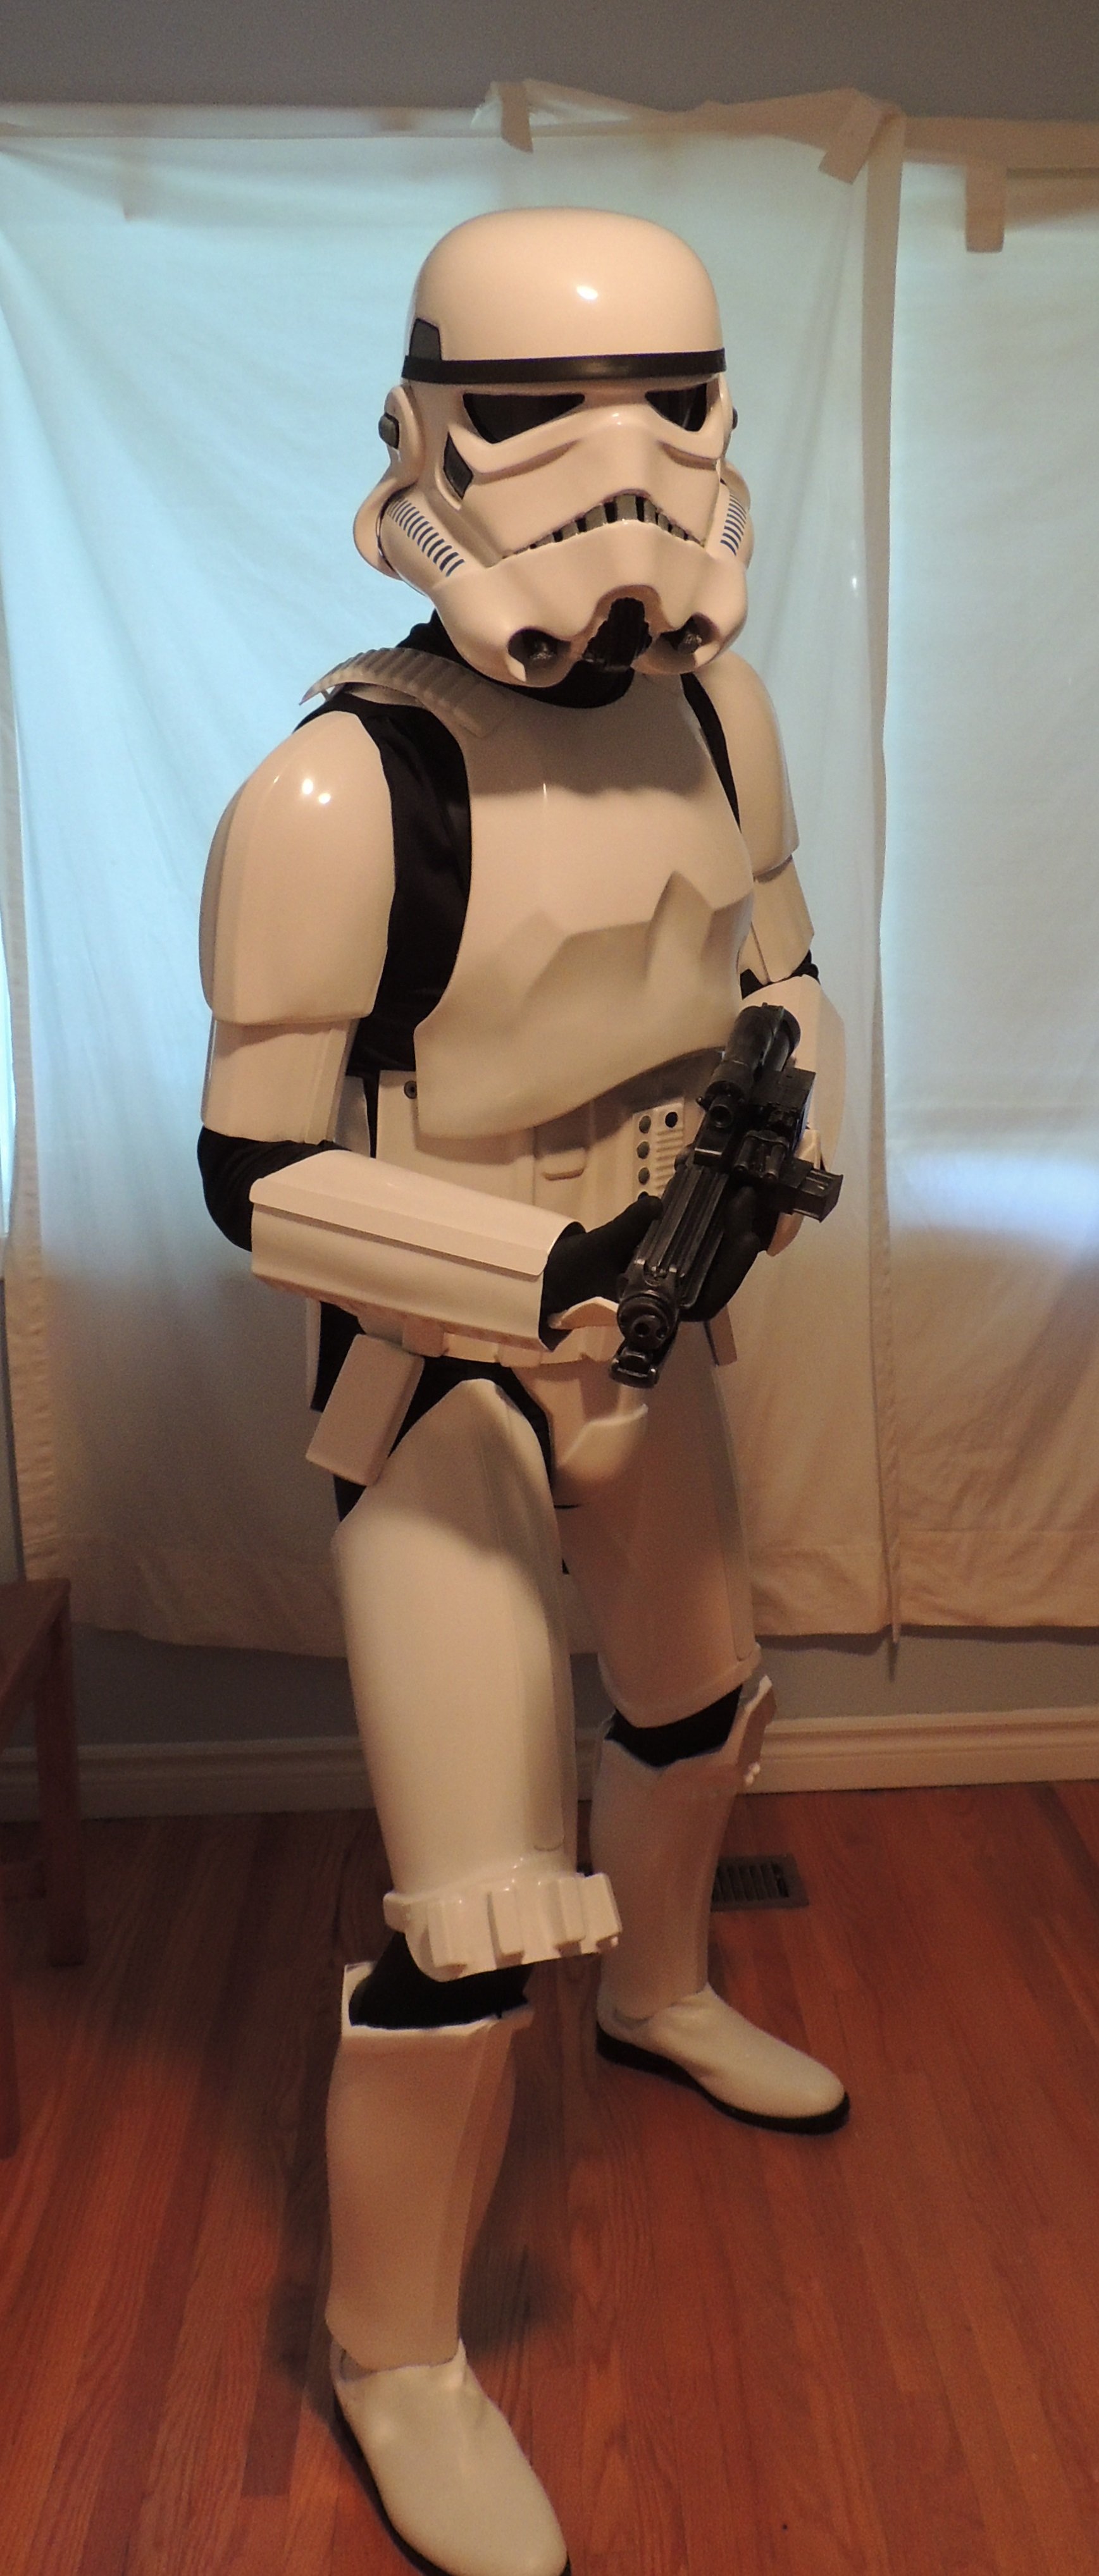
Hi Fred, and really nice overall build on this AP armor! There are a few issues which may cause a snag for basic approval, but nothing insurmountable I assure you. Actually, with a few tweaks here and there I can see you taking this to at least Expert Infantry level! A lot of the items listed below (and some that Q listed) are simple strapping issues, which are much easier to work with than you think. In addition to what Q has mentioned. here are my personal observations/suggestions: 1. Your biceps are riding pretty low and could stand to come up around 3 (maybe 4) cm. Just tightening up the strapping should do the trick and will prevent them from peeking out from under your shoulder bells. 2. Since raising the biceps would increase the gap between those and the forearms, you should raise them as well. Again, a simple strapping issue. Note the blue lines below... everything should look pretty even and symmetrical. 3. You can safely drop the thighs a bit as well, especially the left one as it is riding under the cod. Just make sure the tops are even. 4. Your left calf is riding very high, causing it to ride over your boot. *** The right one is also doing the same thing in another shot so I am recommending that you lower them. This will obviously create a wider gap between the bottoms of the thighs and the tops, but you should be fine for approval with that. Also, there are black stripes on the backs, which will need to be painted/dyed white. Easy fix! *** Something that I have seen done that may help this issue is to create a stirrup in each boot. This is done by gluing some elastic inside the bottom part of the calf (thick green line) and actually running it under your feet before putting on your boots. This keeps them pulled down snug. Hope this helps, and always feel free to ask any questions or for more advice. I have faith that you can jump on these suggestions and you will have that TK designation sooner than you think!1 point
-
Sorry I didn't see this when it was first posted. Just a couple of things straight up, your chest plate is not covering the ab plate, there should be no gap there, looks like your ab may be able to come a little more. Also biceps should sit just under the shoulder bell, one is and the other is not (both are not on the rear photo) moving the biceps up with allow more room at the elbow, also bring the forearms up a little, you are touching your hand plates. Tops of boots sticking out under shins. At the back of the boots you also have black lines, shouldn't be there, may need to paint this white. Also the shoulder straps on the rear are sitting upwards, may need a bend down, one appears not to be reaching the back plate. You have a very large gap on the side, you may want to even this out or try tighter strapping. Drop boxes should align with the end of the plastic belt section, adding a little glue to the straps can keep them in place, you could reduce the length of the straps also, only need a few mm's Stunt version have a higher brow trim than Hero's but should be ok for basic approval. You could also add some white to the mic tip ridges. There should be no grey on the gums around the frown, look like you may have a little paint there. A few tweaks and you should be good to go. Great work and good luck with approval1 point
-
Hang in there....you’re doing a good job [emoji1417]. I remember being on the same boat as you ! I would spend 1-3 hrs every day with my armor. Setting small achievable steps would help my confidence. The journey of 1000 miles, BEGINS with the 1st step. Well you’re way beyond that !!! Keep it up !!! Sent from my iPhone using Tapatalk1 point
-
Very cool idea, I'd love to see a working example! The cost is too much for me, but I also don't need to see 360 degrees around me. I would be happy with just a simple view in front of me. Does you set up completely block the normal view out of the helmet lenses? One issue I would be concerned with is the tech failing mid troop and not being able to see anything.1 point
-
FWIW, here is the "history" link that I should have used. All sources are referenced. ---------1 point