Leaderboard


Popular Content
Showing content with the highest reputation on 03/29/2019 in all areas
-
So true, assembling by the skin of our teeth. Thank goodness some of the Alphas took time to post some build progress, I know it was no small task with only two weeks from start to deadline. This armor was something else. Sorry passed out. Yea I'll be there with the wife and a couple mates. Speaking of crazy lol. Glad to see this thread finally move past the negative. With some product finally on it's way for those that have been waiting it's a breath of fresh air to say the least. To answer your questions: 1. Yes 2. A dozen or so 3. No but I've seen a grown @#$ &@%#$3 points
-
That would be cool, but not likely. You? And I love how this has turned into a private chit chat. Better than "didn't get my ANOVOS xyz yet" I suppose. So do you like oranges? How many times have you seen Back to the Future? Have you ever been in a Turkish prison?3 points
-
Thank you! I'm going to use a Matte Clear coat when it's dry so expect pictures of that soon! Thank you for the warning about the Matte picking up marks. I'll be extra careful. So last night I received my cans of Rustoleum Matte Black (I forgot to take a picture of the can) and decided it was time to add the black stripe to the Executioner Helmet. Here is some of the pre-paint tape job. The Back of the helmet. The Front of the helmet. I used Electrical Tape so that I could try to mirror the curve as best as I could. I also used some plastic bags to help keep everything covered. After sanding and setting up it was time for some paint! After the first few coats of paint! Finally left it to dry over night. I'll be checking on it later tonight. Then it'll be clear coat time! It feels great to see some actual progress! It feels like it's more worth it! More updates coming along soon!2 points
-
And as excitement around delivery continues, here are a few pics to savour. Some good looking pulls. Talk of resin boxes too. Heavy but screen accurate. Sent from my iPhone using Tapatalk Pro2 points
-
FINGERS. TOES. ARMS. LEGS. ARE CROSSED FOR DELIVERY!!!!2 points
-
Hello Glen, Yes indeed, I missed that the bicep should drop much lower than that. Will find a fix for it later. Corrected the button plate, just a fit here before I glue it back with E6000:2 points
-
Hey Adi looking good. One of the DOs will be with you shortly. If I had any suggestions to enhance the look of your armor it would be to following: 1. Tighten the strapping on the side of your posterior, they're flaring out a bit. They should be even with the kidney plate. 2. Raise your waist belt so that the upper ammo belt is at or just below the lowest Ab button. There's a couple more areas that may need some enhancement but none of these or the above should hold you back from EIB.2 points
-
Hello everyone , trying to apply as EIB here Name : Adi Baskoro TK-32294 Forum name : Bazz Garuda Garrison Indonesia Mandatory Information Armor Maker : ATA Helmet Maker : ATA Blaster : Doopydoos Height : 168cm (5'5) Weight : 65 kg Canvas belt : @TKittell Holster : @Darman Boots : Local made Strapping centurion set + elastic handguard (not installed yet) : @Alay Neckseal : Got it from @Chops TD Clip : @ukswrath Front Back Right Left Armor Details Abdomen details Action Shot Interior Strapping Cod and Butt Plate attachment Helmet Details Front Sides Back Hovi Tip Details Lens Color Blasters Accesory Details Neck seal Thermal Detonator Holster Attachment Thank you for the review I'm very open for advice and opinions Regards TK-32294 Bas1 point
-
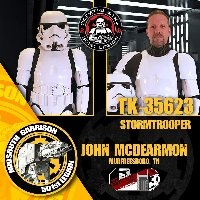
TK-39701 Requesting ESB EIB Status [RS] Trooper Info Name: Pascal Gutfleisch FISD Forum Name: GIZA87 Legion ID: 39701 Garrison: German Garrison Legion Profile: http://www.501st.com/members/displaymemberdetails.php?userID=23509 Height: 5'10" / 178cm Weight: 153 lbs / 69kg Costume Information Armor Maker: RS (RS Propmasters) / PVC kit Helmet Maker: RS (RS Propmasters) / PVC kit Neck seal: ImperialSaemstress Belt: RS (RS Propmasters) Boots: Imperial Boots Holster: Selfmade by garrison member Blaster: E-11 Resin/Rubber Selfmade by garrison member1 point
-
So I don't have much to do right now until school starts, April 30th. So here is my project! I was given a replica of Sting from the Lord of the Rings a while back and it is not quite as accurate as I would like. So I want to help it along. Note that I do not intend to make this 100% screen accurate, if I wanted that, I would probably start from scratch. Here are pictures of my Sting. And it taken apart. Notice the weld of the bolt. Not so straight. Here's the real deal. Here are the main changes that I want to accomplish. Color Width of Hand Guard Fix Scabbard Details My plan is to get bondo and other materials to make a master and then mold and cast copies so I can play around with different designs. Stay tuned!1 point
-
Makes no difference to me so long as builders are no longer confused by the information1 point
-
I use a harness with my TK's. It works great. It helps hold everything in place. You should see the looks I get from other TK's when I get dressed. I dont have to squeeze into my little turtle shell like others. As long as it looks original when it's on you it doesn't matter how you get there.1 point
-
I remember that. I know a lot of the beta group were taking notes on what not to do . Thanks for hitting the trenches before us We're hoping for the best for each and every one of you.1 point
-
Wow, good point on outer biceps, I will look into that, but first I will replace my elastic, it is way to tight Sent from my SM-G965U using Tapatalk1 point
-
Shin tab or a section of forearm? I do remember someone slicing off the forearm section before realizing it was a connecting point. Thanks goodness for the scrap1 point
-
Walt does offer larger bells now. I know on my WTF kit, I removed all the return edge on the bells and then I removed the return edge on on the outside of the bicep allowing my arms to come in closer. I still have a bit of a gap but its better until I finally pull the trigger and get them larger bells1 point
-
Thank you Sarah !, your centurion strapping set was very helpful ( also your build thread + advice )1 point
-
Ah I see, yes I need to fix the strap Okay maybe I'll use velcro for the waist belt, thank you Tony1 point
-
Even as a beta they where delightfully, patient, exciting, scary times, "what instructions, who needs instructions"1 point
-
Not much time to build these days, but I have a fully built AT-ACT Driver arriving tomorrow just in time for Chicago. I'll be toting the Kenner Vader too.1 point
-
And I saved every friggin scrap until I was done because we had virtually no reference as to what we were cutting. I think at one point I had to fish out a shin tab.1 point
-
Still have some from my scout helmet build...saving for repair work if ever needed haha. Sent from my iPhone using Tapatalk1 point
-
Bring back memories?1 point
-
Omg is this real !! I can’t believe my eyes great googly moogly Sent from my iPhone using Tapatalk1 point
-
It's PARTY TIME!1 point
-
None that are required for EIB or Centurion. I'd ask Paul TM, he may have exact specs, I haven't seen any reference material on this.1 point
-
1 point
-
The elastic is to tight on bottom of both bells. I will have to re-strap bells Sent from my SM-G965U using Tapatalk1 point
-
Nice work although they do appear angled from the cheek, here's some nice references showing the gap consistent along the cheek ------------1 point
-
They look more then pretty good, great job. Sent from my iPhone using Tapatalk1 point
-
WOW, Arthur! I've been waiting 5 months for this! Outstanding job on those helmet fixes, brother. Just need the rest of the photos!! For those of you who may not be aware, I have asked Arthur to be the new ESB CRL model for the upcoming updated version, and he has agreed. Well done, sir!1 point
-
Lovely!1 point
-
That amount of reading will take care of my #2s for a week or so Looks impressive!1 point
-
Nice work so far Tyler, keep it up.1 point
-
Congratulations Miguel, beautiful job. Welcome to Centurion1 point
-
Good luck with the Rustoleum I had issues with it in the past being blotchy so changed to automotive acrylic paint, dried a lot quicker and seems a little more solid. The black for Executioner is a matte black which does pick up oil from fingers so try to use soft gloves when handling, some apply a matte clear finish which does help keep the matte from getting blemishes, also I clear coated the helmet before applying the matte black.1 point
-
Yep, very little has changed lol1 point
-
Like Sarah said, check how it looks with the torso and also, the original bells were trimmed with a curve and not straight which will help getting the bells closer to the chest and back. Bell from the Lucas archives taken for the court case with SDS Original to the left. Original to the right.1 point