Leaderboard


Popular Content
Showing content with the highest reputation on 09/04/2018 in all areas
-
Hi all! During the recent changeover to the new server, the program for issuing certificates for EI and Centurion was affected. Mathias has worked like a madman to get this resolved and has come through like a hero! If you requested one during or since the 1st of August, I am working to get those issued. We appreciate your patience, and if there are any problems, just PM me. Thanks! Joseph5 points
-
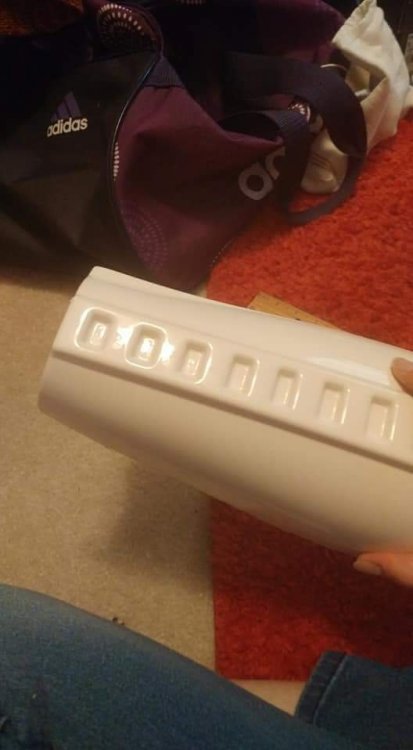
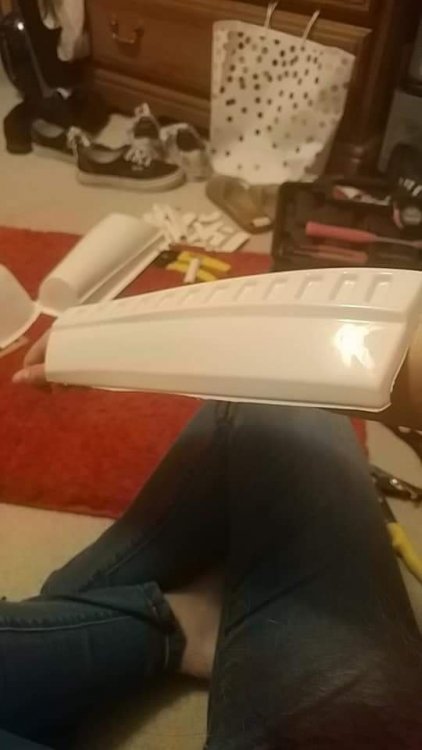
Holes cut with dremel small sander drum Used the tape to prevent sticking and cover strip is on (and more waiting...) This may be a very slow process due to the E6000, but should be worth it.3 points
-
Got the lower torso all strapped up today. A little heat gun treatment reduced the slight flaring of the lower/outer edges of the posterior piece, it now contours to my sides much better. I do have a bit of overlap at the bottom rivet on the riveted side, but only when I strap the cod and posterior together. I'll need to figure that one out... Also got notification that my next order of snaps shipped today, should be here Wednesday, so that's good! Hopefully they're actually Tandy snaps this time.3 points
-
Prop store have an auction at the end of the month and one lot is a TLJ screen used helmet. https://propstoreauction.com/view-auctions/catalog/id/138/lot/28672/?url=%2Fview-auctions%2Fcatalog%2Fid%2F138%2F%3Fpage%3D20 Whilst none of us are likely to have the money to buy it, there's some amazing images as always so some excellent reference. See also these ANH stunt helmet and E-11: Hemlet https://propstoreauction.com/view-auctions/catalog/id/138/lot/28623/?url=%2Fview-auctions%2Fcatalog%2Fid%2F138%2F%3Fpage%3D18 E-11 https://propstoreauction.com/view-auctions/catalog/id/138/lot/28622/?url=%2Fview-auctions%2Fcatalog%2Fid%2F138%2F%3Fpage%3D182 points
-
absolutely i will, after work tonight i will just post as many pictures as I can.2 points
-
you will, no problem. Be sure to upload photos as much as possible. weather its showing off, or needing help, ask, and upload! give us something to look at!!!2 points
-
Bravo!!! Really good work so far. Those shins are coming along flawlessly.2 points
-
Like Rat said 1" is fine.2 points
-
I would think that the 1" would be okay. Just cut them so they are like 2" in length so you can double them up for the security factor. Sent from my VK815 using Tapatalk2 points
-
Because if you needed to repair something gluing them would make the repair process that much more involved. 2 cents2 points
-
Hello all! My name is Taylor and my BBB day for Anovos was just a few days ago! Yay! I was told that it would be very helpful to create a build thread on here as it is my first time building a TK costume, or any costume for that matter. Anyways, I am a female and am only 5'1" so I have quiitttee a bit of trimming to do! I trimmed the forearms today and they are pretty large on me. I hope I can figure out where to trim everything when the time comes! Stay tuned!
 1 point
 -
Wanted to share my progress with my build. I have finally did the initial trim of all the armor pieces. One exception is that Anovos is to be sending me a replacement piece for the buttocks. It was scuffed through the plastic covering. In any event, ready for next phase of the build. Any advise where to start next? Should I sand the edges to smooth out or start with a specific section for fitting? I have some issues with thighs being too tight and need to address this further to ensure I am a fit for the kit... Before trim After trim Feedback and advise welcomed! Thanks Sent from my iPhone using Tapatalk1 point
-
NO! You build more armor than I do, you build mine lol Good to see you brother, hope the fam is doing well.1 point
-
Ghost of Christmas past lol1 point
-
So many small updates today, ha! But, j got the second thigh taped together. Thinking I'm doing to half to trim a little bit more. I was mostly wondering if they're on the right side, which I THINK they are? Sent from my LGLS992 using Tapatalk1 point
-
Ty, gmrhodes.... I’m not done [emoji736] YET !!! Sent from my iPhone using Tapatalk1 point
-
Congratulations trooper and welcome to the rank1 point
-
Thanks. Super nervous, but I know slow & steady wins the race. Plus I'm gonna have mentor help by my SoCal Garrison (IE Squad) mates, so really looking forward to the BBB Day and getting this thing started!1 point
-
I better not beat u to level 3....lol Sent from my iPhone using Tapatalk1 point
-
No have had a lot going on. Its not easy being a Commander1 point
-
Yeah clear and concise pictures are really good, plus they help us to see what the issue may be. Yeah the Anovos kit has way, way too much return edge. Sent from my VK815 using Tapatalk1 point
-
Where are you based? Remember this is a world wide forum.1 point
-
1 point
-
Well let the fun begin. Look forward to watching your build Craig. Sent from my VK815 using Tapatalk1 point
-
Congratulations Jose! Welcome to the Advanced Ranks Trooper! Nice to see you're hitting those easy fixes quickly. See you at Centurion soon!1 point
-
I agree with all of Glens points. Not a fan of #3 just because it looks weird compared to any other TK. Maybe it was meant to make it stand out from other skins in game???. #10. Funny all the shots I found when making mine never showed a holster. But there it is. I thought we ironed out the overlap for level 3 not being required anymore since not all makers can be adapted to overlap. I thought new reading is if your armor supports it( TM, CFO....) then go for it. If not we allow coverstrip. That's reason how I was able to get Centurion. I think your recruit should be ok Glen. Definitely need to add #4 to CRL. They can be seen in most shots. I added mine after Centurion approval just to not go against requirements. Thanks for bringing this up again Glen. The more we do things like this the better and more accurate we get. Even with this awesome mixed up FrankenTKstein!1 point
-
Yes I did, actually. Cool.1 point
-
I believe you automatically follow when you start a thread. Did you get a notification when I replied?1 point
-
1 point
-
Well, let's get cutting I suppose Sent from my LGLS992 using Tapatalk1 point
-
Nice work, Craig. Looking forward to following your progress. :-)1 point
-
LOVE that attitude, Jose!! We will have you out there making the Star Garrison proud as a Centurion before you know it!1 point
-
I’m already working on it, guys.... Level 3.... YOUR NEXT !!! Sent from my iPhone using Tapatalk1 point
-
Hi again, Jose, and thank you for your both your patience and your ANH-Stunt EI application. CRL and EIB Application Requirements: All required submission photos have been posted, and I am very pleased to announce your armor displays all the necessary elements to qualify for Expert Infantry. On behalf of the D.O. Staff, congratulations! Other-Armor Fit/Assembly: In this section we review observations made by your fellow troopers and ourselves. Some observations may lead to suggestions to improve the overall look of your armor. First, thank you for all the hard work in fixing the issues that have been discussed! For the higher levels, it's all about looking your best and getting a close as you can to screen accuracy... here are a few other items that will help you do that, so let's dive right in! 1. The tears on your helmet would look a lot better if extended to the inside edges of the indentation. Reference image 2. Your vocoder looks good, but a bit of black paint and a "filbert" style brush would clean up the edges and make it look even better! Reference image 3. The tops of your shoulder bells should be touching (or very close to) your shoulder bridge. I have some ideas for achieving this in the section below for you. Reference image 4. For a much better look, your canvas belt could stand to be raised quite a bit in the back. The front part meets the requirements for level 3 by touching the bottom of the center ab button plate, but that could come up more as well and still be acceptable for Centurion. Reference image 5. Some of the buttons on your ab plates could be a bit smaller and more uniform in size. Removing the paint and cleaning them up would take some time but would be well worth the effort and improve the look immensely. Reference image 6. You have your TD plate a little too far toward the front. The "O" should basically face straight up. I noticed that it touches the ends of your clips on the bottom, so just trimming the ends off of those and repositioning them should do the trick. Trimming a small amount from the bottom of the plate would help as well. Reference images Centurion Suggestions: Because Centurion photos show much more detail than EIB, items pertaining to Centurion might be seen there and not here. We try to point out all we can from what is seen but the final accuracy is the responsibility of the trooper. 1. Your shoulder bells should be brought in a lot closer to your chest/back plates. I noticed that you have quite a bit of return edge on the bottoms in some areas, all of which can be removed. You may also want to consider a hot water bath to widen/reshape them to conform to your biceps and ride a lot closer in both the front and back. CRL: There should be a minimal gap between the shoulder armor and the chest/back plates Reference images We realize that not everyone can achieve the "perfect gap" as seen above, but with a bit of work I feel confident that you can get a lot closer. 2. Super nice job on sizing those shims for your ab/kidney connection! The gaps are spot-on, but you will need to use some ABS paste on the right side (like you did on the left) to cover the seam. CRL: A single visible seam line is present 3. The ear bars should only have one bump painted black. Easy fix! CRL: Ear bars shall have only one bump painted in black Reference image Overall a really nice job, brother. I am hoping you can get on these issues like you did the previous ones so that we can get you to Centurion!1 point
-
Hey Jeff welcome. While you're waiting for one of the DOs please post a link to your EIB application thread at the top of the page. Thanks1 point
-
And I found that idea from someone else here on the FISD. I just can't remember where I saw it! You did a lot more than I did to reinforce those straps by adding the extra ABS pieces in the divots. I just filled everything with e6000 and prayed it would work. Nice job!1 point
-
For history - the original CRL is designed to use screen caps of the actual game to the maximum extant, as they are our best resource. Action figures much less so as we all know they take liberties on the details. Also, the skin that was supplied originally by an LFL contact is not necessarily canonical as we can't ascertain to what extent it was a guide/preview, and in the end when it's a choice between a screen cap of the game and the skin, we use the screen caps. In the original game it was essentially an ROTJ suit (plus ab detail change) and an ANH based helmet (with funky ears). Later iterations of the games where the skins are different/updated could cause us to refine the CRL, or provide two option paths to L2/L3, e.g. original game vs. newer game, if found necessary. CRL models are always a WIP and are the best we have for date. For example I was the CRL model for the TKC until Magni showed up with a better suit that mine, and so now he's the CRL model. At some point in the future there may be a better one than Magni, etc. IOW, CRL text is favored over the model when there is a conflict, and the model is the guide when there are no details in the text. Hope that makes sense, and thanks to Glen for taking on what is a thorny challenge in getting a solid recommendation out.1 point
-
Yeah, it's up there quite a bit, can't bend my knee hardly at all. I'm thinking about trimming maybe half an inch or so and seeing what that'll do Sent from my LGLS992 using Tapatalk1 point
-
Thank ya, I will definitely be sure to test fit the other shin tomorrow and see how they look together. Maybe I can actually get something glued, who knows! Sent from my LGLS992 using Tapatalk1 point
-
Like Glen and Tony said it never hurts to be prepared. Double up or single is personal choice. Though I would suggest if you want a few loose ones to carry along on troops then make them ahead of time and have them ready to go for field repairs.1 point
-
Just roll the bend out a smidgen so the button is facing straight up or outward abit then polish the metal with scotch brite and you should be golden.1 point
-
I use mine to showcase all my Legion, garrison, detachment, etc. stickers. It's gotten enough weathering by getting banged up going in and out of my car, and rolling in and out of trooping venues lol.1 point
-
Congratulations trooper and welcome to the rank1 point
-
Congratulations on achieving EIB! Welcome to the ranks !1 point
-
Opened up the helmet a bit more and cut down the screws you see there. Also opened up the teeth a bit more, from this: To this: And then I decided to just dive head first into painting. My hands seem to shake and i'm not that good with handpainting, but it turned out ok I guess? I may have to do some adjusting, but i'm not sure. Seems like I need to widen the temple trap, and also maybe increase the size of the left rear trap bottom side. Hopefully i'll have my Burkbench package sometime this week1 point
-
Shoulder Bridge Update... So I was going out of town a week ago and I was eager to get the shoulder bridges glued before I left. They would have several days to dry completely. So before leaving I glued them into position and clamped them down. However, in my haste I forgot to check the alignment to the back. When I returned and removed the clamps, they looked great from the front... But from the rear they didn't exactly align with the back plate... They were a little narrow at the neck and came back at quite a different angle than the rear shoulder pieces. I thought about removing the bridges and trying again but the angle concerned me. It's possible that I could have re-glued everything and still had an issue. It was suggested that I hot water bath the chest piece and gently widen the shoulders by reducing the curve of the neck. This could align the shoulder bridges better at the rear and at the same time it would reduce the angle of the bridges. I ended up heating water in my largest pasta pot and once boiling I dumped the pot into the kitchen sink and was able to submerge the top of the chest piece. Anyway, it worked and the alignment is much better. Next I attached some snaps to the back and chest pieces... And I also constructed a tab and slot system for the side of the ab to the kidney to keep the sides aligned. I didn't have any black ABS so I gently roughed up some white ABS, spray painted it matte black and gave it a couple of coats of matte clear coat. Hopefully it won't scratch off right away. Then I worked of some of the torso strapping... I also did a bit of a test fit and I found that the side still opens up at the bottom and causes the tab to slip out of the slot. Most likely the belt will hold the bottom closed but I think I will add another strap to the bottom to help hold the AB/Kidney closed. Right now I'm only using the "Han snap" at the top to hold it closed. More to come.... Mark1 point
-
Ehm .... not sure about what's written there about holsters.... ANH holster straps can be either black or tain in color. Stunt has two fasteners, hero four. Anyway great spreadsheet! We can improve this a little more and once it's perfect we should make a downloadable PDF file out of it.1 point
-
Thanks, i honestly worked harder on them than i should have1 point
-
Being a black sheep has its advantages lol1 point
-
My trooper should be 501st approved anytime now so here's the final pics. He's 6'1" @ 175lbs Note: I'll be changing out the pop rivets for more accurate cap rivets after approvals and post the change. As Germain noted earlier cap rivets are more accurate. At the time of the belt assembly I didn't have any and my trooper was anxious to get in his armor and get through approvals. Brackets are shown with the additional ABS support pads. The support pads are not screen accurate and are not required. They we're installed to help prevent chronic stress cracks in the armor due to the wearers height, which was putting a lot of strain on the mounting screw to armor connection. This concludes the build portion of this thread. The following pages are questions, comments, corrections, suggestions, general chat, etc. Thanks for following and hope this has helped you with your build.1 point


.jpg.6e044cdcfa7d89dc8f28b07c83edd152.jpg)