Leaderboard


Popular Content
Showing content with the highest reputation on 09/02/2018 in all areas
-
Hello everybody, I am halfway there and can log in again. Not sure who did what, so first of all I want to thank every person here who helped getting my account up and running again. A very big special THANK YOU goes out to Brian @Bulldog44 who immediately took action. Not only did he start this thread here to raise attention for my login problem. He also updated me via email, so at least I had an idea of what was going on. Can't thank you enough for this, man. Above I said "halfway there" because meanwhile I am able to log in again, but still have the original problem: the FISD does not send me email-notifications for anything. It never was a password issue, only an email issue. That means, I miss every private message until I log in next time. Did anybody ever experience the same issue and/or has any idea how to fix this? Is there anything at all I can do, or is it a technical thing for the webmaster(s)? Any help is highly appreciated.2 points
-
I started with a 15 second count and went up to 30 if needed. Run under cold water to set the shape quickly brother than hold in place2 points
-
I redid the tubes stripes on the helmet: Right now I am still working on the arms, left upper arm is glued, both cover strips are on: Had to fight a bit with the E6000, let's see how it came out. Only time will tell. Lower arm has the first cover strip, in the front glued, but I ran out of magnets.... I cut the parts for the right arm, in the main areas. There should not be to much work until I can glue those parts, but first the magnets have to be freed.1 point
-
Yeah those look really hard to snap in unless you have alot of space in there, so I would go with just the top one as the belt holds the rest, I know some feel that the belt should be non supportive but I never got that, you have the belt so might as well use it is my take on that matter If the side shifts up and down then a tab `n slot works wonders Didn`t need it for any of my TKs but installed one on the TD to be on the safe side as I figured the side pouches and Field Pack could knock things out of allignement and everything is super-secure now1 point
-
Thanks Dan! The tops are currently ugly trimmed for sure, they'll not stay that way. I didn't want to do take any more material away until I get the torso armor on and see how everything meets up. I also want to notch/trim the outside top of the left thigh to be a little more accurate. Stealing Tony's picture here for reference: I feel like I'm so much further away! Haha! Thanks! Good luck! I found that punching the holes in the straps to fit the diameter of the rivet obviously helps a lot. I actually used a smaller punch head and then when I used my soldering iron to seal the nylon the rivets just fit inside the holes. Also helps to space your holes in the straps inside of 20mm apart, mine ended up being 19mm apart. Keeps the gap in the armor nice and tight. The magnetic closures are amazing. I got to check out Cricket's setup at the armor party and they're super strong but still not hard to open. It immediately convinced me to do them now instead of velcro as I had planned. I'm going to try to work on them some today actually.1 point
-
Welcome back, Tino. :-)1 point
-
D ring Sent from my HTC One M8s using Tapatalk1 point
-
Hi Dave, Thanks for your patience. Just one more thing - could we please have a picture showing the d-ring, please. Many thanks.1 point
-
Nacho, Very good work Soon you will get your new level Regards my friend1 point
-
Requesting stormtrooper status, https://www.501st.com/members/displaymemberdetails.php?userID=235491 point
-
Hey You do so by using the link in the second post from the top. The Racing shirts are done in waves and there is no wave planned at the moment, Keep checkin in and be sure to read the newsletters to be up to date when the next run goes live.1 point
-
Impressive! The silver dry brush applocation came out great. The bolt has that real metal look to it.1 point
-
Please let me know how the shin closures work out! I suffer from fat thighs and shins so this is the one area that concerns me... Sent from my iPhone using Tapatalk1 point
-
Looking good! My next step will be this! Sent from my iPhone using Tapatalk1 point
-
Ammo pack Sent from my HTC One M8s using Tapatalk1 point
-
Hi Dave, We’re on the case. To allow us to check for EIB/L2 requirements, could you please provide photos of your sniper knee (left and right) and your thigh ammo pack (left and right, plus inner fixings). Many thanks [emoji1303]1 point
-
Excellent work, Eric. Very tidy. :-) Just a little observation: if you find that the top of the thighs catch or or rub on your armor, you could consider slightly longer cover strips to even out the tops. Keep up the great work. :-) Dan1 point
-
Thanks for the info. I was aware of the LMBO for legion names, etc. but didn’t think about LFL for 421. If we ever consider to go forward with a patch we will certainly do all the proper checks. Will wait to hear about the new info from LFL too. Better safe than sorry. Cheers Q.1 point
-
And the ab and kidney are connected. Exterior gap seems to be ok. Reinforcement snap plates are installed (following the wingnut snap diagram): And the right side snap plates are installed: Found out tonight I probably won't see any more Tandy snaps until the 10th or 11th due to an Amazon screw up, so I'll use the rest of the snap plates that I have available and then I'll be working on the connecting straps after that. I also need to work on the magnetic shin closures and then deal with the wonderful sniper knee plate.1 point
-
My understanding is submersion is best. I think 30 seconds or so if I remember correctly. Sent from my VK815 using Tapatalk1 point
-
Belt done. Stickers and fabric behind pull boxes added Big question; anyone think of a reason I can’t glue this, rather than rely on Velcro? I glued my ot tk arm’s stepping and have never had an issue taking them on or off or storing them inside the shins. Sent from my iPhone using Tapatalk1 point
-
Thanks, all! It was fun to make. Ooh... good point, Jeff. My main concern with the magnetic closure was the part that will stick up into the helmet (general misgivings about magnets next to electrical bits), but I didn't even think of the wires running up the neck... the force doesn't seem too strong since they're insulated by the tubing already but I'd be able to attach a strip of rubber gasket along the seam to help mitigate the magnets' effect even further if need be. Definitely something to keep an eye out for. A.J. - - but really, I got a tabletop snap press finally, and it's *soo* cool. I'm still thinking ABS snap plates due to perceived durability and "clean" look if nothing else. Thanks for the recommendations, @gmrhodes13 ! I'm going to put double snaps in as many spots as I can. I've gotten some of my elastic. Most impressive, I know. I also trimmed a few things today... pics tomorrow! One final thing. Anybody have any tips and tricks for hot water bathing my armor pieces? I've read about others' exploits, but I'd love any extra wisdom y'all can throw at me. Can I use a pot I'd use for cooking if I plan to submerge pieces? Is pouring the water over the pieces close to as effective as submersion, if not? Etc, etc. Thanks!1 point
-
One of the things that frustrates me is ANOVOS' former transparency getting squelched by Disney. The latter objected to the former being so up-front about specific goings-on. Said to stop being public about internal business matters... Me, I think Disney objected to the fact that, unlike with their other licensed offerings, with Star Wars ANOVOS was running into a much more micromanaging and nitpicky licensor. I remember how many of the early products' holdups were Disney dinging the packaging, requiring safety checks on everything -- including said packaging -- and so on. And every time they had to redo or rework something, it had to go to Disney for approval every step of the way. I can see the back-and-forth to China getting positively Sisyphian. And, frankly, kinda making Disney look like the bad guy. With their Star Trek and BSG stuff, it's still a lot more uncomplicated. They say they want to do a thing, the licensor grants access for research and reference, ANOVOS comes back with a thing, and the licensor says "cool -- release it". *sigh* I am sticking with my preorder. I know it'll arrive at some point. Meantime, I have plenty to work on, I've been accumulating accessories and materials for the FOTK, and I have several of ANOVOS' Trek offerings on pre-order.1 point
-
Thanks for the advice! I am going to use it as an example.1 point
-
So many different ways to make snap plates, ABS plastic or nylon webbing, really depends what you have available. ABS plates will need to be heated and bent to the contours of the armor where nylon webbing doesn't. I do like using a soldering iron to make the hole in the nylon webbing as it seals and doesn't allow the snap to pull through Snaps different ways thread here Also this great thread here from Joseph Also I suggest using double snaps on the plates, for just in case one pops off you have a spare1 point
-
Phew! I was worried there for a second when I wasn’t sure what you meant1 point
-
I'll be swapping out some pieces in the not too distant future to a dirty sandy, my TK is getting a few scratches and marks after 6 years of heavy trooping, luckily I have a spare set of armor sitting in a BBB ready to go, just finding the time to get at it Going TK, then TK HWT and then on to TD is great advice, you'll get a lot of wear out of the one set1 point
-
It is important though just to make sure you sand areas that will catch when you move, sharp edges can leave some nasty armor bites . But you are correct, there are always different ways to assemble armor and when ever you think you've seen it all, someone comes up with something new. Keep up the good work1 point
-
I didn't need to use them on my own kit, being skinny and straight up and down, I need something on my sides though so I came up with some bent tabs for those, did a post here . After coming up with the side tabs it then gave me the idea for the butt plate tabs. I've used the butt plate tabs a couple of times on armor I have made for others, so far for 2 RS kits and 1 AM kit and 1 AP kit. Not sure if it was the armor or the wearers but on all the butt plate was being pushed out and no matter what type of elastic or how tight it was it didn't seem to fix it, hence I came up with the tab idea. I just place them on either side right next to the snap plates. Can still move and bend but I wouldn't recommend sitting, that could be a bit too much for the tabs. Once I catch up with one of the wearers I'll take a few photos1 point
-
I placed my pre-order way back in 2016 (I think?) and have been waiting patiently. There are other kits out there but they are not as accurate (softer details, hand sculpts etc.) so I've been waiting it out. I fully expect them to delay these kits as they have been sending emails on several products recently - sounds like something happened overseas and they are having to start over here in the USA. I've stopped worrying about it, I have my ANH TK to troop in, when I get an actual shipping notice from ANOVOS I'll go order the rest of the stuff I need and start building, hopefully before Episode IX. And I fully agree with Clint. Be careful though, if a bunch of people start complaining Disney could also just pull their license and then nobody gets anything ever (paranoid maybe, yes, but possible).1 point
-
I’m not sure about priming but I really like the first pattern of that helps. Sent from my iPhone using Tapatalk1 point
-
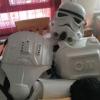
Alright well I decided I was going to do the helmet first, that way if I lose motivation I have a nice finished helmet to get me going again!! So I painted the inside black, easy as pie (it’s all I can do right now) And I was wondering, how much should I trim off the helmet?? Should I just trim to the point where it stops looking super wonky and where it is flat? Also, this must’ve been a rough pull or something because the back side of the helmet has more acne than I ever did in high school! Is this ok? Will it make anything any harder? I’m not going to even attempt to use bondo or anything like that to cover it up. I’m not too anal about that sort of stuff, but it’s REALLY bad. Thanks guys and input is of course appreciated! Sent from my iPhone using Tapatalk1 point
-
Thank you sir! Thanks! I take it you're referring to the corners? I did go with more of an idealized vs. screen accurate finish there as I preferred the plates to match the mounting surfaces, I didn't like the sharp corners there when I first test fit them.1 point
-
+1 And...by wearing thin cotton gloves underneath there`s no sweaty hands1 point