Leaderboard


Popular Content
Showing content with the highest reputation on 07/09/2018 in all areas
-
APPROVED!!! TK-21523 reporting in!!!4 points
-
APPROVED!!!! TK-21523 Reporting for duty!!! will fix my issues with my armor and submit for EIB and then on to Centurion!!!4 points
-
The box arrived today and had a quick inventory check and the helmet was missing *sigh*....pm:d KB so hopefully it will be here sooner rather than later....so now...time to go to work3 points
-
Ok..my 5 EIBs have confirmed on my thread..2 points
-
To arms! To arms! -- Part III I think I finally have the forearms and biceps fitted correctly, but it wasn't particularly easy. For those who haven't started your build yet, there's some things you should know about that impede proper fitting. There are lots if things, really, but let me highlight three -- two of which really slowed me down. First, not all armor is the exact shape it's supposed to be. Because of how it's pulled from the molds, cooled, shipped or whatever, even the best armor (and I consider A.M. to be among the best) just doesn't always match the shape of the body part it's supposed to go on. I talked about this earlier with the forearms. The right one was shaped just right once I got it taped up, and it fit the contours of my arm as it should. The left one, not so much. In fact, the left one is way off, and will certainly require a hot water bath to reshape it to my arm. Meanwhile, both biceps were very oddly shaped. Take a look: Taped up, this is what shape they are, which is not how my biceps are shaped. First of all, these are basically very tight vertical ovals. The upper ends (closer to the shoulder) aren't too bad, but the elbow ends of the biceps are both as weird as they can be. Although rounded on the top, it's way too narrow and pinches my arm severely side-to-side. Meanwhile, the underside of my biceps isn't a narrow square -- but that's the shape these are as you can see. It was making fitting/taping so difficult, I pulled them apart and gave each lower section a hot water bath: Taped up again you can see that the top curves are now wider and rounder, closer to the actual shape of my arm. I also got the squareness out of the undersides, rounding those off as well. This fix has made all the difference in getting the taping and fitting correct. A second issue you'll hit when fitting armor is that of necessity you have to overlap the armor since it hasn't been trimmed to size yet, which effectively makes whatever part you're fitting thicker than it will end up. Also because it's not trimmed, the overlap isn't really flat due to return edges, overall shape, etc. There's not a thing you can do about this right now, but keep it in mind as you mark and cut -- even if the fit feels good, it's not quite accurate because of all this extra plastic. This isn't entirely a bad thing, however. When you do trim and that extra overlap is gone, you'll find the part a tad roomier than you thought. Since you should trim slow anyway, taking off less rather than more, this is something that can help act as a safety cushion. The third and final thing to keep in mind, and this has been said a hundred times before but bears repeating, is that it is absolutely imperative that you do any final fitting before cutting with your undersuit on. This makes all the difference. You obviously shouldn't fit armor over jeans or other street clothes, but even over bare skin you won't get the same fit as with your undersuit on. With that in mind, I slipped on mine and checked my last fitting before getting out the knife. Here's the right arm: Feels pretty good. I can tell I'll still need to do some shaping once everything is glued up, as the biceps have less room side-to-side than they do top-to-bottom (they were more or less vertical ovals before the water bath). Plus, I may need to trim the inner edges at the elbow for better mobility there, but I think this works. Meanwhile, here's the left: The fit, I think, is OK. This was the wonky forearm arm, remember, and it will definitely require reshaping once glued up. That's partially why the wrist seems so big -- the end of the forearm is flattened vertically and not horizontally, the way your wrist naturally is. (The other reason the wrist looks large is that I have large hands and need to be able to squeeze them through.) So, what do you experienced armorers think? OK, with everything taped as good as I think it's going to be, it's time to mark the plastic. This is a simple matter of just splitting the difference in the overlap, marking at the midway point on each half of the part. Once untaped, I'll use these marks as my guide to continue the line from end to end, adding a bit of a cushion (maybe, say, 1/4" for safety), and then make my cuts. All that comes next, after a good night's sleep. The prospect of finally beginning the cutting is daunting enough as is, and I certainly want to go forward with a clear mind in the morning. A.J.2 points
-
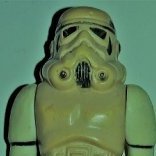
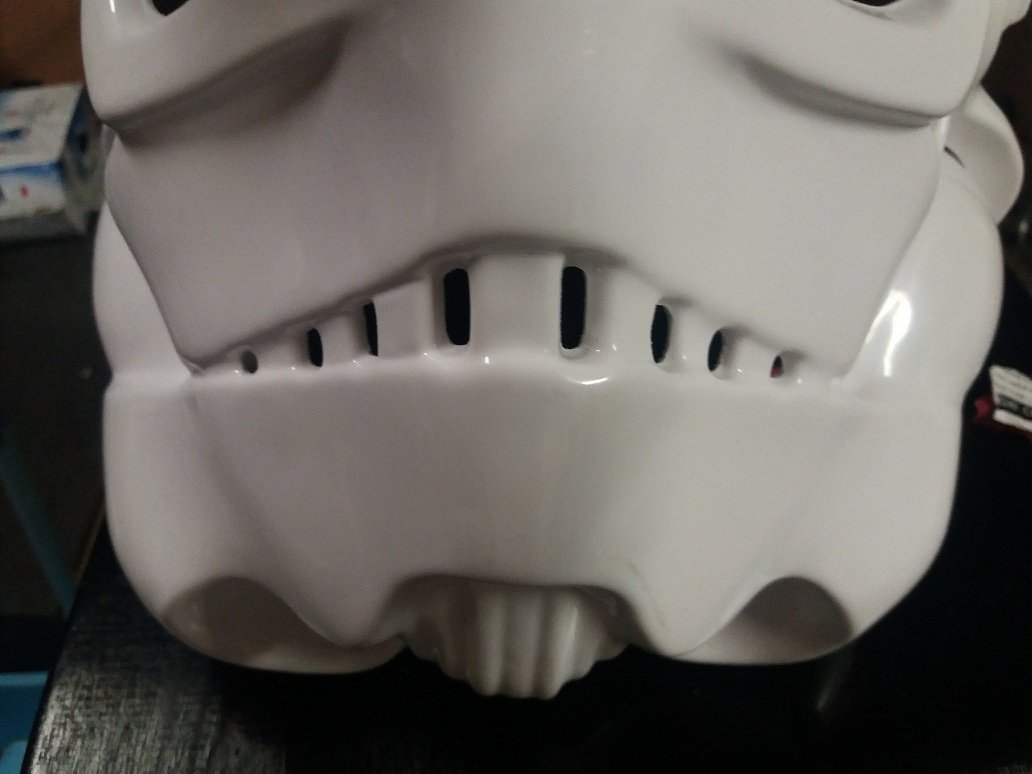
Hey Michael - Centurion as the way to go Here`s some teeth reference to help get that ANH-look2 points
-
Button break After lots of grinding off return edges all morning for my arms, biceps and such I decided I needed a break from ABS grinding, and decided to jump ahead to the Ab buttons for a change of pace. First, I trimmed both the large and small button plates per Billhag's graphic and lightly sanded the edges, then used some really fine sandpaper to scuff-sand the buttons themselves for better paint adhesion. Now, there are a lot of things I do pretty well but painting ain't one of them, so I bought some button masking templates from Trooperbay. These things are a lifesaver for fumble-finger painters like me. The real trick with these (or regular masking tape, for that matter) is to ensure that they're stuck securely as possible to the edge of the paint line, otherwise paint can easily go underneath. So, once I had the templates in place, I used the end of a thin dowel to press around the edges to seal them. Also in this photo you can see everything I'm using for this paint task: fine brush, Q-Tips, screwdriver for opening Humbrol tins and a razor knife. Also on hand was some mineral spirits in a small cup and paper towels. Note that once the templates are all smoothed out, I wrote a "G" or "B" by each button so I'd get the colors right. And if you're looking closely at the items in that photo above you're probably thinking, Oh, look, the idiot has a magnet stuck to his screwdriver. Well, there's a reason for that: Don't know about you, but I have the hardest time handling those tiny lids without either dropping them or getting paint all over me. Or both. So before prying off the lid I stick a tiny magnet to the screwdriver. Then when you pry the lid off it doesn't go anywhere. With luck, it'll even flip around to the magnet itself as it did for me up there. OK, let's paint. I tried both the Q-Tip to paint and the fine brush, and preferred the brush. I brushed on the appropriate colors over each of the buttons, brushing right over the edge of the templates. Then I let the paint "set up" for about 10-15 minutes or so. Not dry -- that will take hours to fully dry and cure -- but enough time for the paint to thicken in place a bit, then peeled off the templates. It's important to remove the templates before the paint dries for two reasons. First, if you let it dry all the way you run the risk of pulling up the edge of the button paint when pulling the templates off. Even if that doesn't happen, the paint will dry with a little "ridge" at the edges where the templates were, and that's prone to flaking there. But with the paint thickened but still wet when you remove the templates, it'll self-level at the edges and be quite smooth when fully dry. By the way, note here that I lifted the corner of the templates with the razor knife, and used that to pull them free. They're easier to handle this way. Finally, let's see how they came out: Nice. Now, I'll set these aside where nothing will get on them -- this is enamel paint, and will remain sticky for hours -- and allow them to fully dry. OK, break's over. Time to get back to those arms. A.J.2 points
-
Hello all! I have started my first build, and have a WIP on the local garrison, but thought I'd see what folks at FISD thought as well. Although as a teenager I think I'd be the perfect build for a stormtrooper (maybe a little short...) but now I'd say I shop in the husky section Shooting for Centurion out of the box. Here are pics of the bucket thus far: getting ready to paint it by hand.
 1 point
 -
Alright all here it is. I am asking for your help to let me know if there are any changes needing to be made before I submit for my approval to the GML. Name: Jordan Tindol Garrison: Star Garrison Armor: AM Bucket: AM Cloth Belt: unknown (bought second hand/New) Neck Seal: Darman's Props Boots: TK Boots Blaster: Hyperform Height: 6'1" (186cm) Weight: 215 lbs (98 kg) Type: TK ANH Stunt Super big thank you to every one of you that had a hand in this, both on the forum and in person! ( @justjoseph63 @ukswrath @Pretzel @LTM @TheSwede @Frank75139 @Seansull and everyone else i may forgot to mention (Im sorry))1 point
-
When I arrived to the Imperial Factory (work) I decided to change my game-plan and work on the blasters first.....been painting (and sanding) alot of pieces...not finished but started to feel good about myself...but.... .... there’s always more......oh well run out of white paint so I guess that’s a rap for today....(yes I have black paint and pieces that are to be black but choose to ignore that )1 point
-
Well...I sleep way less than I should, just can’t help myself I have a white balaclava so al I have to do is getting some black sunglasses and no one will be the wiser True true1 point
-
Yes vacuumed formed plastic.1 point
-
So here's me outside the local...my snap system gave 8n.so I'm now trying to attach magnets to secure your to chest. Seems to be holding well.i need to trim my thighs..should have done a while ago just wary of cutting. Waiting on pouches from Hong Kong and my fav aunt is 're sewing my Jimi gaskets..hopefully by end of month I'll post my clearance pics .. Sent from my SM-J530F using Tapatalk1 point
-
Nice work! Sent from my iPhone using Tapatalk1 point
-
No helmet no problem, you’ve got plenty of work to do before that. Sent from my iPhone using Tapatalk1 point
-
I realize that you have already glued your sniper knee plate on, Daniel, but it could use a little Dremel tool love. Also, since you are headed for Centurion, , I would suggest trimming the edge of the ab plate down to where it is in better alignment with the shim** before adding the rivets. This will save you some heartache later. You are well on your way, brother, so keep up the GREAT work!! Ideally there no gap between the abdomen and kidney armor. ** For an awesome tutorial on using ABS paste (to cover the shim seam) here is a link that will help: https://www.whitearmor.net/forum/topic/42866-how-to-make-abs-paste/1 point
-
Only thing I can see, and it will be for the next level (Centurion) which I hope your going for, is your back plate is sitting too high, and leaves a rather large gap. That will have to be closed up. Other than that you look great and should be an easy pass for EIB1 point
-
Doh!! Missing the helmet...I think people will notice that hot!! Lol1 point
-
Suh-WEET! Congrats on your approval, Trooper! I forgot to add the photo I mentioned above. As soon as you get that done, I expect to see your EI submission!1 point
-
MUCH better! Thanks!1 point
-
Thanks, it’s neglibly wider, maybe 1/2” I’ve been debating just putting it on the table saw and/or taking the belt sander to it but I have a lightweight Hyperfirm E-11 that will likely be my primary and trooping weapon. Sent from my iPhone using Tapatalk1 point
-
Hooray for BBB day - even if it is bucket-less. Post lots of pics and share all the details. At this rate, by the time I finally finish my TD, you will have finished an ESB TK, TD, and FOTK. I don't know how you do it.1 point
-
Here's the Helmet process pics: Post Initial sanding down to 320 grit. These show how I marked the little holes after priming. Those holes I fixed with bondo filler. And the Bondo filler Sanded down the bondo with 320 grit Then primed again: Here's the trimmed leg pieces. I further got the sewing done to fit the gaskets right. Arms still in progress sewing.1 point
-
Congrats, Jordan!1 point
-
Looking good!1 point
-
Thanks for the tip Joseph! I'll start that as soon as my second coat of paint has dried (didn't like the rough texture of the first coat). Haha thanks! I jest, I jest all in good fun!1 point
-
Congrats trooper!1 point
-
I didn't pay attention when I was kitting up, and ended up with the shins higher than the Velcro, just hitting the top of it. I dressed yesterday because I was messing with my electronics in the helmet (Having Feedback like crazy) and made sure to lower the shins, walked around with no issues. also got the thighs evened up. Only thing keeping from submitting EIB is the ear paint1 point
-
Totally. I am finishing touches on my TK so I can troop at comic con. Was hoping to get some photos done and submitted before then, but know that’s not gonna happen in two weeks. Wanted to ask, as it would have been awesome to be “knighted” a 501st before or at SDCC. But I’ll just have to wait till after:) hope to meet some of you at SDCC!1 point
-
1 point
-
And the next update was late again, I am a bad German anyway, finished my belt today: All it needs now is some time for the glue to dry, but then the good thing is finished I also carried on glueing the cover strips onto the appropriate places. New update maybe tomorrow Cheers, Freddy1 point
-
Don’t worry about that, mate. That’ll be hardly noticeable and could be polished out a little if needed. :-)1 point
-
UPgrades !!! 3 weeks of trooping and Tracey (TK13570) seems to have worked out most of the kinks will now be going through some adjustments and upgrades will list them out and work through accordingly stops me forgetting 1. wider elastic for better support on thighs going from 2" to 3 " now 2. removing snaps from one side on chest/back plates and attaching elastic straight to one side 3. adding padding to inside of forearms/vamp braces (better stability less rub when carrying dlt 19) 4. new fan system to fit for helmet, micro fans going in running variable speeds using digital control box 5. fitment of speaker and rom set up will picture up and document each change as I get it done1 point
-
Huge update: I’ve done a lot over the past week in progressing the armor. Still waiting on the marine snaps I ordered to put the shoulders, cod piece, butt plate and all together. So, in the meantime I’ve got to find other parts to work on. First off I sized up my leg pieces and made the necessary cuts to shape them more screen accurate as well as have them sit on my legs much more correctly/comfortably. After this I spent a bunch of time working on the back plate and extending the underarm section so it sits flush with the chest piece when wearing the TD and ab plate. I ran out of Apoxie Sculpt part way through this so I’ve got more on order to fill in the remainder then be able to sand/cut it down. At this point it’s just a waiting game for the final pieces I need so I went ahead in the process with the helmet. I sanded it down using 100 grit, 220 grit, and finally 320 grit sandpaper. After this I used some Rustoleum Sandable Primer Filler to spray it up. Once sprayed I marked all the little holes I found with a pen and then with bondo filler I covered all the little holes. Note: Bondo hardens a lot faster than Apoxie Sculpt. So when you use it, only do small bits of bondo/hardener at a time. Otherwise you will end up having a lot go to waste. Once all the holes were filled I had to sand again to get the smooth finish for another round of priming. I used the 320 grit sandpaper and wet sanding to get the excess bondo sanded up. It takes a good deal of sanding to get down, but once done those holes are filled and I’m ready to prime again. I did another final coat of primer after I had washed off the helmet from the wet sanding and let it dry. At this point it’s ready for some polish sanding with a much finer grit sandpaper. I’ve seen others use anything from 1200 to 3000 grit on this. I think I used something near 3000 for my blasters. This I will do later once I’ve got all the other pieces to the same point. Pictures incoming.1 point
-
Those look good. I used foam to pad mine. I can only say from my experience that wearing everything gets Heavy( No Pun ) as the day goes on. Some events I fill pouches with individually wrapped Twizzlers(Licorice) and hand out to little fans. Keep up the good work!1 point
-
Great progress, Greg. Tidy work, as always. :-)1 point
-
Minor progress these last few weeks. Life with young children is not conducive to building armour - plus we’ve been away on vacation for a bit. Oh well, here are some more check boxes that I’ve checked off. Started to add the canon bracket strapping. I managed to get the screws counter sunk a bit. I have seen other people use elastic along the left kidney to abdomen connection. They also used a extra piece of ABS to support it. I tried the same method, but once I got the split rivets set, a gap formed. The elastic got stretched a little a now won’t retract due to the ABS support. This is a lot more gap than I want. Not too happy. I changed out the right ab snap for a “Tandy”-less snap. Added some bits of ABS to the inside of the thighs. I will ABS paste the outside. The screen used thighs appear to be filled as well - probably paint. Reference Snap bases for shoulder straps. I also added a snap base opposite the right ab snap (not shown) 25mm coverstrips for back of shins. Adding Velcro before gluing. I’ll see how that works. Just waiting for one snap base to set. Happy belated Father’s Day. My wife ordered me a couple of helmet bags from Trooperbay. She even knew that one should be TD. Just when you think they don’t care... Sent from my iPhone using Tapatalk1 point
-
Magazines built for side HWT MP40 packs. They don't really seem to do a lot but they do help a bit to make the pouches less floppy and I suppose from certain angles will look slightly more real. If the weight ends up being noticeable though I will remove them and go without. Empty pouch on the left, mags in pouches on the right:1 point
-
First glued part. Sewing my own hooks as well. http://imgur.com/a/GxRlRTn1 point
-
Yeah, you're absolutely right. In fact, I mentioned that in the first part of the forearms post, although I didn't specifically refer to L3: "The A.M. kit includes a healthy return edge on everything, which can make fitting difficult, plus there's not supposed to be any return edge on the wrists anyway." And then again a bit later: "In the photo below you can see the trimmed returns on forearms. Almost nothing on the wrist end (I'll finish that later after assembly is complete), and about 3/16" on the elbow end. " I hope you'll be pleased to know that everything I'm doing at this point, although it's for Basic now, is a preliminary for going for Centurion. I'm leaving a bit of return on those edges until after gluing, at which point I'll then go back and remove the last little bit. I want a really smooth transition, so I'll do the final sanding and stuff on those wrists after that. A.J.1 point
-
Also, if you're shooting for Centurion don't forget to remove all the return edge from the wrist side.1 point
-
To arms! To arms! - Part II Taping things up for a test fit was pretty straightforward, although it did involve a lot of trial and error. And, of course, the things kept wanting to spring back open every move you make, but I finally got both forearms to where I think they're about right. I made sure to wear gloves to guarantee I could get my hands, which are large anyway, through the wrist opening. (And, yes, before doing a final marking and cutting I'll do it with my undersuit on.) I have to say that this feels really weird having these things on; very unfamiliar. With that in mind I think I'll want to sleep on them at this stage of taping up before deciding if I have them right enough to start cutting. Well, let me rephrase. I'm not literally going to sleep on them, but rather come back tomorrow and try them on again to see if I still like them. Or, what the hell. Maybe I will wear them to bed. It's a Saturday night. Part of why they feel so weird is that one of them is really oddly shaped. I read about this with A.M. forearms in another build, although I can't remember which one or ones it was. Take a look at the photo below. The one at the left of the photo is the right forearm, and the wrist opening is pretty good as far as it being a "natural" shape of a slightly flattened circle. The left wrist, though, is more of a vertical oval. I see a hot-water bath in my future. (For the forearms!) Meanwhile, the elbow ends are even more oddly shaped. That's the left elbow end on the left of the photo, and it's shaped exactly opposite of what it should be and, as such, made getting the tape right difficult. Even once I did get the tape to where I think it's correct, it's hard to tell since it doesn't sit naturally on my arm. Meanwhile, the right elbow end -- on the right of the photo -- is, like the wrist end, pretty good and conforms to my upper forearm nicely. In short, the right forearm cross-sectional shape isn't bad at all as far as a natural fit is concerned, while the left forearm is pretty much opposite of what it should be. Again, I read about this in another A.M. build thread so it didn't come as a surprise. I think that's all I'm going to do for today. Tomorrow, a re-test of these forearms, and then I think I'll start fitting the biceps. A.J.1 point
-
So whilst waiting on answers about if the cover strip could be slightly thinner than the molding on the front of the thigh, I started pouring through the galleries. Yes it can. It was hard to notice in the screen caps except for one, but the RS suit gallery gave some answers as well. What gives me a headache is after looking through the galleries it seems 12.5mm tops of forearms, 15mm bottom, 15 mm biceps, 21.5 front thighs, 20 back, 22 front of shins, 25 back of shins are the closest. LOL. no wonder 15, 20, 25 is the rule of thumb. I think I'm going to go 15 arms, 21-21.5 front of thighs (just to have less of the under molding showing) 20 backs of thighs. 25 back of shins, and somewhere between 20 and 22 on the front.1 point
-
Just got my photos. Going to post them here in the Pre-Approval area and see what everyone says. then once i get word i am approved they will be coming the EIB and Centurion shortly after!!!1 point
-
Hiya, Yes- rule of thumb is usually 15mm arms, 20mm thighs and shins, 25mm calves. :-) Sent from my iPhone using Tapatalk1 point
-
Updated pictures: Front Blaster Thank you for your patience. Do I need to edit the original post or can I just post here? Sent from my iPad using Tapatalk1 point
-
Blaster with ring installed and painted. Hope this will make L31 point
-
For added detail here's how I attached the containers on the left leg: And for the Jim kit I noticed I couldn't get the small greeblies to fit in the rectangle openings provided, so I trimmed out a groove using my dremel and cutting bit. With that little groove I was able to fit the pieces no problem. I expect a little detail sanding for the greeblie pieces, but so far things are going well. For those following this thread for their own builds, Notice that I used a long strip of masking tape to hold the greeblies in place with glue. This was to keep the forced bend as the glue dried and cured. It worked out quite well. Just make sure there's enough pull on the tape that it keeps a tight hold on the greeblie in the bent positions.1 point
-
well this all happened pretty quick in the end, Tracey's now cleared and done her first troop with the UK garrison at the UK's national space center. Even helped out Warwick Davis at one point will take the time over the next fews day to update all the pics on the thread so they work and make sure i haven't missed any parts of the build. might even try and and add a table of contents at the start. will get her to sign in and introduce herself properly now and start a troop diary but prior to that here a quick few pics TK13570 signing in with a bang instagram tj_fem1 point
-
Haven't had any catastrophic failures yet. Several small cracks though, which i've reinforced with fibreglass mats and resin from behind. This armor requires upkeep and is a bit of work sometimes. But I guess you have that with every armor? Still think it is the best looking kit right after ANOVOS, if you can get your hands on that1 point


.thumb.jpg.55c74df05456b40069c85977e140b535.jpg)