Leaderboard


Popular Content
Showing content with the highest reputation on 06/13/2018 in all areas
-
I just ordered my third DD E-11 resin kit a little over a week ago, and for the first time I actually received an email stating that it had been sent, along with a tracking number, WOW! I know in the past that DD has not had the best reputation for communications (to say the least), and shipping times to the U.S. could take up to 8 weeks or more, but it seems they have changed their tune for the better, happy to say. On a side note, I also ordered another one of Tino's awesome E-11 finishing kits which (of course) arrived in less than a week!4 points
-
Well alrighty then...How's about this? F... sanding, I pulled out the scissors...and then the sandpaper again. Think it's there. Sent from my HTC One M9 using Tapatalk3 points
-
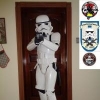
OK back to building, after the brief sidetrack into the world of painting. Not that the discussion wasn't helpful (which it was), and it has made me redirect my build path, and am moving painting up in the schedule. Last night and today are about focusing on Ab belt pieces, AND Ab plate pieces (I plan on busting out the paints to do it all at the same time) so time to trim them up ready for paint! Trimmed the belt last night, score and snap of 4mm of plastic to get to 3mm, is no good for your blood pressure. The other side was 5mm, so I let it be, as shaving 2mm was going to be even worse. Then I woke up this morning, and minor OCD just wouldn't let me let it be, as that 2mm difference seemed like 10. Not having a belt sander, I tried to rig something up, which involved a trip to the store for some 60 and 80 grit sandpaper. 220 was the smallest usable I had left. Pics are: the manual belt sander, lol, the acceptably finished belt, drop box pieces at 12 and 15 mm. And the Ab button plates I need to finish up. Sent from my HTC One M9 using Tapatalk3 points
-
Hello all I am excited to announce the new 3D Printer section as mentioned in the June News Letter is now live. Please take a look around and if you have anything you would like to see added as topics or you have some goodies or expertise you would like to add, go for it and make a post. https://www.whitearmor.net/forum/forum/201-3d-parts-and-technical/ Thanks all, have fun3 points
-
Read through this whole thread Rat, and I am a bit behind you in my build (allthough I started before). Great to see where others meet challanges, and be aware of them. I am about 6'2" or 189cm as I would say, being European and all, and i am about 100kg, wich is about 220lbs i think. My experiance is that I am right in the hight limit for this armor, and my challange has been making the cuts without cutting to much off, coz i need every inch or i would have to add. I have done the forearms, biceps and shins, and are now ready to glue the thighs. Every part is just enough, allthough I am unsure about the right shin - it fits, i can close it - but its very tight. For my chest i will have to maximize every part so that it reaches all the way down. Hopefully it will. Like you, I just caht wait to get out there and have it done. I am not much of a builder, though I am sure once it is done - I will be very proud of myself for having done it, and i will know every inch of my armor. I am really impressed with how you have worked throug every part and cant wait to see you finished. It will be a great motivation for myself. Just wanted to say that - I am cheering for ya'! Greetings from TK-Unknown3 points
-
Well didn't think to grab pictures as I was trying to readjust the straps. I went ahead and set them with four on the chest. I also realized that I almost forgot my snaps for the shoulder bells so got those sewn on. Tomorrow I think I'll tackle the shin straps and possibly painting. Sent from my VK815 using Tapatalk3 points
-
Honestly, don’t be worried about it Kenny. The reason we do this hobby is to see the smile on people’s faces when we troop and to have fun trooping. Rounded or square has no impact on the joy we bring to folks at events, or the excitement we have when kitting up.2 points
-
Just bear in mind that clearance and screen accurate are different things. The CRL tries to find a happy medium between screen accurate (suits thrown together quickly for filming, battered by stunt men, damaged during filming etc) and idealised. Personally, even if rounded corners can pass (as per your example) personally I’d still rather follow the reference of the suits we grew up dreaming about. Just my personal view. No offence to anyone with rounded edges.2 points
-
I've been lurking your build, you're doing some good work. I'm in agreement with the 4 button for sure. Was really wondering more about the big plate, and think I will go a similar direction. Sent from my HTC One M9 using Tapatalk2 points
-
Thanks, yeah I trimmed very little off most of it mostly the arms, biceps and forearms. Everything else is just to the anovos lines. Hopefully my build will help you further along in your build. We learn through others mistakes as well as our own. Look up ukwraiths build for this kit or look up tk1636 on YouTube both have been helpful for me. Good luck on your your build as well you can never research enough. Cheers mate. Sent from my VK815 using Tapatalk2 points
-
They're not as readily available as in my shed cabinet. It shouldn't be a big deal, if I don't stuff it up in the first place Honestly, it's a fantastic brush cleaner, especially enamel, but definitely no joke. There's a reason it comes in metal or glass. But thinking about how much my sphincter clenches when doing the old score and snap, I'll probably avoid the nervousness of "wipe and melt"2 points
-
I placed some on a paper towel and used it to wipe paint off my AM helmet several times and had no issues. I’ve actually used it to take a few scrapes off the armor as well. But I mean a little bit on a paper towel. Don’t go too much and don’t let it sit on the plastic, quick wipes nothing left behind. It’s NOT something to mess with, it will melt plastic if it’s in direct contact. Sent from my iPhone using Tapatalk2 points
-
Excellent Insight! I hope some new recruits stumble upon this and find some benefit for it. Well done.1 point
-
Great job! Sent from my LG-M470 using Tapatalk1 point
-
Good write-up!1 point
-
Neat and tidy. [emoji1303] Sent from my iPhone using Tapatalk1 point
-
I gotcha! [emoji106] Sent from my iPhone using Tapatalk1 point
-
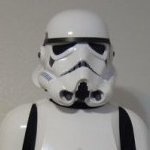
Didn't mean to!! You can square them like the picture below if you want. But I was just saying that if you like your rounded corners better, this should not pose much trouble, as I've seen many people reach Centurion with rounded corners. That's all!1 point
-
I actually just finished that on my AM 2.0 last night. I sanded it down to flush. (Not to where it sits down inside.) rounded corners on the bigger plate and flush, squared corners on the smaller plate. But I’m also just a noob. Sent from my iPhone using Tapatalk1 point
-
I must say that this is an excellent summary, and these are many things "I wish I would have known" myself before starting this journey. As so many of us know, so much is learned during the process of your armor build, and thank you for taking the time to write down your 'lessons learned' to share with the community. Your tips will be pure gold for any of our new recruits to the white armor ranks! This is truly what the motto *Troopers helping troopers*, it all about!! (also, thanks for the shout out, and thanks for the collaborative help in the search for the best Trooper Talk app settings )1 point
-
Thanks! I spent an hour and a bit pouring through reference photos and hi-res screen grabs last night. Boy, do they make me feel better about my mediocre craftsmanship (granted I don't have to whip up 50 odd suits on a production schedule). I also found a collection of "Billgrams" which I find to be incredibly useful. More to come... Sent from my HTC One M9 using Tapatalk1 point
-
Oh! I'm stealing this! (Or more appropriately, saving it.) Was thinking my smaller plate was too big.. Thanks!1 point
-
Thanks a bunch fellas! It's been satisfying to make progress like this as I've been on the planning stage for quite some time. I know right Tino! I gleaned this idea from another trooper here on FISD - his logic of switching between blaster bolt and stun with the flock of the thumb on the grip, such a great idea! Totally, will see to have the button recessed well enough ... end transmission "click"1 point
-
guys im back on the run pm me if youre interested thanx1 point
-
Thanks Going to post some more updates later as i've had some time with the armor. Mods i've done etc!1 point
-
That is the perfect place for that little mode button. Can't think of anywhere better. Hot glue will surely do the job. Just make sure to install the knob deep enough to avoid inadvertently pushing it, while holding the blaster.1 point
-
As others mentioned, E6000 is the preferred choice. Especially for your first build. I couldn't tell you how many times after I glued pieces together, I had to peel off the E6000 and start over because I made an error. If I used CA-Glue or another form of adhesive, I would probably have had to order new parts. E6000 is and always will be my best friend and first adhesive of choice. I have trooped 40 times in the two years of being a member and ZERO issues with my parts that I glued together.1 point
-
You can also look at some of the gallery's pictures, which could give you an idea. Look at this one, for example - it shows the cods of many old original armors. Maybe it can give you an idea/example to follow : But as Lou said, not many people will see this part, so you can go for something that's more comfortable for you, because I guess that's an area where comfort is important! 8-)1 point
-
Oh I agree. GMLs can be a lot pickier than the basic approval standards. It happened with me and my friend when we joined. My approval photos were taken by myself and was before I even had a chance to fit the armor to myself and re-do all the strapping. Some strapping was missing completely and yet I was approved. For my friend submitting his TB photos they wanted him to change some things to level 2 standards. I helped him with that and eventually got him approved. So is why I say it's best to play it safe and look your best. For Patrick it mostly seems to be fitting adjustments which are a quick fix1 point
-
Coming on nicely. :-)1 point
-
Hello again folks, another update coming your way. Focus this time on the selector lever and assembling the BlastFX mode button with acorn nut and accompanying washer. I first dremeled to shape the turn knob on the rotary switch. With a square file to follow-up, I'm able to get it pretty clean. I then progressed to shaping the underside of the selector lever as well. I would later pat down the edges of the circle with green stuff to make it extra snug. At a later stage, when I get to painting, I will finally glue this piece tight using CA glue. I then proceeded to carve out resin so to make way for installing the BlastFX mode switch. I figured I could follow along the bottom of the ridge (see picture) to keep my mod inconspicuous. I took out my trusty dremel bit (this is a must have attachment as there's teeth on the top as well to push resin away along with sweeping it from side to side) and was careful to stay under the concave part of that upper grip part, and it worked! On test fitting the mode switch, I decided to drill pretty deep into the circle and the channel ran pretty deep too, so not to have the final button protrude too much and to minimize the curving of electrical wiring - the ideal was to simply plop the electronics in with little resistance. Lastly, I made the acorn washer have a wider inner circle to fit the acorn nut from underneath. Also drilled deeper into the underside of the acorn nut using a 1/8" drill bit - it now sits much deeper overtop the BlastFX mode button. I decided to also dremel away some of the the BlastFX Mode button so the acorn button / washer will sit more recessed in the circle cavity. Will do that soon... Just test fitted for now ... Have to recess the whole thing in cavity, thinking to use hot glue. That's it for now fellow builders - until the next update, have a great day!!!1 point
-
Why take a chance when there`s better options readily available?1 point
-
I havent used E6000 since its not available in my country, I used blue UHU for plastics and its STRONG... it fuses the parts together, no trace of glue left but its kind of permanent, no ungluing once its there. I hope this is useful1 point
-
awesome1 point
-
possibly. But it developed 6 months later1 point
-
Thanks for the response on the paint booth! That is similar to what I'm contemplating with a PVC frame. It will be placed in the garage but there is limited space and would like it to be positive pressure as well. Using automotive paint is why the booth is needed - want to keep dust away.1 point
-
Depends were you want to use it, I've used E6000 on sections that need to open like shins but on other joins I have used JB weld, very strong and does allow sanding and some flex too. For a standard OT TK you only need to use E6000, for a FO TK I advise E6000, JB Weld and Bondo to fill in the joins. I've been trooping in the armor for the last 4 years, all joins have bondo on them and nothing has cracked so far, you just have to make sure you prepare the area properly first, use a course sandpaper to rough the surfaces before applying bondo, try to only apply in thin coats and allow to dry before adding more. Good luck with the build.1 point
-
I figured you meant to say install happened via the charging handle track anyways, it's all good. This can allow for the screw head to sit flush against the inner tube, for pulling back of the bolt. Don't think I'll attempt to mimic a pull back bolt, but maybe! Glad the install of the 2nd screw worked for you. Thanks for following-up, cheers!1 point
-
Finished my 5th horseman blaster. Not happy with the paint. I think it’s so cold my patience didn’t allow the paint to fully cure so the finish is t what I wanted. Electrics were a slave Leia as I tried to make everything independently with mini miles plugs made it hard to keep track of what was what Now off to sand the trooper again The plug is one of the magnet connection type. Just clips on. Sent from my iPhone using Tapatalk1 point
-
Perfect. That is the Holster I use. Great Choice.1 point
-
Cricket you’re a genius! I took off the tiniest amount and changed the shape of curve. It wasn’t so much where the dip was between the thighs, but the convex curve that was very unnatural against my cheek. I made it concave and it seems to be staying perfectly in place now. (Can’t share a direct Imgur link on my phone). https://imgur.com/a/jnOnagw1 point
-
Beautiful work.1 point
-
TK-21615 ready to troop!!! Thank you all so so much for your expertise and moral support along the way. I can't wait for my first troop this weekend!1 point
-
Spats Pt 3: I glued the painted greeblie to the spats and lined up the proper placement of the accompanying snap on the greeblie for proper closure. I used the Devcon glue for the male snap. After test fitting the spats around the base of the shin, they slid below the shin a little too easily after walking around so I applied some velcro on the front of the shin to hold them in place better.1 point
-
Thigh A. Confirm both sides will align correctly once clued B. Using a scotch brie pad or similar scuff up the full surface of the cover strip and 1/4" surface on each thigh side. C. Install cover strip on one side. Let dry for 48 hrs. Afterwards remove any excess glue from the gluing surface D. Prep. Have several 10" strips of painters tape cut and waiting. Have any clamps and magnets separated and waiting. Have a block of wood roughly the width of the cover strip at least 3/4" thick x 10"L. E. Apply glue to 2nd half of thigh. F. Bring sides together and install clamps at the ends. G. Grab a strip of painters tape and strap the two sides together so they are flush. H. Add as many magnets as you can to the cover strip. I. Add block of wood on top of magnets. J. Add remaining strips of painters tape over the top of the wood at the same time forcing wood downward until the two sides are parallel with each other. K. Double check everything. If it looks good, let dry for minimum 48 hrs.1 point
-
"TK, huh? Tick. I'm gonna call you Tick! That all right?"1 point