Leaderboard


Popular Content
Showing content with the highest reputation on 02/07/2018 in all areas
-
See how they fit on your legs once cover strips are applied, you don't want them too loose, or tight. I left a return edge on mine and never had an issue with it bitting3 points
-
@TheSwede : I guess I’m going to have to go frame shopping now...2 points
-
Massive help. Thank you buddy. Really appreciate it. |-o-| Sent from my SM-G955F using Tapatalk2 points
-
Thanks guys, I think the problem wanted to be solved. As soon as I put in the first nail the answer was slapping me in the face. :-) Mark2 points
-
For anyone looking for the brown in a Spray Paint form factor, I tested nearly every widely available brown against the Vallejo "Dark Rust" suggested by Paul. Rustoleum Satin Espresso is a nearly exact match.2 points
-
Hi guys. Respectfully requesting EIB status. Any and all constructive criticism to get me there welcomed. Will eventually be going for centurion, and aware of a few kinks to iron out, but Thank you for your time. 501st profile link: https://www.501st.com/members/displaymemberdetails.php?userID=23150 Name: Tom Betchley Gairrison: Isle of Wight garrison Height: 6’2” Armour: RWA Helmet: RWA Neck seal: Katie walmsley Canvas belt: Katie walmsley Hand plates: imperial supply depot (painted silicone) Boots: imperial supply depot Blaster: sheartech (rubber e11) Holster: imperial supply depot Full body Front (arms at side) Back (arms at side) Left (arms raised) Right (arms raised) Left (side detail) Right (side detail)1 point
-
Hi guys. Just wondering what I have to do to start a thread on the EIB request thread? I’ve applied for 501st TK access, but still can’t start a new thread. Cheers in advance1 point
-
started to explore 3d printing half year ago, now changed to a higher end 3d printer, which I'm very happy about it ~ most important is that I don't need to worry about customs / shipping fee / tax anymore: allow me to show off here : 1. SE 14R with real scope: 2. Merr-sonn Power 5 (conversion parts only) 3. DH 17 4. DLT 20A exploring to print out T 21B / DLT 19... etc, too many project ahead of me now.1 point
-
Hehe. Yes, the downside of a packing for holiday AND mocking up photos!! Lol1 point
-
Best of luck, Tom. Looking great. :-)1 point
-
I especially like the second trigger that's part way down the grip in that photo. Is that one for "stun"?1 point
-
Firstly the DO's are still catching up on applications from the Christmas break backlog so please stand by, they will be with you as soon as they can. You have a very nice build, a few things I can see are only minor adjustments (which I pointed out on your other poste ) wishing you the best of luck1 point
-
different seams and different shapes on the legs are nothing unusual, no worries. Yes you want one or two fingers space between your leg and the outside of your thigh. You also need that space to slide it over your knee. dropbox trimming line looks perfect1 point
-
You have a beautiful set of armour Tom and it fits you well, I particularly like the canvas belt and the way your thighs fit. Good luck in your EIB application. You will need to close those gaps on the ab / kidney fir Centurion, but I guess you know that. Good luck [emoji3] Sent from my iPhone using Tapatalk1 point
-
I wear thin cotton gloves underneath my rubber gloves. Less sweat and more comfort1 point
-
Will do my friend.... I just need to get some good pictures ..... I’ve never taken a good picture, mind you, they are better when I’m either in my bike kit or my TK.... can’t see the face ... lol Thanks for your very kind offer [emoji3] Sent from my iPhone using Tapatalk1 point
-
Aaah! I did see that but thought it meant something else, didn`t know what though1 point
-
Think that’s all on the checklist Look forward to hearing from you... and also dreading it haha Many thanks1 point
-
Accessory detail Neck seal Thermal detonator (back) Holster attachment detail1 point
-
Hehe. Cheers mate. I don’t have a good resolution Attaché logo, however... ;-) Sent from my iPhone using Tapatalk1 point
-
Helmet details Front Right Left Back Hovi tip detail Lens colour (very dark green)1 point
-
Armour detail Ab detail Action shot Cod and butt plate attachment detail Inner strapping1 point
-
Yeah you do!! Awesome Pictures, just missing the Imperial Attachè logo1 point
-
Thank you, my friend. That’s very kind. Feel free to PM me and I’ll knock one up for you.1 point
-
I know, right?! It takes more effort to build them for sure. But soooo worth it. I've been stopped at every single troop by other TKs so they could see them up close and try them out. I should organize a Magnetic Shin build/conversion party this year. Those warpy areas are where stress is happening on the butt plate. Even if you flatten them out, they can still come back unless you've reinforced your returns with an extra layer of ABS. On my RS kit, I've ended up with cracks on my butt plate returns only where I missed adding some extra reinforcement or where I just used ABS paste alone to make a fix. Maybe find some scrap ABS and use CA glue to add some strength to the returns? That should help. Let me know how it goes!1 point
-
I'm a bit bored with working on the torso, so the brackets will have to wait. Instead, I've begun the next step for my magnetic shin closures! I followed the tutorial here for the most part. I deviated from it in order to make the closures super strong by using a magnet-to-magnet closure rather than the magnet-to-steel method outlined in the tutorial. I have worn the magnetic shins I made for my RS Props TK out on over a dozen troops, and I have never had them come apart on me. No maintenance has been needed on them, either. Once you get this mod on your kit, I swear you'll never go back to anything less than a magnetic closure on your shins. This stage involves making and securing the "holes" part of the closures for the magnets. I begin by cutting out two 3/4" x 12" strips of ABS. You should have this when you're done. Next make a lengthwise mark in the center of each strip to help keep your holes lined up in the middle. Then mark 3/4" in from each end. That will be the center point for the magnets on the end. I like using magnets with holes in the middle for this, so I can easily find the 'crosshairs'. Trace the magnet. I like to use extra magnets underneath to help keep it secure while I trace. Next, find and mark the center of the strip. It should be at the 6" point. From there, measure 2 5/8" from the center mark on either side. Mark and trace your magnets. When you're done, your plastic strips should look something like this: Next, I used my drill press and a step bit to drill out the holes. It went really quickly! When you're done, you should have two strips with holes in them that can easily fit the magnets. The next part is where people tend to get confused, so I took this photo to show what goes where. The "hole" strip will be glued to the inside half of the shin on the inside. It sounds kind of confusing, but it's not all that bad. Remember that the "hole" strip will be hidden! I begin with my left shin. I mark the center of each hole to assist when I line up the edge of the shin. Next, I test fit the strip on the shin to verify placement, clamping on both ends. Then I apply e6000 to the area of the strip that will be in contact with the shin, clamp and add magnets. This is what it looks like when glued together: Here's the right shin after gluing, but before I added the magnets. Here are both shins as the e6000 cures. I'll be allowing a few days for this to cure, which will give me ample time to get my ABS buttons ready for installation.1 point
-
Looking fantastic Christine [emoji3] Must admit, the magnetic shins I copied from you are by far the best thing I did to my armour, putting them on is a breeze, even if they were a pain to build. Like you I got those raised bits around the butt and kidney return edges after the hot water bath, I flattened them out with s heat iron, but it appears to have made the abs brittle, I had the armour on for an hour the other day, walking around up and down stairs, just to check all was ok ahead of my first troop. When I removed it I noticed some small cracks around the butt return edge, where I had used the heat iron, I’m currently dieting them out with abs paste. Do you know what could have caused this? Didn’t take any pics... doh Sent from my iPhone using Tapatalk1 point
-
Must admit, I love the picture you have put together, wish I had that skill Sent from my iPhone using Tapatalk1 point
-
Quoted wrong convo... see! Forums do not like me. Haha.1 point
-
Awesome. Many thanks. I was just assuming I was doing something wrong as I so often do on forums haha. I’ll keep checking.1 point
-
All good we all learn I will lock this thread as no more observations are needed1 point
-
I thought I recognized hat Anovos hardhat harness system! I (carefully) ripped mine out and got some helmet pads on Amazon. They are much more comfortable and now my helmet moves with my head instead of whatever way it wants to. Mine was as walpyjod as yours, and my helmet always wanted to turn to the right.1 point
-
I took all return off, but like I said, I've got thicker legs. I've seen some builds retain the edge. And I have in other places on the Armor. But thats a sensitive area! Sent from my XT1254 using Tapatalk1 point
-
For height, I trimmed it similarly to the belt - a couple mm above and below boxes. For length, I essentially eyeballed it by holding and bending the ammo pack against the thigh. (Heat bending it first might help.) Since the length depends on the circumference of the bottom of your thigh piece, even if I did have measurements, yours would be almost guaranteed to be different. Just be sure that it's pretty tight against the thigh and it should be ok. As for the Velcro, still holding up great, but it's only been 3 months and 3 troops. I wouldn't be surprised if I eventually had to replace it, but I don't foresee that happening anytime soon. Hope this helps!1 point
-
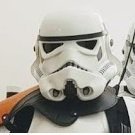
I used to troop in a FX armor for the last 3 years. It's still approvable if you change that helmet. I recommend you to get a helmet from one of the vetted makers. TM, TS, WTF, RWA or whereever. I can show you why the FX helmet isn't accepted anymore. Here is a comparison shot of the FX helmet (on the left) and a regular helmet... as you can see, the FX helmet differs a lot from the regular helmet shape. I hope you understand why the 501st wants FX armor wearers to get a different helment. I went with a CAP-W some years ago and changed to Anovos later. But I'd recommend you to look out for smaller armor makers in your local region if possible.1 point
-
Just little things, one hand plate is touching the forearm the other there is a gap, could bring the belt up a little, reduce gap between shoulder bells and shoulder bridges, reduce gaps around lenses on helmet, should have a small gap between belt and drop boxes, shoulder straps at back could be curved more to reduce gap between them and back plate, really just nitpicking, more for higher level acceptance, I'm sure you will be fine for basic approval1 point
-
Only thing I can see: those boots look really short. Do you have something like a stirrup inside your shins? might help to draw them downwards. Other than that: great work on your armor!1 point
-
All good, need to wear my glasses more often Could have just been my ISP, been inconsistent of late, seeing images fine now. You could make some minor adjustments on spacing but really doesn't look like much would hold you up for basic approval, good luck1 point
-
You're going to want to trim the return edge on the top flange. That's going to dig in and bite pretty good. [emoji33] make sure you're measuring the circumference of your thighs before removing too much material. I may rework mine in the rear by increasing the thickness of the cover strip (I've got thicker legs). And, as always... Measure twice, cut once, and use a straight edge. Sent from my XT1254 using Tapatalk1 point
-
Looking much better, good luck1 point
-
Cool, I didn't cut as much to make sure it wasn't too thin, but will have to see how it looks with the armor when fitting. the original trim line made them crazy thick though.1 point
-
Pictures of the flexible hand guard just laying on top of the glove Move it closer so it overhangs the knuckles a little? On to thighs. I thought I might have to add to the back of the thigh, but once I clean up the back line looks like my right thigh will be ok. Still need to clean up the cut line1 point
-
I mount mine on back of hand from where wrist bends and front overhangs knuckles a little. Same size handguard and different size hands will get different looks. But overhang is ok.1 point
-
We’re spoiled with armour makers nowadays. There’s some quality stuff around. Tony’s link should get you on the right path.1 point
-
Looking good trooper. You are missing a picture of the rivets of the ammo pack on your right knee. and you need to show the sniper plate placement. some small feedback though (won't affect approval), i would position your shins a little lower to your boot. Just an eye test, the shin guard looks better when its closer to your ankles. Also the elastic holding down the shoulder straps should be significantly thinner. I believe they should be 1/8". It will make it look cleaner too. Good Luck on your approval!1 point
-
To make my kidney to an connections to not overlap one another I had to reinforce the left side and then add a tab and slot to the right. Thanks to Daniel directing me to cricket’s build. I got some black plastic that was just a bit thinner than the AP Armor. The black stuff is 0.06 inch. I cut to size and curved with a heat gun. Mock up to make sure it will work. Glue black piece to kidney. Overkill with clamps? Never. Cut and sand the side posts for the slot. Glue in side posts. Cut and glue in top part to slot. Finished. Keeps the seam from overlapping on itself. Sent from my iPhone using Tapatalk1 point
-
Your armour looks great, I too have used Velcro to help support my belt. Good luck with your application Stephen [emoji3] Sent from my iPhone using Tapatalk1 point
-
What follows here is probably my least favorite part of the build: shaping the torso all around my slender frame. I seem to recall that this part felt like it took forever to get right. I had lots of trial and error with my RS kit, so I was expecting problems. However, with many mistakes comes knowledge, and I managed to get through this part with not many new gray hairs. I always see the plastic of the armor pieces as a big puzzle. When the pieces are the correct size, the whole kit fits together without much effort at all. You can use a belt to cinch things in, but you really don't need it if the plastic is the correct shape on your frame. I began with strapping my torso together temporarily with industrial velcro to see how it fit before modifying. I didn't strap my back plate to my kidney at this point. The back plate is unaltered in the photo below. I needed to see how the shortened kidney/butt assembly would fit first, then I added the back plate to see where I would need to cut it at the bottom. You can see how the back plate overlaps the kidney. The back plate is too long. I attached all the velcro and got some pics. Pics were taken in a mirror, but I've flipped them so that the orientation doesn't look weird. That back plate needs some major trimming! The chest plate needs to be adjusted upwards because it's sitting too low. And I've got typical new-armor-diaper-butt going on, too. Remember that I have not trimmed anything for size from the sides of the kidney, ab, or butt plate. You can still see the flashing on the butt plate where I need to clean things up still. There's still a tiny bit of flashing left on the kidney as well. I noted where most of the overlap on the back was happening and marked it. I cut where the mark was along the bottom of the back plate and attached it with more industrial velcro. With everything together, I was able to better see where I needed to shape my armor to my body. The back shoulders definitely need to be curved downwards; they stick up a lot. And the ab could use a little bit of curving in at the sides. The butt plate actually fits well on me, so I don't need to shape that around my body (I'll be shaping that at the bottom tab later). And then there's the kidney. Ugh. It pops out on both sides. Clearly too wide. Instead of cutting it to fit, I'm going to shape it inwards with a hot water bath. I think I'll be able to get the kidney to fit well without trimming the sides at all. Here you can see how much of a disparity width-wise there is between the front and back halves. If I put the permanent strapping on at this stage, I'll be putting a lot of stress on my brackets and the plastic, and repairs will need to take place sooner rather than later. No need to stress them out if I don't have to! The kidney is key for this. When a kidney is well-shaped, it makes the entire kit look so beautiful, just like a well-tailored suit. I began with focusing on one side of the kidney at a time. I like the flat middle part of the kidney, and I want it to stay flat. So the middle stays out of the water. I was able to dip 1/3 of the kidney into boiling water, and gently apply pressure to curve it (running it under cold water after each round of shaping). It's okay if the returns get a little warped- you should expect it. Those warped areas are easy to flatten out later. (NOTE: do not trim your returns until after you've fully shaped your armor to your size! The warping that can happen to returns can sometimes make some areas of the return narrower.) Here you can see what my kidney looked like before and after shaping it as compared to the butt plate (which was not sized): I shaped the ab to make it more narrow around the sides, then continued to shape the kidney to fit the ab. It took a bit of time, but I am happy with the result. Photos were rotated so it's more like how it will be worn. Kidney/ab left and right side connections. Keeping Centurion in mind, everything lines up at the top. Like I mentioned before, for me, the armor is a bit like a puzzle. The challenge is to get all the pieces to not only fit together but also to fit to your own body. Here you can see how I've made my TK puzzle fit nicely together. You're looking from the cod upwards, with the kidney on top. After heat shaping, the sides of the kidney and ab now meet together well without any additional strapping or support. When I install my side rivets and brackets now, there won't be any unnecessary strain on those connections. And yes, it fits me as well- I simply ran out of steam today to take photos of it all on. Time to take a break!1 point
-
I use a pot that's large enough to make tamales in... I think it's a 12 quart pot? It's not marked, but it's about double the size of my 6 quart pot. You can easily put 1/2 of a full-sized WTF shin in that size of a pot. You shape it by dunking one end in the boiling water for several seconds, then flipping it over to heat the other side a few seconds. Then shape it all as you dash over to an already-running faucet of cold water. The cold water quickly cools everything down and speeds up the process. When I need a bigger space to shape (like with kidney or ab), I boil several pots of water at one time and pour it all into the kitchen sink. The water stays hot enough to soften the ABS for at least several minutes. Hope this helps!1 point
-
A sidetrack from finalizing armor: You gotta have a good way to transport it! I took inspiration from VancouverTrooper's Husky box thread (read: blatantantly stole the paint scheme, albeit with his blessing!) and gave my 50 gal Husky box a serious makeover. Masking the top lid: Painted top lid: Masking everything below the lid: Top and front panel decals: Right side decals & stickers: Back panel decals: And there you have it! Oh, for the record, I used Semi-Gloss White Rustoleum Painter's Touch 2x Ultra Cover Paint + Primer. I think I used about 3 cans, total. At this point, I'm waiting for my 501st engraved box tag, to cover the Husky logo, and awaiting a few stickers for the side center panels. (I'll add SoCal Garrison, and 501st stickers on one side, and add the FISD stickers to the side with the LA Squad sticker... or some combination thereof.) I also need to figure out the best way to clean up the lines that didn't come off as cleanly as I would have liked. But then I'll be ready to roll out in style! Once I see how it looks with the box plate on it, I may also paint the bottom of the little indentations to each side that center panel, to break it up a little more. With the exterior done for now, I started on the interior. VirtualCaitlin had the great idea to use foam from a cheap Walmart bed liner: Fits great side to side out of the box, just have to trim the ends off: ... which leaves just the two small sides bare, once it's glued down with 3M Super 77 spray adhesive: Fortunately the two cut-off sides work nicely to fill those bare sides, and ta-da, we're all nice and padded. If I ever need to commit a small child, I have the perfect padded cell! LOL For packing, this is the best combination I've come up with for packing, to date. Needless to say this is a work in progress. I've used some random sheets of foam (perhaps 1/4" thick?) I had laying around, scavenged from various packages I've received, between the layers. Bottom-most layer: Shoes on the right, laying down flat underneath the arms, in their white bags. Shins nested into thighs, and forearms nested into shins, leaving the biceps sitting out atop the shoes, with the shoulder caps nested over them. TD in the middle, as you see, and tool/repair kit at the end, along with my Imperial Handcuffs. The thin foam sheets go over this layer. Next layer: Ab and chest plate, connected. Add another layer of foam on top, and then: Next layer: Full back panel, all connected. Add another layer of foam, and then: Top layer: Helmet lies sideways on the left, in a helmet bag for protection. Belt lays across the other side, on the right, with the holster attached. E-11 Blaster, gloves, neck seal and underlayers all just go whereever they fit, on top. That's pretty much it! Although I'm trying to find a good inexpensive source for acrylic mirror that I can attach securely into the underside of the lid. Should be handy while suiting up. I forget who came up with that idea, but I like it.1 point


.thumb.webp.27f7939d37871f319ff836257d4a3668.webp)