Leaderboard


Popular Content
Showing content with the highest reputation on 10/13/2017 in all areas
-
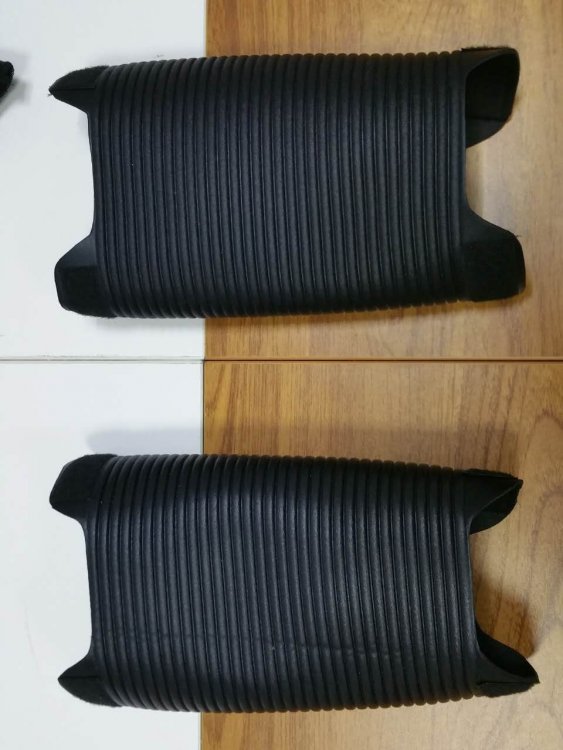
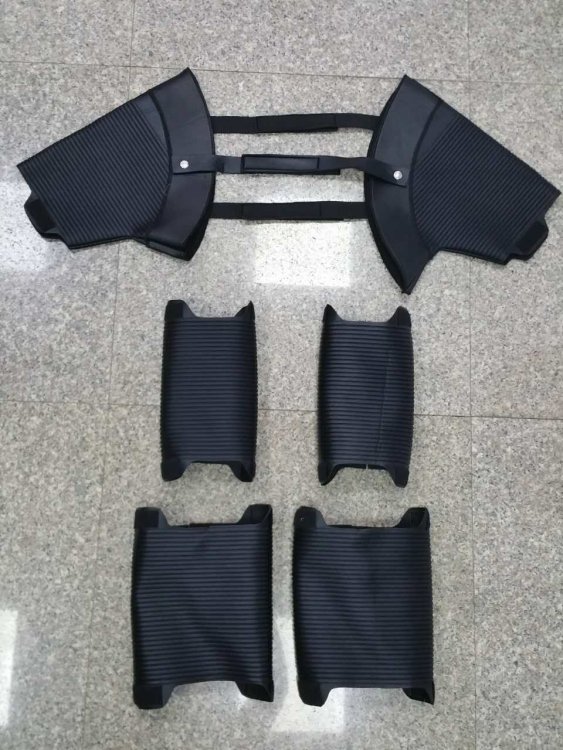
Dear Troopers, fellows Many have asked us if we would do a gasket for the FO trooper especially since we started producing our own blend of fabric for the R1 death trooper. We've been playing around in the workshop and came up with an elegant solution using our home made technology to create this gasket fabric... the question is how many troopers are in need of the FN gasket.

 2 points
 -
Hi Paul! Excited for you as you embark on this great adventure! With patience, forethought and a steady hand, you'll be holding a completed blaster in no time! Familiarity with tools and know-how will develop over time; you'll be a craftsman in your own right. And if you get it wrong, 'green stuff' will come save the day. In my experience, keeping the FISD E-11 Blaster Reference close by is a good idea to give you the lay-of-the-land and insight on the build. I like to then dive into Tino's two builds to show me how it can be done, and done well in reaching personal build goals. Look forward to future posts! Cheers!2 points
-
And Joe let me tell ya. It was a battle to get him to accept it!2 points
-
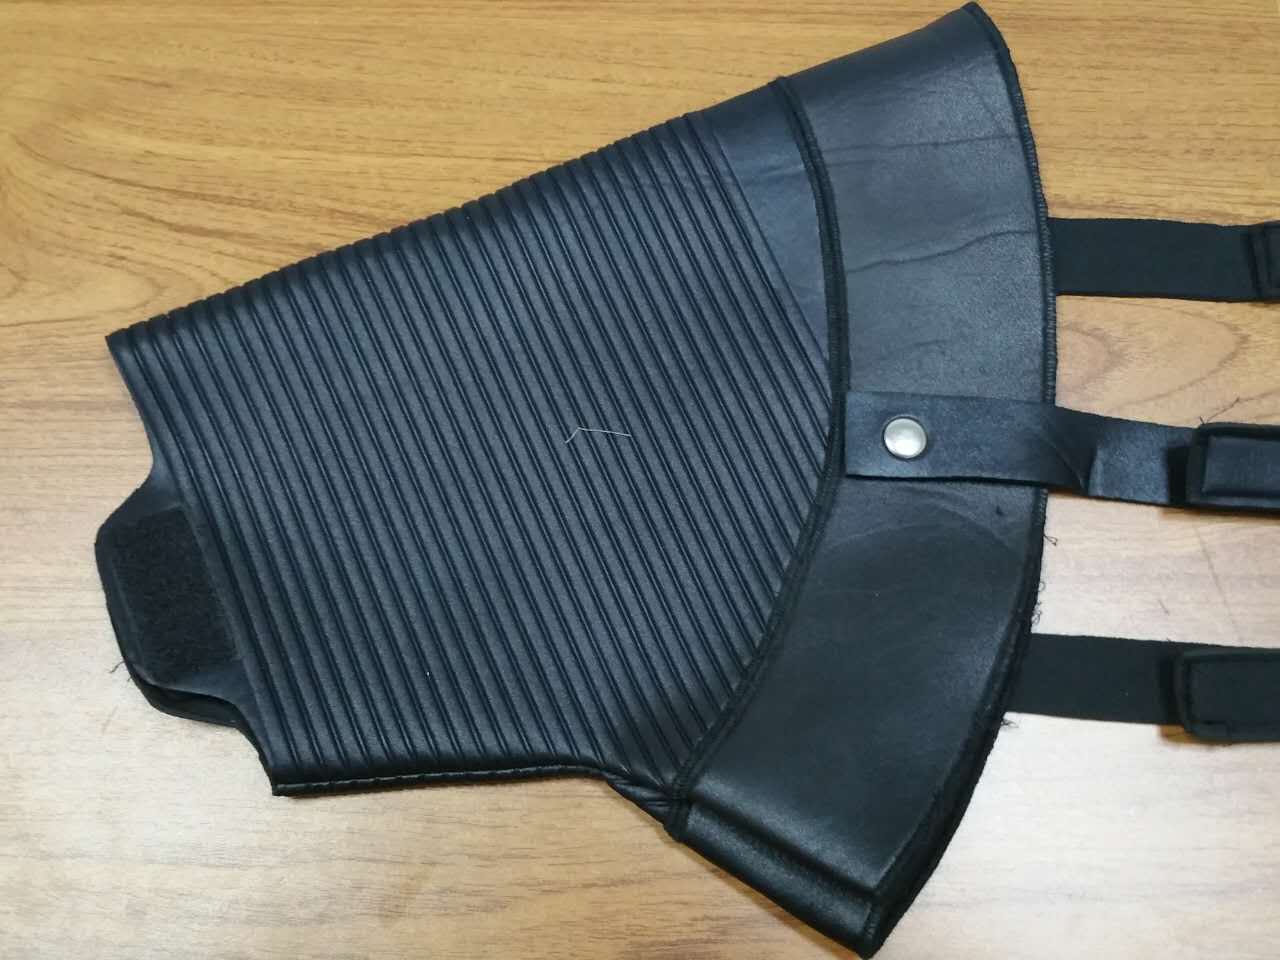
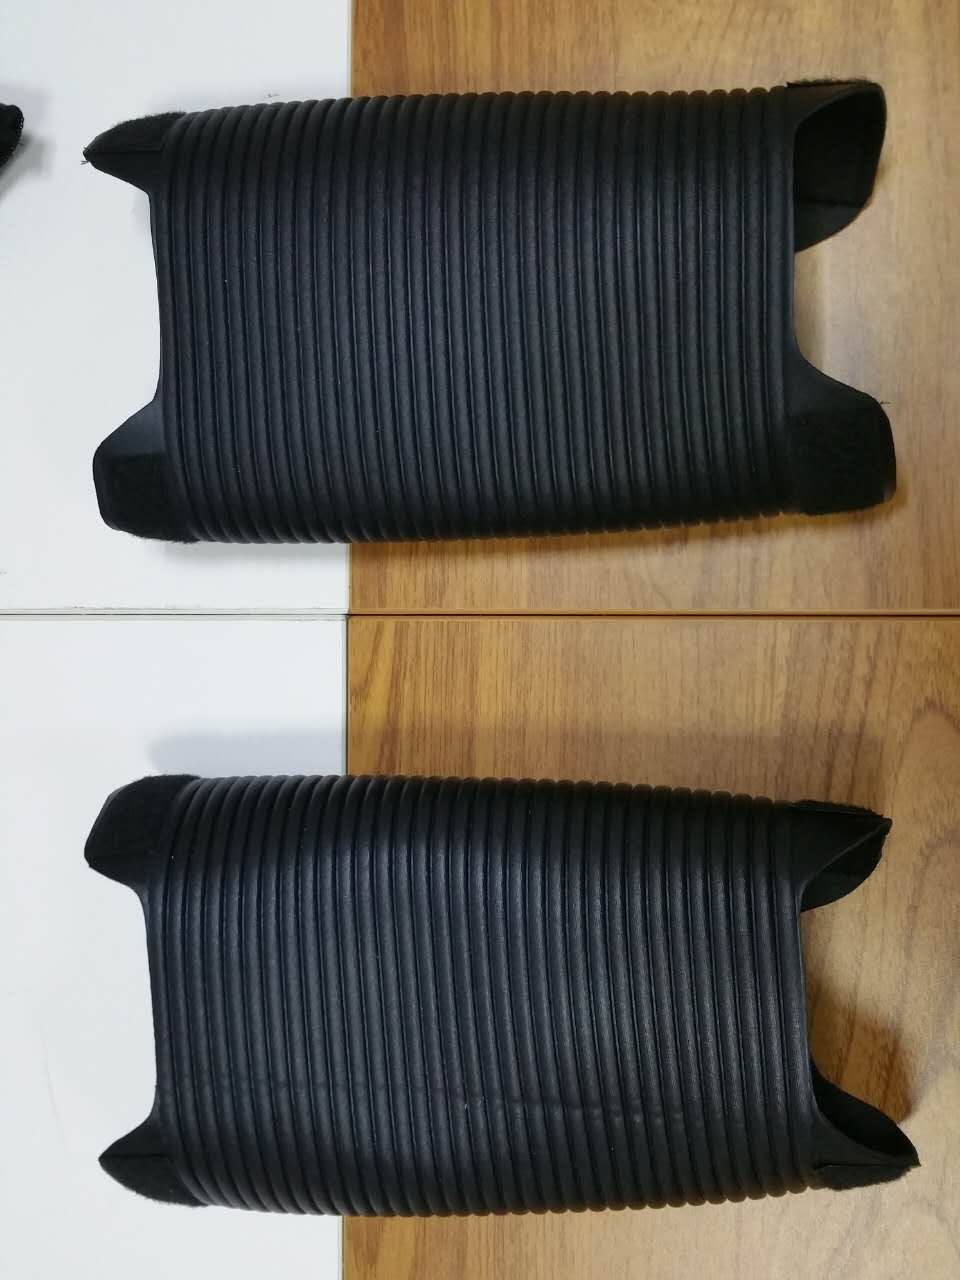
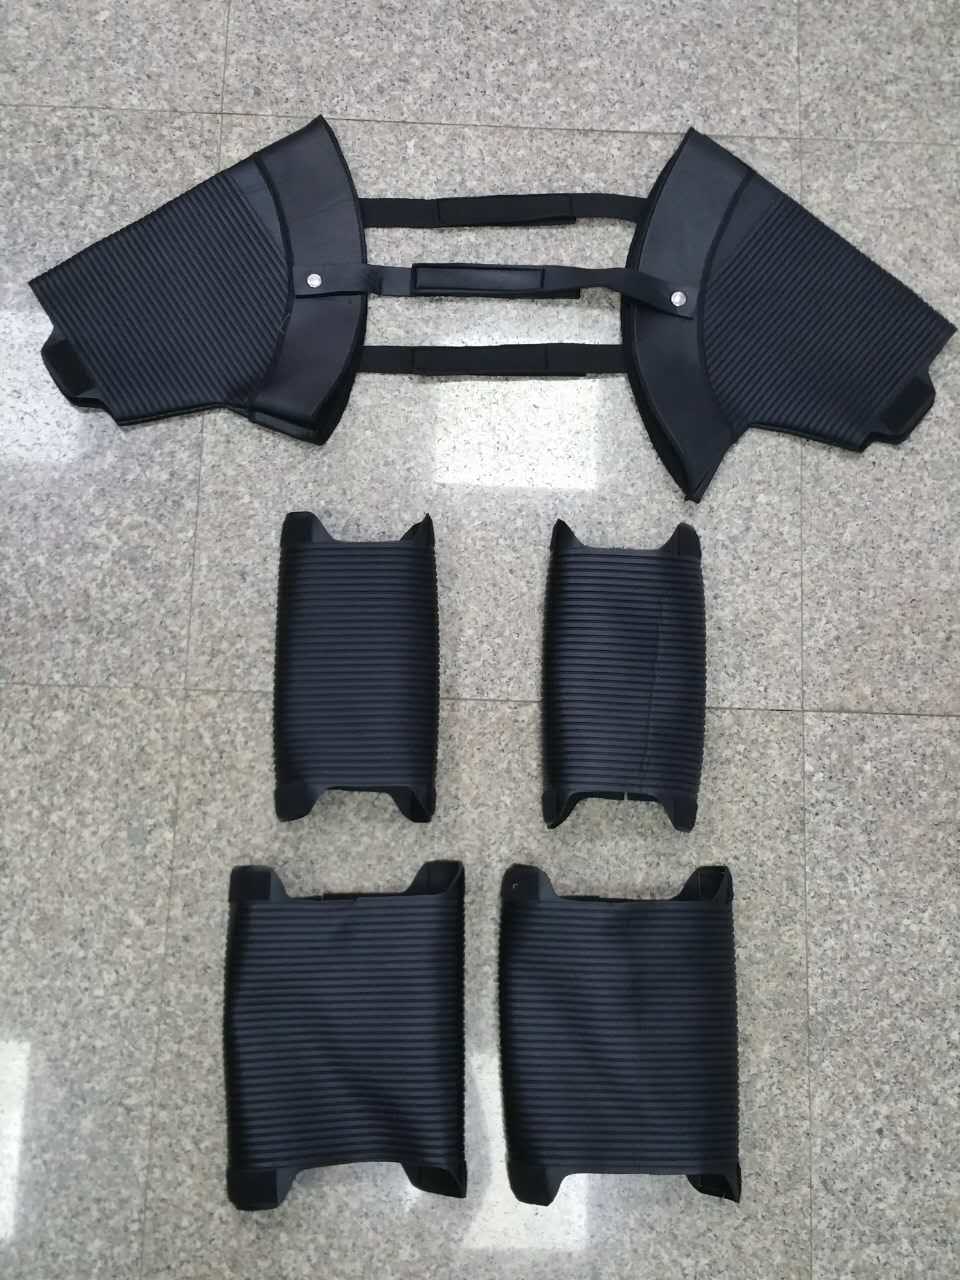
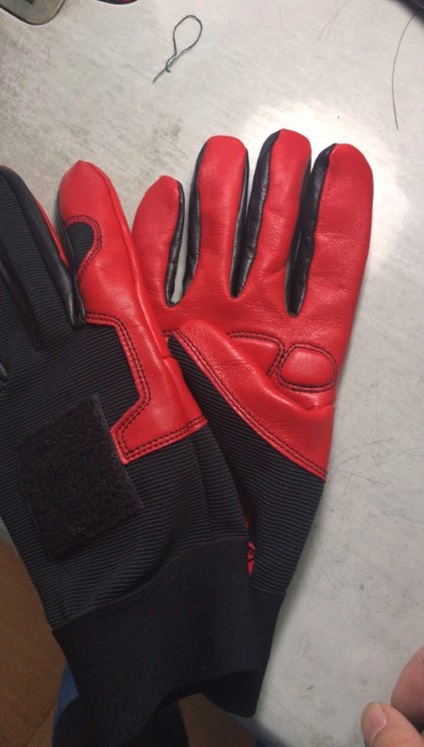
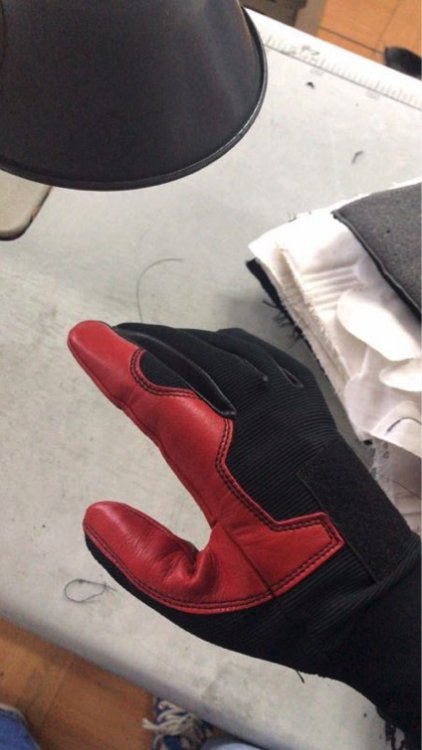
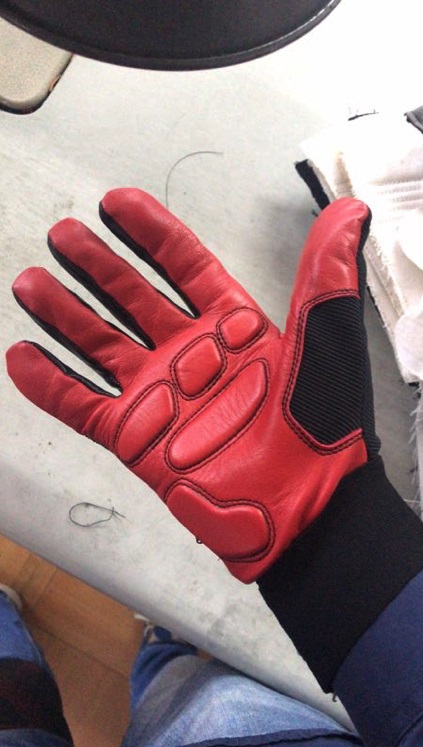
I meant an FISD Facebook group. I don't even know if there is one. As for the boot armor, when I asked, Delilah said the artists did their illustrations based on her descriptions -- which said illustrations don't go all the way down, to my annoyance. But she said she figured he'd have more armor parts like Phasma did than what a regular Stormtrooper has. So I'm sticking with sabatons. In other news, Vincent sent me these pics of the prototype gloves. He said if there are at least ten people interested, they can start a run soon, so people who want gloves in time for TLJ can have them in time... --Jonah
 2 points
 -
....when everyday things start reminding you of it.
 1 point
 -
There are left/right shins. You just need to check greeblie placement. You’ll also add the thin boxes to the left shin. Sent from my iPhone using Tapatalk Pro1 point
-
You're a boss! Thank you! This helps so much. I actually don't have to worry with Jims V5 about holster placement. He casted the base raised section into the armor itself. No guessing. Also there is a specific left and right with my kit. Only thing it doesn't have is left and right shins. Easy fix.1 point
-
The answer is simple. He has seen them, maybe even had them measured with calipers, but for sure they did not allow him to disassemble them and take a piece home. There is no way with the simple tools he was able to use in that days to reproduce their complex shape accurately (in a way it´s as good as he says, when denying that others might be better). Newer technology is easy able to do that job better from pics than, at his time, with calipers (or maybe he only used a ruler?), esspecially when someone does this as a fulltime job. So, nonetheless i don´t like him and his behaviour, i don´t believe his accuracy statements. I´m no costumer, i´m a prop collector - and if i would believe him i would buy his, no matter how much i dislike him.1 point
-
Hey Team, I haven't been lost. Sorry for the lack of updates and frankly work on the project. I broke my wrist over the summer which put a crimp on my scissor hand to work on my armor. Now I am whole again, complete with my Skywalker cybernetic hand scar, ready to work again. I am looking forward to making process on my armor and getting ready to join the local garrison for events.
 1 point
 -
Last bit of progress today. Holes drilled out of the barrel. Blank drilled out and bolt fitted. Marked out and drilled 3 holes in the main body and handle, I used shelf holders to secure the 2 pieces. Drilled out the blanks on the front but got carried away so will need to make good with some green stuff [emoji4] Lastly how have you that have done this mod attached the lever to the click thingy.I’m struggling to see how to do it. That’s all for today. Sent from my iPhone using Tapatalk1 point
-
Your stock cube looks great!1 point
-
Dude that looks great! Thank you very much for that!1 point
-
Hi guys, I embraced the pressure and got a few more bits done. As always, I thought I’d get more done than I did, but it’s okay. :-) Started by repositioning the scope. Simple job - just need to fill he holes. Next, moved on to the end cap and clip. Added the hole on the cap. Then started pivot testing to get a working end cap clip. Currently using an unfinished nail as the pivot. Fitted the end cap clip and tested. All works just like a genuine sterling. I then fabricated the hinge part for the folding stock. Just an old piece of wood, cut and sanded to size. As it’s not going to be functional, I used a dome headed nail to hold the tube to the hinge end. Packed it with electrical tape to keep it tight. And that’s all she wrote for today. I’m really pleased with how it went today, even if it doesn’t look like much of a change from before. I think I’ll remove the end cap clip as it could be fitted straighter. Again, that’s mostly be being fussy. No resistance yet as I’ve not installed a ‘spring’ (aka folded plastic part). Sent from my iPhone using Tapatalk1 point
-
Thanks mate. Sent from my iPhone using Tapatalk1 point
-
Congratulations! Welcome to the Ranks! Now go have fun out there!1 point
-
Hi Tino, Thanks for the input it’s much appreciated [emoji1303].made the guard from some 25mm metal I had lying around, I’ll make those adjustments and see how it fits. Sent from my iPhone using Tapatalk1 point
-
Hi Paul, good choice to start a build thread here and a nice progress so far. Trigger guard looks okay, maybe you can bring it closer to the trigger to reduce the gap at the bottom and curve that straight section. Not sure what you made the guard from, but please bear in mind, the aluminum stripe in the kit was meant for the scope rail. However, you can surely get the same (or similar) aluminum locally. It's 2x20 mm. Dan (CableGuy) is currently running the same build (DoopyDoo's full resin kit with Completion Set V3.0) and Jesse (Dracotrooper) too. I am following each of you in case I can help and there will surely be a lot to learn from the other builds. Enjoy your weekend and happy building1 point
-
I would be down for getting a pair of boots and gloves. It would be awesome to make a Cardinal kit! We have a local Phasma that is a guy but it would be funny if I made Cardinal. Sent from my iPhone using Tapatalk1 point
-
I’ll look at adjusting it a little, thanks for the reference pic [emoji1303] Sent from my iPhone using Tapatalk1 point
-
Hiya. By hand also, with these too. With lots of faffing, mine is now like this. :-) Sent from my iPhone using Tapatalk1 point
-
Hi Paul. Great to see you’ve started a build thread. Here’s a side by side comparison I put together for he trigger guard, if it helps. :-) That’s sterling vs DD. :-) Sent from my iPhone using Tapatalk1 point
-
Now imaging having OCD and building this thing lol. In the end I had to let go and understand that nothing was gonna match perfectly, be symmetric, or have straight lines. [emoji6] Sent from my iPhone using Tapatalk1 point
-
Yeah it looks fine Joe. You will see that there are a bunch of pieces that just don't line up the way you would think they should. Thats the beauty of stormtrooper armor. It is far from perfect. With that said, if you make some errors throughout the build you will find that almost all of them can be fixed in one way or another.1 point
-
In my opinion, your forearms are fine. Here is mine in comparison. Hope these reference photos help.1 point
-
Hi all, My armour is now compete. Need to get my blaster compete for UKG clearance. My pre-clearance pictures raised two small areas to look at, namely the shoulder bridges covering a fair bit of the back plate, and my forearms possibly looking a little chunky. Do I look Imperial? ;-) Any thoughts or comments gratefully received. :-) Sent from my iPhone using Tapatalk1 point
-
You are moving along wonderfully. Keep up the great work trooper.1 point
-
Hehe. Yeah, no pressure!! Lol Regarding the scope etc, that’s such a simple fix I’d rather do it and be that little bit more screen accurate. I’m already wishing the morning away and planning a to-do list in my head, including; Finish end cap clip Inner folding stock tube and fitting Finish power cylinders Work on flash guards Make a start on internal bolt Can’t wait. :-) Sent from my iPhone using Tapatalk1 point
-
About to post an update in the CRL thread. Dunno if you have notification turned on for that one, so wanted to give you a heads up.1 point
-
Okay give me a bit and I will work on that for you.1 point
-
That's actually not a bad idea. That could be a good way to carry the baton.1 point
-
Here's the best image I got. I unfortunately didn't get to making a holster, but I reckone one could make one out of nylon strapping with a snap attached to the exterior of it.1 point
-
maybe it is like this:1 point
-
Man I love that shot. Am I the only one who gets more excited about the FO characters than I do the Resistance ones? Ever find yourself cheering for the "bad guys" in Star Wars? (well, except for ANH. That's sacred stuff right there)1 point
-
If you watch the scene where the prisoner transport door explodes, you can see the baton dangle side to side with a stationary rectangular shape behind it.1 point
-
Yes, just a busy work day. No, I think the beveled edges will stay - they are very unique to this costume.1 point
-
It looks like there is a black sleeve behind the baton that the belt loops through. Part of me wants to go the route of attaching a snap to the black sleeve and the baton itself.1 point
-
It is made of plastic and aluminum.... got the plastic parts and PVC pipe from Robert or swpropman in Ebay1 point
-
how do we holster this to the belt?1 point
-
Cool. Your efforts to replicate each and every detail is paying off Jesse. Folding stock is looking great.1 point
-
Glad you decided to hack out the resin folding mech in the stock. Looks better as one whole part even though you don’t really see it , but you know it’s there!1 point
-
If you're going to use Phasma as the model in terms of shin and boot armor for Cardinal, something else to consider is that Phasma's shin armor is different in TLJ. For TFA it's as the Visual Guide depicts. From a practical standpoint, that was done to account for Gwen Christie's atypical height - the screen FOTKs ranged from 5'8" to 6' tall whereas Gwen Christie is 6'3". Hence the extra material at the ankles. For TLJ, the costume designers seem to have taken that into account and produced a set of shins to accommodate her longer legs. Now, her shins look a lot more like a typical trooper - spats and all.1 point
-
And all done!..sort of...the chest rubbed of the paint on the topp rivet so the eraser is just there as the paint dries Submission-pics this weekend1 point
-
Are you already on the preorder list for the Anovos kit? If so, then assuming they come through with their scheduled deliveries then you may as well stick it out with them, especially if KB is having supplier problems with his white ABS. I would caution with Anovos that it seems the yoke area will need to be modified in order to meet basic 501st acceptance standards (seamless yoke). That is based on the photos we've seen coming out of New York Comic Con last weekend. Still, it seems like it would be less work than putting together a KB kit. But then again, none of the Anovos standard kits have shipped yet, so we just don't know for sure what it will take to assemble them into a wearable costume.1 point
-
Also, I made this TK riot baton based off of the limited reference we have of the screen used baton in the prison/Imperial Labor Camp transport scenes. Would this be useful for the optional weapons accesory's section? Here are the images it's based off of.1 point
-
The position of the counter on the scope looks good to me, Dan. The only thing I would suggest, is to move both parts a bit closer towards the end cap. Not sure where it came from, but I always install the scopes with the rear foot aligned above the folding stock hinges. Does that make any sense?! However, it doesn't have to be like that. Maybe you want to check some photos in the Blaster Reference for this.1 point
-
Metal, Plastic or rubber? Where did you buy it? Looks amazing!1 point
-
Hi guys, kalkamel (SL-2320) from Malaysia Garrison here. After months of searching, I recently found a old hardware store in Malaysia that still carried vintage brown t-tracks from 30-40 years ago in stock. I have shared this find with the folks at The RPF and the Graflex Addicts Support Group on Facebook and have also opened up sale threads in those forums. These are FOUND ITEMS, not reproductions. I admit they're not 100% accurate as Gino's or Roy's (the center profile, although tapered is slightly thinner) but they're the closest found vintage tracks available anywhere at the moment. Base width is accurate at 12mm. I've asked Holnave, a member of my Garrison to help open a sale thread here for them in FISD since I've only just registered and don't have access to post in that section yet. They're in limited supply at the moment and once they run out, you wouldn't be able to get them anywhere else. In any case, feel free to ask me any questions you may have about the tracks. Thanks!1 point
-
Well done Ross. I am pretty sure you're the first Amour maker to make Centurion in their own armour!1 point
-
If its in the book I don't see why not. Someone just needs to build it. I am betting it might go to Spec Ops though.1 point
-
It's a project 2 years in the making, but I finally finished my E11! Well... I still need to weather and clear coat it, but want to make sure the black is fully cured before I do that. What makes this special to me is that it isn't just a kit I bought... it's a kit I made myself. For years now my primary "trooping weapon" has been my real Sterling, with real scope / counter and SaberFreak vintage T track. It's beautiful, but very heavy and an awfully expensive thing to be tromping around at conventions with. In January 2013 I started the process of molding it. I got some extra help from another local SW geek (Greg Chase) who had a cut down Sterling in his garage. He let me borrow it so that I could get the best parts from both of our guns. The road to get here was fun. I started off with silicone putty waste molds. From there I did castings, cleaned those up, then made the real molds. The only part on my kit NOT molded off of something original is the T track. I wasn't going to recast the stuff I got from SaberFreak, so I scratch built some out of sintra: It's not ultra-accurate, but for most people it would be fine. For those that care, they can get something else to replace it. I made it so that it could just be slapped down flat, but heating the ends and pushing them into the holes does give it a nice look. The stock on mine is much thicker than the real one. I wanted it to have a bit more of a chance to survive an impact. I thought about making this part out of rubber, but this seems to work well. The added bulk is on the inside and only visible from this angle: The plugs for the front and back are sized to fit tubing with the correct ID and OD. If the pipe is right, they drop straight in: Overall I'm very happy with how it came out! This last pic in particular shows how sharp the details are. The top is the vintage scope, the bottom is the casting, straight from the mold: Anyway... It's been a long time since I've posted anything here, so I'm excited to have something to share!!1 point