Leaderboard


Popular Content
Showing content with the highest reputation on 09/07/2017 in all areas
-
Made a few of these,,, probably need to post these in a diff thread ...3 points
-
This picture says it all! My SBB in all it's glory! Wooh, it was a good month of waiting which isn't so bad at all considering it came from the UK. For my E-11 Blaster, I decided to go with a Doopydoos Full Resin Kit. All parts were delivered but the folding stock - wishbone had a piece broken off. This is my first blaster build. First time also working with Resin. I am going for good level of screen accuracy, battle worn and as realistic as possible, especially as it pertains to the SMG part. I will be making a ANH version of the E-11. To bring the blaster to the next level, I am complimenting the doopydoos kit with T-jay's Completion set, and Chris's 3D printed parts. Although originally looking to get Steve's magazine replica some time in the future as well, it will be a toss between it and Robert's magazine, as the latter is hollow and I may need room to put electronics. One huge addition I am absolutely to-the-moon-and-back about is installing Paul's fully wired and ready to install BlastFX - electronics that will bring the E-11 Blaster alive with lights and sound. This latter addition will be a dream come true; order made to arrive late October 2017. As for instructions, I am relying heavily on the E-11 Blaster Reference Manual. Thank you thank you for all the authors involved in this valuable document - gives us newbies a solid step forward. My timeline for completing the blaster is likely a year or so into the future. I am just out to revel at every detail, enjoying small advances every day. With E-6000 as my CA of choice and allowing for green stuff to fix mistakes with that cure time of also, 24 hours, I need all the time in the world anyways. Also, I'm not going on any particular order. Generally speaking, I will be putting the SMG portion together first then, move to the E-11 parts following, but not in every case necessarily. Also, I will seemingly leave component parts 'incomplete' and jump to another component part. So in short, my build will not be done in orderly fashion. Well, without any further due, let's begin!!! After a nice wash to get rid of fine resin dust and left over release agent chemicals, I proceeded to sand down the two ends of the broken part to get ready for applying the reinforced epoxy. I then placed the entire folding stock / wishbone piece on my vise. I placed Popsicle sticks to fill the void between two forks of the wishbone and held them together with tape. After having the epoxy settle while the piece was on an angle sitting on my vise, I felt the epoxy was starting to harden, although really, it was just a short while, so I positioned the piece vertically, so to use gravity for better surface area contact between the resin parts and the epoxy. After cure, all is well! The forks sit evenly between themselves - Yes! Just need a little sanding down of the left over epoxy around the seams which I'll do later when I tackle that piece. Here, I drill all holes in the Receiver tube. Before getting into details, want to emphasize how fine the resin gets when you're killing it. Highly recommend, as it was highly recommended to me, to use a proper respirator and safety glasses. Nothing beats safety and ensuring for good health! So I began by measuring out the existing holes made by Doopydoos using my precision measuring tool and came out with 7 / 16 " and was delighted to see a matching step on my step drill - bingo! I then used my kids crayola crayon to mark the center of the to-be-cut holes and placed the receiver tube on my vise trying to keep it as horizontal as possible, trying to eliminate any tipping and rolling etc. As for the drilling, I tried to keep it as vertical as possible and let the drill do it's work. It took a while, especially when you hit the inner metal tube. I was afraid to go too far so, as you can see, I didn't go all the way to the 7 / 16 " mark, afraid I would over-rotate and make a large gaping hole! It was difficult to see how far I drilled too with all that swiggly resin coming about from the drill process. I will need to go back with some fine precision to get it just right. Better to proceed with caution right?, then have nothing to work with and sorrow. I will need also to finish drilling the rest of the holes, which, hopefully, I will be brave enough to commit to the 7 / 16 " mark more firmly. Here is finer detail showing the work more clearly. I am happy to have made it this far though as I try to be as systematic as possible, wanting to have a clean build with as few mishaps as possible. I proceed with finishing off drilling the remaining holes of the receiver tube. After marking the center of the holes, I created pilot holes and proceeded with using the step drill bit this time around. This just gave the step drill more grab and helped me have my holes more aligned. If you noticed, my first set of drilled holes had one that was pretty off! Here's the piece after drilling. As you can see, I still have the folding stock notch that still needs to be cut out. Oh and yeah, I went a little trigger happy with my drill and tackled the holes on the underbelly of my wishbone. I also will need to do some modeling with 'green stuff' to fill out the handle piece I mangled. This complicates things for this piece, especially about the extension tube which I destroyed, but I will get around to addressing these later. I picked up a 6 in. Round Bastard File (the weirdest of names) to help sand down the uneven inner parts of the drilled holes. While sanding, I noticed that Doopydoos leaves allot of resin where the T-tracks meet / grab onto the receiver tube. The holes on either end of the tracks are filled with excess resin which obscures and takes away the kind of detail I want. To open up the T-track grab holes, I first drilled... ... and then used, what's called a Riffler file to get at shaping out the hole. I learn something new everyday. It says they are made for woodworking, but it is working fine so far. They're pretty tiny tools that come in many sculpting forms. The one I chose is curved on the outside and cornered on the inside. I am hoping the curvature will help me shape the hole and the cornered part of the file to give me the angle I want for shaping the T-track part. Here's the cornered part of the Riffler file tool I just mentioned. Here's the tool getting at the T-track part... ...and now the hole curvature part. Here's the T-track grab hole the way I want it. I think the cut out / file will get cleaner as I work the other holes. The vent hole notch is now cut out and I've managed to patch-up a vent hole that was quite off. Hollowing out the folding stock was quite a bit of work as you will see. Receiver Vent Hole Notch Precision measured the notch to be 3/16" and applied a 1/8" router bit to my Dremel 3000 and put it to task. Followed up by using a square file to get it clean. Redo of Vent Hole Used a 7/16" thread-cutting tap to carve out a portion of the vent hole. Then proceeded to fill entire hole with green stuff. I let the green stuff harden over 10-12 hours to be safe. Then I drilled through once again and followed through with a sanding file. Now, the vent hole is the right size and in the right place, mostly - it's now to my liking. Hollow out Folding Stock Used 1/4" 60 Grit Sanding Band (Dremel 430) at medium then high speeds, ranging from 30,000 to 35,000 RPMs. Before I knew it, resin dust was spewing into the air. SO glad I have a good quality respirator because there was a lot of resin dust by the end of the task. My little nylon brush came in really handy to brush away dust between sanding sessions. I managed to hollow it out in about 1/2 hour. I will need to go back to lightly sand to get it just right. Finally set-up my workshop - here's my set-up for resin work for use of my dremel and for manual handheld sanding. Progress on front sight. I precision measured a dimension on the block and compared that measurement with the real sterling dimension from the E-11 Blaster Reference guide. They don't match up. I gather, generally speaking, doopydoos somehow reduced the scale of the thing? Think will likely need to eye-ball it to get it to proper shape. I came away quite literally, 'short' on trying to make due with my Doopydoos front sight block. Having filed it to shape it,it came out really small! Don't think any pin is going to fit inside let alone a grub screw! Order for Chris's 3D printed part happened real soon after this! In this test-fit pic, the block does look reasonably well but definitely, still on the small side. I did do good on texturing the appropriate parts of my front sight though, like that of the original sterling - green stuff applied and patterned. Green stuff applied Knurling pattern source Pattern applied Pattern applied to back I then removed the strip on the bolt and also made that part of the receiver tube more pronounced. Doopy's resin blobs for screws were also removed. Strip removed Edge enhanced Resin blobs for screws Left blob removed Right blob removed Proceeded to hollow out the outer edges of the bolt, I've gone and recreated the plunger and extractor. I'm happy with it mostly, although still lacking in size and detail but I like it enough to move on. When my completion kit arrives, I have to follow through with putting in the strip that diagonally runs across it. As I don't have a letter and number stamp set to put in the serial number thingy on the bolt, that will be a much later addition. Plunger & Extractor Did more detail on the folding stock. Having hollowed where the rod sits a while back, today, spent the time to add realism to the piece. Carved in and around individual pieces that make up the folding stock to add realism by making it look more like movable parts. There's a ton of 'green stuff' where I was too generous using the Dremel. Still need to follow-up to sand those parts down. Folding Stock I was careful not to hollow out too much of the opening so to reveal the latch inside. Proceeded to work on magazine power cylinders. I just took out the central capacitors with my dremel. Original power cylinder Close up of central capacitors Central capacitors removed I proceeded to tackle a rather significant component of the E-11 Blaster - the m38 scope. I've managed to use spade bits to hollow it out and made some front and end cuts. I've purchased a monocular and will place it in the inside. With the scope being hollowed, I'm hoping the light coming through to the inside will make the monocular functional. Lenses will be placed on either end of the scope as well - with it's concave shape, this will help with drawing light in. A third glass-like disc will also be placed near the large lens end of the scope to reveal graticulars, cross-hair thingys, you know, for aiming at those rebel scum! Original m38 scope - front assembly end Original m38 scope - large lens end I uses spade bits to get the job done. 1" (25mm) bit was used to begin hollowing at the large lens end. 3/8" (10mm) bit was used to begin hollowing at the front assembly end. I tried to be as tactful as I could to progressively move to smaller bits as I proceeded deeper into the scope from the large lens end as you need to take into consideration the narrower contours as you get further in. If you do make a mistake as I did, not tapering in far enough, it's nothing green stuff can't fix. Hacksawing to remove large lens housing Front assembly end - lens housing removed large lens end - lens housing removed Reassembled scope - front assembly view Reassembled scope - large lens view I was eager to get started as ordered items from Shapeways arrived in the mail recently. I now have a true replica of the sight block and pin. With this piece in my possession, I proceeded cautiously to carve out a 'dove tail' channel that will hold the sight block. Having cut-guides put in place, I proceeded to cut out the channel using a hacksaw blade, and using a square and mostly a triangle file to get it to shape. I dare not use a dremel or I would have messed this up really bad. Applying intricate filing and allot of patience paid off. Although the block sits a little loose on the channel than desired, it's nothing green stuff can't fix. I'm overall quite happy with the results. Sight block position template Outline of template Template removed Precision measure for depth of dove tail channel Hack sawing is the first go Square file to retain hard edges at 90 degrees Masked hard edges so I don't widden top edge of dove channel Finished dove tail channel Top view of finished dove tail channel Side view of finished dove tail channel Sight block with pin, test fit on finished dove tail channel Side view of front sight installed Thanks for reading! Any and all comments welcomed.2 points
-
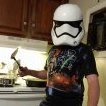
Being all of 5'7" in armor, I've heard the "short for a trooper" line many times now. My comebacks depend on the troop, really. I've done the following in response to the line: staring silently until they walk away "Shhhh! (then taking them aside, whispering loudly) I'm with the Rebellion, and you're gonna blow my cover!" (said very, very seriously) "The Empire is an equal opportunity employer and does not discriminate against height." "I was crushed in the trash compactor last week and am still recovering." "But I make Lord Vader look tall. He appreciates that." I'm sure that I'll come up with others the more I troop. I didn't think I'd enjoy being on the short side for trooping, but I've really had fun with it!2 points
-
Thanks Bulldog! and great of you to check in. I have to say, your detail work on your M38 scope offerings are amazing - so many component pieces. See you at the next post.1 point
-
Thanks [emoji3]... it took a lot of attempts but it was worth it in the end. One thing for sure... they ain't coming undone [emoji3] Sent from my iPhone using Tapatalk1 point
-
That looks really, really great1 point
-
To add to some of the great comebacks here are some more: "Aren't you a little short to be a Stormtrooper?" I fought Obi Wan but he had the high ground I was sat on by Jabba the Hutt We can't all be Chewbacca I was stepped on by an AT-AT I'm a distant relative to the Ewoks so...1 point
-
Haha, hey thanks! I'll keep up the good work There's much joy in this blaster build that's for sure Addertime - great to know my efforts are paying off - thanks so much for the support haha, oh really? I thought that would be the go-to finish because the front sight block is a metal SMG piece. Thinking the metallic finish will be nice during the painting phase - yeah, you should totally add a markup now! Lastly, fabulous 3D printed pieces Chris. I'm extremely happy with my delivery set! Thanks Tino for your words of praise, it really means allot. Next update available soon! Until then1 point
-
Awesome Job! Can't wait to build one!1 point
-
Hello everyone. Exciting times - most of my strapping is complete, including the arms now connected to the shoulder straps. I kitted up to measure the gap between the chest and back (over the shoulder) and this came in at 2cm. Used masking tape to cover my 2cm gap and then measured up the white nylon webbing. The ab to chest straps were not finished for these pics. Also, the cod to butt strap is also not done yet. It feels great to wear. Just need to practice my mobility and get used to the movements required when suited up. Managed to get most of this on by myself. Just couldn't reach the second arm to attach it to the shoulder strap - (wife to the rescue). :-) To anyone reading that is on-the-fence of whether to take the plunge and build a TK kit, my advise would be ........ DO IT!!!!!! [emoji16][emoji16][emoji16] Sent from my iPhone using Tapatalk1 point
-
Looks awesome. Interesting fact: you're the only person to order the front site in the metalic finish! Still find it weird that people use these, I should have added a markup1 point
-
Looks like your progressing nicely. My armour is 1-1.5mm ish and I couldn't feel my hands at the end so I'd hate to imagine 2mm!1 point
-
Yeah congrats Alberto. I can't get enough of seeing your armor. Awesome job!1 point
-
Congratulations and welcome to the ranks trooper1 point
-
Have only tested the electronics when they arrived, which is ages ago now. They are in one of the boxes of blaster parts that I keep adding to promising myself that I will start a blaster build this weekend, no next weekend, no next weekend, no next weekend. I'll have a dig around and give them another test for you Ted. If I remember correctly I thought they were a little bit on the quiet side but I will confirm this week. I'm working nights so please bear with me bud [emoji106] Sent from my iPhone using Tapatalk1 point
-
Congratulations! Fantastic armor trooper!1 point
-
Thanks guys! Setting my OCD aside and moving on!1 point
-
So I had a pretty busy bank holiday last weekend trimming my armour and I've now got most of it mostly done, I've got a little tidying to do on some pieces and then some fine sanding before fitting. I did cheat a little and grab Wilko's own version of a Dremel to get rid of most of the material as using the scissors with this 2mm armour was killing me. I reduced the padding in my helmet after some advice from an armourer and it still fits snugly while allowing better air circulation. This weekend, I did some work on a few of the smaller bits so I've now cut the 15mm deep drop boxes, painted my ab buttons and made the TD, I've just got to put the clips on now. Here's a picture of me all taped up with the thighs on, as I was a little worried that they are too long for my thighs, as you can see my knees are completely behind the armour piece itself and that's as high as I can get the ab/cod. My armourers have said to carry on with the kit so we can see it with my shins and ab on properly but any advice for the future for this would be greatly appreciated. I've also ordered everything else apart from my blaster so that should all start arriving soon.1 point
-
Looks great. Glad to see another KB props kit build.1 point
-
Thanks Paul And done1 point
-
If I could throw in my 2 cents worth on this... I thought about that when building my first set of armor. I also thought about someone's idea where they used a pouch that hung around their neck to hold a wallet, phone, etc. The truth is that I just keep these items in my bin. I have been on countless troops, and never, ever felt uncomfortable about doing this. 99% of the time, the bins are kept in a secure area, and I don't even lock it. We tend to be a very honest, respectful bunch of folks, and I trust my fellow 501st brothers and sisters implicitly. Once in a great while bins are stored in an area where the public may have access (this is very rare), so I just lock it and keep the key on an elastic band around my wrist under my glove. If you want to keep your phone on you at all times (as some do) it should be turned off during a troop, and if it is in your backplate you couldn't get to it anyway. Just food for thought....1 point
-
Well after the next couple of days of trooping looks like I'll be back in the workshop and doing a mod to the "Claw", Hot Toys just release some images and what I thought was a blaster magazine is more a rectangle with 3 slits on two sides, I gather it will still have lights. I didn't do too bad with the sound and lights though, pretty similar Still doing some updates, I'm after accuracy not speed Thanks Tony, means a lot coming from you Thanks Shane1 point
-
That could very well be the best "Aren't you a little short..." comeback I've ever heard!1 point
-
Occasionally after someone takes a photo with me, I ask to see their phone and announce "This is the droid we've been looking for", or "I think I had my eyes closed". Always gets a laugh or at least a big smile.1 point
-
And, if you are helping someone with their EI & Centurion, DO make sure you log it in your Detachment Armorer progress page. Yes, shameless plug...1 point
-
Combined July and August's Newsletter as we missed July and halfway through August. http://i.imgur.com/G3ninZq.png http://whitearmor.net/images/newsletter2015/inthisissue.png In Memoriam From the DL Around the Detachment Notable Troops Advanced Tactics Awards Follow FISD http://whitearmor.net/images/newsletter2015/fromthedetachmentleader.png From the DL August is certainly the time us Americans as well as Europeans take off for vacation. There are no major holidays (US at least), the kids are out of school, and everyone seems to be outdoors. For the 501st that means a very busy trooping calendar, and for your FISD staff we are no exception. This month's newsletter is pretty light and there hasn't been much progress on our initiatives. With the cooler weather returning in the Autumn and the return of regular schedules, here is what to expect for the fall quarter on FISD: CRL Updates Magma, HWTv2, and the R1 deployed troopers are all moving to MEPD. We'll help them get those to done as best we can, as they started here and want to assist our dirty brothers. HWTv1: I went through it and we'll probably change some wording to ensure it's clear this CRL is only for the original game, not the new ones. R1 TK: We'll get this done on a big push. All we are waiting on now is photos and someone to submit their fully built suit. TFA TK & Phasma: We'll get EI & Centurion standards squared away. Merch A SpecOps/FISD joint coin design should be complete, and also watch for a new regular coin run as we are out of EI coins. Forum updates The goal is to fix the EI/Centurion list page and also provide a real-time list of Attaches. Honestly, I think that will keep everyone busy for the fall but we are always looking for good ideas. What do you think the staff should be working on the rest of the year? With unquestioned loyalty, Paul “Daetrin” TK-8020 FISD Detachment Leader http://whitearmor.net/images/newsletter2015/aroundthedetachment.png COMPETITIONS 2 New Contests! We have 2 new contests open... One for those who already have their 501st TK approval, and one for those who are in the process of building their first set of armor. Entering is easy, and there is some cool swag to be given away. Both contests end at the end of August, and the winners will be selected by our Imperial Attache team. For more information, here are the links to the threads: Good luck! For those who are approved TKs For those who are currently building a TK With Unquestioned Loyalty, Joseph Pedigo TK-10963 "justjoseph63" FISD Amabassador http://whitearmor.net/images/newsletter2015/notabletroops.png Want Your Troop to be Include? Post your troop report in the Field Training Exercises section here Those with troop logs please post a separate troop report as it is easier to link too. JULY Supanova 2017 http://i.imgur.com/7g7FhqZ.png http://i.imgur.com/lAbouaZ.png More here By: Glen, gmrhodes13, TK85421 Edmonton Alberta Pride Parade More here By: Teresa, Soulart, TK41307 AUGUST 4th of July in Alaska More here By: Kae, sorceresssupreme, TK72410 Fiona Stanley Flash Mob http://imageshack.com/a/img924/6883/IDGwjw.jpg http://imageshack.com/a/img922/7822/C7bhSD.jpg More here By: Glen, gmrhodes13, TK85421 The High Tide Adventures of Pyrates at the Ronald McDonald House More here By: Aaron, Pyrates, TK99725 SW Stop animation Summer Camp More here By: Teresa, Soulart , TK41307 http://whitearmor.net/images/newsletter2015/advancedtactics.png This area lists all those who have gone above and beyond basic approval toward screen accuracy. FOR JULY the 1st Imperial Stormtrooper Detachment would like to congratulate: Expert Infantry Badge Award: Francois Deslauriers "frencyyyd" TK 13429 EIB 732 Bryan Coffey "Java 555" TK 70813 EIB 733 Juan A. Carrasco "password" TK 25567 EIB 734 Peter Flockton "heinous" TK 98311 EIB 735 Antoni LaFont "ToniML" TK 27612 EIB 736 Mike Souza "msouza" TK 11463 EIB 737 James Mihal "jamihal" TK 72179 EIB 738 GREAT job on your approval, now on to Level 3! Request your free EIB certificate here: https://www.whitearmor.net/forum/topic/40769-request-your-eib-certificate-here/ Centurion Badge Award: http://www.whitearmor.net/eib/centurion_badge.png Will Humphries "willatfisd1064" TK 10064 Centurion 338 Hubert Chandler "buccaneer" TK 22807 Centurion 339 Frank Fraga "fragarock" TK 92111 Centurion 340 Juan Carrasco "password" TK 25567 Centurion 341 Gary Hill "Sentry71" TK 11146 Centurion 342 Jay Piazza "Heavy Metal" Centurion 343 Outstanding job on reaching Centurion, troopers! Request your free Centurion certificate here: https://www.whitearmor.net/forum/topic/40770-request-your-centurion-certificate-here/ FOR AUGUST the 1st Imperial Stormtrooper Detachment would like to congratulate: Expert Infantry Badge Award: Martin Dauphinais "Dauph 197" TK 66303 EIB 739 Robert Bowser "rwbowri" TK 53929 EIB 740 Ross Walmsley " Ross8008" TK 5509 EIB 741 Nicholai Risvang "Risvang" TK 80176 EIB 742 Steve Dredge " TDStig" TK 10450 EIB 743 Frederic Lavoie "TK-69969" TK 69969 EIB 744 Darren Elkins "xSCDx" TK 70670 EIB 745 David Sihombing ""Commander Raider" TK 99924 EIB 746 James Leach "PhoenixUK" TK 41182 EIB 747 Brock Preston "Xanicus" TK 77984 EIB 748 Jared Snow "BigBadFun" TK 27970 EIB 749 Jim Sobota "Engineering trooper" TK 12638 HWT EIB (Second EIB)!! GREAT job on your approval, now on to Level 3! Request your free EIB certificate here: https://www.whitearmor.net/forum/topic/40769-request-your-eib-certificate-here/ Centurion Badge Award: http://www.whitearmor.net/eib/centurion_badge.png James Mihal "jamihal" TK 72179 Centurion 344 Darren Elkins "xSCDx" TK 70670 Centurion 345 Outstanding job on reaching Centurion, troopers! Request your free Centurion certificate here: https://www.whitearmor.net/forum/topic/40770-request-your-centurion-certificate-here/ If you see any of these Troopers around your Garrison or Squad, be sure to congratulate them! 2017 EIB "March to 1000" Campaign As many of you are aware, the FISD is currently in our March to 1000 program. Our goal is to reach the one thousand mark of Troopers who have earned their Expert Infantry Badge, and although we are well on our way to this goal, we only have 5 months left to successfully reach it. The amount of approved submissions is increasing (almost 80 this year alone) thanks to the dedication of those willing to go the "extra mile" toward screen accuracy. Here is a brief description of EIB as written by Paul (Daetrin), our founder: "Expert Infantryman status is not required for members of this detachment. It should be viewed as an optional set of requirements for those who wish to take the accuracy of their costumes to the next level, and be recognized accordingly. We're a costuming club - think of it as an award for costuming excellence and you get the picture. The requirements will not replace or supersede 501st standards, but only serve as an inspiration for the level of accuracy that can be achieved. The standards are meant to be high but achievable..." Besides the added pride you will have in your armor, those reaching this level can purchase exclusive EIB gear (patches, decals, etc.) and get a free certificate for your accomplishment. If you are interested or would like more information about the program, there is a link below** that will help. You can also contact myself or any Imperial Attaché, and we will be more than happy to assist you! ** https://www.whitearmor.net/forum/topic/35371-eib-and-centurion-what-do-these-terms-mean/ With Unquestioned Loyalty, Joseph Pedigo TK-10963 "justjoseph63" FISD Amabassador http://whitearmor.net/images/newsletter2015/followfisd.png Don't Forget We're on Facebook and Twitter! Facebook: www.facebook.com/whitearmor If you're on FB, stop by and say hi, ask questions, and share stories! Twitter: www.twitter.com/FISD501st or @FISD501st follow FISD on Twitter! Instagram: www.instagram.com/501stfisd With Unquestioned Loyalty Glen "Q" Rhodes TK85421 "gmrhodes13" Imperial Attaché / Imperial Propaganda Department On behalf of the 1st Imperial Stormtrooper Detachment Command Staff and the Imperial Propaganda Department, <End Transmission>1 point
-
I've been a Star Wars fan essentially since birth and had thought about joining the 501st on and off over the years, but what tipped me over the edge was having my own son in the ICU for about 6 months of his first year due to a congenital brain cyst and the ensuing complications after 17 surgeries. I even met a member of the GGG at the same hospital who also had a son in the ICU and I never got his name, so I hope to reconnect after I get approved. The idea that I can bring some smiles to kids like our sons is all the motivation I need. (My son is 3 and is doing great now.) Edit: Just saw the bit about including a photo. I've been working on my kit for about 3 months and just did my first full suit up (minus the helmet which you can see on the ground behind me) a couple nights ago and I was honestly giddy to see the photos. I decided to try to build to Centurion from the beginning and I hope I've done a good job.1 point
-
OK I'll check that out. I will try and get a better flashlight rail too as I've just got a standard airsoft one at the moment. You can't really see but it hasn't got the angled edges to it. I've got a stronger scope rail on the way too The S&t E11 power cylinder were surprisingly close to the R1 cylinders. At first I thought they were too wide but I looked at the reference thread and was pleasantly surprised. After this is finished I'll start working on a sidearm. Every good airsofter needs a sidearm so naturally I'm looking at either an A180, DL44 or Merr Sonn Power 5 Sent from my SM-N910F using Tapatalk1 point
-
Awesome! Welcome to the Empire!1 point
-
Name: Rebecca Beiderwell 501st ID: 29118 FISD Forum: Sharkbait Garrison: Central California Garrison - South Valley Squad Mandatory Information: Armor Maker - AM 2.0/RT-MOD Helmet Maker - AM 2.0 Blaster Type - Hyperfirm Optional: Height - 5'11'' Boots Maker = TK Boots Canvas Belt - TKittel Hand Plates Type - Elastic strap over chemical gloves Electronics - ukswrath hovi mike tips/speakers, amp, iComm, omni mike, Gatz fans Neck Seal Type - trooperbay.com Holster Maker - Darman Thigh garter system - Pencap510 Photos: Front, arms at side Back, arms at side Left, arm raised Right, arm raised Right side detail, arm raised Left side detail, arm raised Ab details Cod and butt attachment Interior strapping Helmet front Helmet side Helmet back Hovi tip detail Lens color (backlit) (flat smoke gray) Edit: Lens color (backlit) with better lighting- it really is smoke gray. Blaster left Blaster right Edit: Blaster D-Ring added Neck seal TD Holster attachment Action shot Bucket off Misc edits: Fixed shin and thigh cover strips:1 point