

Chemi
-
Posts
1,887 -
Joined
-
Last visited
-
Days Won
5
Content Type
Profiles
Forums
Gallery
Articles
Everything posted by Chemi
-
Welcome to FISD Arvin!!! There is no doubt, RS is a good choice. Their customer service is outstanding. I am sure the Centurion badge will be under your name soon. Totally agree Arvin...And as Joseph rightly says, we are here to help!!!
-
Hello "G", welcome to the FISD!!!
-
Congratulations Daniel!!!
-
Hello Dimitri... Welcome aboard!!!
-
Congratulations Mike!!! Welcome to the ranks!!!
-
Nice work, Mark
-
Welcome aboard Chris!!! I look forward to your progress.
-
Hello Mark!!! You can cover that small hole with some "sugru" or ABS paste. These threads can help you...
-
Hi Mark!!! Yes, I think you can sand the big plate a little more (those buttons look great!!!). Reference images Regarding the other one, I think that trimming the bottom part a little will solve the problem. Reference images You’re doing a really good job!!!
-
Welcome to the FISD, Jason!!! Good luck with your build
-
I got a 4-day pass...We will see what happens a year from now....
-
Looking good Paul!!! And as Joseph rightly says "we hope to see your submission for Expert Infantry! "
-
 Congratulations Matt!!!
 -
Hello and welcome to FISD, Christopher!!!
-
Awesome!!! Congratulations!!!
-
As Adam rightly says, I would fix these two. Very nice work!!!
-
New recruit from NY, preparing for BBBD!
Chemi replied to Zsleagth's topic in New Member Introductions
Hello Mark, welcome to FISD. While you are waiting for your kit, you can do some research on the forum (check out some of the previous ANH build threads...). -
Looks great Luca!!!
-
Thanks @trooper96and @BigJasoni. Congratulations!!!
-
Hello Jonathan... Looks great!!!
-
Hello and welcome to FISD, Matt... Here is a great resource thread And please, keep us posted!!!
-
Hotel booked too...A lot of things can change until then, but...
-
WTF TK ANH Stunt Build thread - newbie needs help
Chemi replied to cnsf's topic in ANH Build Threads
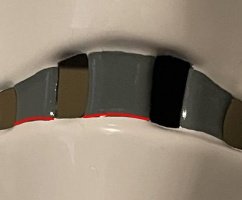
Great!!! . Could you post some pictures to see the result? Thanks Cory!!! -
LEGACY FEM TROOPER Version A TJ_fem WIP
Chemi replied to Chopper857's topic in Legacy Stormtrooper Build Threads
Really, really very nice work!!! It looks like new!!!! -
Of course you can do this, Chris!!! As Joseph says, don't try to rush. When in doubt, always ask before cutting or gluing (don't be afraid to ask lots of questions), and be sure to add photos(a picture is worth a thousand words) ...
