gmrhodes13
-
Posts
31,219 -
Joined
-
Last visited
-
Days Won
1,070
Content Type
Profiles
Forums
Gallery
Articles
Everything posted by gmrhodes13
-

DarthBiscuit's R1TK Build (Jimmiroquai kit)
gmrhodes13 replied to DarthBiscuit's topic in Rogue One Build Threads
This is why I went off Rustoleum paints, the consistency has never been good, you can go a few cans and no issues then you use another can and disaster, I'm not sure if it's shelf life, mix or not enough shaking but was just too inconsistent to keep using. For difficult pin holes that keep popping up I use something sharp and open the hole a little more, then add some bondo (automotive filler) sand and usually that fixes the problem E6000 is pretty strong and if left for long enough should work fine, keeps cover strips on OT armor so I don't think you will have any issues. Normal drying time can vary, I like to go 24 to 48 hours before putting any pressure on. You can also clean off any excess by rubbing it off. The magnetic sheets I've seen here are not very strong so I don't think they will work for you. There is also double sided tape but you would need to go for a thin industrial type, not sure how easy that would be to find. -
Good morning Troopers.. Steps to my passion.
gmrhodes13 replied to Harder's topic in New Member Introductions
Great news, looking forward to seeing the BBB photos -
Hello and welcome aboard trooper
-
Raindrop’s 4.5 AM ANH Stunt Build
gmrhodes13 replied to TheDecisiveRaindrop's topic in ANH Build Threads
If you paint white first in the tube stripes stencil it will fill any bleed areas, then once dry go over with blue -
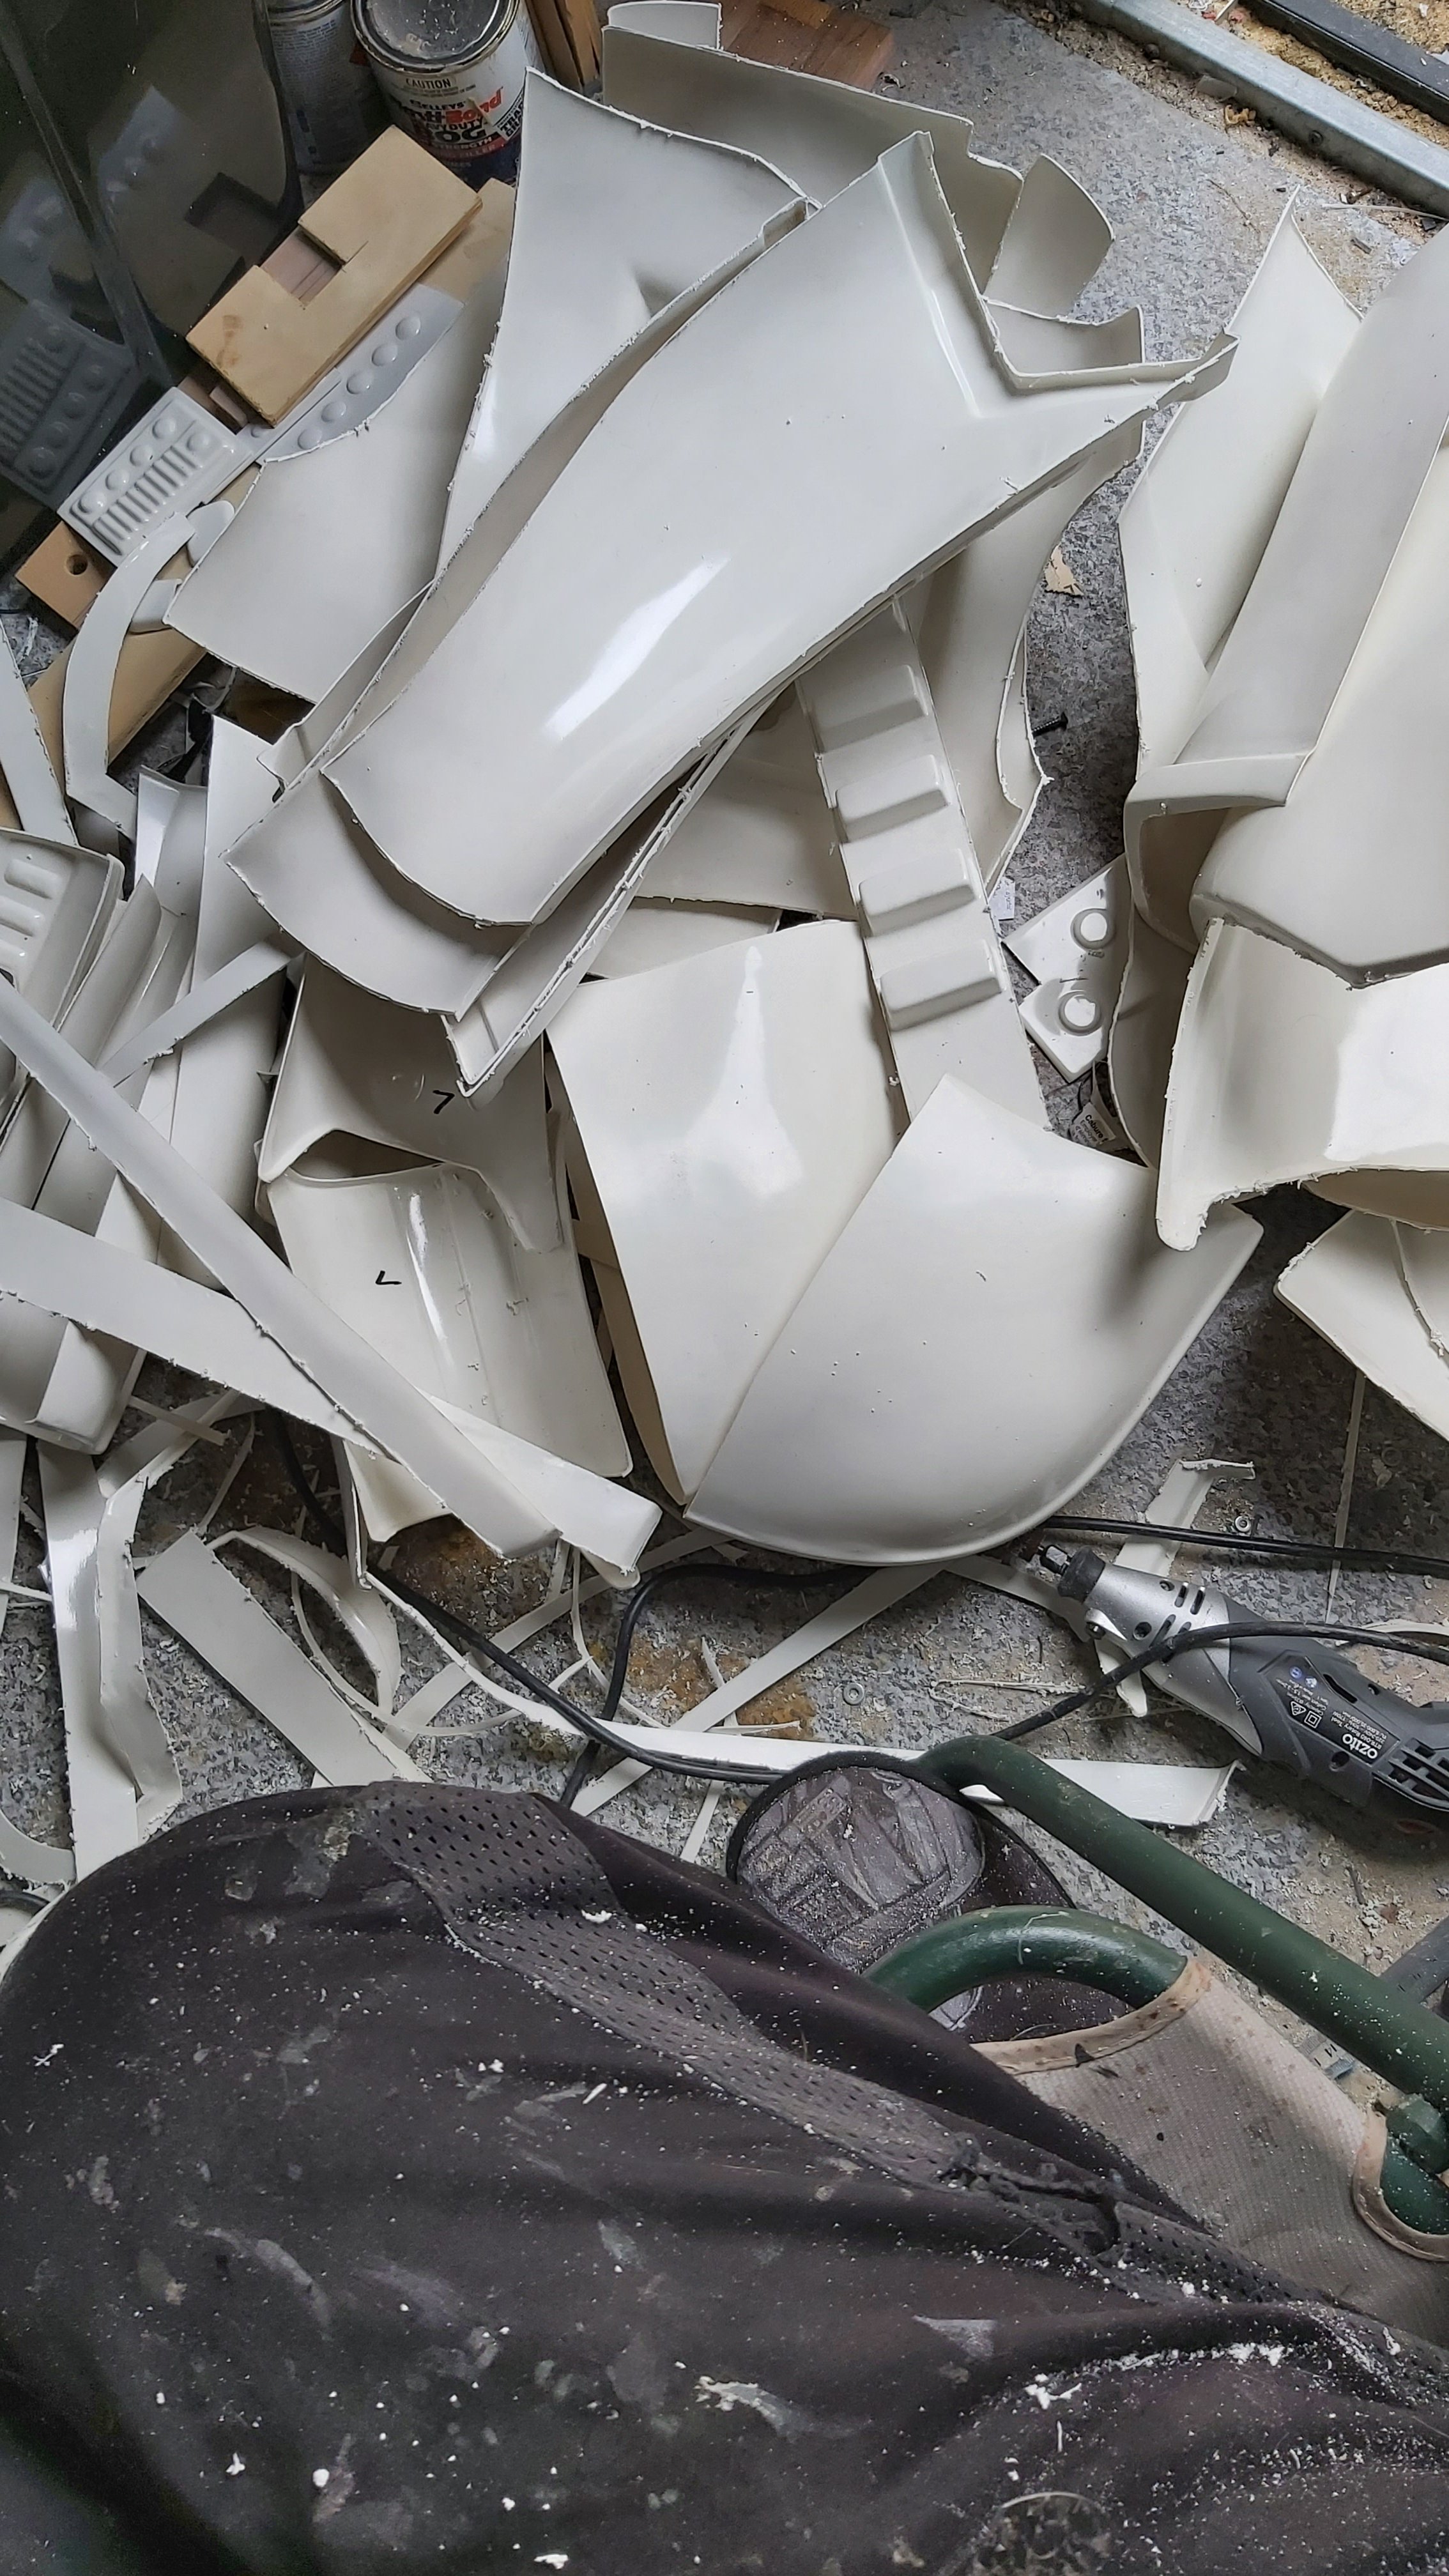
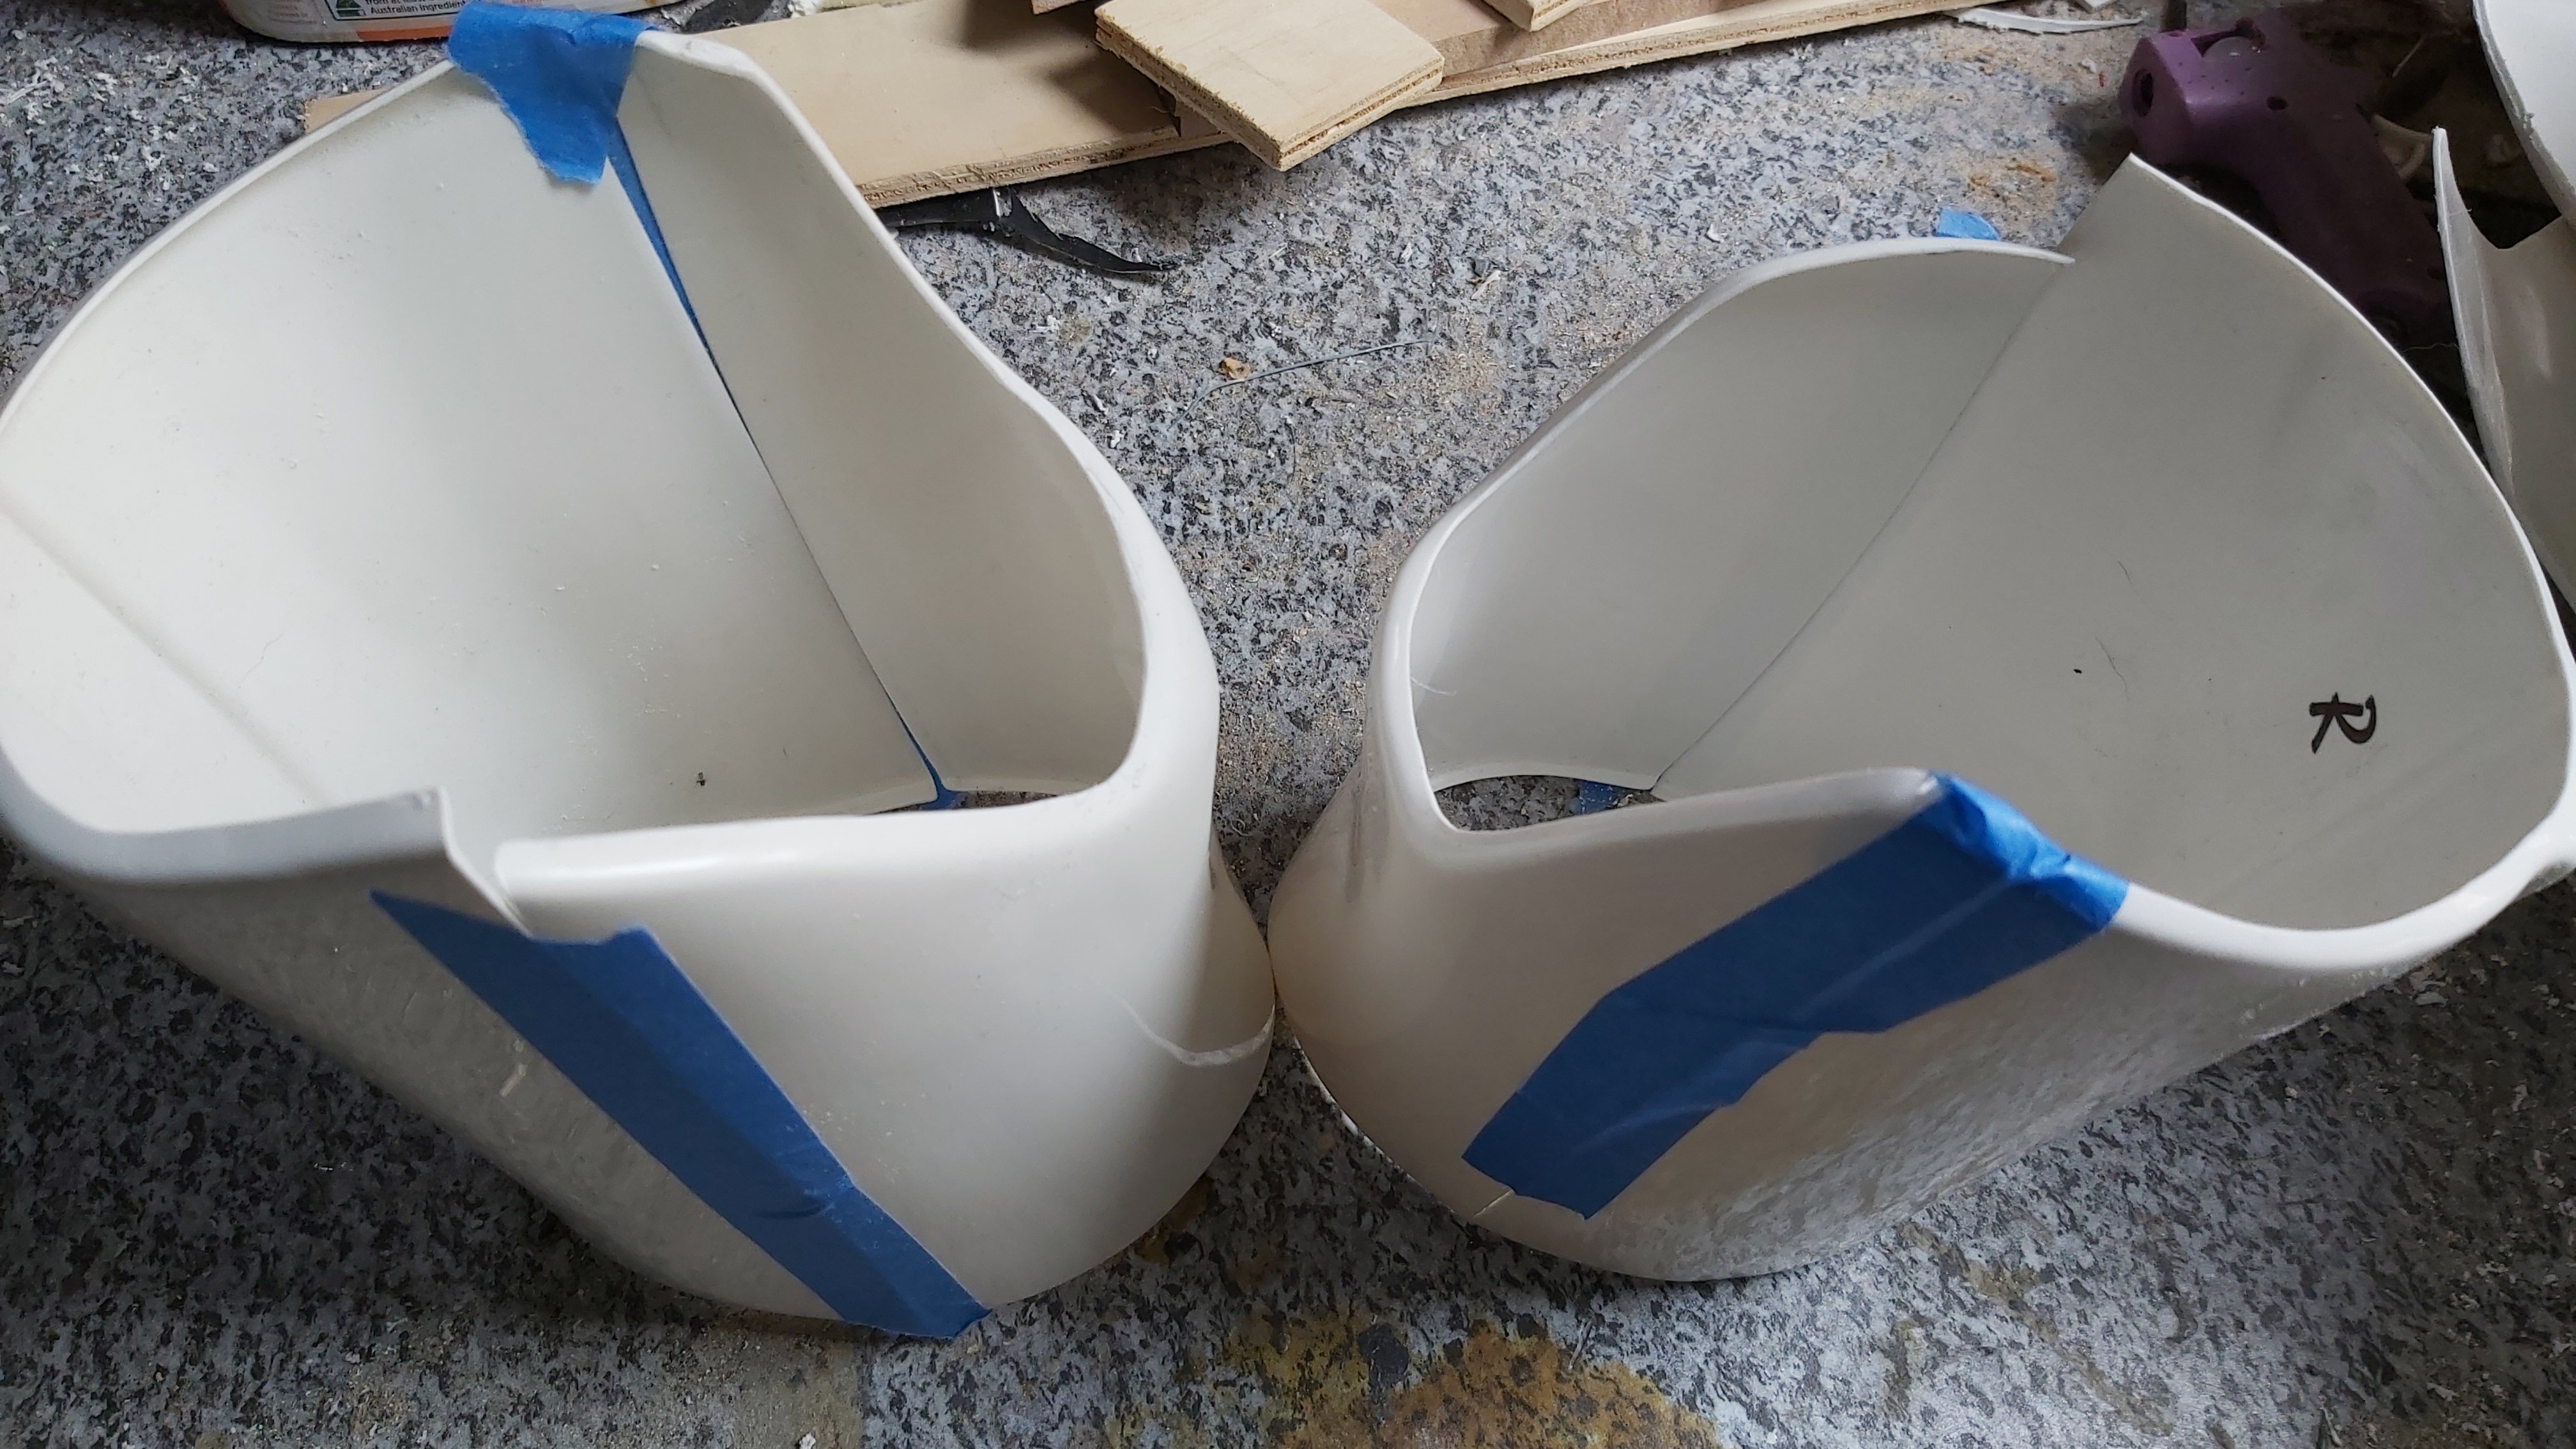
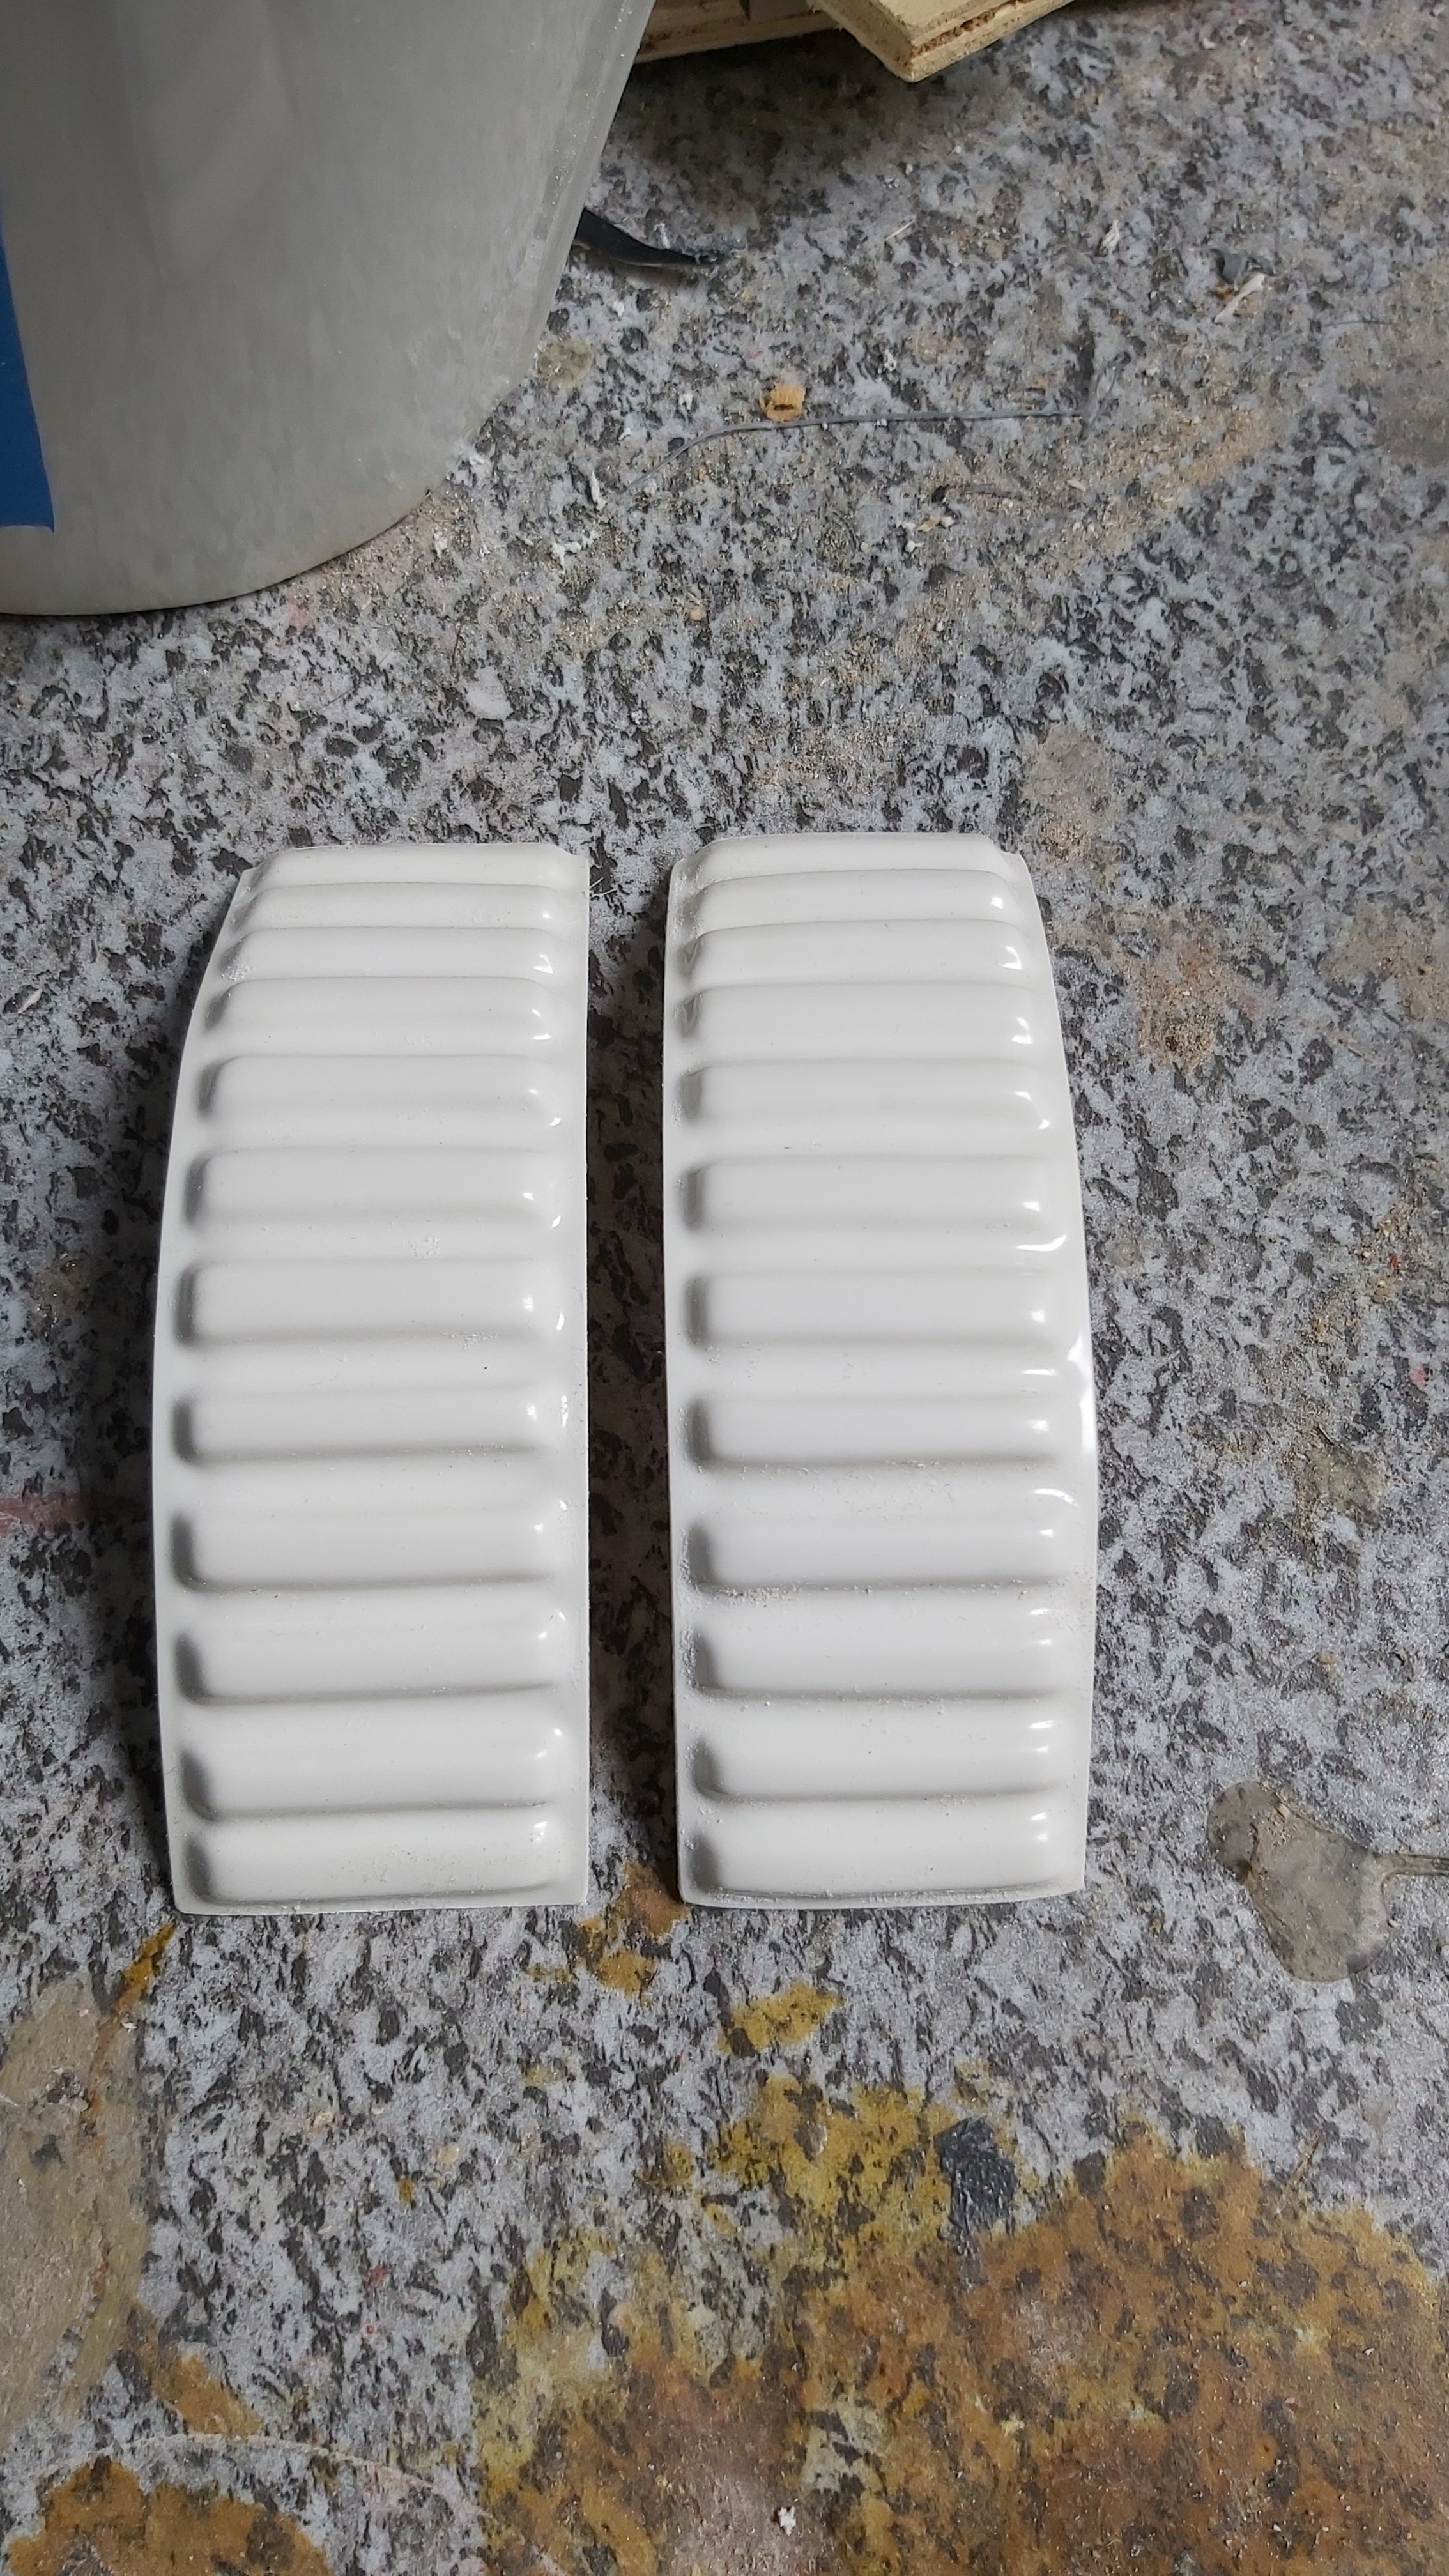
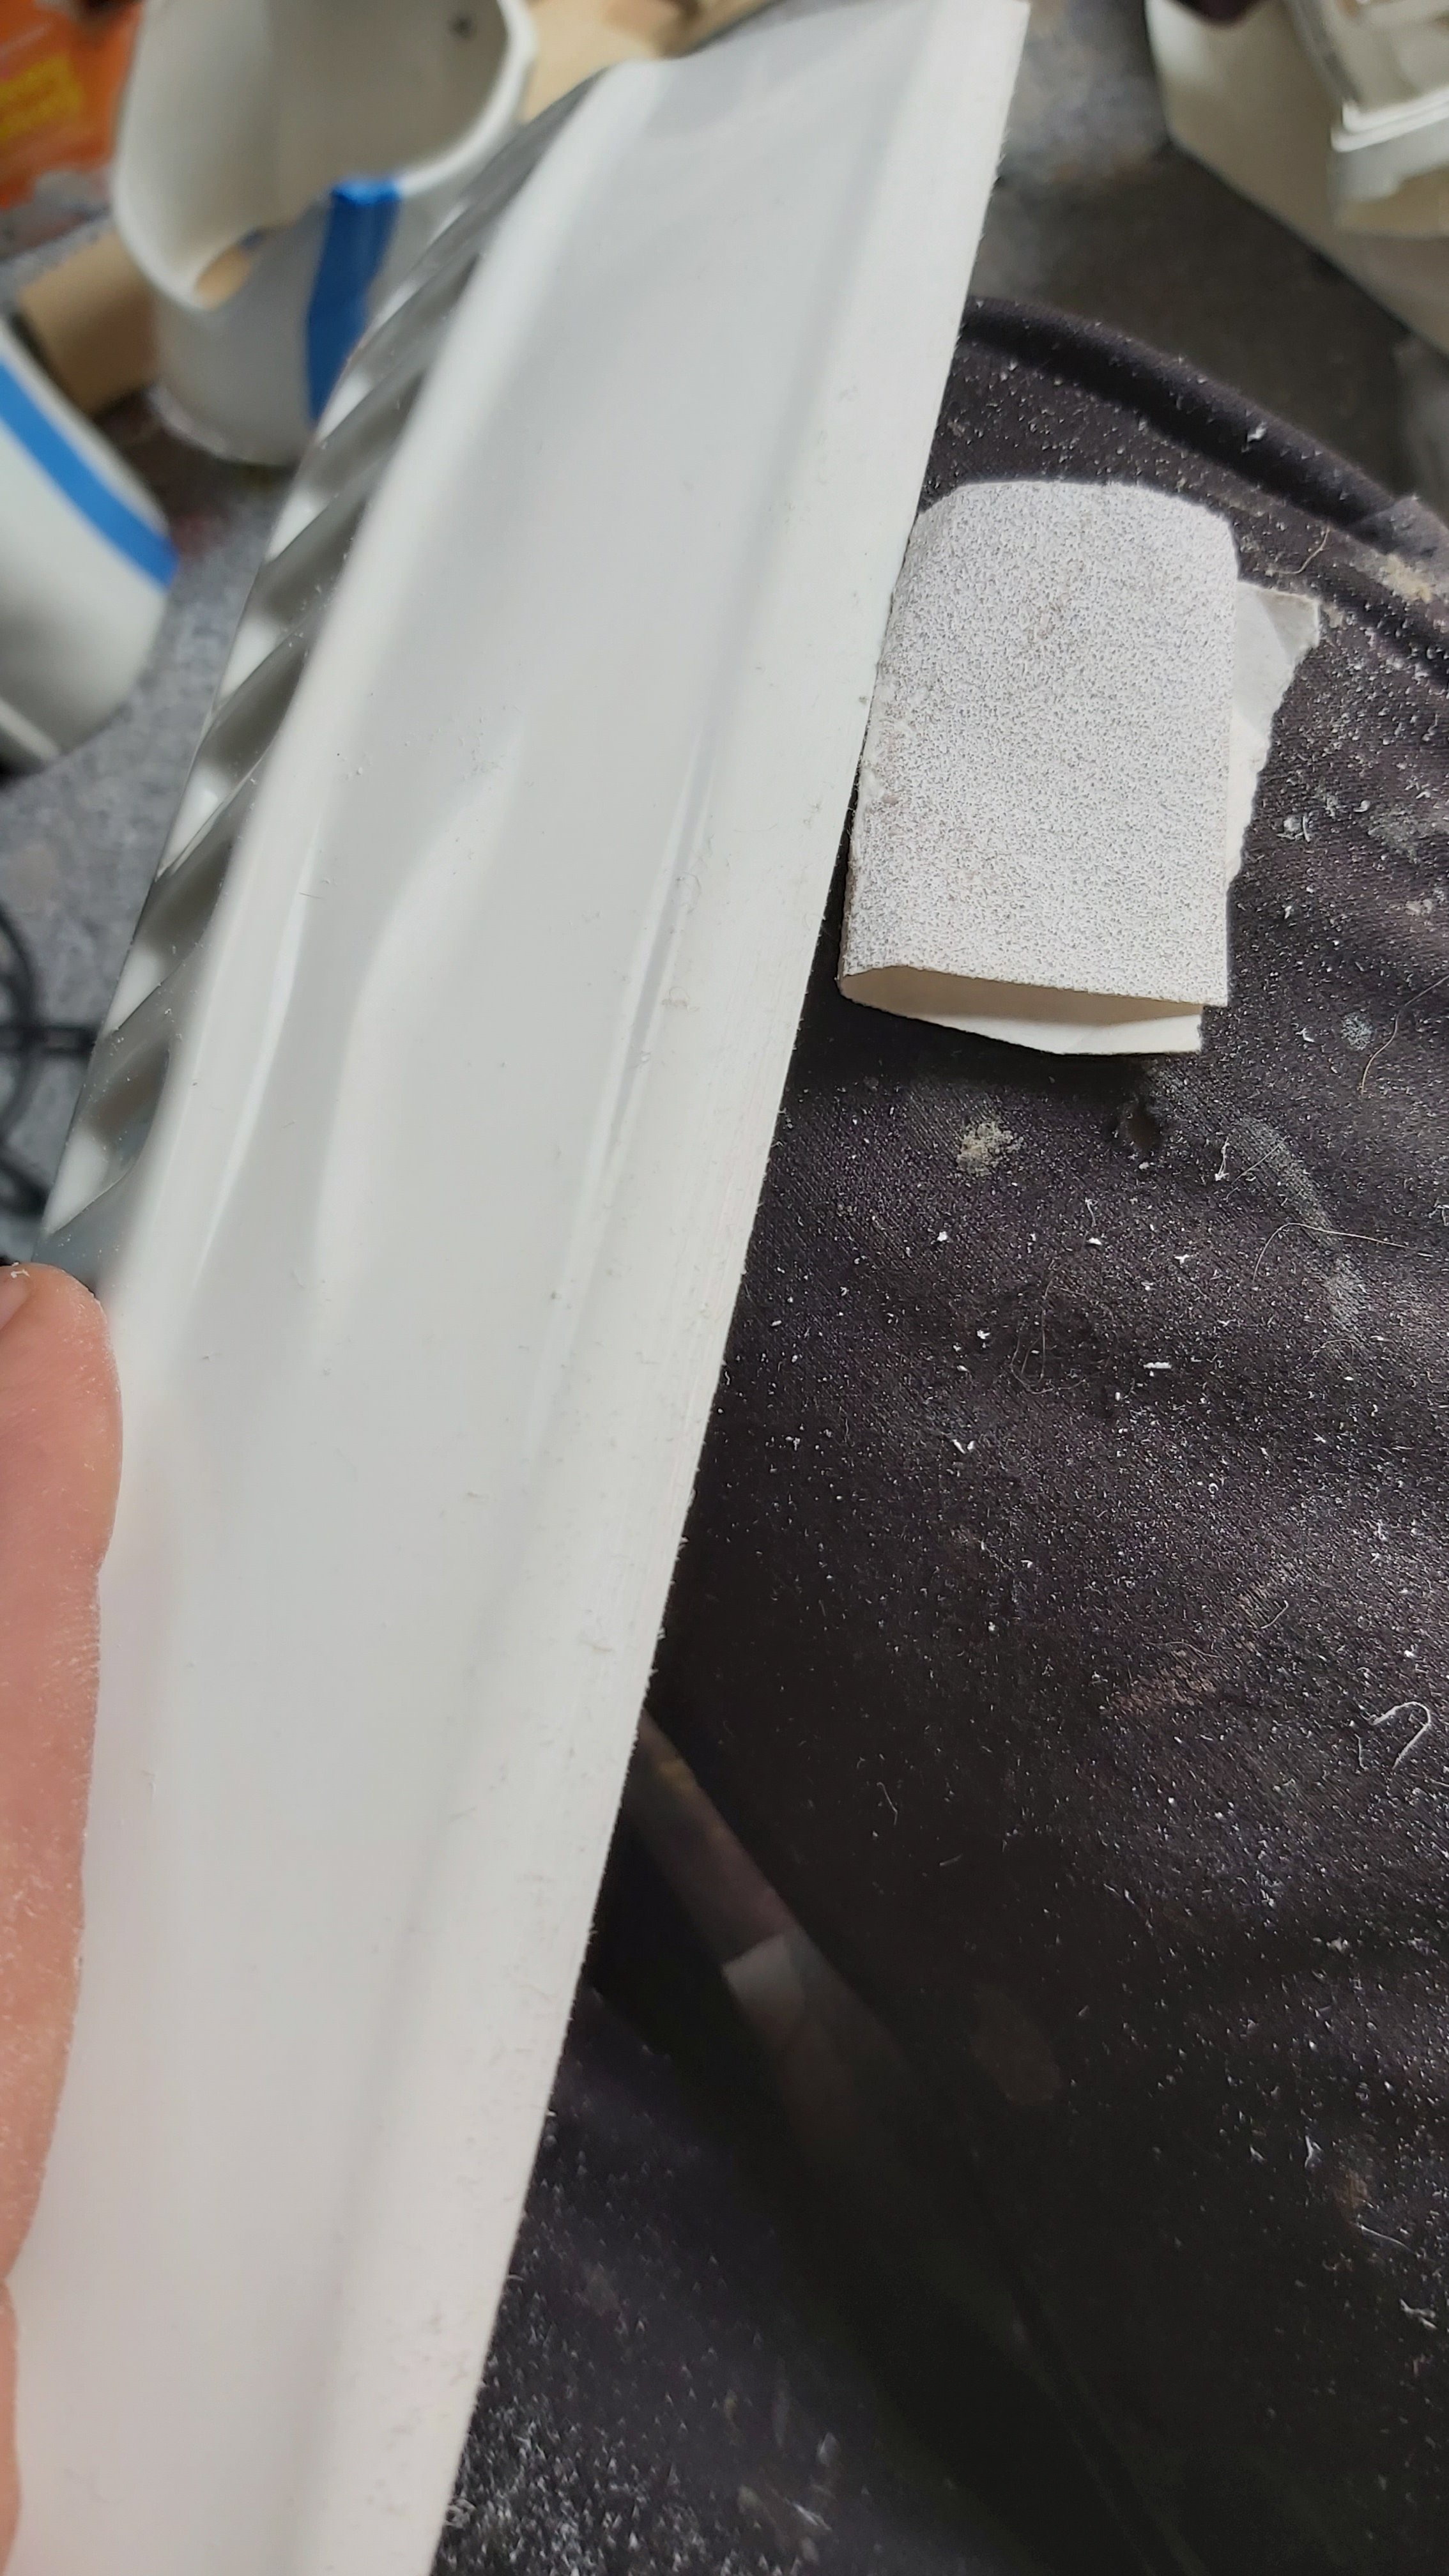
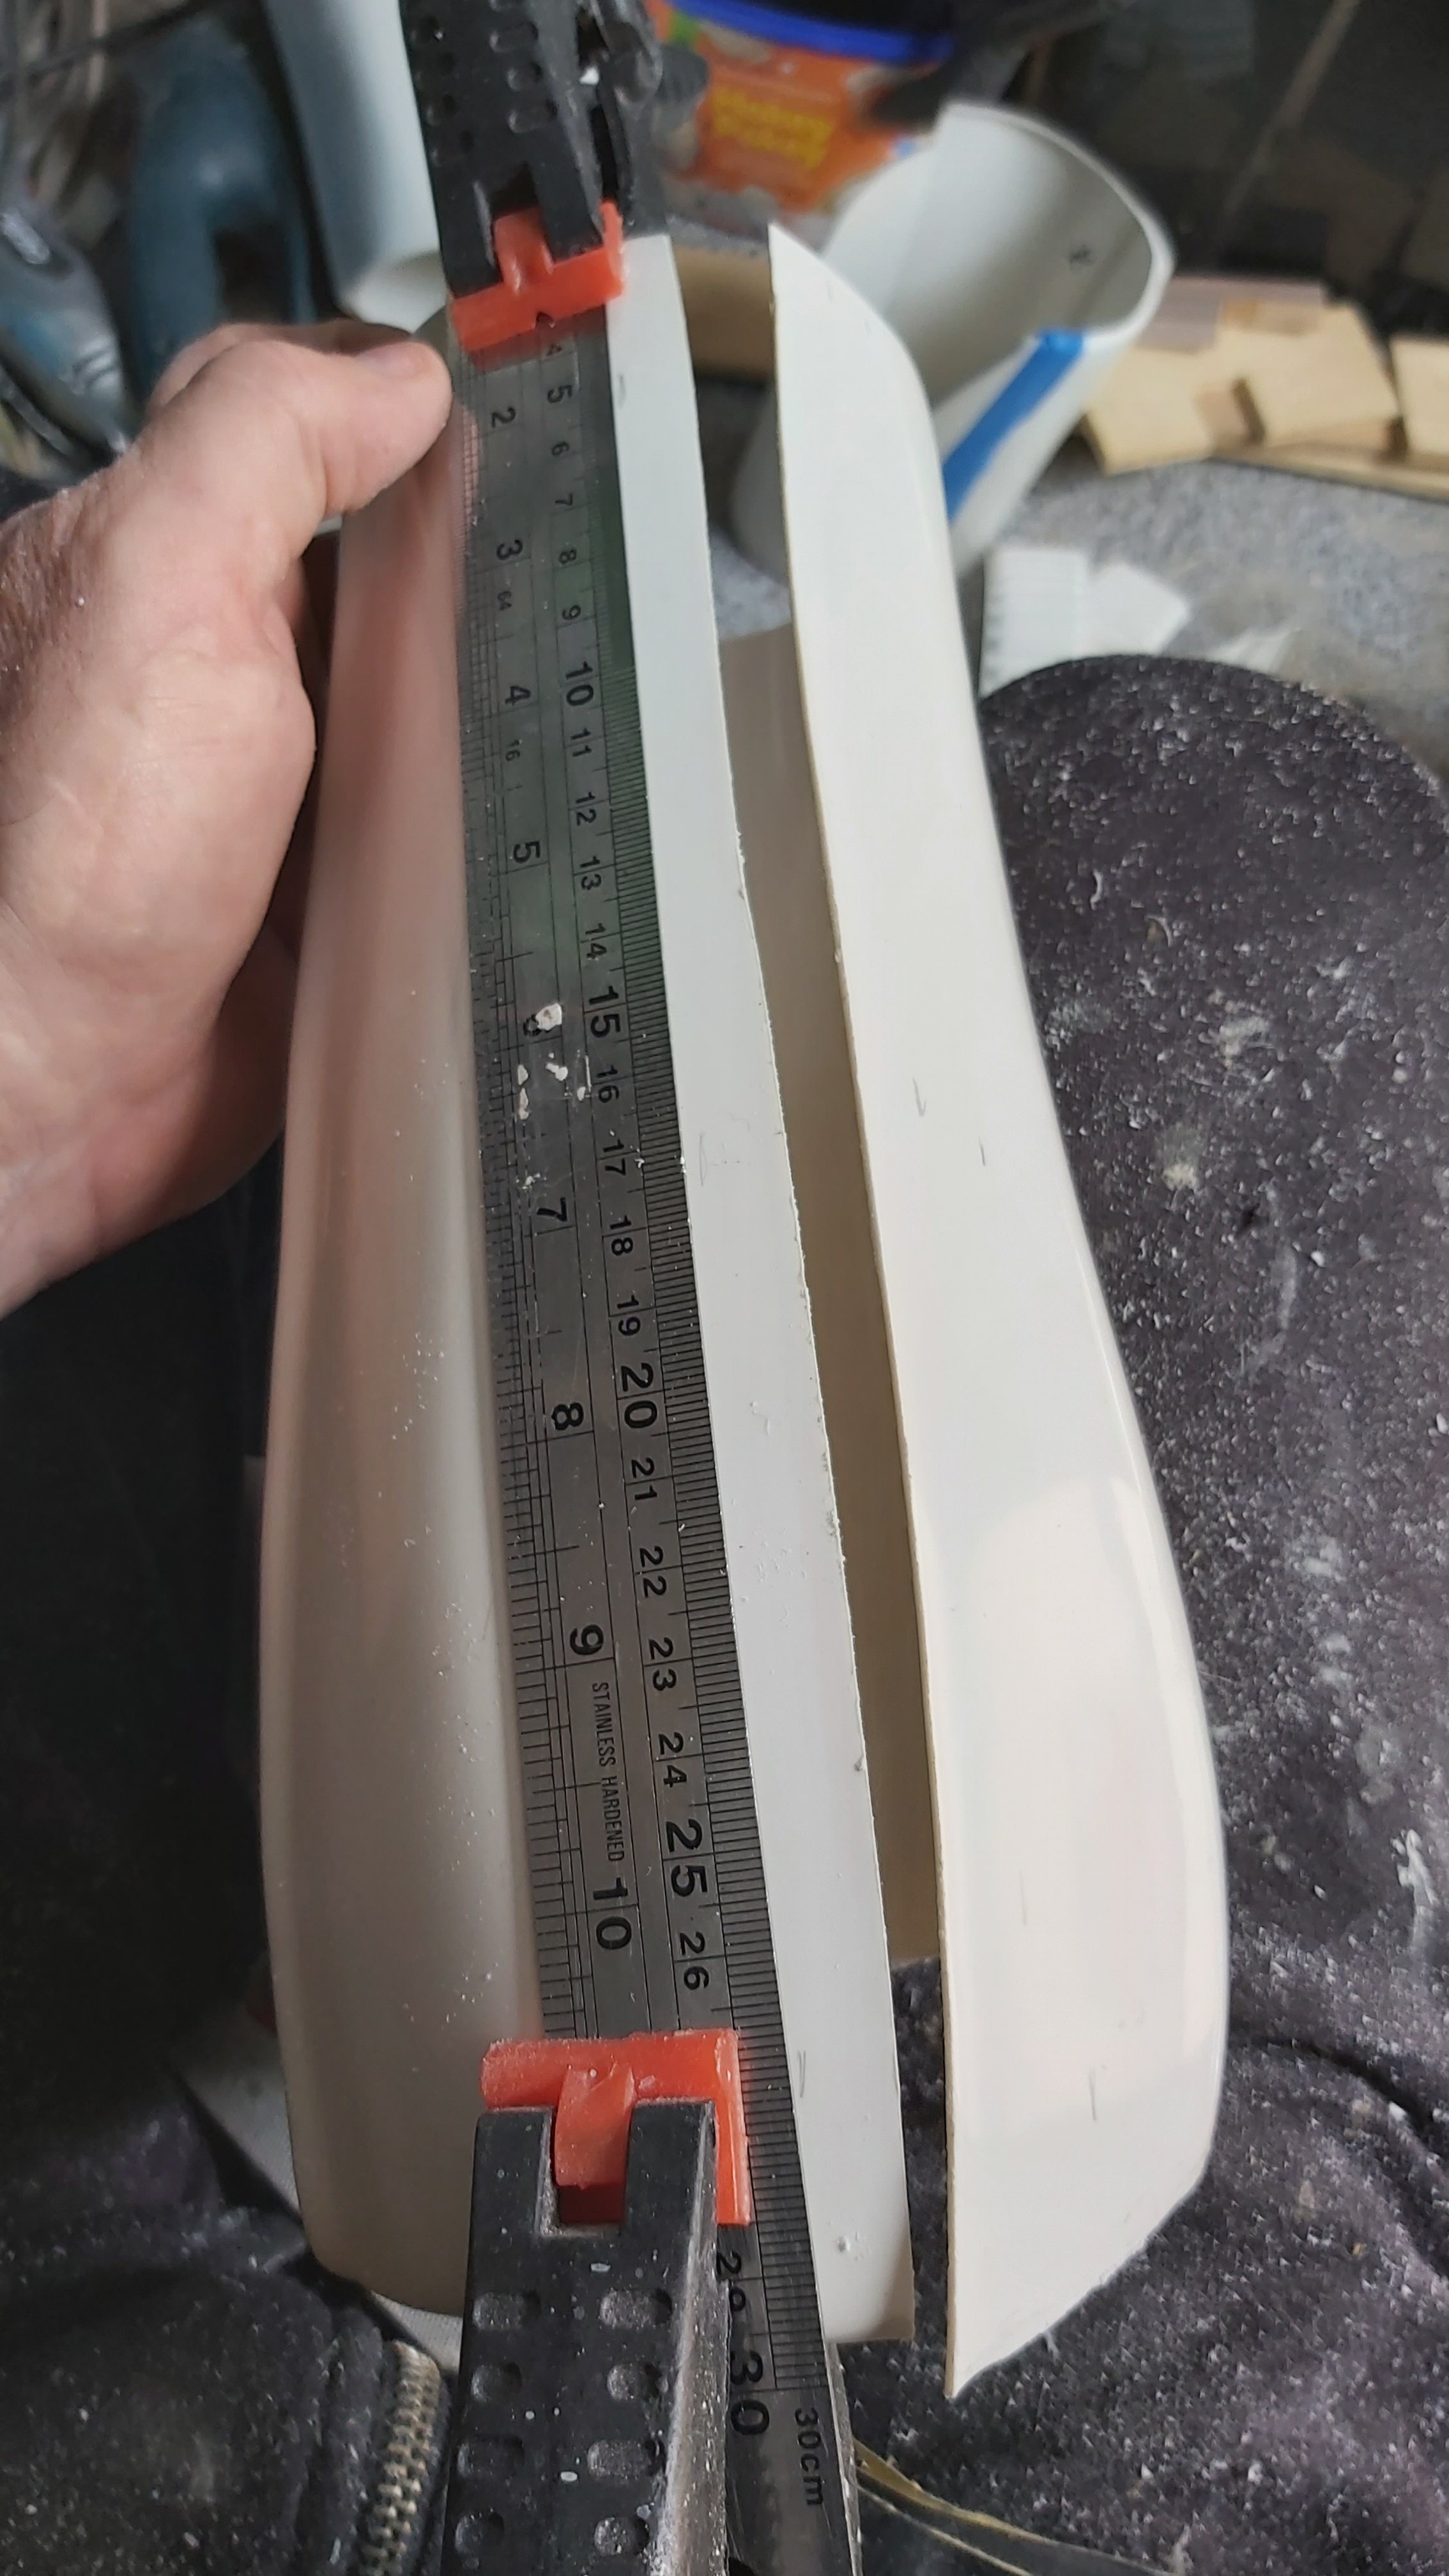
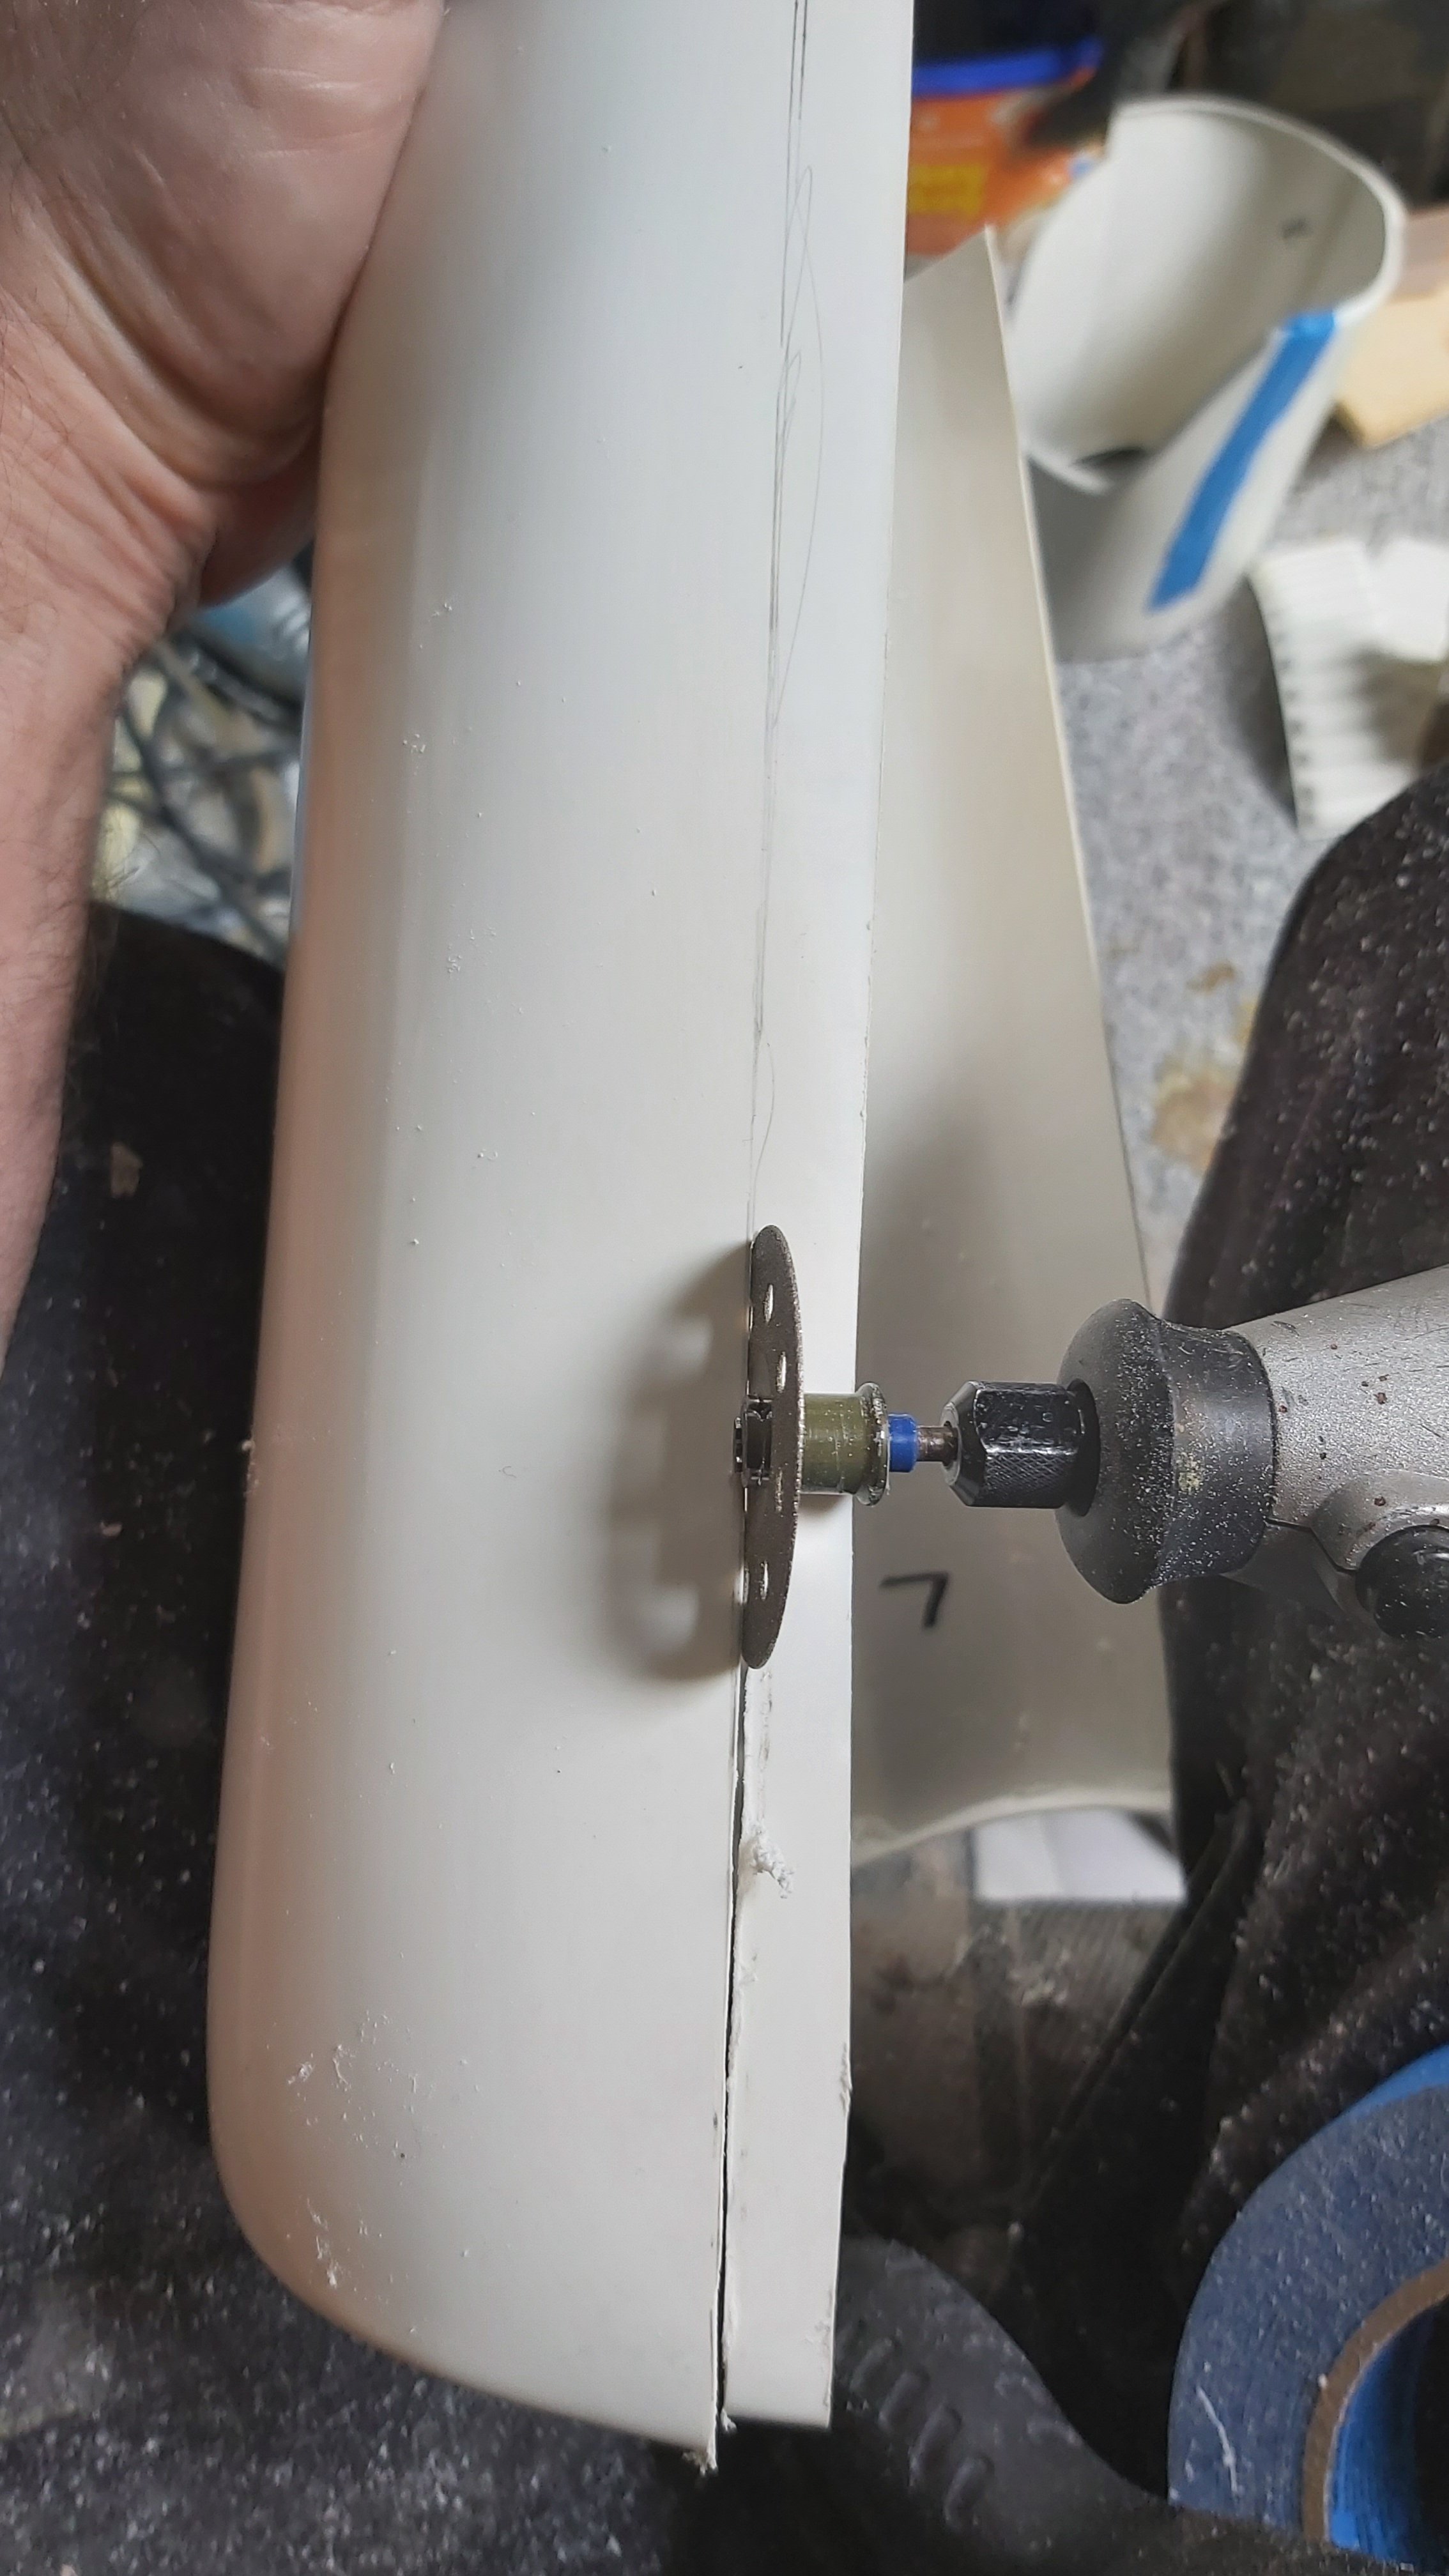
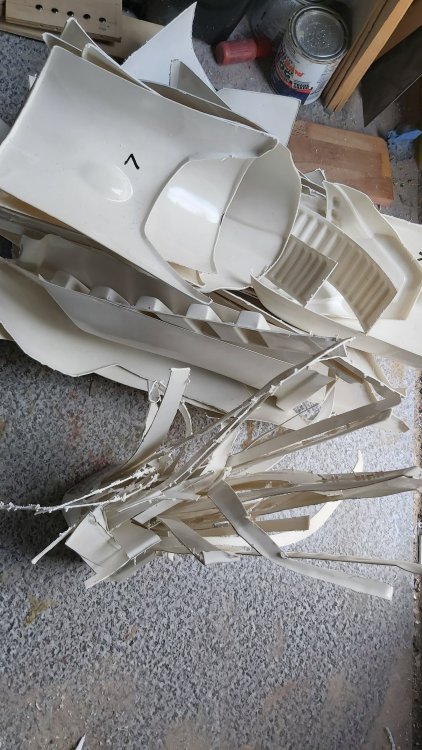
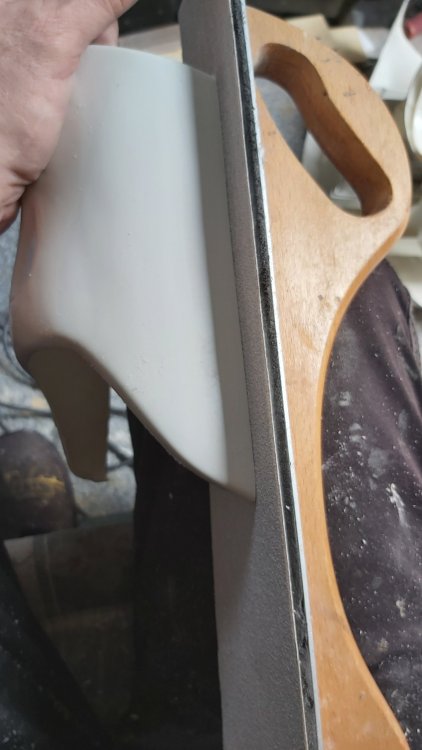
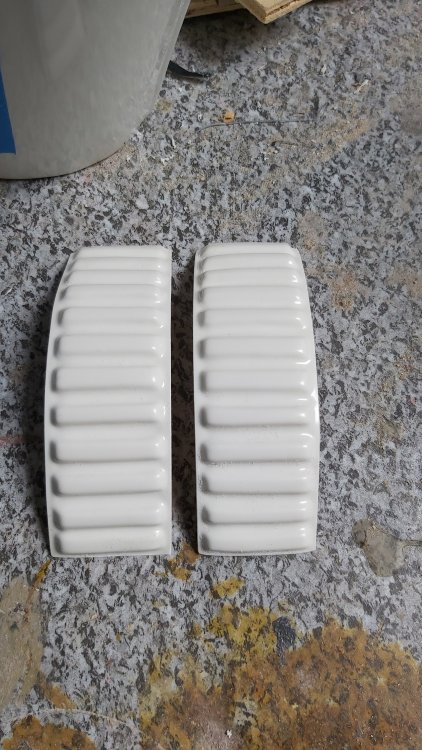
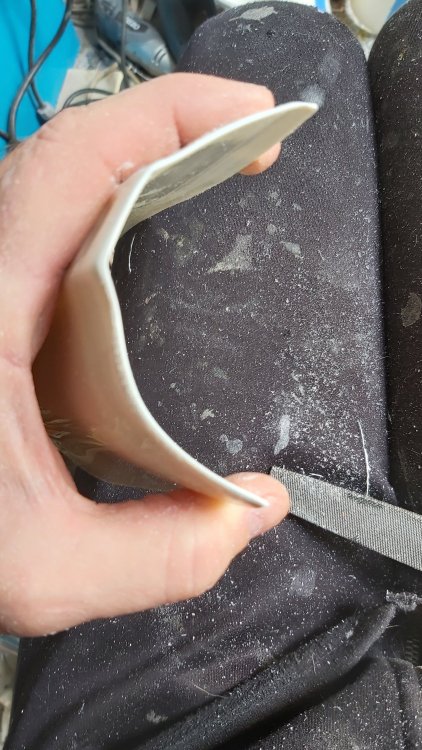
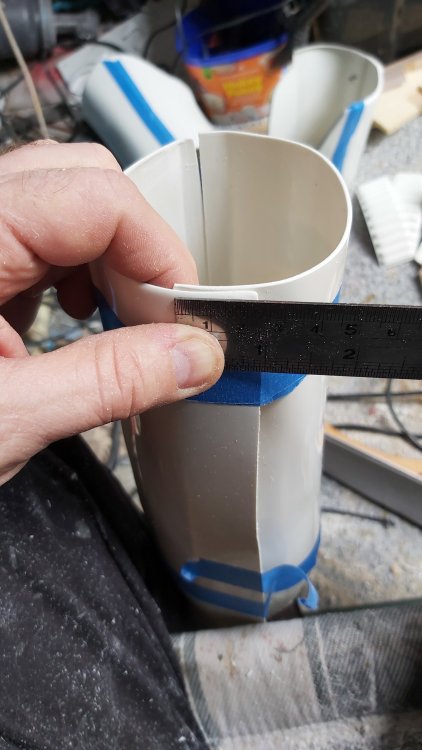
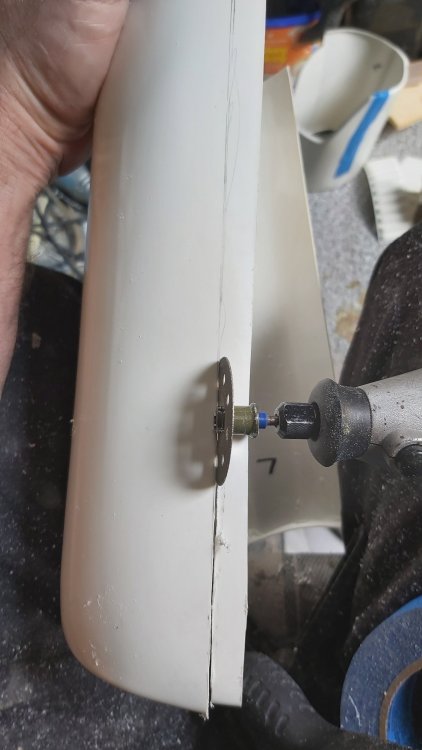
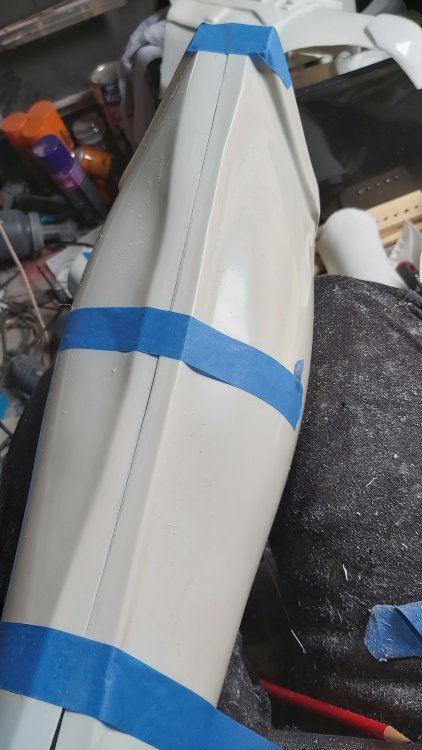
Well time for trimming the armor, I did get a little carried away, I know what a mess but you can't stop production to tidy up . Ok may be I should, it's a little more tidy now I normally try to keep some of the offcuts from any different armor I work with, never know when you are going to need some ABS paste. I'll cut up into smaller pieces later and keep in zip lock bag and label like others I have saved. Working out trim lines, a ruler with clamps works for me I like to use a cutting disk on the Dremel to trim, I can get pretty straight lines. Use a long sanding block to finish Some 240 grit to smooth any sharp edges, also sand a small area where the E6000 will go, helps adherence Add some painters tape to bother sides to check for sizing Measure, divide by 2 and trim excess from both pieces Large tabs from shoulder straps removed Make sure all the return edges from the front of the forearms is removed Shins ready for a trial fit for sizing


-
Dead Post Links & Broken Photos, How You Can Help
gmrhodes13 replied to Sly11's topic in Forum Help & Support
Excellent thank you Brian -
Worth a try, not all do though but you may be lucky
-
Have you tried contacting the maker of the armor. Just be careful getting one from another make of armor as shades of white can vary quite a lot.
-
Doomsdale's 3D Printed E-11 Build (from PremierProps)
gmrhodes13 replied to Doomsdale's topic in ANH BlasTech E11
I like to use automotive bondo (filler) for gaps, I also have 3D pen which I use for larger gaps. Although spray putty does fill a lot of lines I still find you have to give everything a sand before hand. Normally I only need to put on a couple of coats of spray putty, then sand, any small holes or imperfections I use blade putty. -
ANH Stunt - AP Trimmed - First TK Build
gmrhodes13 replied to MightyAtom's topic in ANH Build Threads
There are never enough when you want to build quickly -
Dead Post Links & Broken Photos, How You Can Help
gmrhodes13 replied to Sly11's topic in Forum Help & Support
https://www.whitearmor.net/forum/topic/32767-space-trooper/, restored by gmrhodes13 https://www.whitearmor.net/forum/topic/684-tk-space-variant/, restored by gmrhodes13 https://www.whitearmor.net/forum/topic/10164-return-of-the-space-pack/, restored by gmrhodes13 https://www.whitearmor.net/forum/topic/36754-spacetrooper-rebreather-backpack-wip/, restored by gmrhodes13 -
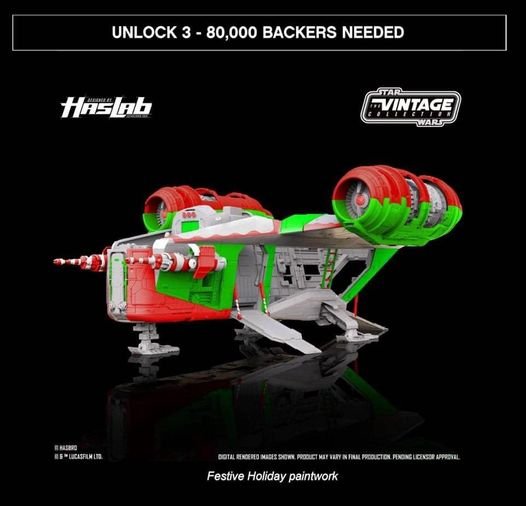
I guess you need a vehicle to cart those presents around
-
DarthBiscuit's R1TK Build (Jimmiroquai kit)
gmrhodes13 replied to DarthBiscuit's topic in Rogue One Build Threads
Foam on the inside can definitely help to stop rotation on the forearms and biceps. Good news on the paint arrival -
The BigJasoni's ROTK 3D Print Build Thread
gmrhodes13 replied to BigJasoni's topic in Rogue One Build Threads
One of the things I hate about 3D printing, majority can be great with little work need but others (usually fine detailed and hard to get too areas) need a lot of work. The virtual convention sounds interesting, great to hear you will get to meet up with local members soon, it's amazing how people can look at the same things and have different ways to fix or modify, usually things like this you only find when you are in a group of builders. -
Hey Mike I'm not sure if you have noticed but a lot of CRL's have been going under reviews and updates over the last year or so, with this a lot of things can be picked up which may have been missed previously, there is a lot more scrutiny now compared to the past. Also the TKC had undergone an update which basically this CRL is just a plain version of so some things would have been added to this CRL. We also had a different DL back then, I looked back and some feedback on the thread was in December2019 and February 2020 from other staff so some things had already been noticed.
-
Jakob's RWA ANH stunt build (aiming for centurion)
gmrhodes13 replied to Yacorp's topic in ANH Build Threads
The mic tip backs being thin is a common problem, personally I don't use ABS paste as it is really thin there and the paste may disform when drying. I use a washer on each one, I place the washer over a socket then hammer a punch in the middle, this curves the washer which then fits nicely over the back of the thin area, I just add a little E6000 to hold. I've seen others use various different glues, fiberglass resin, sugru, what ever works. I normally add a few magnets to hold together the sides while trimming the ears, once added the screws in the ears will pull everything together. Normally the only place you will need ABS paste is any gaps in the lower ridges of thighs and some who have to add shims in the sides of the ab/kidney use it to fill the join seam, apart from that I don't use it. Obviously it can be used for other things like any mistakes, teeth cut out too far, holes drilled in wrong place. -
Definitely have your shins and wear the boots to get a true idea of sizing and how much extra material you'll need to add.
-
Hello and welcome aboard, there is not a lot of difference between ANH Stunt / Hero and ESB, with a few things swapped out you could do all 3 versions, which many have. Many purchase RS and are happy with them. Hope to see BBB photos from you in the not too distant future Good luck
-
Is there something weird with the vocoder or is it just lighting, appears angled halfway through
-
Good morning Troopers.. Steps to my passion.
gmrhodes13 replied to Harder's topic in New Member Introductions
Every piece adds up in the end -
I usually use the "direct link" if using computer or "copy image link" on mobile, or they won't show ie: Looking good, gets exciting the more pieces go on the body. You will find wearing boots will bring the shins up you have room at the top of the thighs to come up so that will not only reduce the gap there but also give you a little more room at the knees. You may find you might have to bring the ab/cod down a little too if you still have too much gap between the cod and thighs.
-
Thanks Andrew. All the velcro inside is dry so fitted the fan and foam, also made a template for the lenses, marked and cut out, I use a little hot glue just to hold them in place than apply some black silicon around the edges, I like the darker look inside. And fitted. Don't be too concerned if you have small gaps, does help with air flow Time to add the decals, yes I'm going to cheat and not paint, my hands are no longer up to painting fine lines after 2 finger operations and arthritis in a few knuckles. Dave M decals, a little expensive with shipping but a must if you can't paint and want to go L3. Make sure you have the correct tubes stripes on the right side (or left ) You want the tube stripes falling forward at the front. If you look at the image bellow you can see the front leans forward ie: front \\\\\\\\\\\ back Should be a pencil width from the cheek. As I guide I like to use a piece of masking tape the same size as a pencil Trim to size and apply I like to pull away from the decal as I find it doesn't pull the decals off while removing the top sheet. Repeat on the opposite side. On to the tears and traps, I find it easier to trim the decals down to size and test fit, adding a little tape in places is a good guide. The decals don't fit all helmets perfectly so you may need to trim down slightly, using a permanent marker is a good way to restore any missing black lines you may have to trim off. Any air bubbles just a very impolite person with a pin and push the air out. No this is not how the brow trim looks finished, it was pulled down to apply the decal And helmet is done for the time being, I'll apply some light battle damage/weathering once the armor is complete, I like to do it all at the same time so you get a consistent look.
-
Nice work trooper, good luck with approval
-
DarthBiscuit's R1TK Build (Jimmiroquai kit)
gmrhodes13 replied to DarthBiscuit's topic in Rogue One Build Threads
-
Have you thought about using an online image host, many are free, some of us use Imgur, once uploaded you can just copy and paste the "direct link" into your posts, could be an option