gmrhodes13
-
Posts
31,219 -
Joined
-
Last visited
-
Days Won
1,070
Content Type
Profiles
Forums
Gallery
Articles
Everything posted by gmrhodes13
-
Minimum 5 forum posts
-
 Could also move the elastic straps backwards on your shoulder straps, this will help pull them closer to the backplate, yours are in the middle of the elastic at present
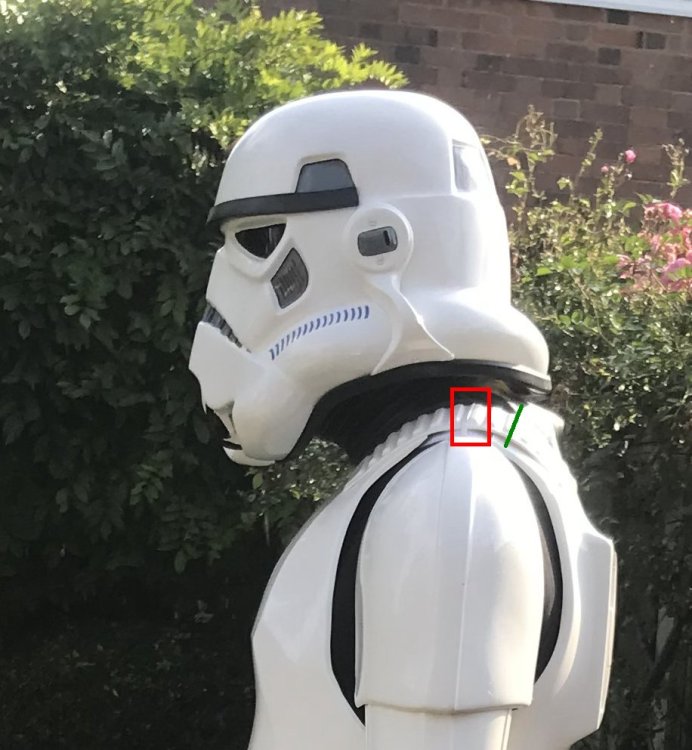
-
UK Garrison - TK19984 - New to the FISD
gmrhodes13 replied to Ebio Amisi's topic in New Member Introductions
And replied -
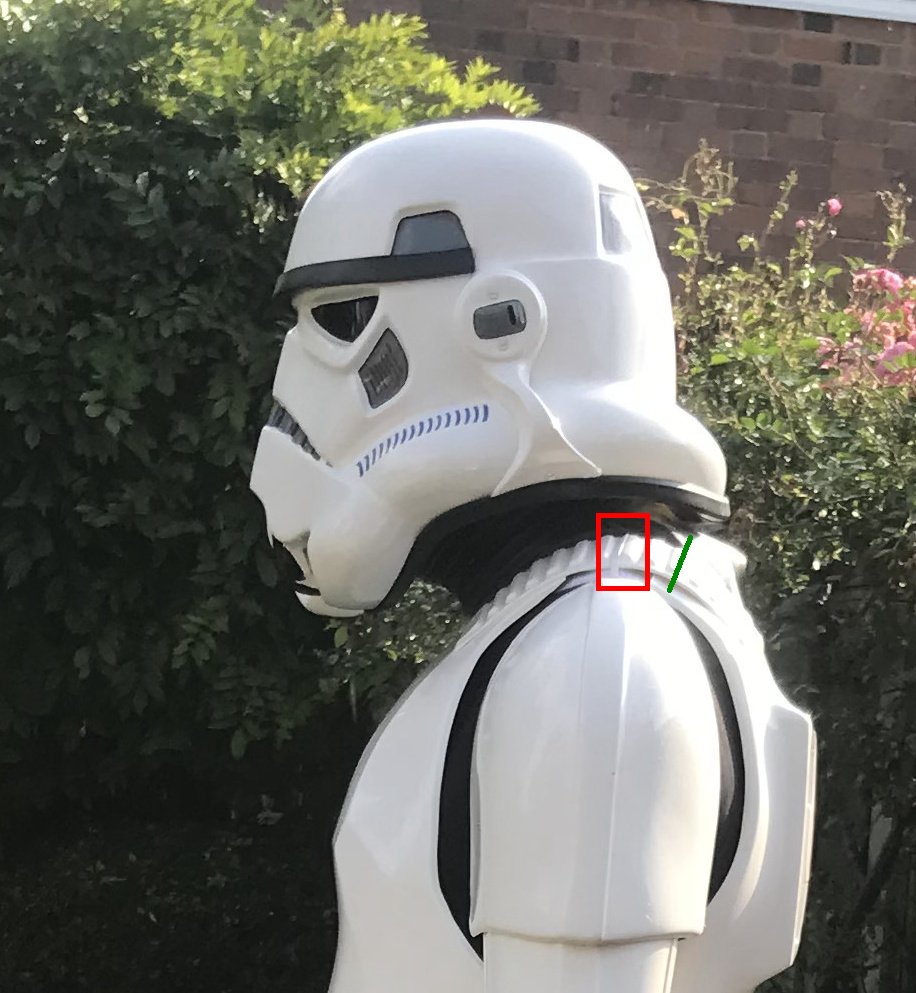
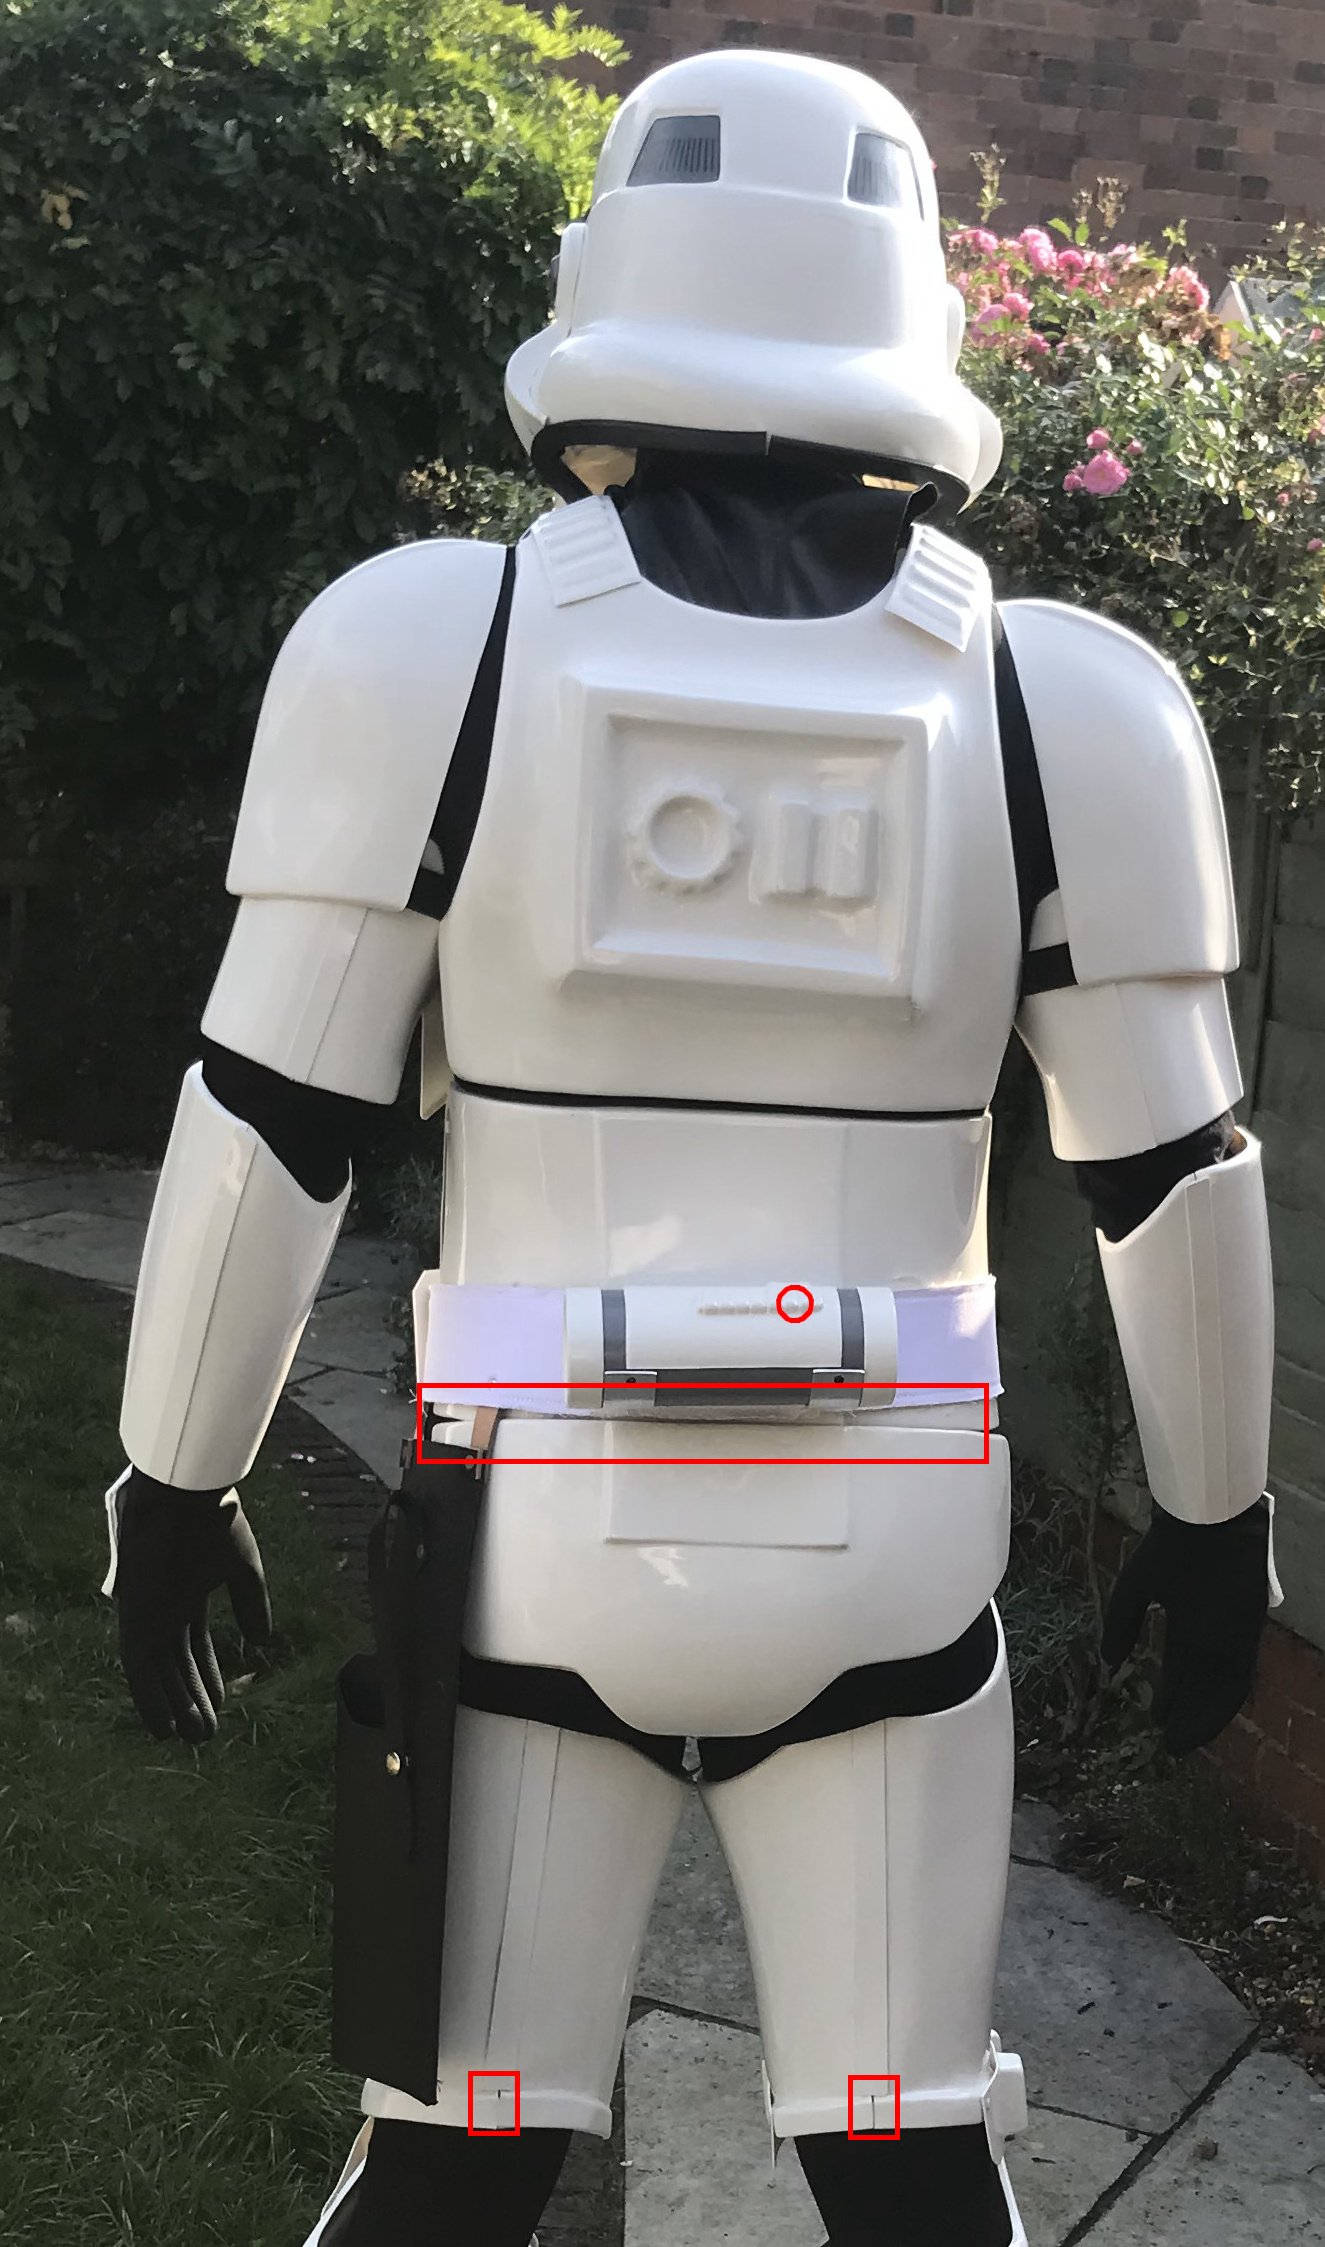
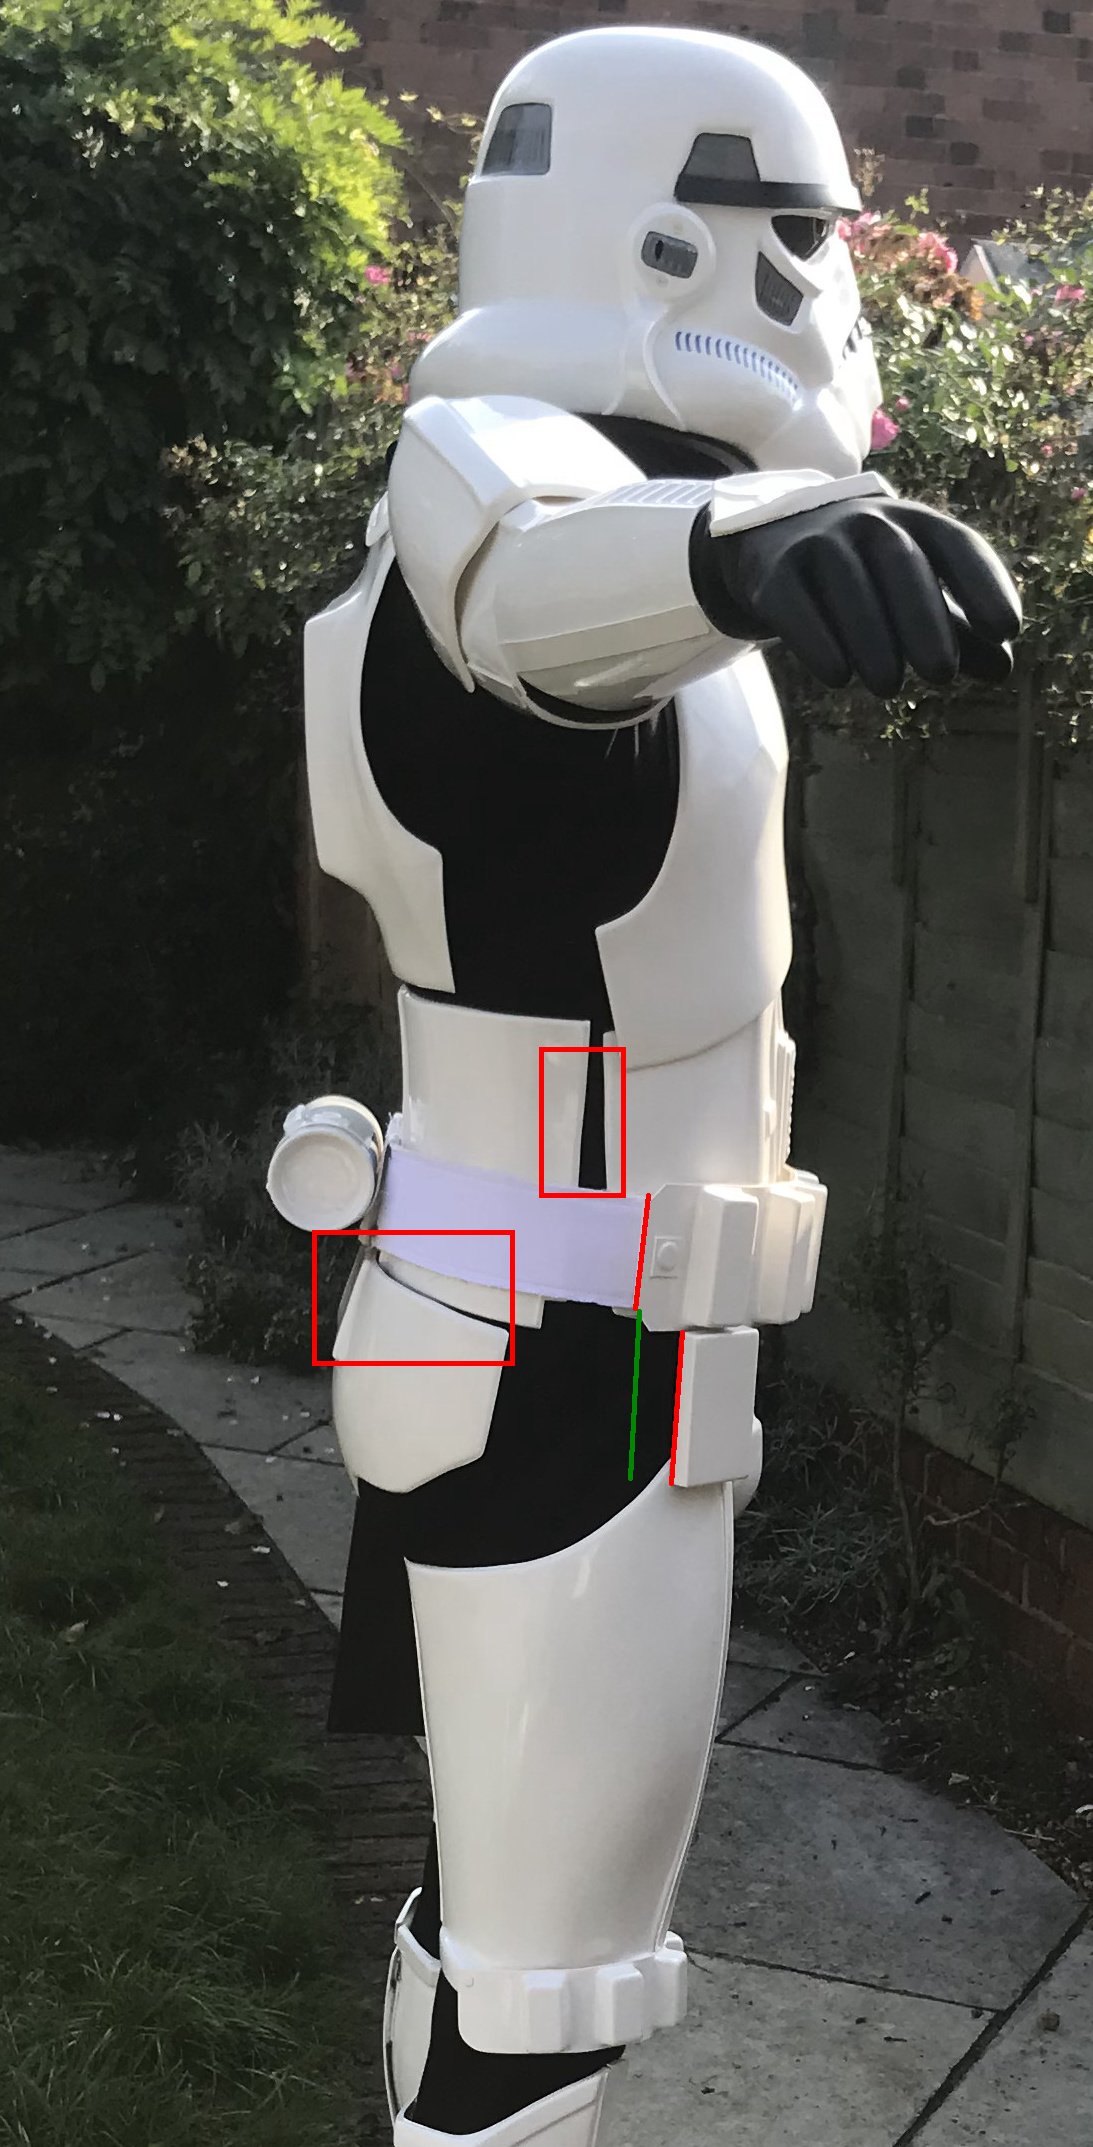
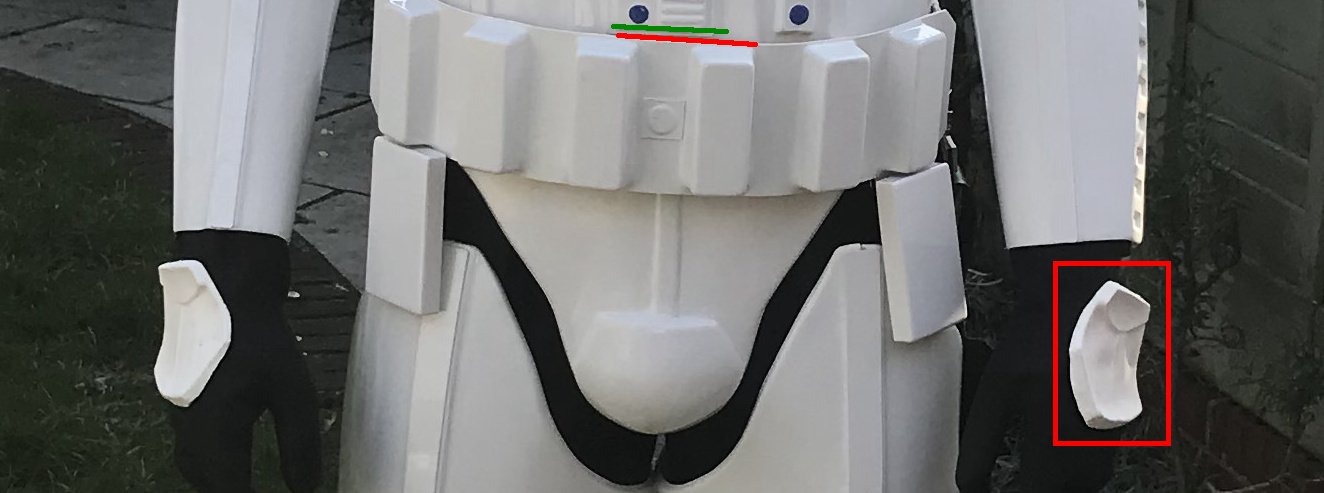
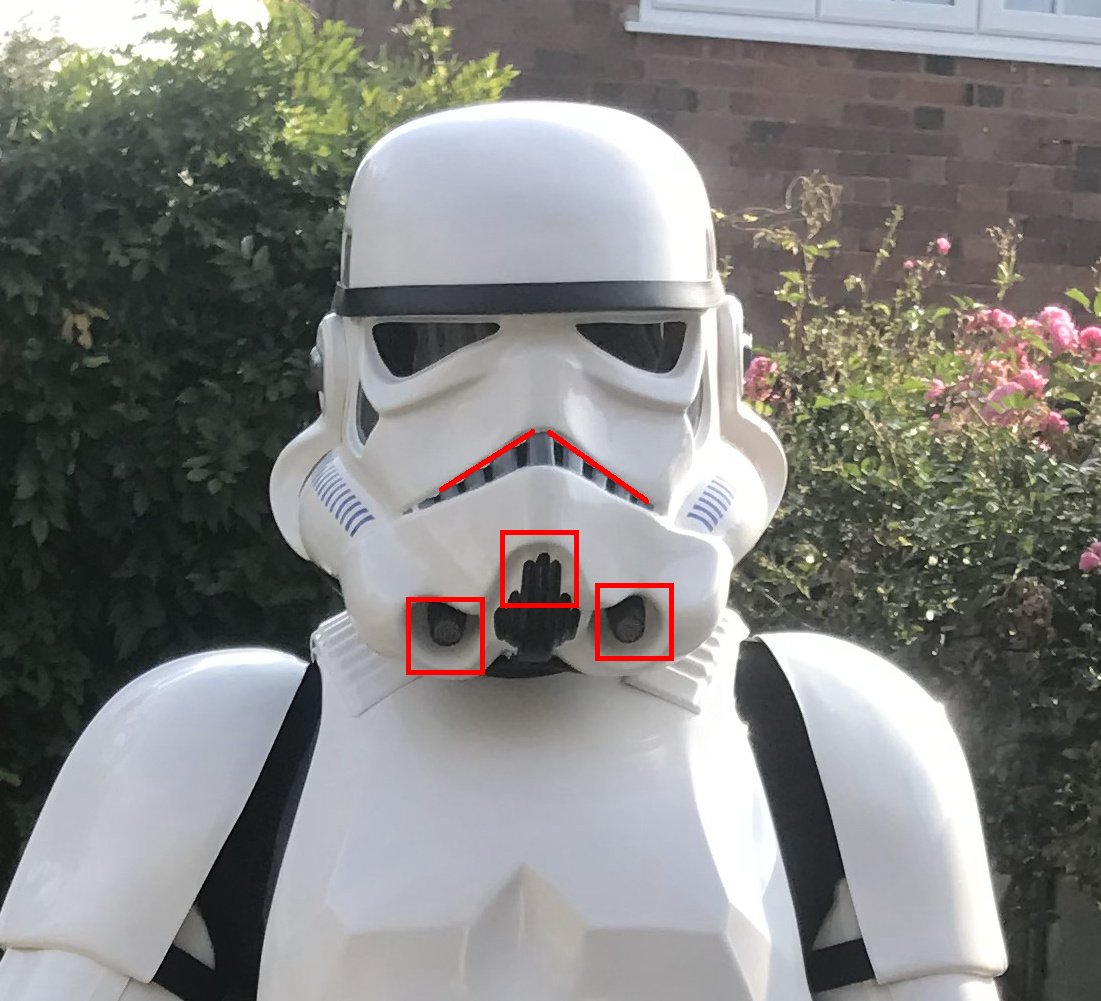
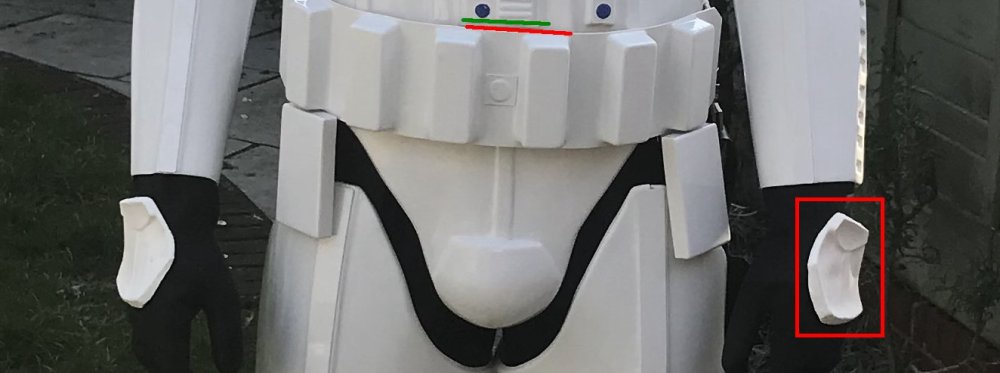
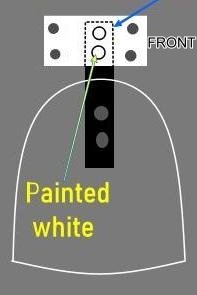
Great work, a few things to address. Rotate (shorten clips) the TD so the O can be seen. Raise belt a touch so the belt is just under or touching the last ab button The top of the ABS belt shall sit at or just above the bottom of the central and vertical ab button panels. A slight overlap is suggested, but not required. Drop boxes align to end of plastic belt. Also tighten strapping between ab and kidney, a slight gap there: OPTIONAL Level three certification (if applicable): Ideally there no gap between the abdomen and kidney armor. Also corners of the plastic belt should touch the fabric belt Drop boxes are vertically aligned with the end of the ammo belt with minimal gap between belt and box. The corners of the plastic ammo belt shall be trimmed at a 45 degree angle that that meets the outer edge of the cloth belt. Drop boxes are vertically aligned with the end of the ammo belt with minimal gap between belt and box. Butt plate is overlapping the kidney, adding V tabs may help Handplates appear to be curled, are they attached properly to the gloves? You may be able to shorten the gap between the shoulder bells and shoulder straps A little hard to see your blaster, just make sure there is no weathering on the grip or T tracks as they were black plastic Vocoder looks a little narrow, top middle Should be no paint on gums, remove excess Paint white rim on mic tips (hovi's) Belt is on an angle. You may also be able to reduce the gap around the base of your helmet by modding your padding inside the helmet. Your neck seal is sticking out on the right side back Could add abs paste to the gaps between the thighs on lower ridges Just a few tweaks, also having a mirror handy is great to check for gaps and alignments. Good luck with EIB, looking forward to seeing your application soon.


.jpg.a3050b80f2c3b9983a828883cd5e6930.jpg)
-
Luke’s ANH ammo belt
gmrhodes13 replied to TrickyT81's topic in Boots, Soft Parts, and other Accessories
Or build from scratch -
Bending the ABS Belt by gazmosis, Boba_Skywalker3 Attaching Belt to Abs by GnrlGrievous Holster Placement on Belt by CableGuy Current (2021) Holster Placement by gmrhodes13 (follow-up to previous thread above) [NEW ADDITION] Belt Assembly by ukswrath Belt overlap Removable Holster All in one resources thread, go to for most info
-
Luke’s ANH ammo belt
gmrhodes13 replied to TrickyT81's topic in Boots, Soft Parts, and other Accessories
Hero Version Luke is approvable, no issues with EIB or Centurion. Joseph was doing a run of the grappling hooks/box Comlink here Also note Luke has slightly different handplates if you really want authenticity Great page here on Hero versions http://starwarshelmets.com/original-ANH-hero-Stormtrooper-armor-helmets.htm
-
Dead Post Links & Broken Photos, How You Can Help
gmrhodes13 replied to Sly11's topic in Forum Help & Support
Armory - Tutorials, Tips and HOW TOs Page 7 Completed - gmrhodes13 Page 6 Completed - gmrhodes13 -
UK Garrison - TK19984 - New to the FISD
gmrhodes13 replied to Ebio Amisi's topic in New Member Introductions
As you won't have access to the EIB area until you receive full TK access you could post some images in the Pre Approval area, even though you are approved it's a great way to get feedback for EIB and Centurion https://www.whitearmor.net/forum/forum/193-request-tk-pre-approval/ FYI if you are having any issues adding any images most of us use a free online image host Imgur, then copy the image links directly into our threads -
How "clean" does our armor need to be?
gmrhodes13 replied to Drftfan's topic in Assembly, Mods, and Painting
Images can tell a thousand words -
Lazerjock's Trooper Master ANH Stunt Build
gmrhodes13 replied to Lazerjock's topic in ANH Build Threads
There is a forum limit to the amount of images a person can post, understandably with the thousands of members here we'd need our own server just for images. Most of us use a free online image host Imgur and copy the links to our threads, here is a great tutorial -
UK Garrison - TK19984 - New to the FISD
gmrhodes13 replied to Ebio Amisi's topic in New Member Introductions
Hello and welcome aboard, once you have your TK access here you should be able to access the EIB section. Looking forward to seeing your application photos, good luck -
TK62713 Reporting for duty
gmrhodes13 replied to General_Nuisance's topic in Newly Approved Members - Sound Off!
Congratulations and welcome to the ranks trooper -
Quite a few people have decals made locally, lots of people with vinyl cutters too so worth asking around at your local forums. You can find lots of suppliers online too who will customize decals for your needs Thread on 501st legion forums, was from 2019 but website link still active https://www.501st.com/forum/viewtopic.php?f=13&t=98585&hilit=bin+decals https://www.assassingraphics.co.uk/
-
Hello and welcome aboard, @sskunky is definitely your man for U channel. I have a TKC which is L3 cleared, threads here is you are interested in looking, links below EIB TKC Centurion TKC Also great references can be found in our gallery sections https://www.whitearmor.net/forum/gallery/category/15-tk-commander-reference/
-
AM Armor 2.0 ANH Build (1st time TK Builder)
gmrhodes13 replied to Darth Atlast's topic in ANH Build Threads
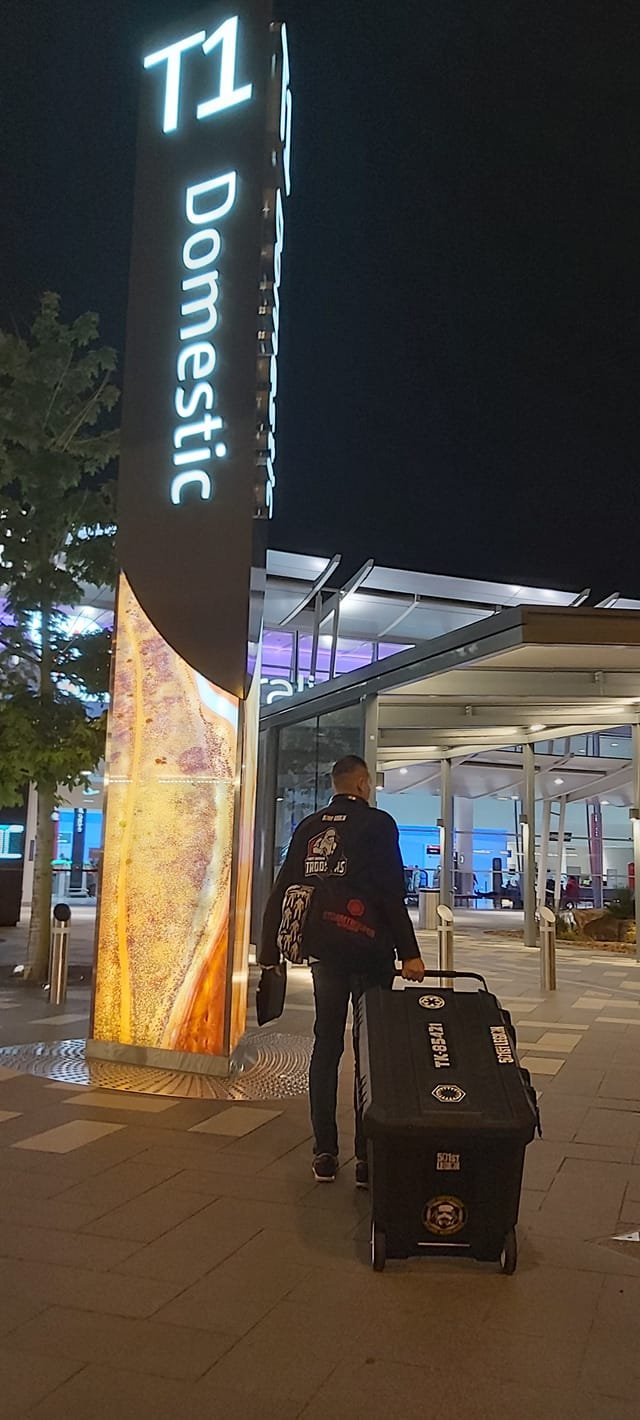
At many events I use a suitcase, it's smaller and easier to maneuver than my large plastic bin But the big bin is great for air travel Some outstanding builds here
-
I also find if you offset the snaps on the shoulder straps more towards the front it helps to rotate the shoulder inwards when moving the arms around. Double snaps have helped me on more than one occasion to keep on trooping
-
Playing dentist - ANH Stunt Teeth question
gmrhodes13 replied to SublimeBW's topic in Hard Armor (General Discussion)
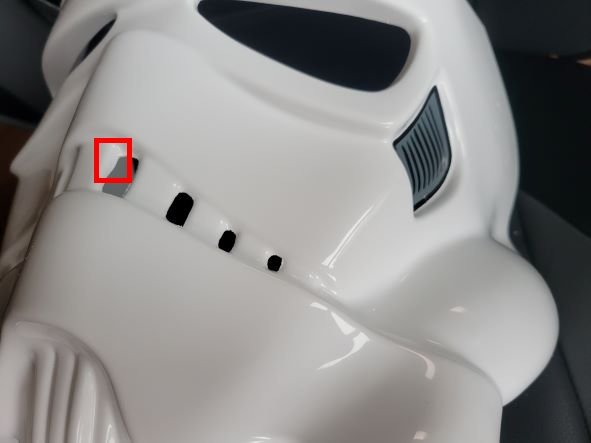
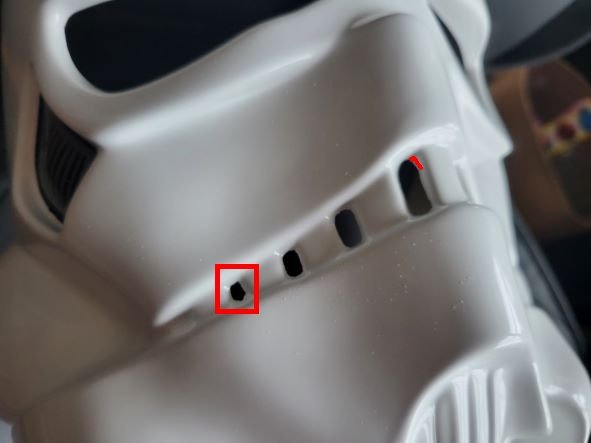
I try to match both sides, notice your middle teeth are a little different in height. Also in width in this image, the side is a bit doglegged. And here your smallest is a little uneven on the bottom References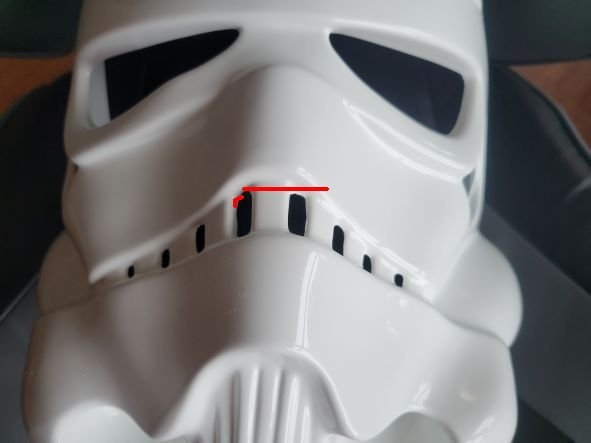
-
It's very thick
-
AM Armor 2.0 ANH Build (1st time TK Builder)
gmrhodes13 replied to Darth Atlast's topic in ANH Build Threads
Research is the key, measure twice and cut once. If you don't know something just ask, there's no such thing as a silly question only silly mistakes. Plenty of helpful people around to lend advice and you can also check references in the gallery sections https://www.whitearmor.net/forum/gallery/category/24-anh-tk-reference/ -
Dead Post Links & Broken Photos, How You Can Help
gmrhodes13 replied to Sly11's topic in Forum Help & Support
Armory - Tutorials, Tips and HOW TOs Page 9 Completed - gmrhodes13 Page 8 Completed - gmrhodes13 -
SublimeBW's Armor Master's (AM) ANH Stunt Kit - Build Thread
gmrhodes13 replied to SublimeBW's topic in ANH Build Threads
Great news the excitement, then panic when you realize you have to put this together Some great helmet threads For when you are in doubt check the gallery sections -
TK Monkus' RS Prop Masters ANH-S Build Thread (first build)
gmrhodes13 replied to TK Monkus's topic in ANH Build Threads
As far as I'm aware any generic heat gun should be ok, mine is just a cheapy from a local hardware store You could always post on your local garrison boards, perhaps someone can lend you one -
TK Monkus' RS Prop Masters ANH-S Build Thread (first build)
gmrhodes13 replied to TK Monkus's topic in ANH Build Threads
I used snaps behind the rivets for splitting the armor for air transport, worked well. I did however shorten the posts of the rivets so they were just enough to split into the snap. It's a bit hard to control heat with a hot water bath, I prefer a heat gun as you can apply heat to just one area. If you are stuck with a hot water bath then make a plug out of wood to sit behind the whole piece, then once warm press against with another block of wood and run forward/backwards until cooled. -
Dead Post Links & Broken Photos, How You Can Help
gmrhodes13 replied to Sly11's topic in Forum Help & Support
Armory - Tutorials, Tips and HOW TOs Page 10 Completed - gmrhodes13