gazmosis
-
Posts
4,043 -
Joined
-
Last visited
-
Days Won
23
Content Type
Profiles
Forums
Gallery
Articles
Media Demo
Everything posted by gazmosis
-
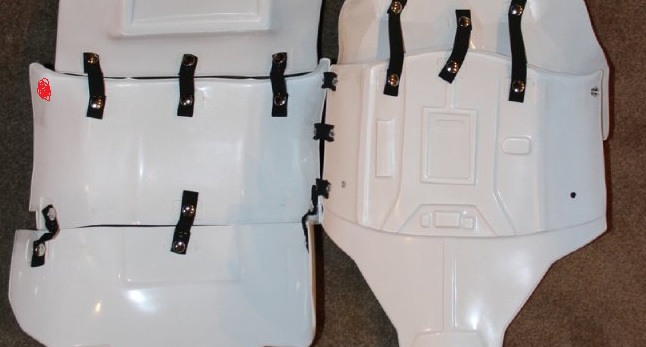
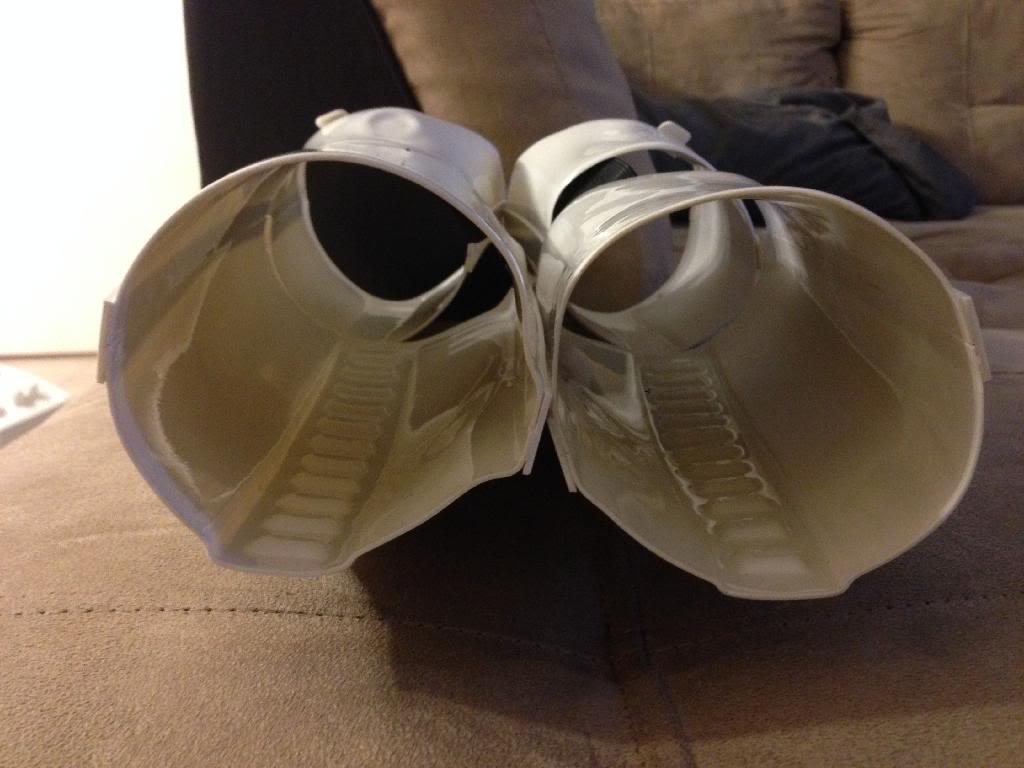
looking good so far. Getting used to your dremmel is something that comes with time. I saw that you went a bit enthusiastic on the lock opening on the folding stock. You might want to invest in some "green stuff" as it is being called. Modelers putty is what it is really called. This has corrected thousands of mistakes, mold bubbles, and even created details not present on the doopy kit
-
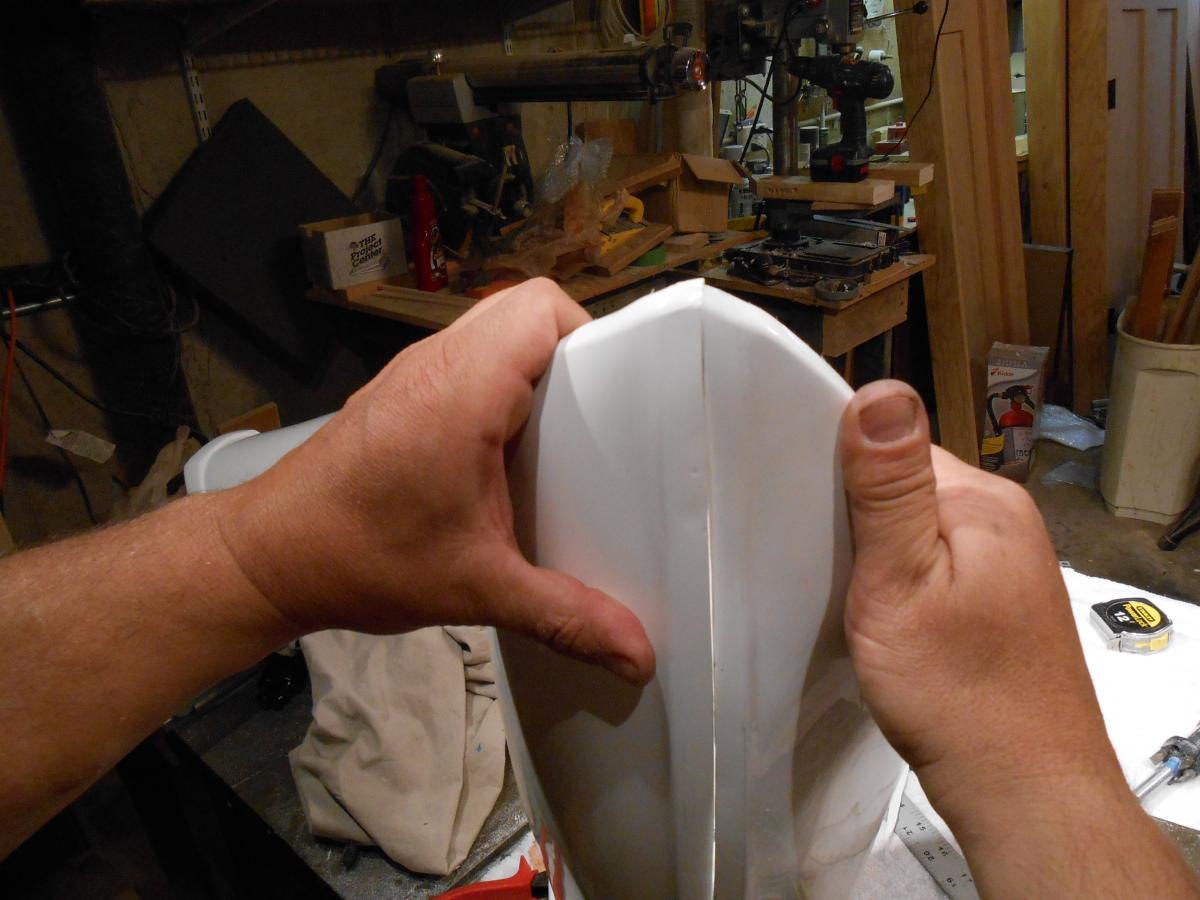
Most of keeping your brow trim in place has to do with how the helmet was constructed in the first place. If the cap and face are fitted together with the brow trim in place and the fit is made where there is no gap along the brow line, it will stay in place on its own with no adhesive. Yes it can droop due to handling but all and all the pressure will keep it in place
-
If you are still interested in getting rid of the gap, there are adjustments that can be made but I feel it won't close it completely. Where the gaps are located, the only thing that will move the entire ear closer to the helmet surface is to remove material from the round portion. If you are not careful, you could end up with a poker chip for an ear cover. You could trim back a little from the round portion being careful not to go lower into the gap at the top of the cheek on both the front and back sides. Don;t touch the gap on the back at all but on the front, you could take just a touch off the bottom of the curve. This will suck the ear in closer when you tighten the screw. The other thing that people often do is to drill the angle of the bottom screw too steeply upwards. If you do this, you are actually compressing the curve of the ear CREATING a gap. Drill this in a more downward movement so when the bottom screw is tightened, it pulls the ear curve downward
-
 Hey there Pete!!! Thank you so much for your Centurion application!! Let's look at this !! CRL and Centurion Application Requirements: All required photos have been posted. Upon close review, your armor contains all the necessary elements to qualify for Centurion. Congratulations on this well earned accomplishment!! Other-Armor Fit/Assembly: You blew my away, Pete!! I swear to you, when I laid eyes on your new and improved helmet (opened eyes) I pumped my fists in the air and yelled, "YES!!" Absolutely stunning!!! So well done. You nailed the helmet and you went on the make such a HUGE improvement on your sniper plate. It almost doesn;t even look like the same one! Before: AFTER: Just majestic! Congratulations, Pete!! Your people are waiting for you to impress them.
 -
Much better alignment! Those...are green lenses! Great work!
-
Boot Soles? And are these good?
gazmosis replied to Knockerbot's topic in Boots, Soft Parts, and other Accessories
The elastic doesn't look too bad its the trim piping around it that won;t fly. You can find similar boots with simple stitching like thesehttp://www.amazon.com/Bass-Mens-Amsterdam-Ankle-Boot/dp/B003TFEVN0 For a similar price. Here's a second choice ------------- -
You look great, Brother!!! nice work! The tow things I would switch off the bat are the left side paper clips. The heads are a bit too domes and arent the tails jabbing you on the inside?? The next thing is you have a sever misalignment of your right side torso. YOu have the right idea of using webbing instead of elastic to keep the halves together, its just that the kidney is riding way high. Shorter strap perhaps? Extra strap at the bottom?
-
TK-74614 Requesting ANH Stunt EIB Status (AP)[499]
gazmosis replied to Teekay YYC's topic in Request Expert Infantry Status
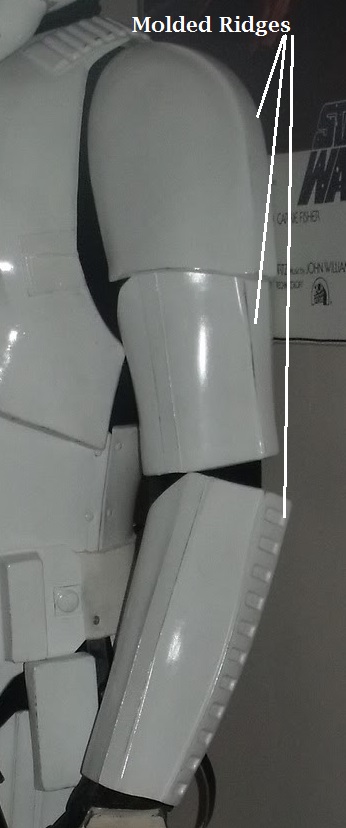
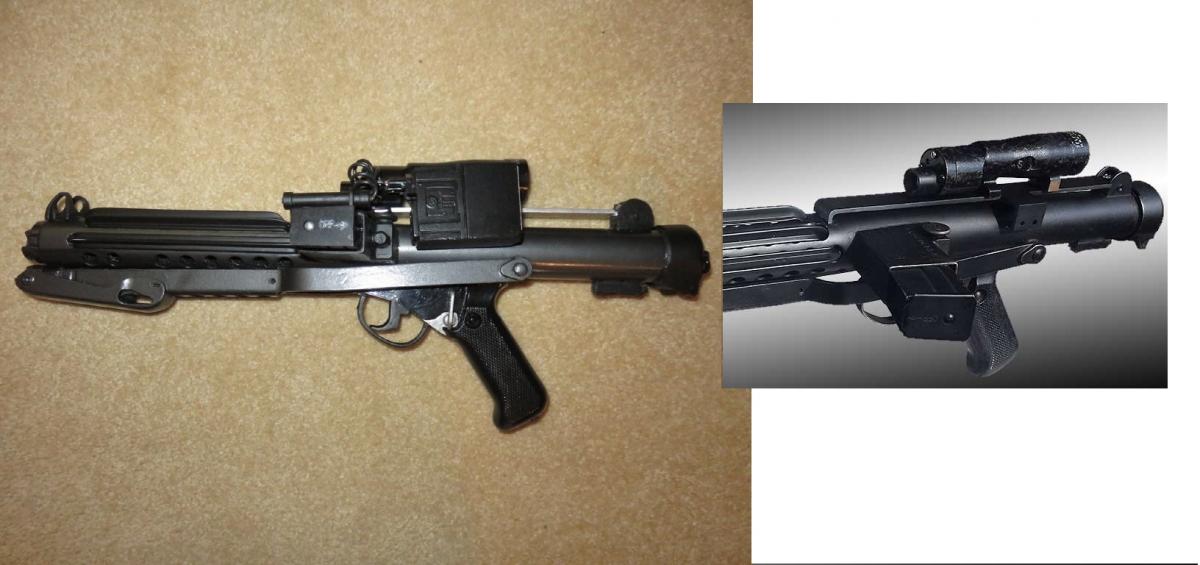
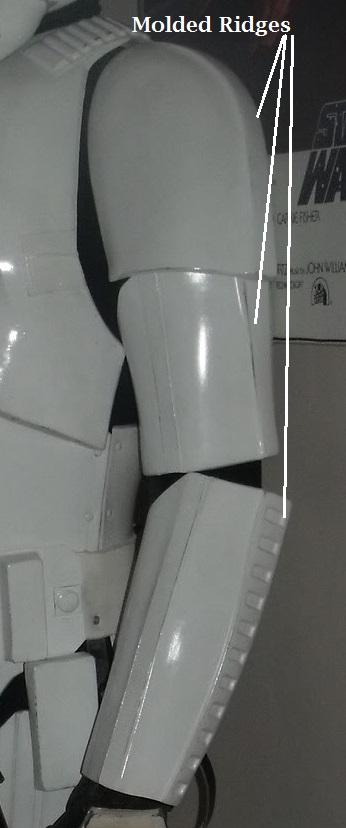
Hello, Jaydon!! Thank you for your application for Expert Infantry. Let's dig into your armor!! CRL and EIB Application Requirements: All required photos have been posted. Upon review, your armor displays all the necessary details to qualify for EIB. That said, I would like to congratulate and welcome you to EIB!! Other-Armor Fit/Assembly: In this section I will review observations made by both your fellow troopers and myself. I will specify if any suggested changes or adjustments would be required or affect any application. Your overall build....what can I say? Well constructed, well detailed, and great fit. Nice overall work! When you wear your forearms, make sure you have the square indent ridge, and the molded ridges on the biceps and shoulder bells aligned. Excellent work with your painted details. Your buttons are perfect and your paintwork on your helmet is outstanding. Nice, thin outlines to all the traps, tears, and rank bar areas. Your side seams are mentioned a couple times by your fellow troopers. This was a judgement call on my part. It is required that if there is any gap on the sides that it be kept below 1/2 inch or 12 mm. On your right side, the separation at the top exceeds this but I believe that has happened from a lack of strapping and not improper fit of your armor. In looking at your interior strapping pic, you have no closure strap on your right side. You have the male snap installed in the upper corner of the ab, but this should be both functional as well as a Centurion feature. I have the strap mounting location in red. Centurion Suggestions: I try my hardest to spot things that might affect a Centurion application and list them, but the ultimate accuracy is the responsibility of the trooper. It seems pretty obvious that Centurion is your goal. There are a couple things I will need to have changes before you apply. Going back to your side seams on your torso, once you get that retaining strap installed on your right side, and a good belt tightening, your side seams will go away. Please make sure you re-take your Centurion photos with this corrected detail. Next actually has to do with your blaster. There are certain details on your blaster that need to be installed correctly. First is the clip end on your magazine. It needs to be flipped over. The release button should favor the right side, the word "OFF" should be upside down and the arrow should be pointing left towards the front of the blaster. The correct magazine is on the right here: Next, I love that you decided to go with dark gray or gunmetal as supposed to all black. I like the contrasts. Anyway, your scope rail needs to be painted as well. If you like the silver one, make a second one and switch them out for your application. The last thing is your bayonet lug is missing. This will need to be installed. Beautiful overall work, Jaydon!! Congratulations!

-
Reboot - NE Armor: 2 years in the Making!
gazmosis replied to BBQTrooper's topic in Build Threads Requireing Maintenance
Your journey begins with pics...and research, of course. Many NE build threads here. -
Hey there, Carlos!! Thank you for your Centurion application!! CRL and Centurion Application Requirements: All required photographs have been submitted. Upon review, your armor contains all the necessary elements to qualify for Centurion. Congratulations! A well earned Centurion. Other-Armor Fit/Assembly: Sometimes I look at a set of armor and just say, "FINE WORK!" This is one of those cases, Carlos! Clean, neat, well painted....everything is here. Now go rock your Garrison like I am sure you already have been doing!! And by the way, Happy Birthday, young man!!
-
TK-24976 Requesting ANH Stunt Centurion Status [ATA][187]
gazmosis replied to gusynet's topic in Request Centurion Status
Alright José!! Thank you for your Centurion application!! Let's get right to it CRL and Centurion Application Requirements: All required submission photos have been posted. Upon review, it has been determined that your armor displays all the necessary requirements to qualify for Centurion. Congratulations on earning this badge!! Other-Armor Fit/Assembly: Impressive is the word that leaps into my mind regarding your awesome presence and look in this armor. Now to your well appreciated adjustments. Yes, you closed up your side gaps. But your biggest adjustment was moving your tube stripes up into the proper position: Every once in a while, I will make a request for a change that might not be on the CRL, but that is merely to better the look of the helmet/armor. This was one of those examples. Nice work!! Congratulations on all your efforts! Your Garrison should be proud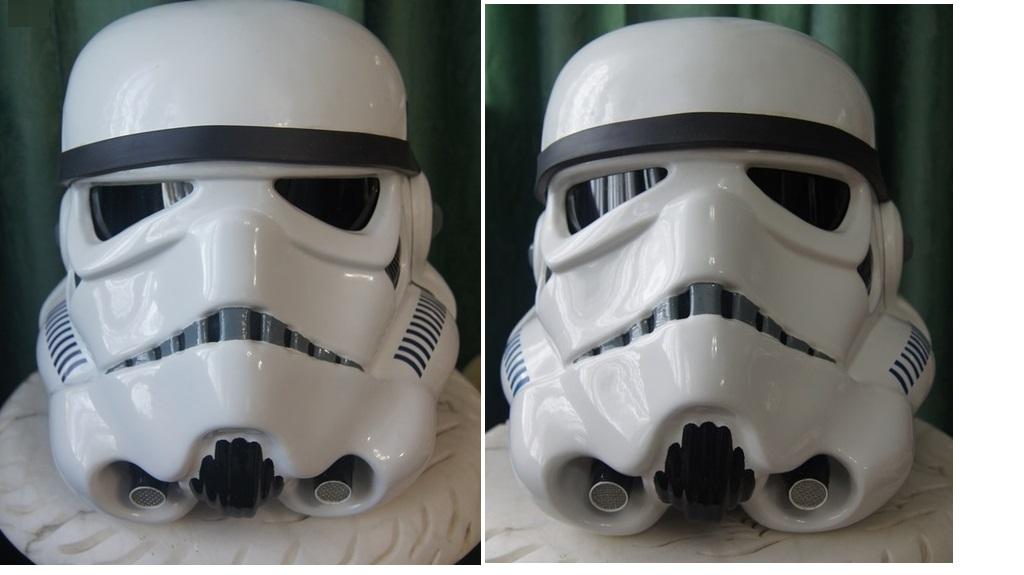
-
Those thighs were things of beauty!!
-
Richard's ANH Stunt 2 mm [TM]
gazmosis replied to VulpX's topic in Build Threads Requireing Maintenance
Don;t worry one bit about the molded ridge under the cover strip being even. Paul re-created this ridge to honor the un even ness of the original piece. You are doing fine. If you are planning at any point to go for a badge or accuracy, specifically Centurion, the return edge on your forearms will need to trimmed up into the square indent ridge of the forearms. Beautiful work so far!!!!
-
Desperately Need Help with this Kit.
gazmosis replied to The_arab_TK's topic in The Foundry - Armor and Prop Making
There are several RS build threads on here. You have a very nice suit that has the ability to be custom fit to your body. It's worth doing a little bit of homework here. -
DarthMel's TFA Stormtrooper Build Thread
gazmosis replied to DarthMel's topic in Build Threads Requireing Maintenance
Make sure you doeble check part by part what your cut lines are. The thermal detonator is a very confusing part and can be damaged if cut wrong. The forearms are also tricky -
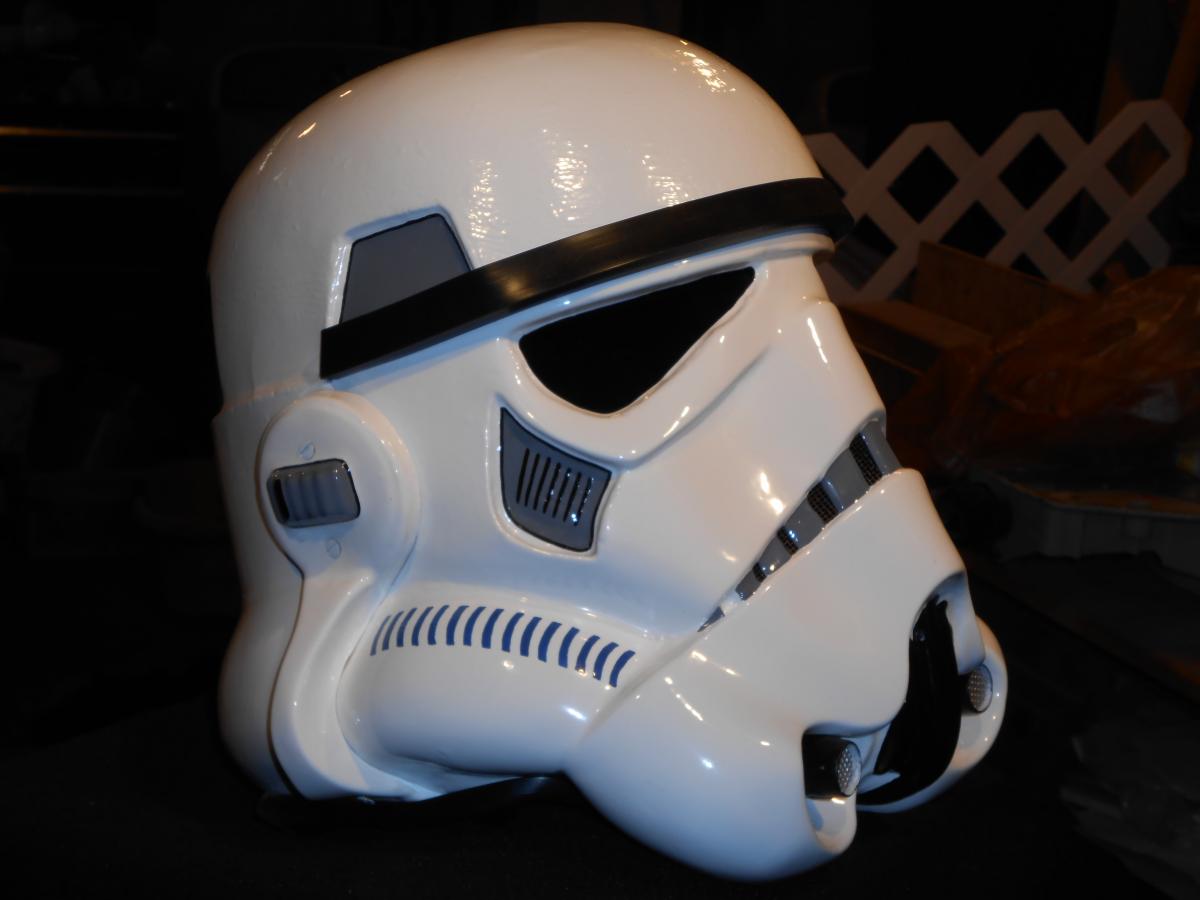
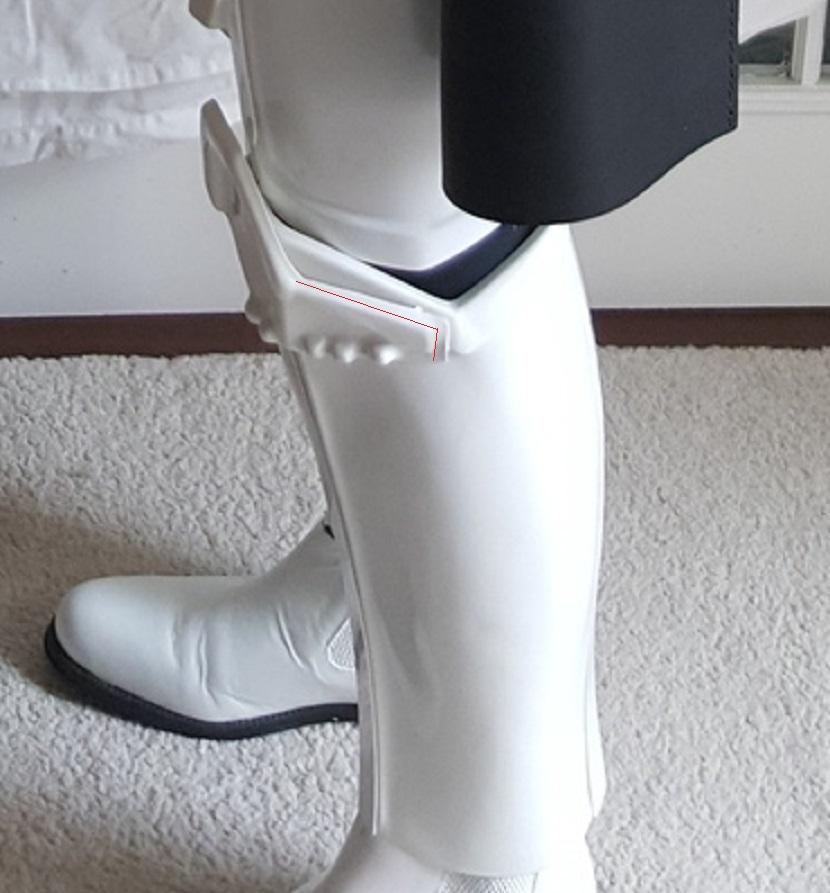
Hey there, Pete!!! Thank you for your application to Expert Infantry. We have some things to cover so let's get to it!!! CRL and EIB Application Requirements: All required photos have been posted and your armor contains all the necessary elements to qualify for Expert Infantry!! Congratulations and Welcome to EIB!! Other-Armor Fit/Assembly: In this section, I will discuss the observation of your fellow troopers along with my own comments. If there are any suggestions for improvements or changes that may affect an application, I will specify on those. First, brilliant photos. Crystal clear!! I love to see pics that can showcase a wonderful set of armor like this. I want o give kudos right away for mounting your left side, vertical rivets in the proper location away from the seam line. You needed that little bit of extra plastic they leave and you used the proper placement rather than the "suggested" location they have the dents for. Thank you for honoring this detail! Congrats on the hand painted details. The outlines could use a bit of evening, but nice work all together. Since we are on the subject of your helmet, I believe the overall look of your bucket could be improved by opening the eyes a little more. Just to compare to this RS helmet with the eyes opened a bit further than yours: Both Andy and Joe touched on a design flaw that goes all the way back to the beginning of RS. Here is a shot of the thigh they took their molds from and as you can see, the uneven top was on the screen used thigh:I have seen many people who REALLY wanted to even that down but didn't feel comfortable molding a new return edge or didn't have the tools to do so. I experienced the same thing on this build and repaired it.: If you get your suit built by RS, uneven is the way it will come. I will not suggest any change here. As for the mention of your sniper plate, well....congratulations for getting it attached!! Snaiper plates seem to the Achilles heel in most builds. So many people have so many different sized calves and that is what affects the fit of one sniper plate compared to another. Now, I do agree it can be moved up slightly and the rear portion trimmed as I suggested with the red lines. Centurion Suggestions: If you decide to take on any of the suggestions above, just make sure your Centurion pictures are changed from the EIB ones to new ones. Great work!!


-
I see that. Awesome and congratulations!! I can officially put you through!! Great work, Carlos!!
-
TK16084 - Requesting RotJ EIB Status [CFO][496]
gazmosis replied to KaitoTrooper's topic in Request Expert Infantry Status
Ok, Felix! Thank you for following up on those pics. I will put your EIB badge through and congratulations!!! Thank you for your follow up plan on your blaster. Sometimes even a small detail like that sight is very important. If you plan on shooting for Centurion (which I hope you do) the rounding of the corners on the side of the kidney/butt combination is what I need to see. Please make sure this detail shows in your Application. ANH/ESB kidneys were 90 Degree angles and the ROTJ corners were different. Congrats again!! -
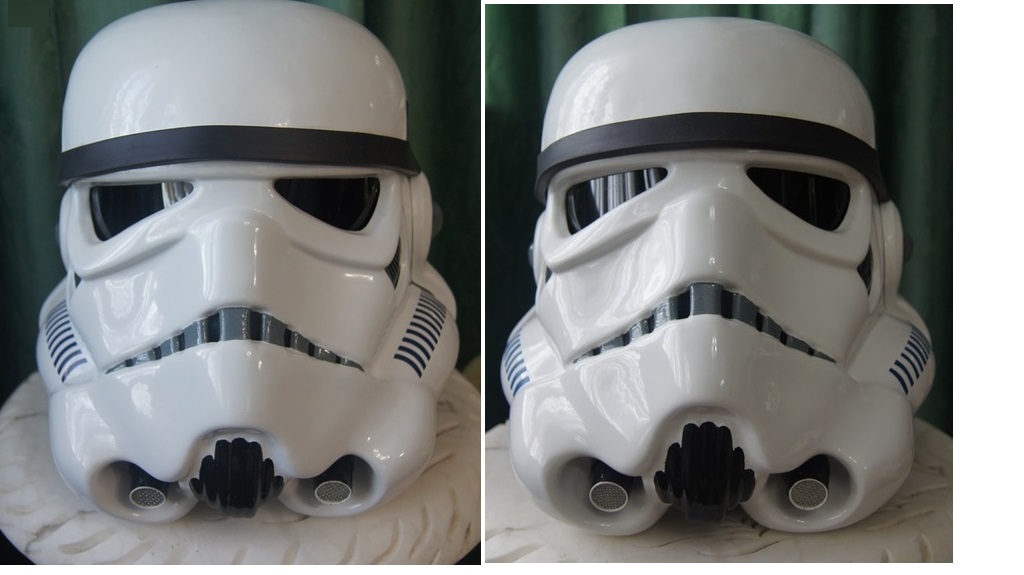
Hey Michael!!! As the summer season is winding down and temps outside are getting cooler, what an awesome reminder that Halloween is approaching than to see a sweet Deathtrooper like this. CRL and Centurion Application Requirements: All the required photos have been posted. Before approval, I need to confirm one detail. Deathtrooper armor is based on ANH armor which requires no gap on your side seams. Yes it's a Deathtrooper, but certain standards still need to be adhered to. If you just want to throw on your torso, tighten up the belt, and grab a couple quick shots of both sides that will be fine. Other-Armor Fit/Assembly: The only bit of criticism I have is in regards to your helmet lenses. I went back and looked at your EIB where they appear much greener than what you have here. Frankly, they look more blue to me. But onward we go! The creativity of you troopers blows me away sometimes!! What a cool idea to incorporate the massive head wound into the top of the helmet! That weathering must have taken you an eternity to do!! You will be just in time to rock this at the upcoming Autumn special events. Please get those side seam pics posted so I can approve this badge.
-
Tk 31689 Requesting Anh Stunt Centurion Status [AP][186]
gazmosis replied to JoblessPunk's topic in Request Centurion Status
Hello, Tim!! I cannot thank the stars enough that I am forced to spend extra looking at everyone's sets of armor. Sometimes a set comes along that steals a breath from me. This was one. Let's have a look! CRL and Centurion Application Requirements: All required photos have been posted and your armor properly displays all required elements to qualify for this badge. With that, I congratulate and welcome you to Centurion!!! Other-Armor Fit/Assembly: It is obvious to me what your intentions were right out of the box. Helmets off to you, Tim! Yes, the photography helps, but it comes down to the details. Your body type allowed you to remove the un-needed cover strip ridge in the thigh backs. Although some may say your helmet details are too perfect, I think the Empire would probably say different. Hyperfirm blasters have atendency to arrive with "enthiusiastic" weathering. I don;t know if you ordered it un-weathered and did it yourself or you altered it, but your blaster looks awesome. I am sure you have been making your Garrison proud already. I would love to be seen beside you. Well done, Tim! -
A few builds as of recently have displayed their calf openings facing the outside of the calf. Upon discussions, both ANH and ASB calves openings face the inside of the lags....as should ROTJ. Since tow out of three of these pictures are of screen used suits and the calf openings are clearly to the inside, it's evidence enough to support. Troop ON!!!!

-
TK-44678 requesting ANH Hero Centurion status [AM2][185]
gazmosis replied to Kredal's topic in Request Centurion Status
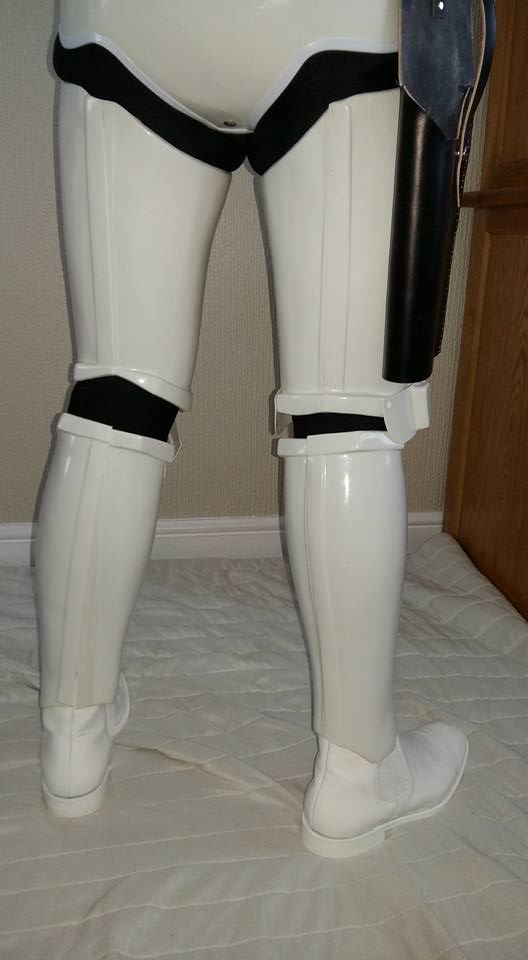
Hey there, Josh!!!Thank you so much for your Centurion application! Let's get to it! CRL and Centurion Application Requirements: There are two missing pictures. (Kidney notch and wrist openings) but both of these details can be seen in other photos. Your armor contains all required elements to pass Centurion. I both congratulate and welcome you!! Other-Armor Fit/Assembly: Thank you again for this great build. As a group I respectfully refer to as the "muscle" troopers, this armor was the perfect match for you. Well built, to both your body and to the "hero" specs. This sounds strange,......but your butt plate looks so much better that you trimmed off that corner on your hip. As for the "gun to my head" suggestions, I understand having big calves and how it wasn't possible to pull yours down any further. I thank you for removing the return edge at the bottom. I was really hoping you would have removed that extra return edge from the sides of your back plate. A couple things I would put on your "eventually list" is to shorten the straps at the top of your shoulders. Your shoulder bells are falling away from the top. Lastly, the black trim around the rear and temple traps are what I call an enthusiastic version of the "handpainted" effect. It would really benefit the overall look of your helmet to have these outlines evened out just a bit. Congtatulations again and Welcome, Josh!!
-
TK-60571 Requesting ANH Stunt Centurion Status [SDS][184]
gazmosis replied to 0skar's topic in Request Centurion Status
Hey there Oscar!! Thank you so much for your Centurion application!! Let's get right to it!! CRL and Centurion Application Requirements: All the required pictures have been posted and your armor demonstrates all the necessary elements to qualify for Centurion. Very nice work and congratulations!! Other-Armor Fit/Assembly: Well, we have a couple things to discuss. There was mention regarding the placement of your left forearm and although this will not affect your application, it does concern me because it would prevent your armor from bending. I just fear that you would crack either your your bicep, forearm or your REAL ARM. It looks like you wear them comfortable and your right arm looks perfect. Unless it bothers you, I wouldn't bother trying to fix it. As for the vent lines on your helmet. Using a medium other than paint is inventive. As long as it doesn't take away from the final look, I am fine with it. Thank you for trimming back that button plate. It looks SO much better!!! Thank you also for posting the pics showing your butt joint construction. It is greatly appreciated but it is necessary as most suits before yours have been presented with overlapping joint construction. Congratulations again!! -
TK-61164 Requesting ANH Stunt Centurion Status [SDS][183]
gazmosis replied to jariche's topic in Request Centurion Status
Hey Tomás! Thank you for your Centurion application!! Let's not delay any longer!! CRL and Centurion Application Requirements: All required photos have been posted. Your armor displays all the necessary requirements to qualify for Centurion. A well earned congratulations to you!! Other-Armor Assembly: This was just wonderful to look at. Thank you again for providing the assurance that your armor was built with butt joints instead of overlapping joints. SDS has historically been presented with overlapped joints so this programs requires us to be sure. Well done, good, Sir. Well done! -
TK31713 - Requesting ROTJ Centurion Status [CFO][182]
gazmosis replied to K@nne's topic in Request Centurion Status
Hello there, Christoph! Thank you for you application for RotJ Centurion. It's nice to see a little surge in these suits and they are getting better and better. Let's get to it!! CRL and EIB Application Requirements: All the required photos have been posted. Your armor contains all the necessary requirements needed to earn the Centurion badge. Congratulations!! Other-Armor Fit/Assembly: The only discussion that can be brought about here are your calf closures. You did well in fitting your calves because this feature didn't jump out at me during your EIB application. Nice catch, Tigresa!! Anyway, it caused me to start looking around. If the ANH/ESB troopers all had inward facing calf openings, why WOULDN'T RotJ?? Well, I guess it is common. I looked back and even Sskunky himself built one with them facing outward. Until the definitive answer surfaces, It will be allowed both ways. Congratulations, Sir!!! Well done.