gazmosis
-
Posts
4,043 -
Joined
-
Last visited
-
Days Won
23
Content Type
Profiles
Forums
Gallery
Articles
Media Demo
Everything posted by gazmosis
-
You will definitely be happy with Paul's kits!!!
-
 The anovos plastic is actually a bit off white color. It is slightly different than the RS plastic which is whiter. It is closer to the off white TM 1.5. The 2.5 is VERY white and shiny.
 -
TK ANH Stormtrooper Helmet Kit 1:1 Screen Accurate
gazmosis replied to kevin926's topic in eBay Armor
There is not enough bad things that can be said about the quality of his armor. It is stolen molds and the plastic is SO bad I cannot understand how anyone could buy from him. Sadly, I speak from experience in seeing other members' purchases first hand -
Very nice work. Seems like a fairly straight forward kit to assemble. His print setting need a little tweeking, but a decent kit. I would re-paint the charging handle to the same color as the body because they were never that bright silver, but overall nice work
-
lucnak's ANH Stunt Build (ATA)
gazmosis replied to lucnak's topic in Build Threads Requireing Maintenance
save that great ab button paint job by not installing those plates until last -
Successfully completed scratch built T-tracks
gazmosis replied to kevin926's topic in ANH BlasTech E11
Great work! -
ANOVOS ab button plate trimmed too much - salvageable?
gazmosis replied to vettereddie's topic in ANH (Stunt and Hero)
You can sand the edges flat and try to glue the flat flashing that should have been left. -
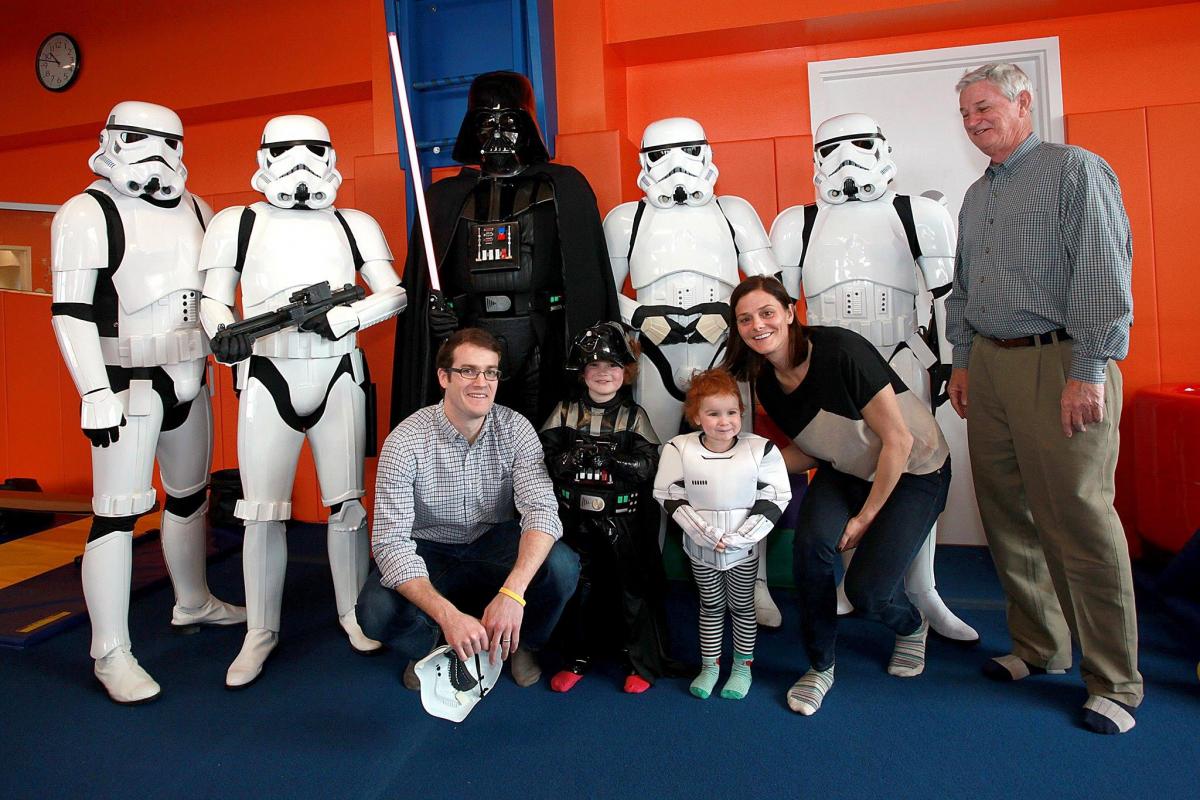
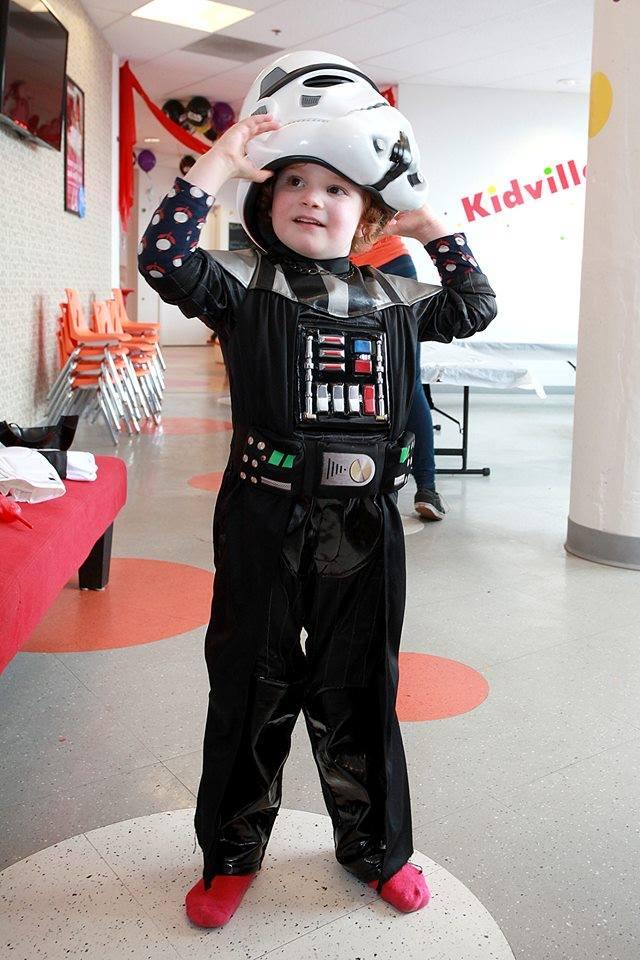
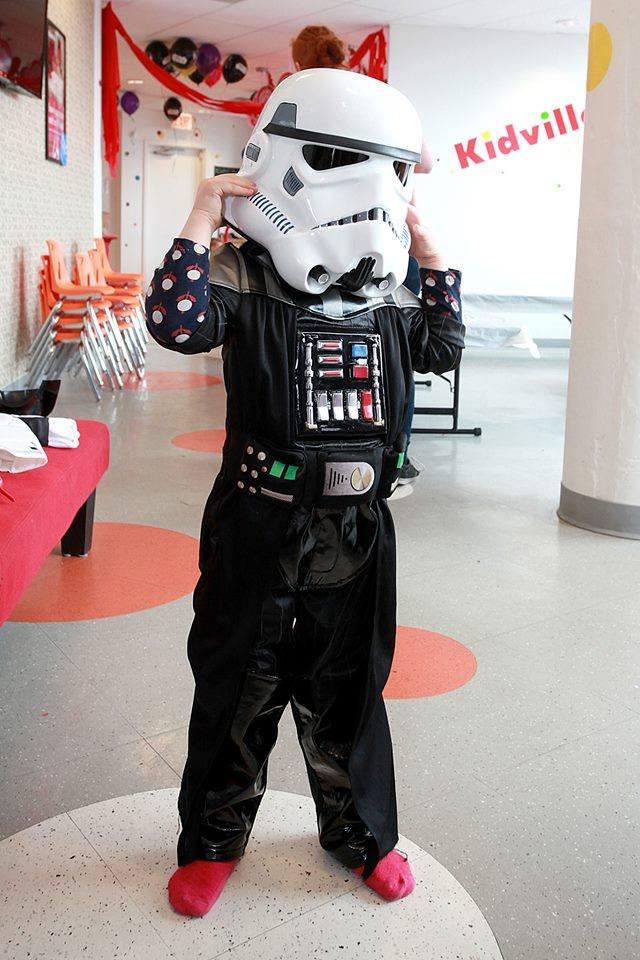
Another huge shout out needs to be given to Andy (Wildcardz) for donating a helmet stand for Mimi to keep and display her helmet. Thank you Andy!!!
-
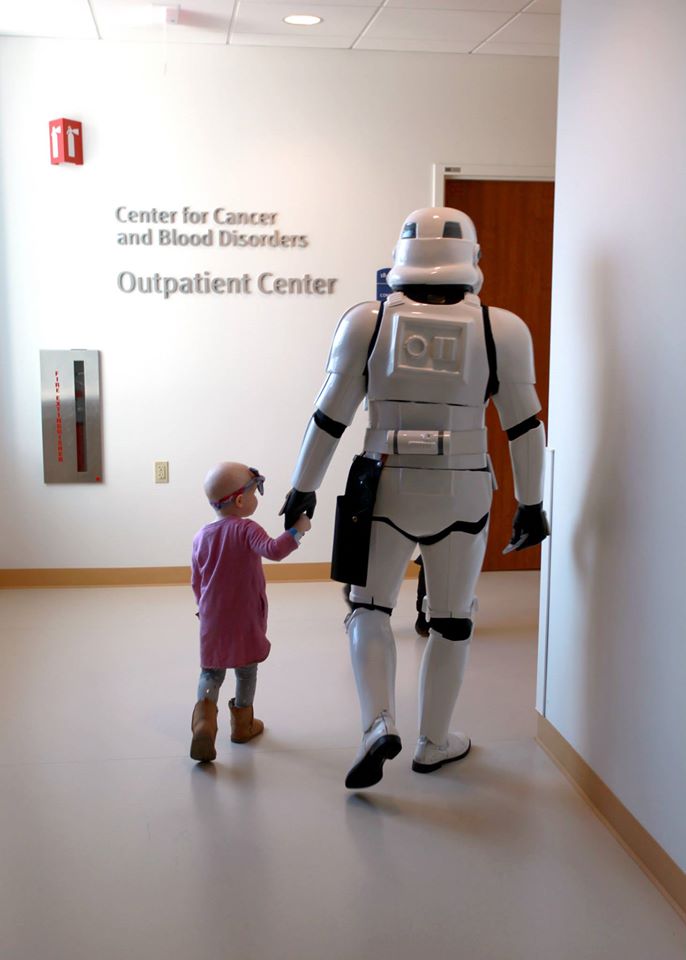
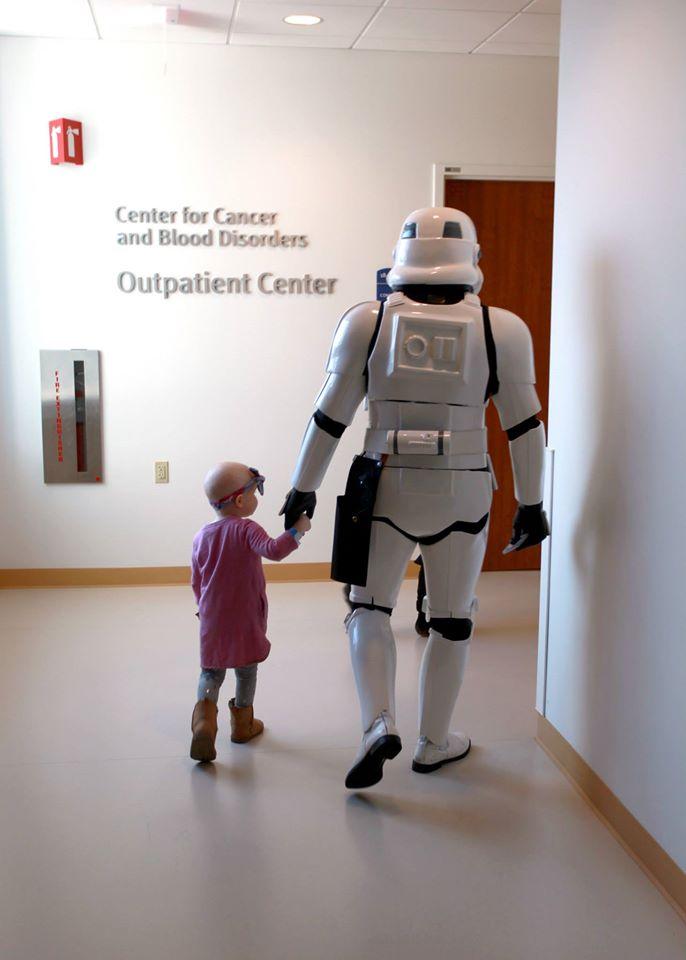
Everyone remembers the heartwarming story of Mimi. She is the little sweetheart who underwent cancer treatment and was visited by members of the Midwest Garrison. She wanted to go for a walk and took the hand of our own TK 41551 (Eric Werner) and the rest is 501st history This past weekend, the Midwest Garrison with help from hospital administrators and Mimi's parents, were reunited and payed a visit to our little trooper. It was a total surprise to her so to see her in a Vader suit was a surprise to the troopers!! A HUGE shout out to Walt at Walt's Trooper Factory for donating her birthday present: his incredible kid's helmet with the upgraded molds. I built it with extra love for her her. She will treasure it forever!

- 30 replies
-
- 22
-

-
a few Anovos fit issues/questions
gazmosis replied to Perotis's topic in Assembly, Mods, and Painting
YOur back plate seems up high. Keep in mind that your back plate and the kidney plate will be resting together. Like this: Your chest position looks correct. Yes the helmet is hitting it a bit but that is just due to your body shape. Super thin troopers have the chest plate that lays much flatter against them creating more room between the chest and helmet
-
Makes me drool!!!
-
welshchris77's Anovos build
gazmosis replied to welshchris77's topic in Build Threads Requireing Maintenance
Boy you're tall! -
Thank you guys.
-
No holster
-
I didn't take a before pic but if you search the 8000 other pics of the Anovos helmet, it looked like those. Yes, Jason. I have a few under my belt.
-
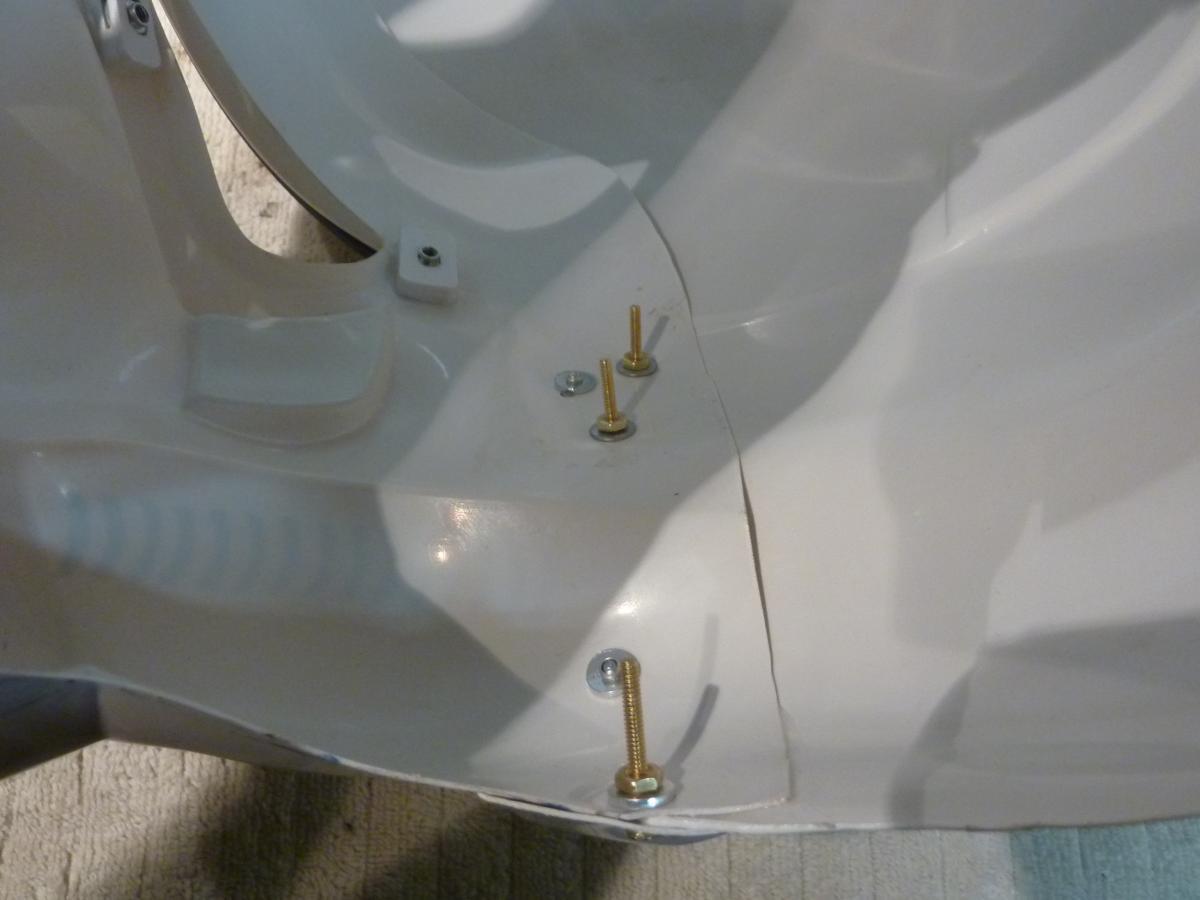
I just trimmed of the majority of the flashing.
-

-
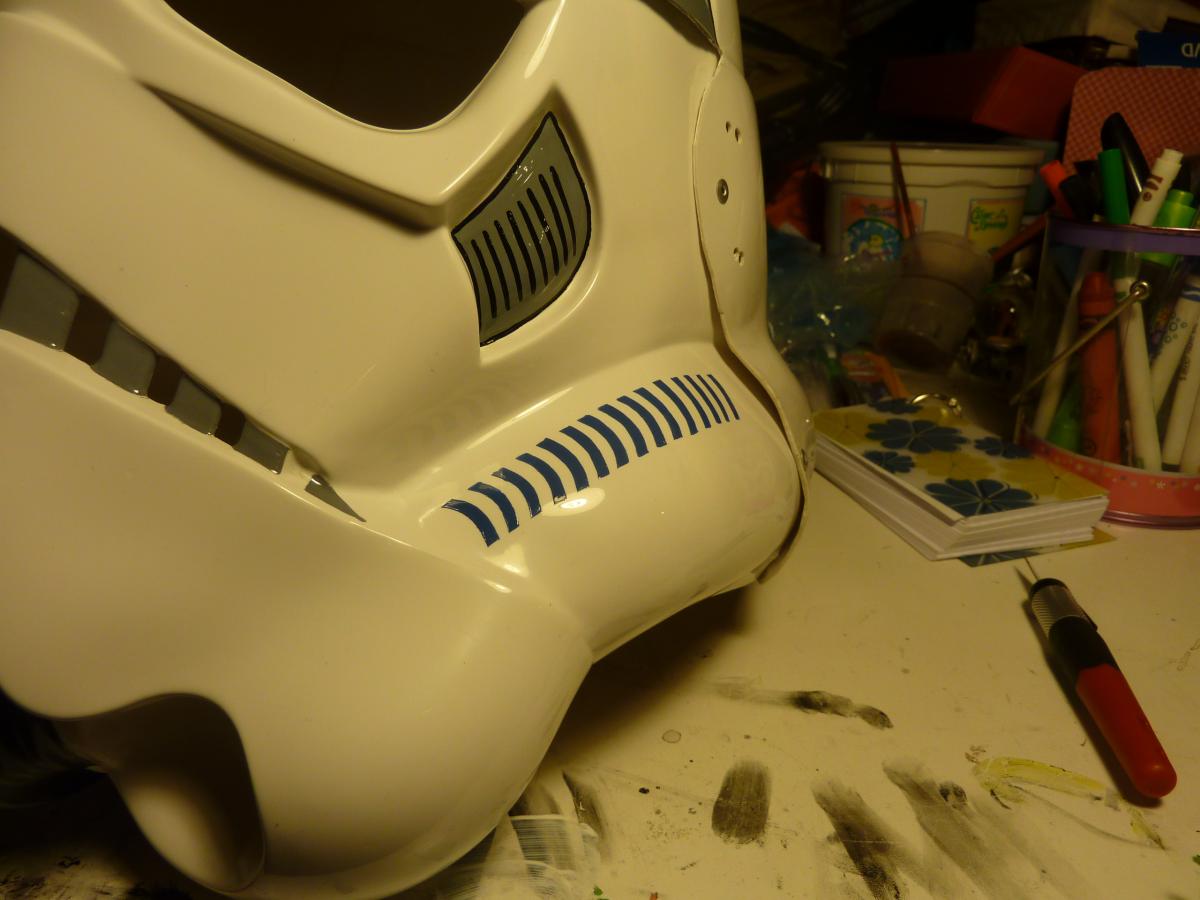
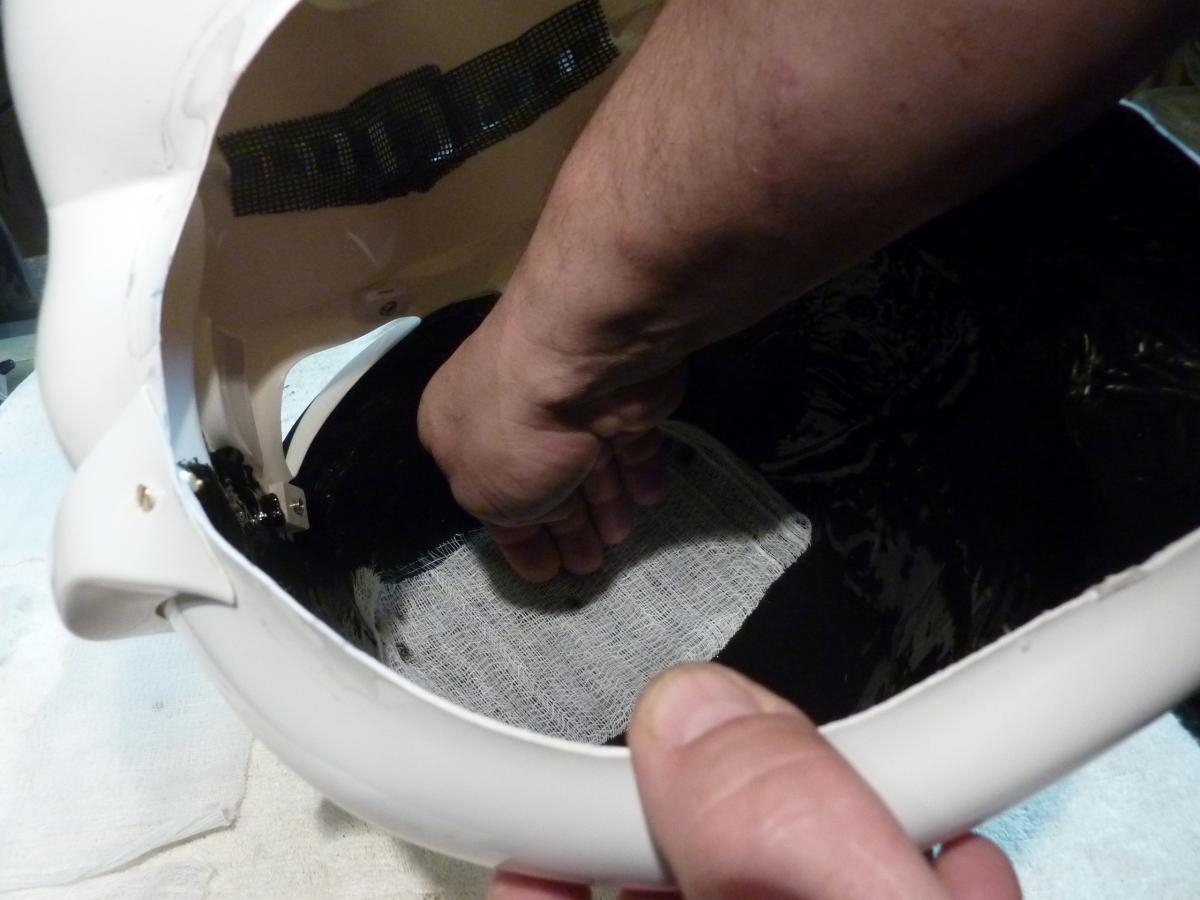
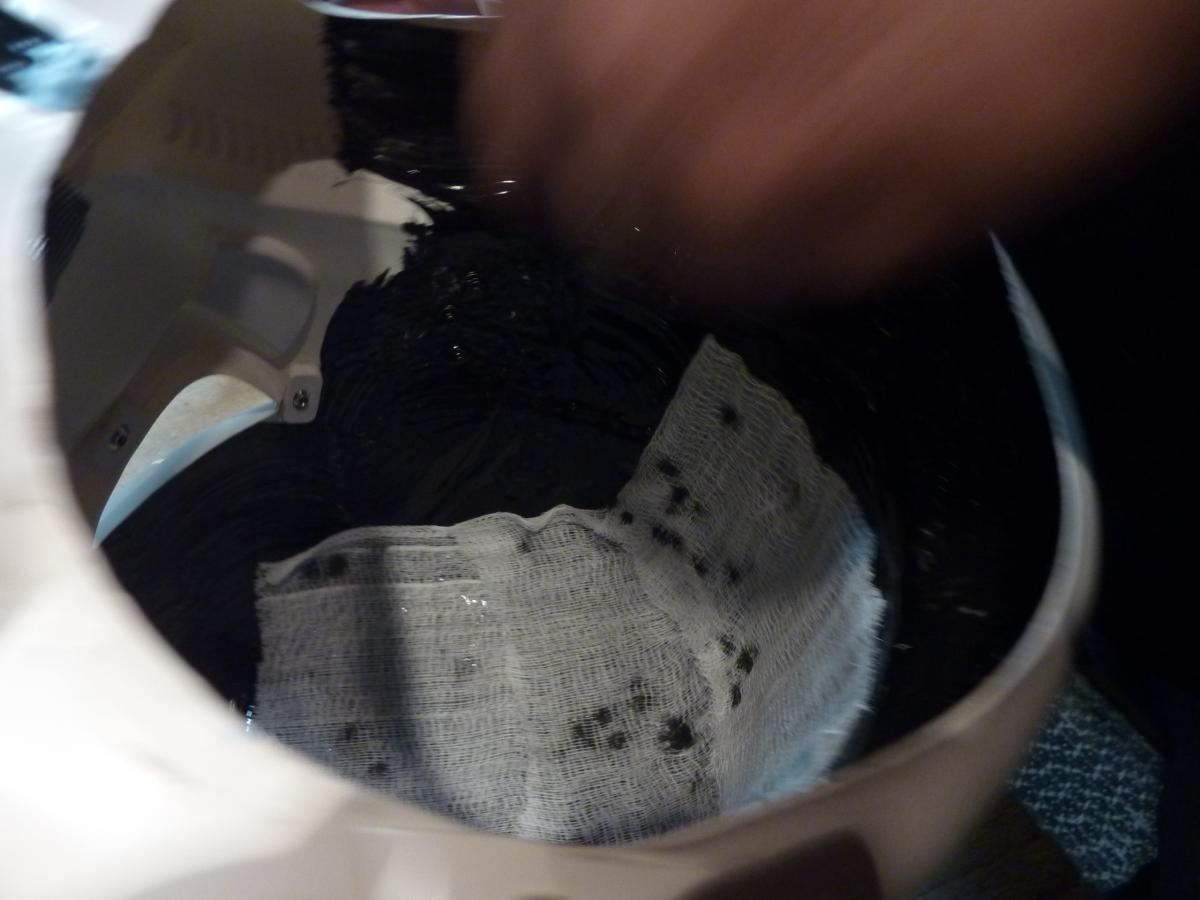
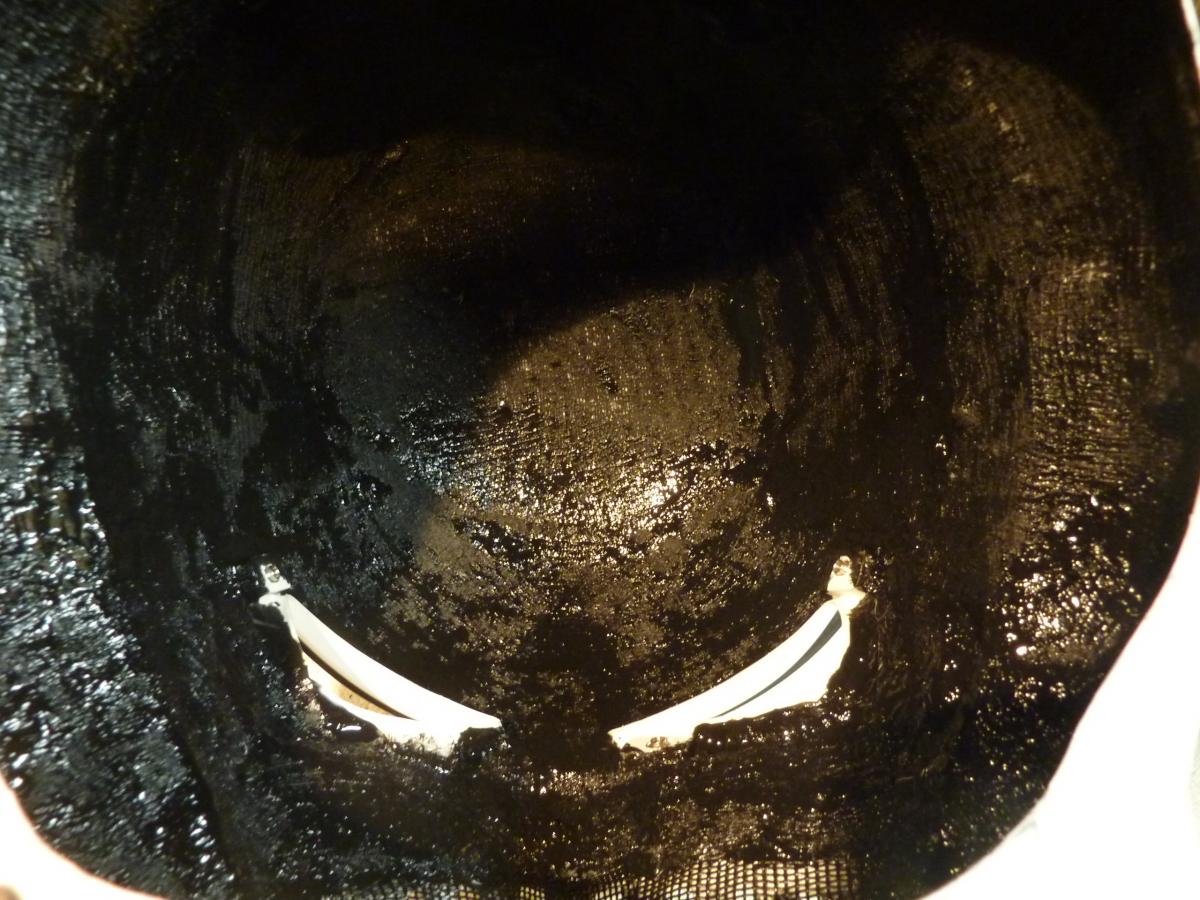
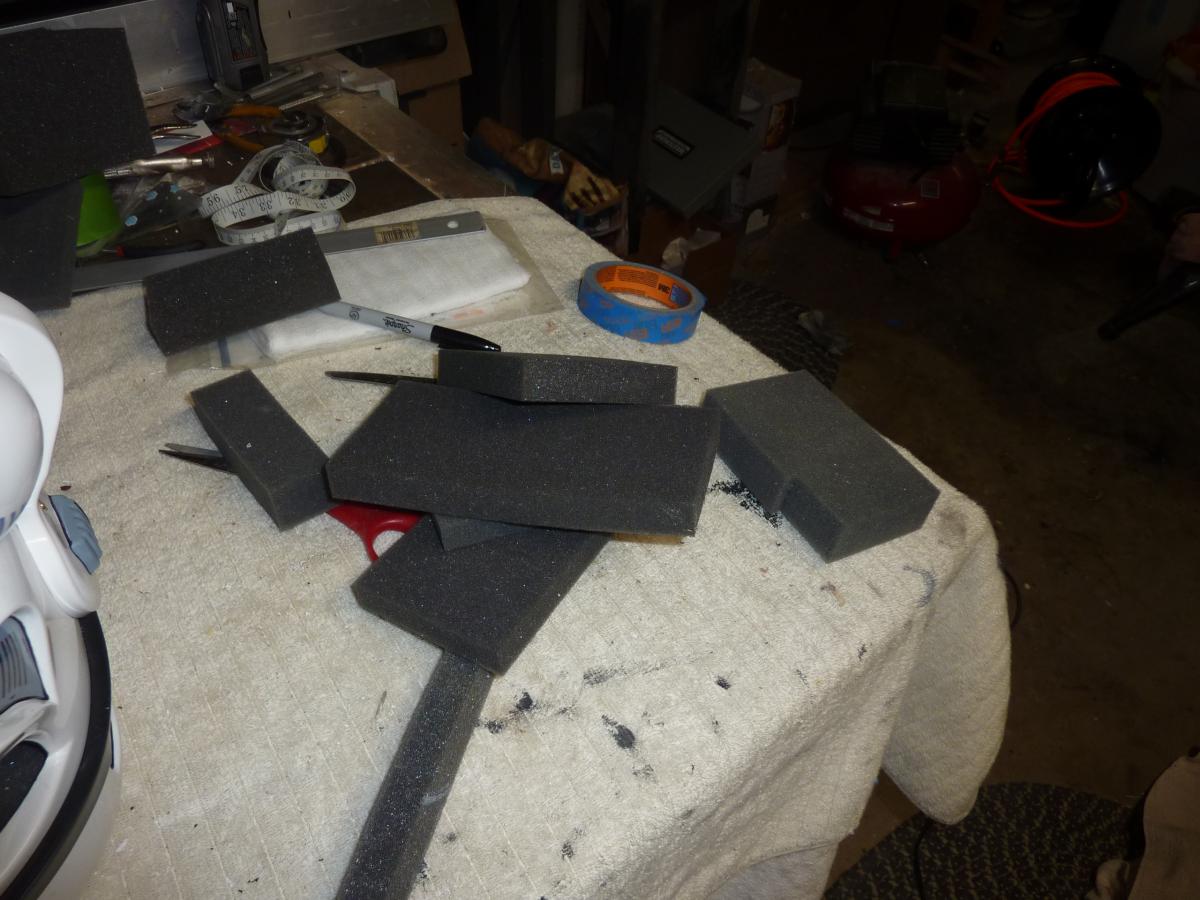
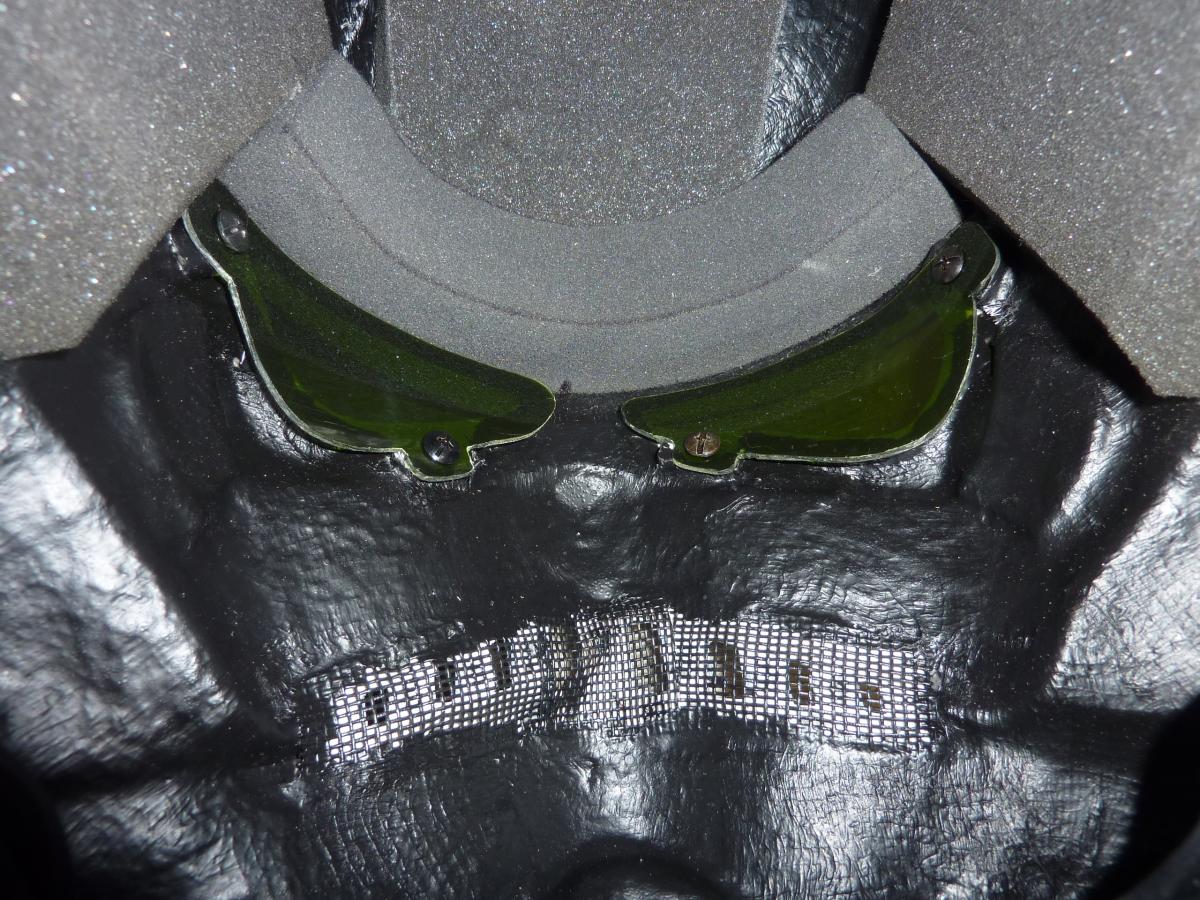
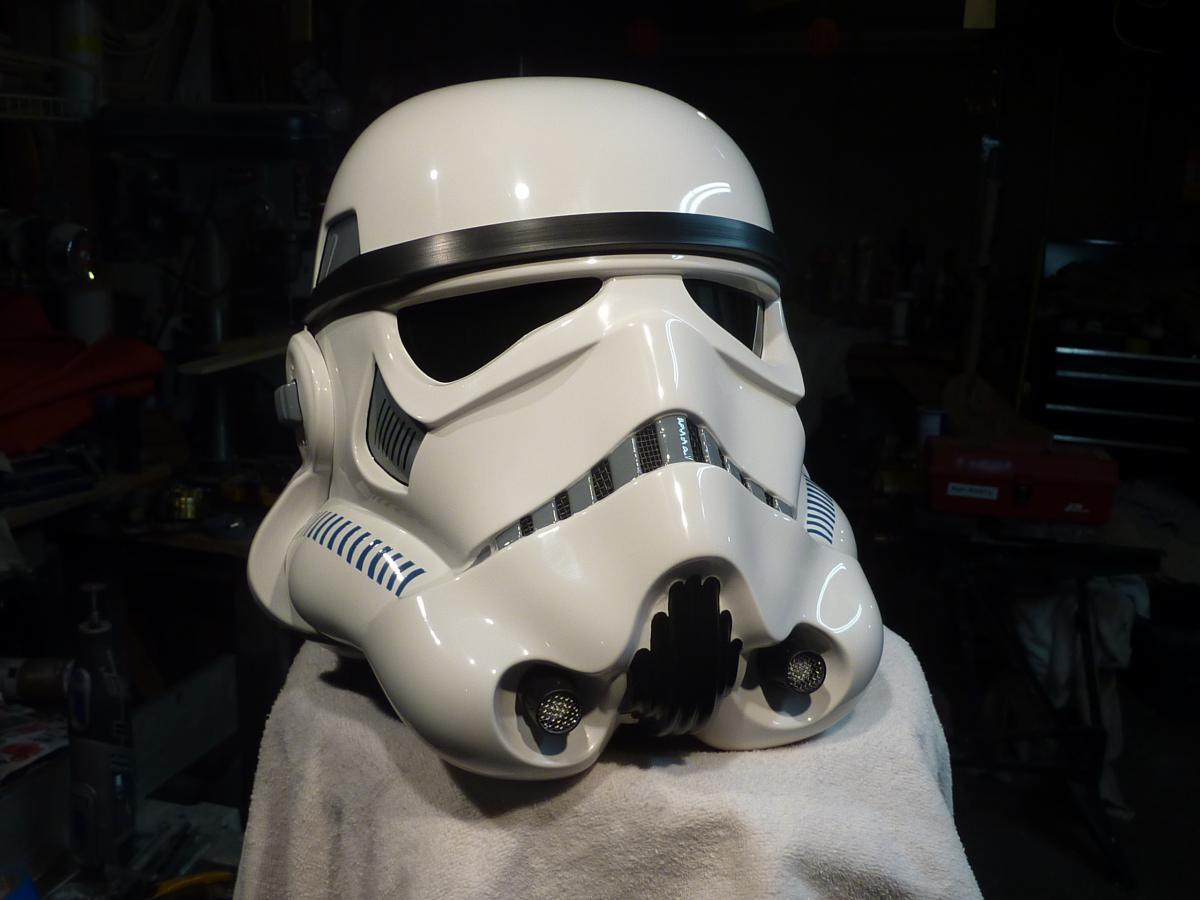
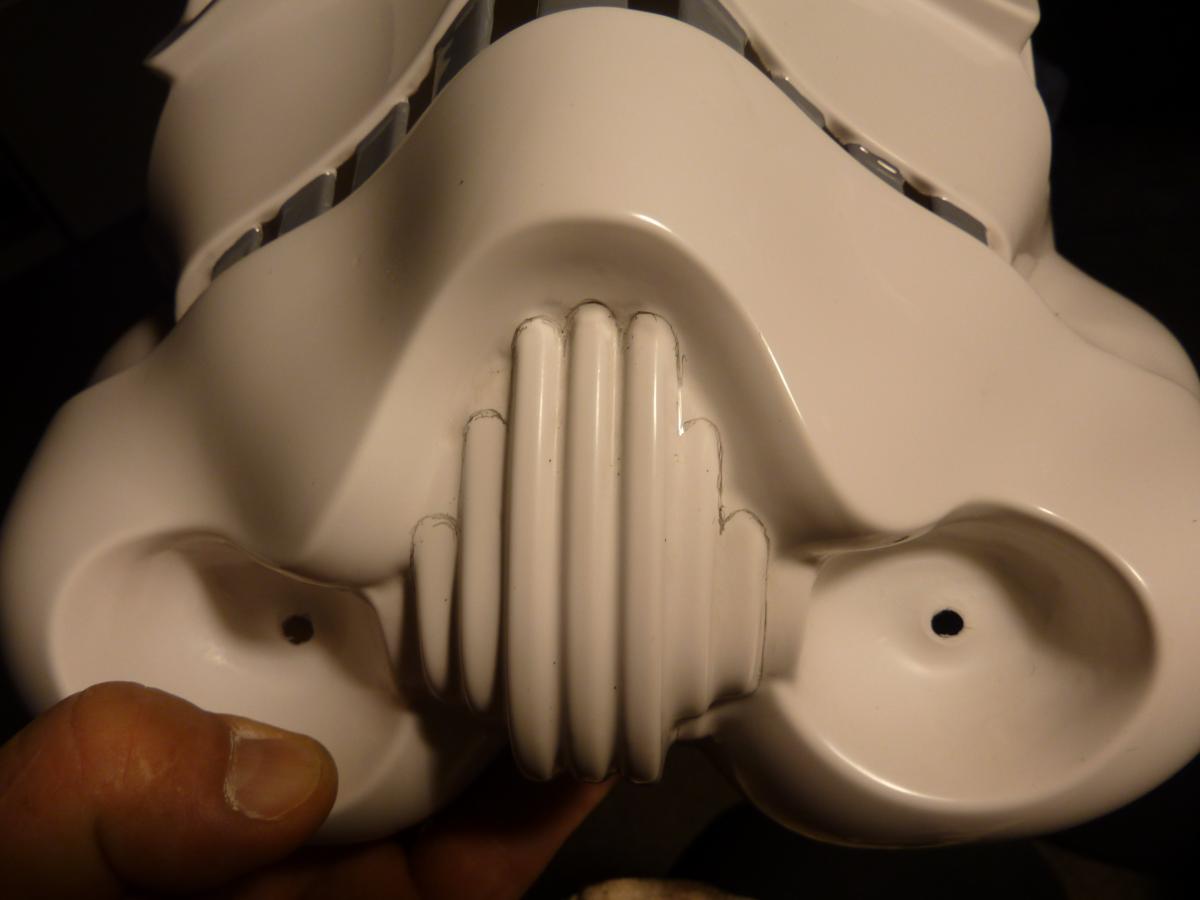
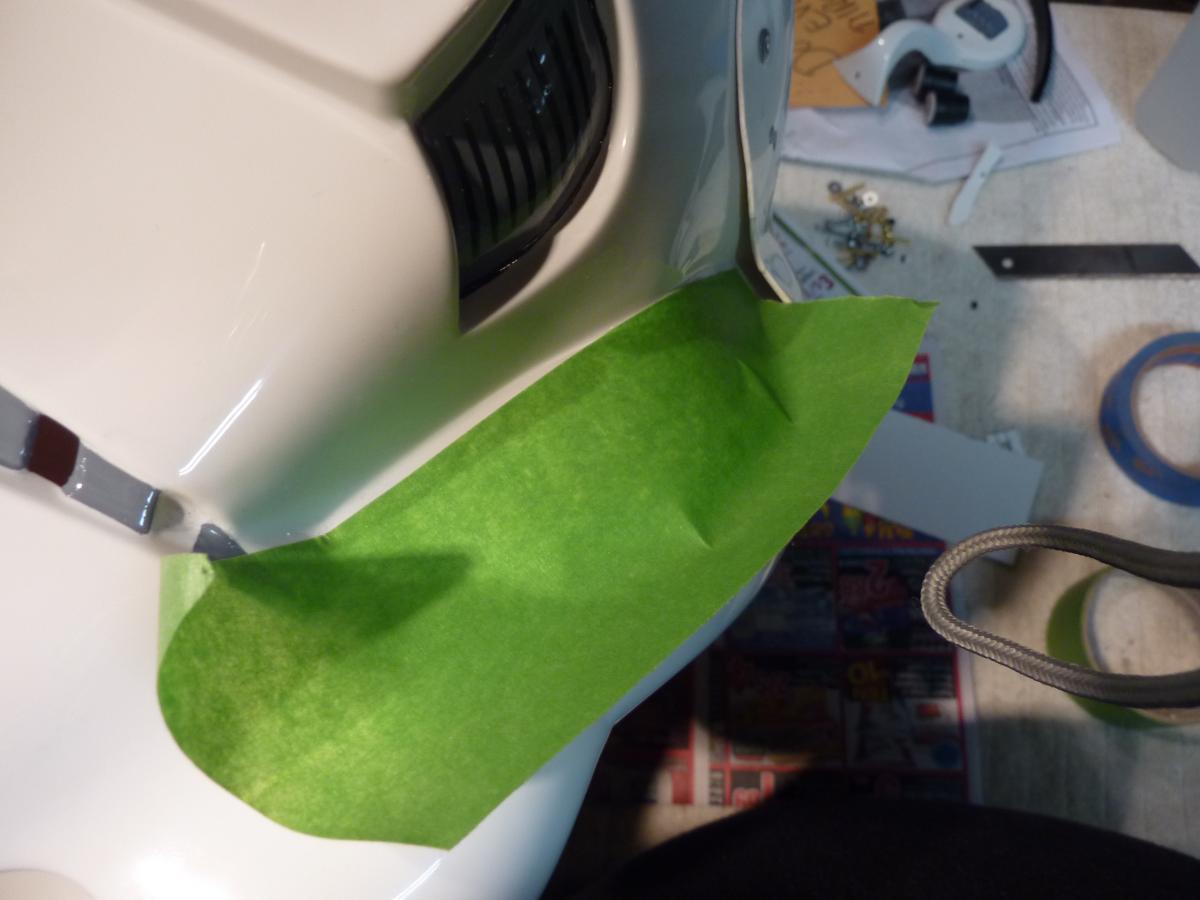
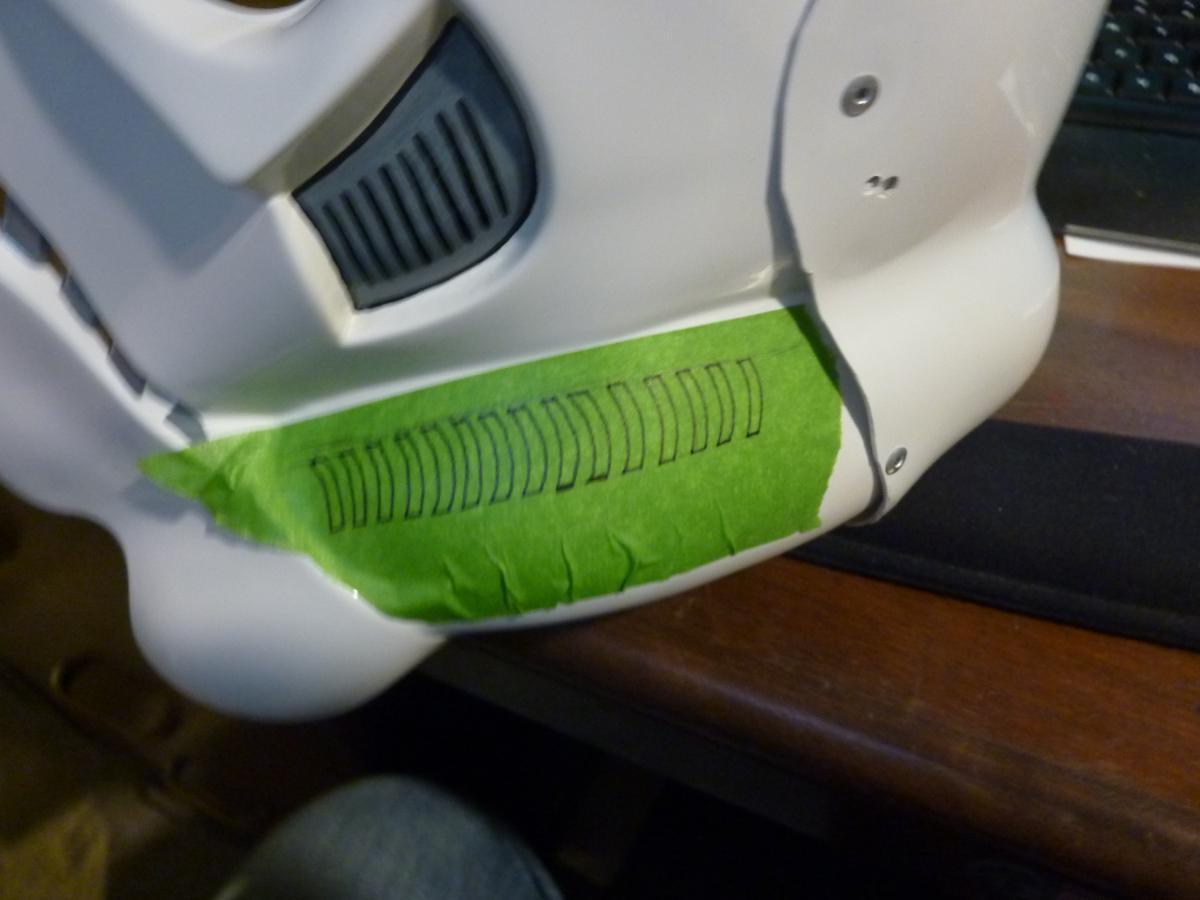
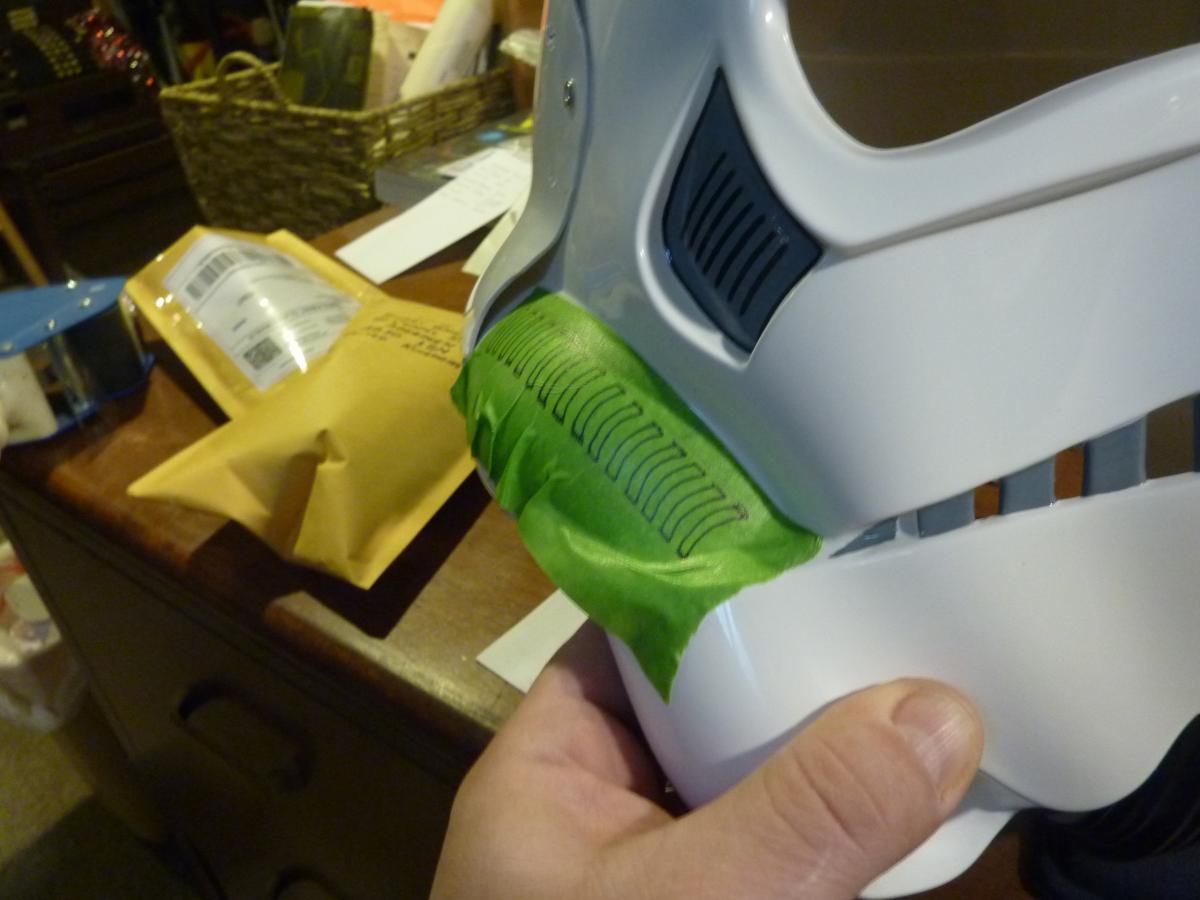
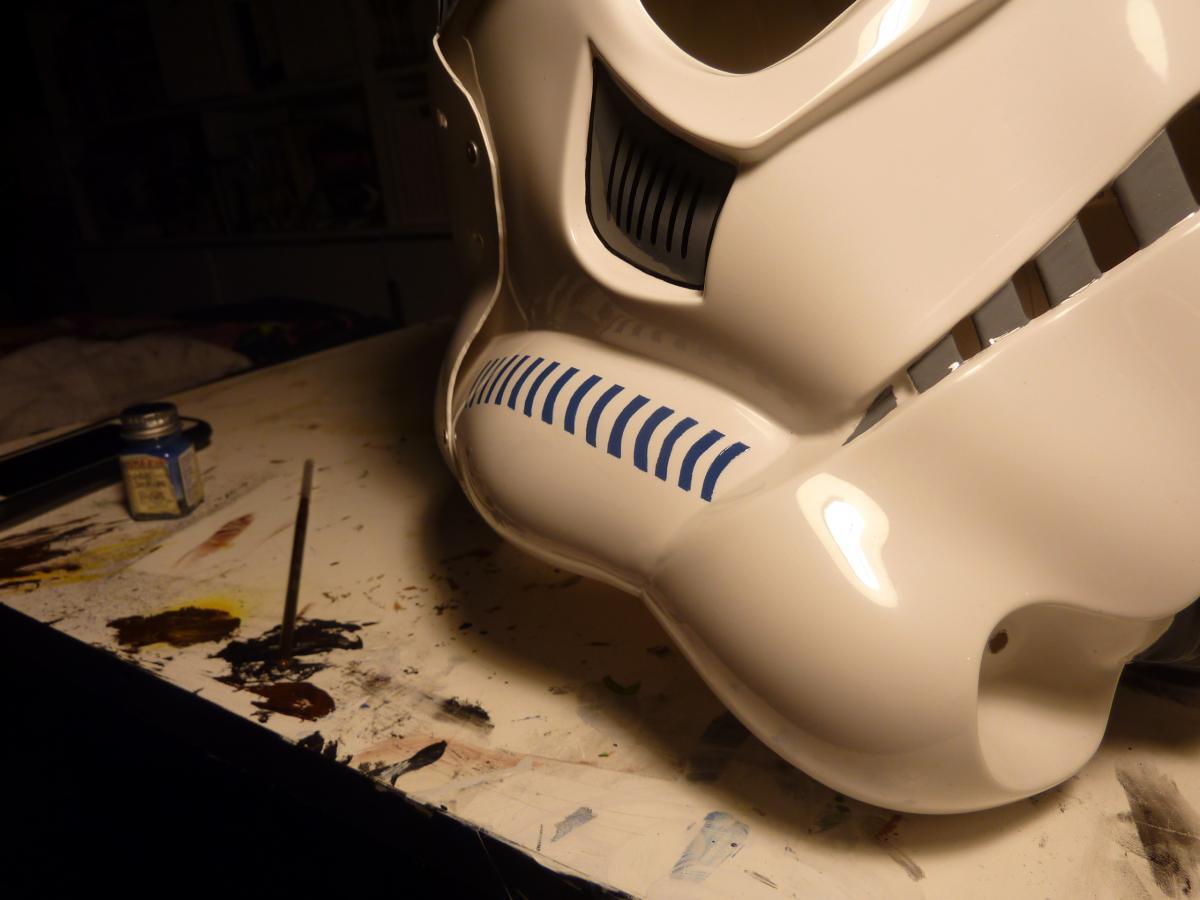
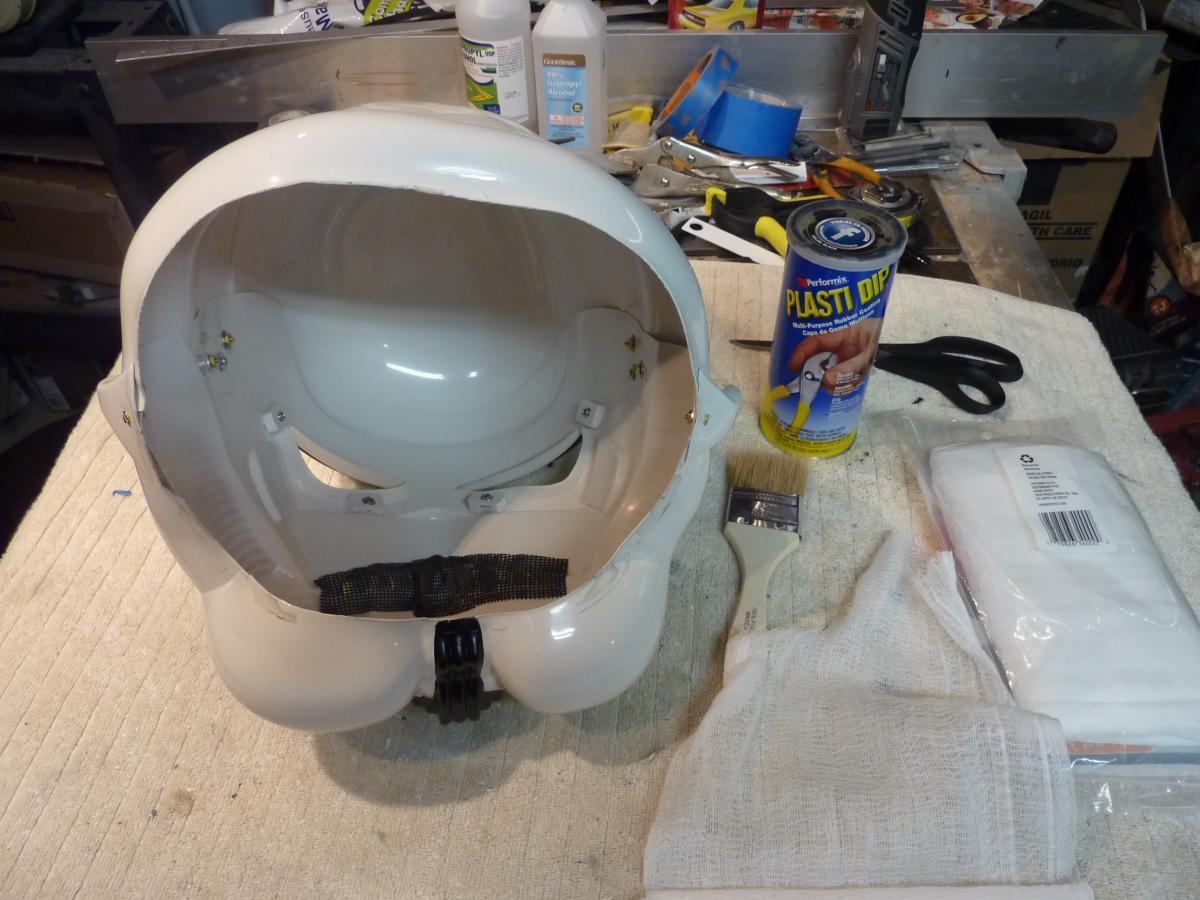
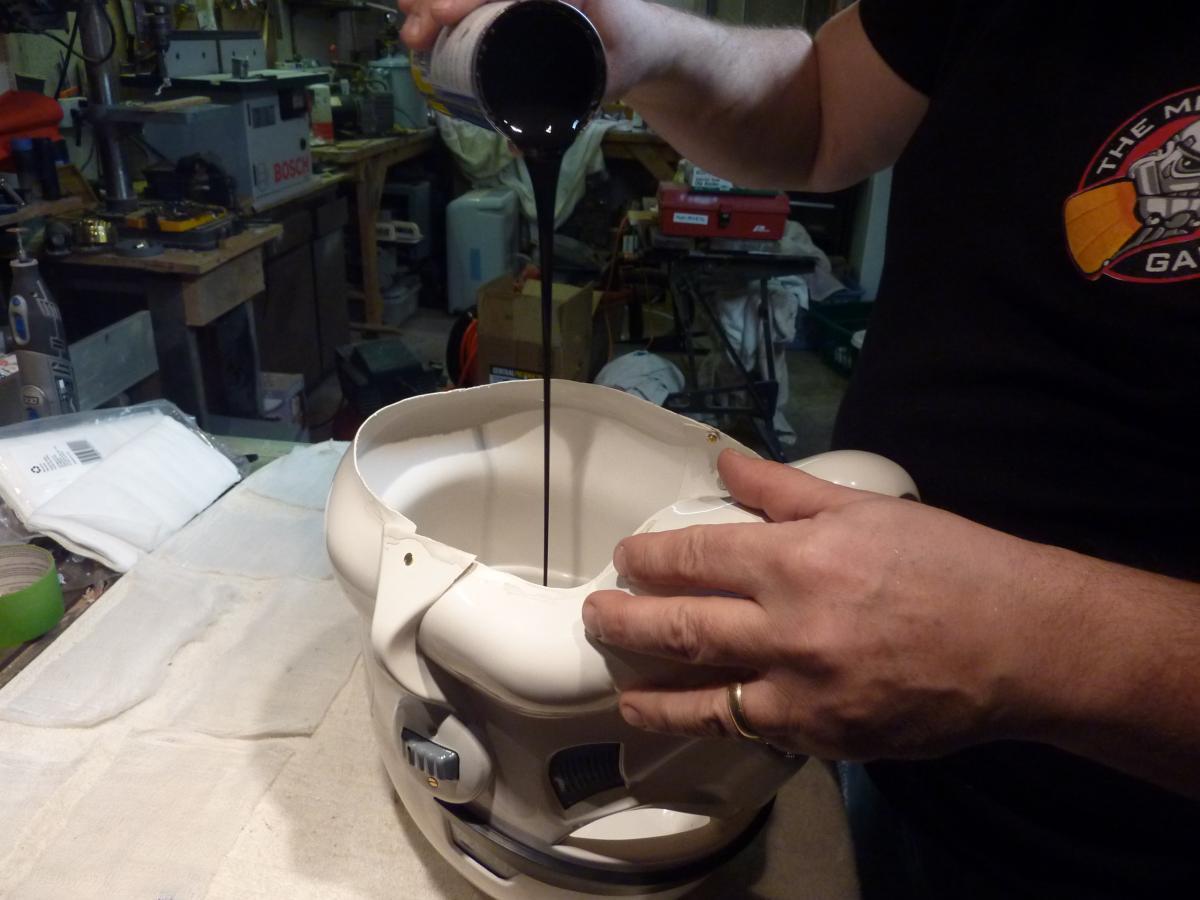
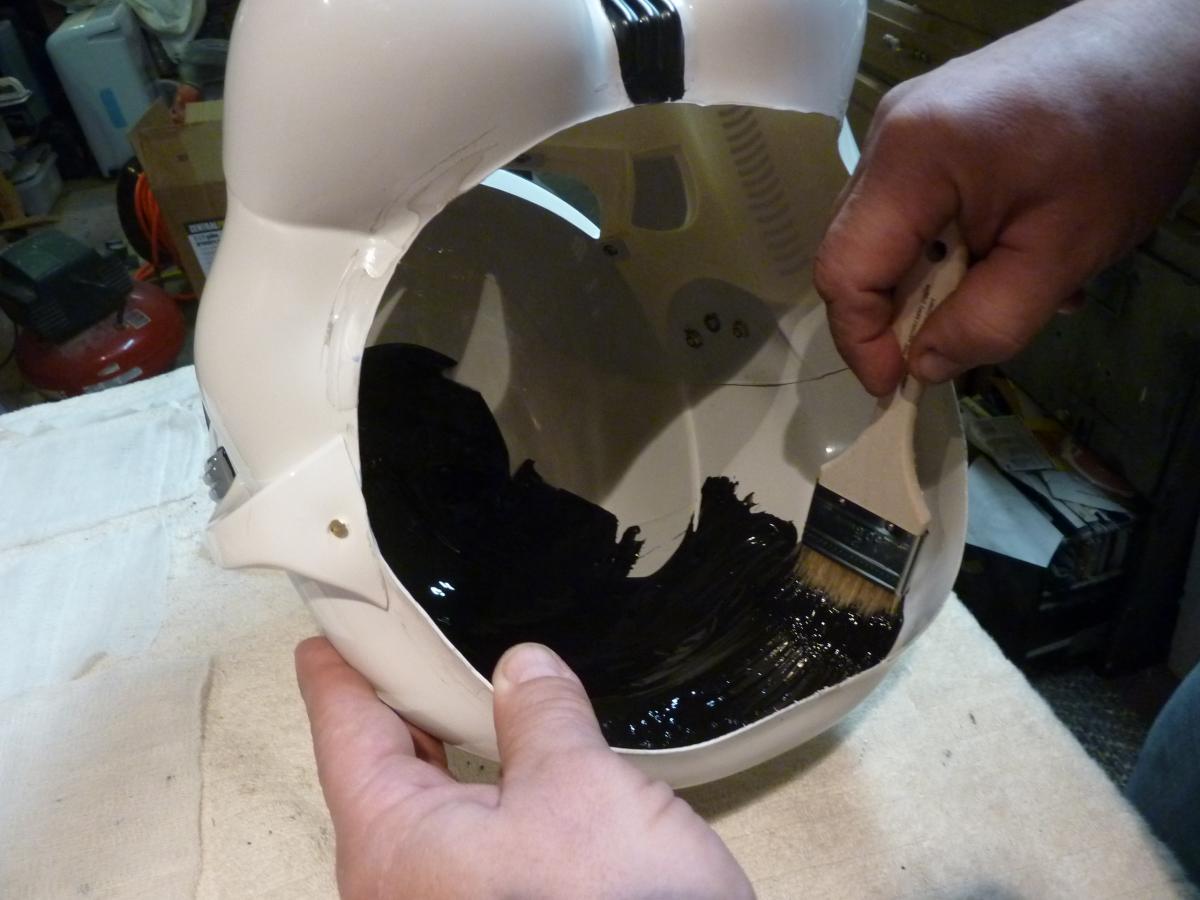
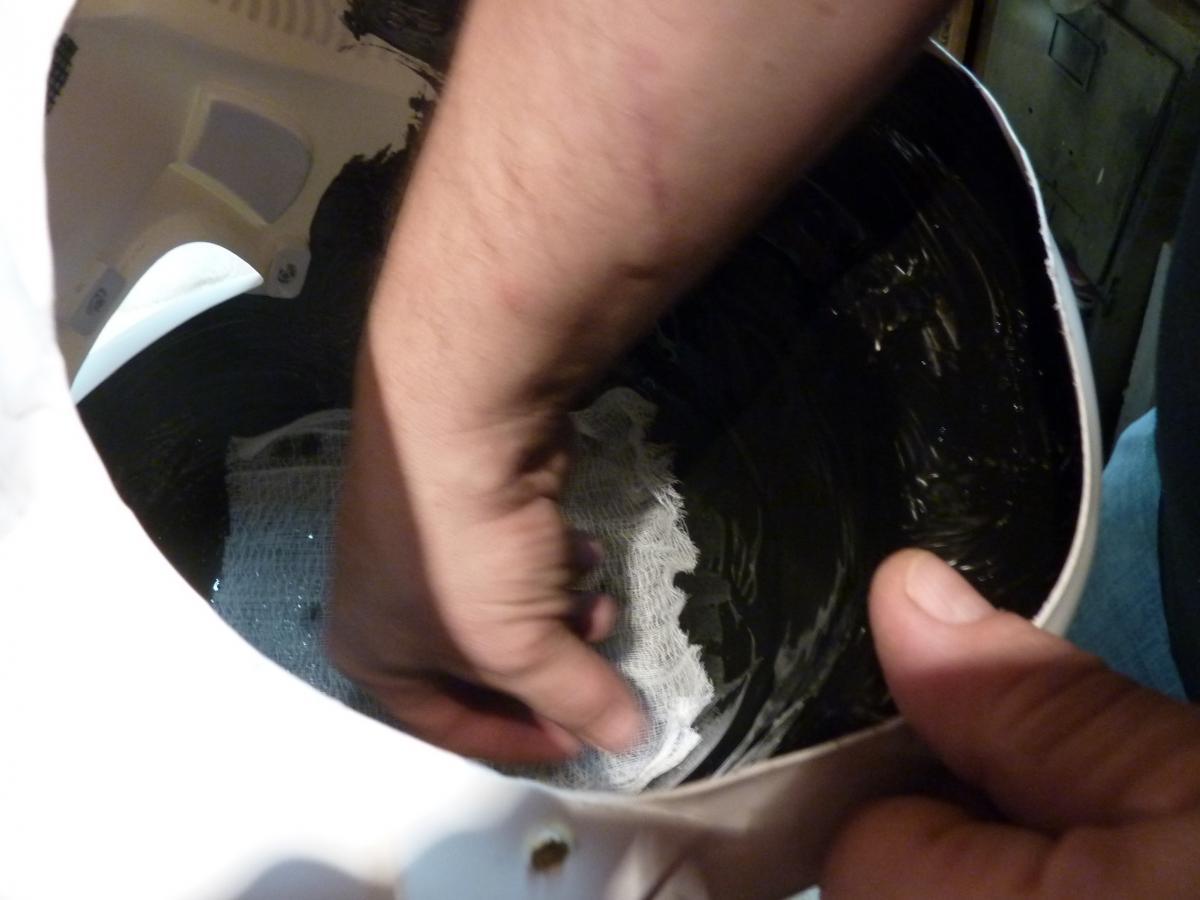
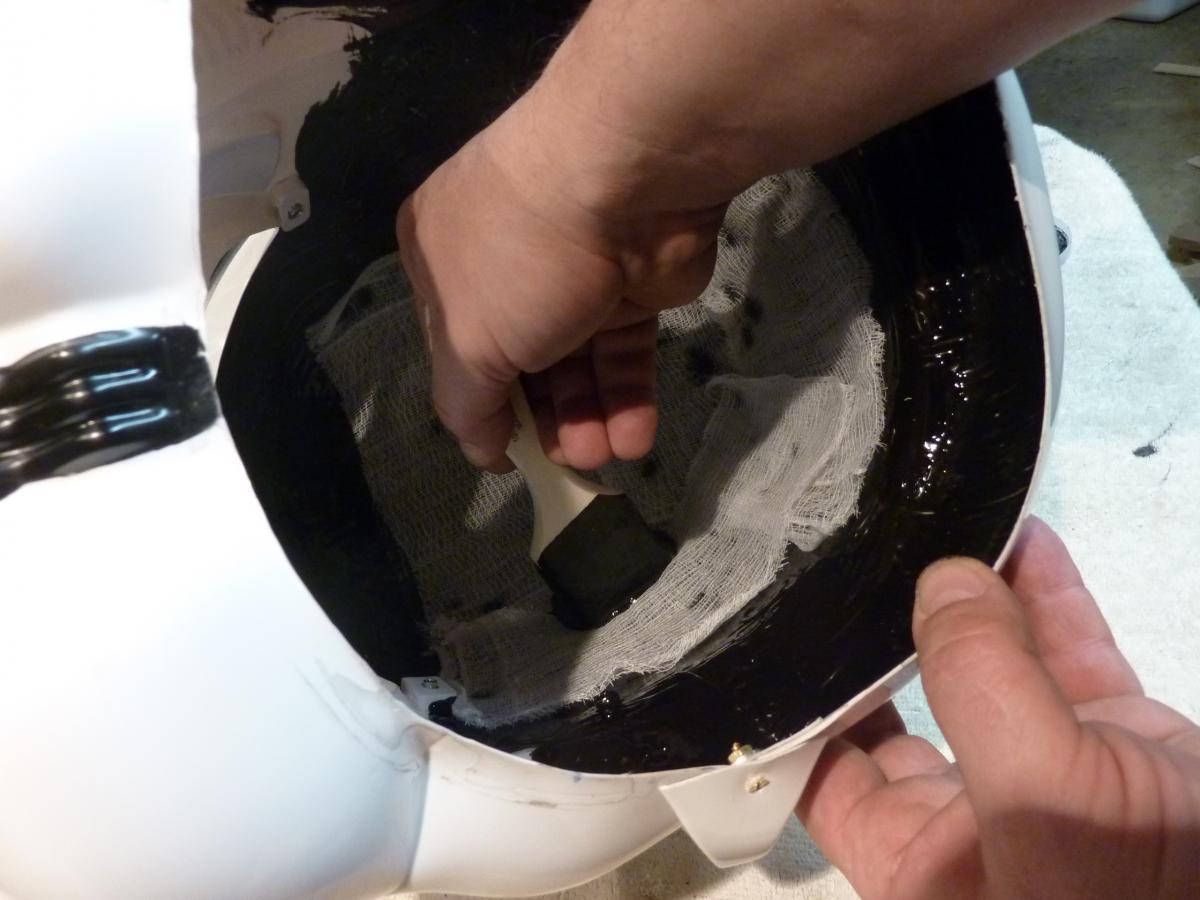
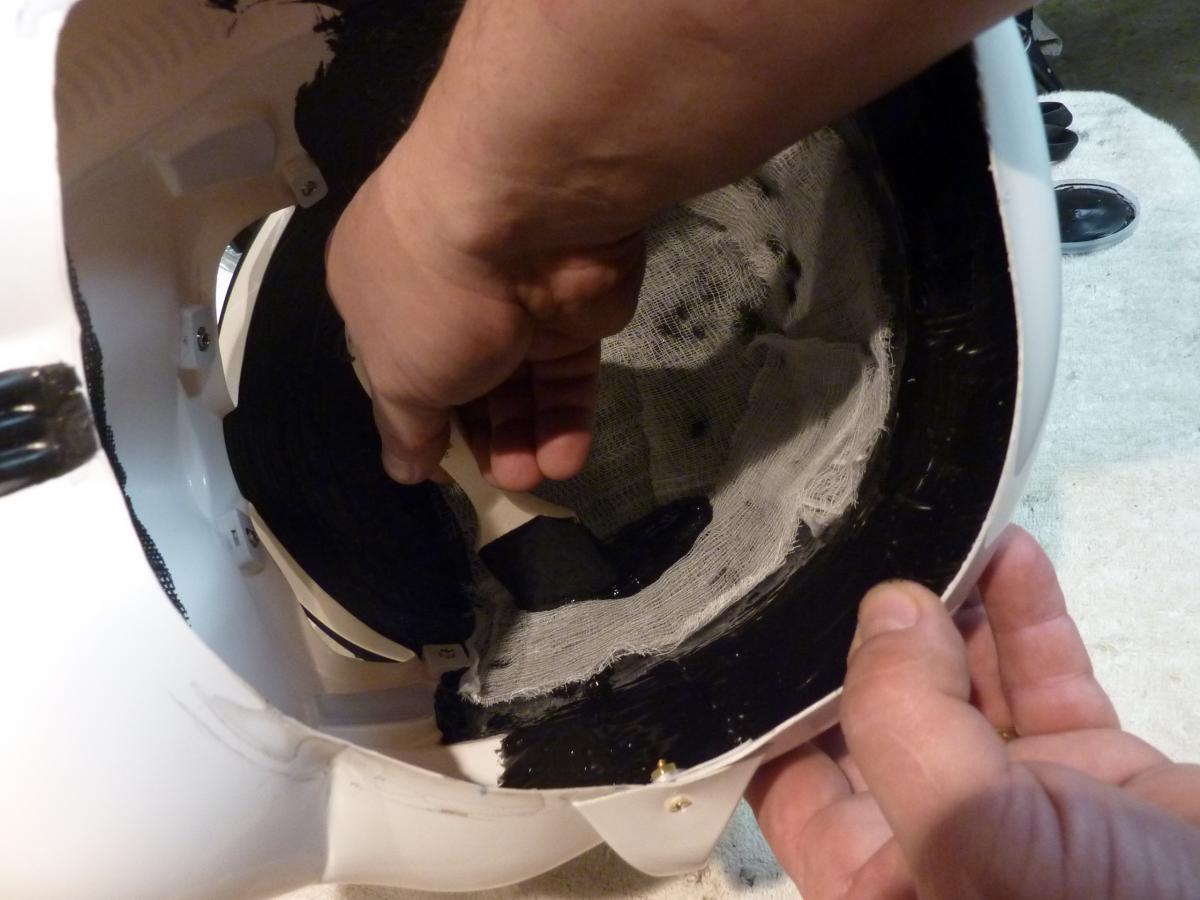
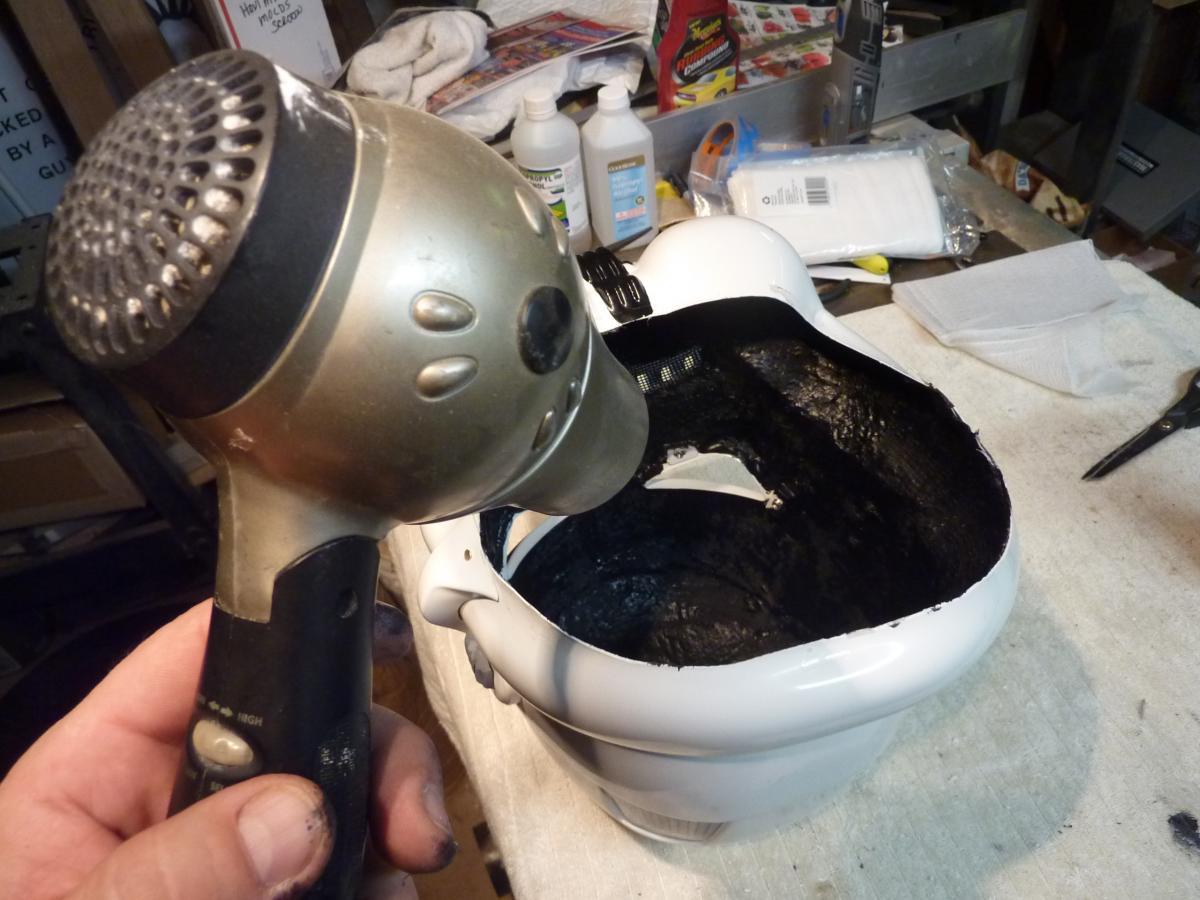
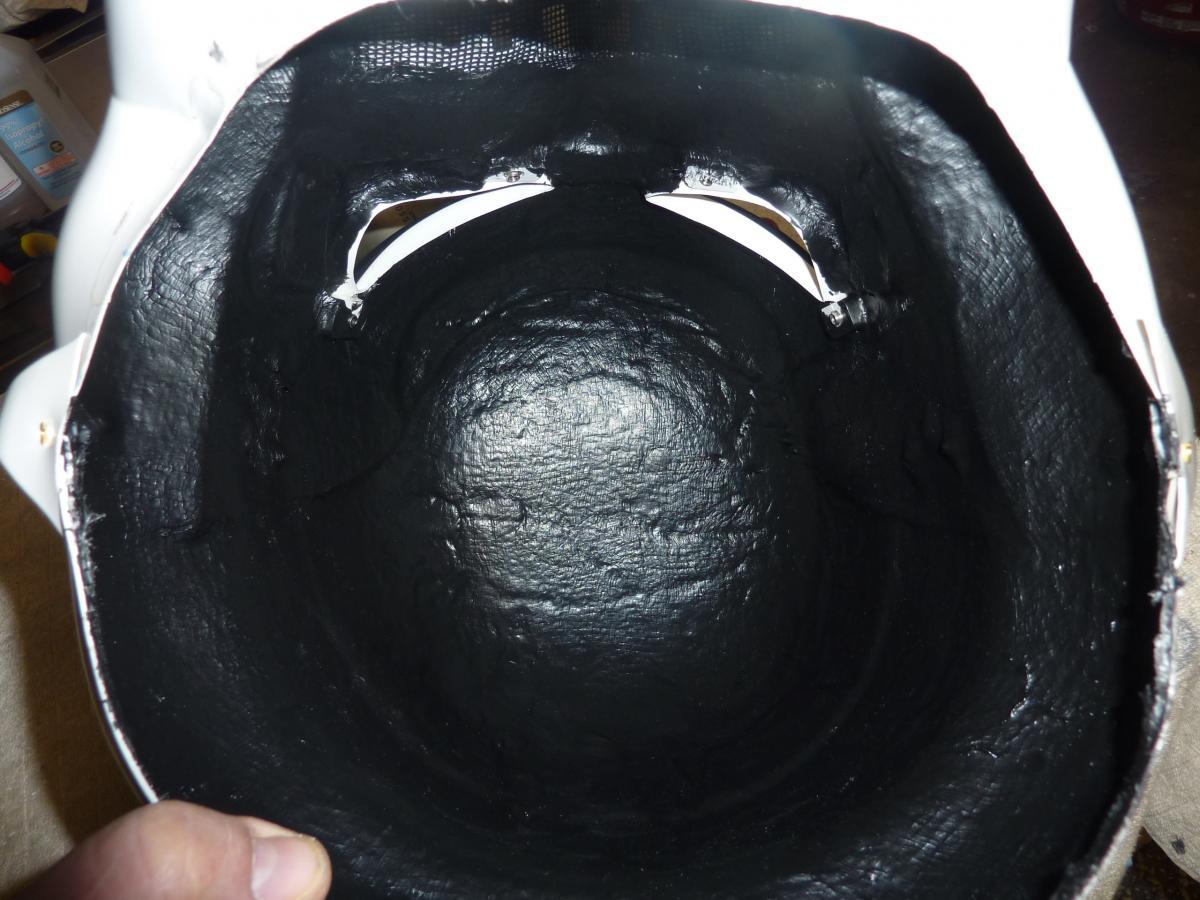
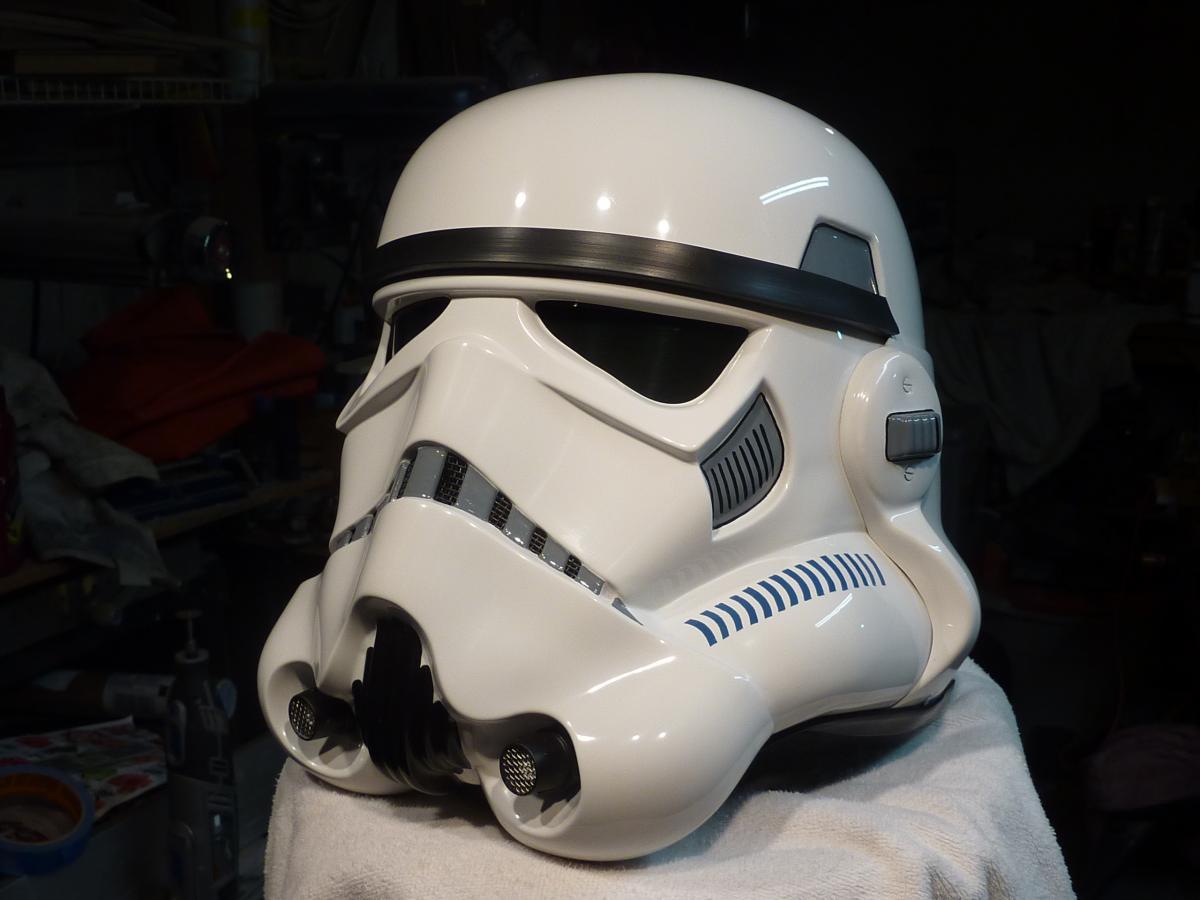
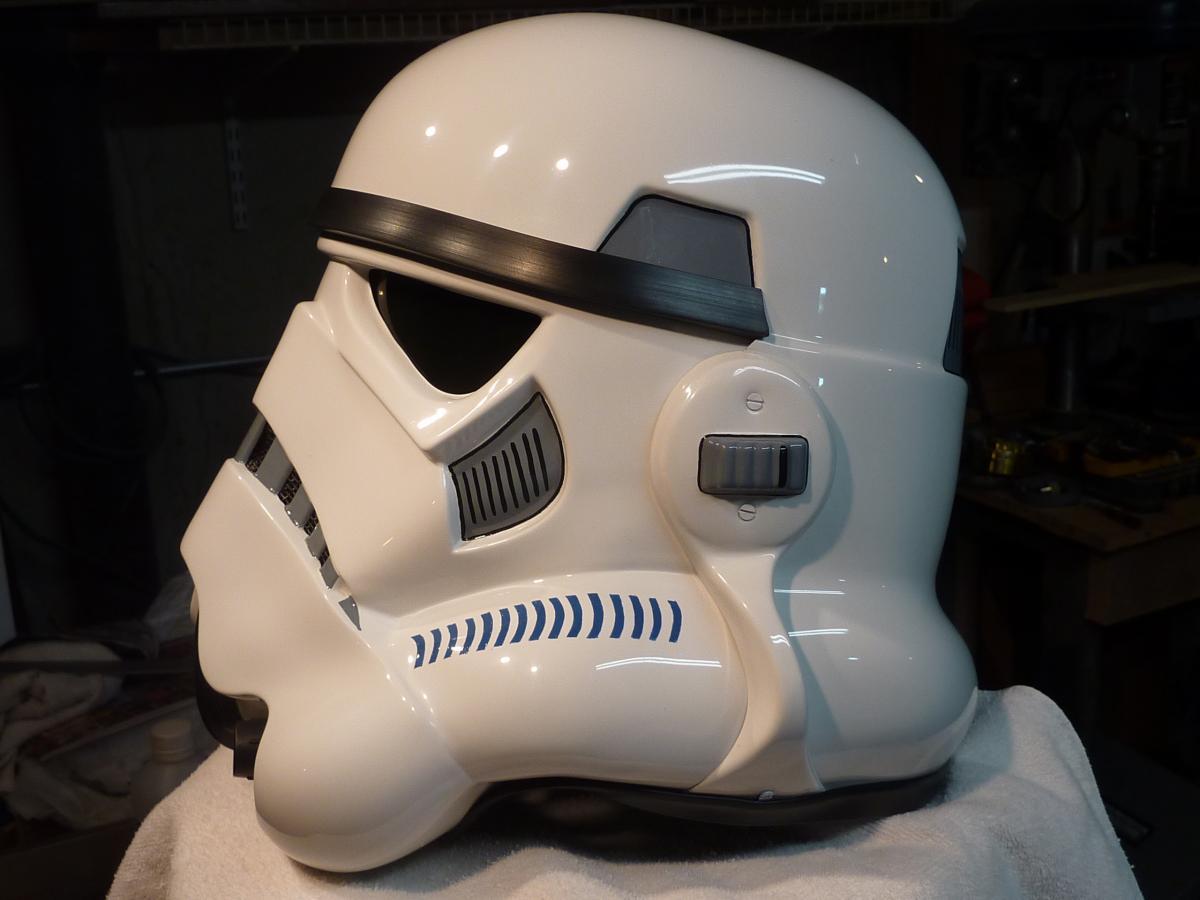
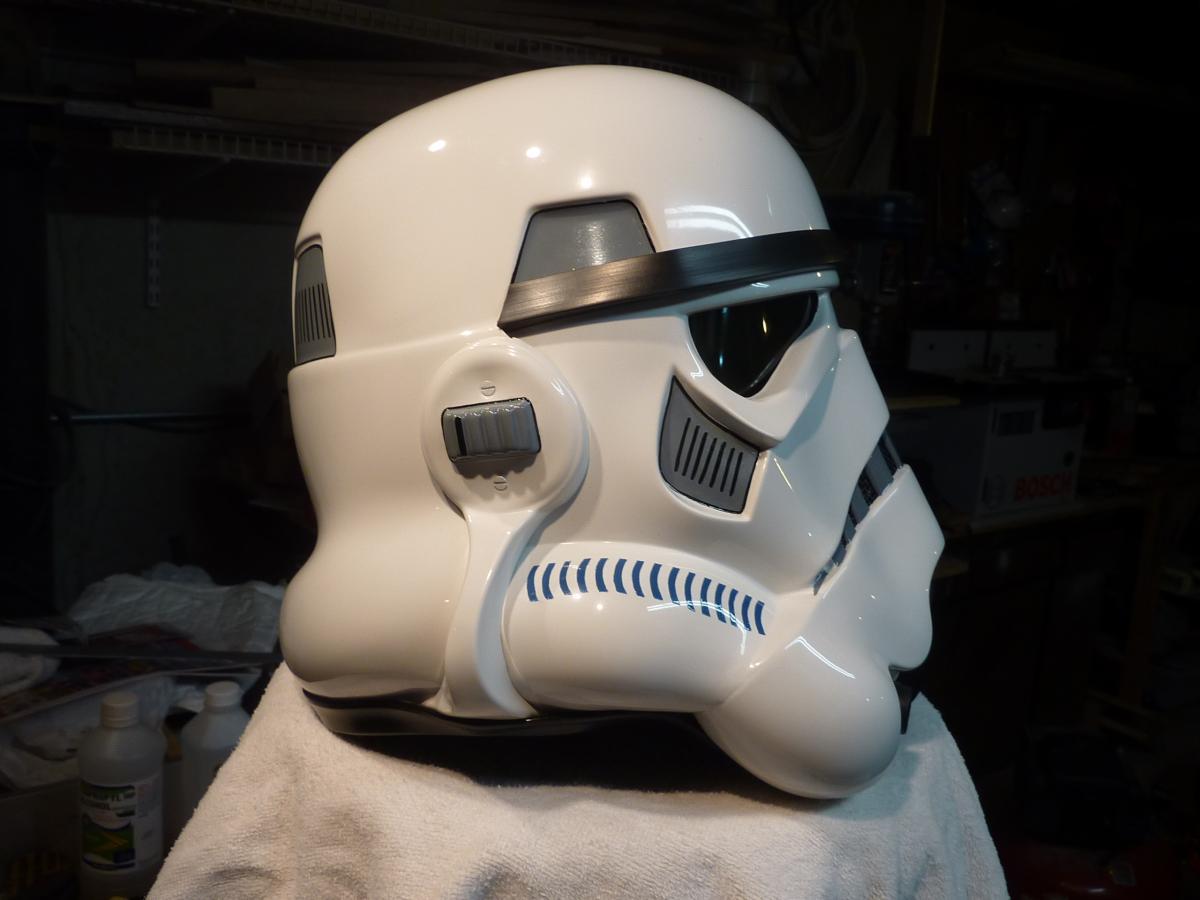
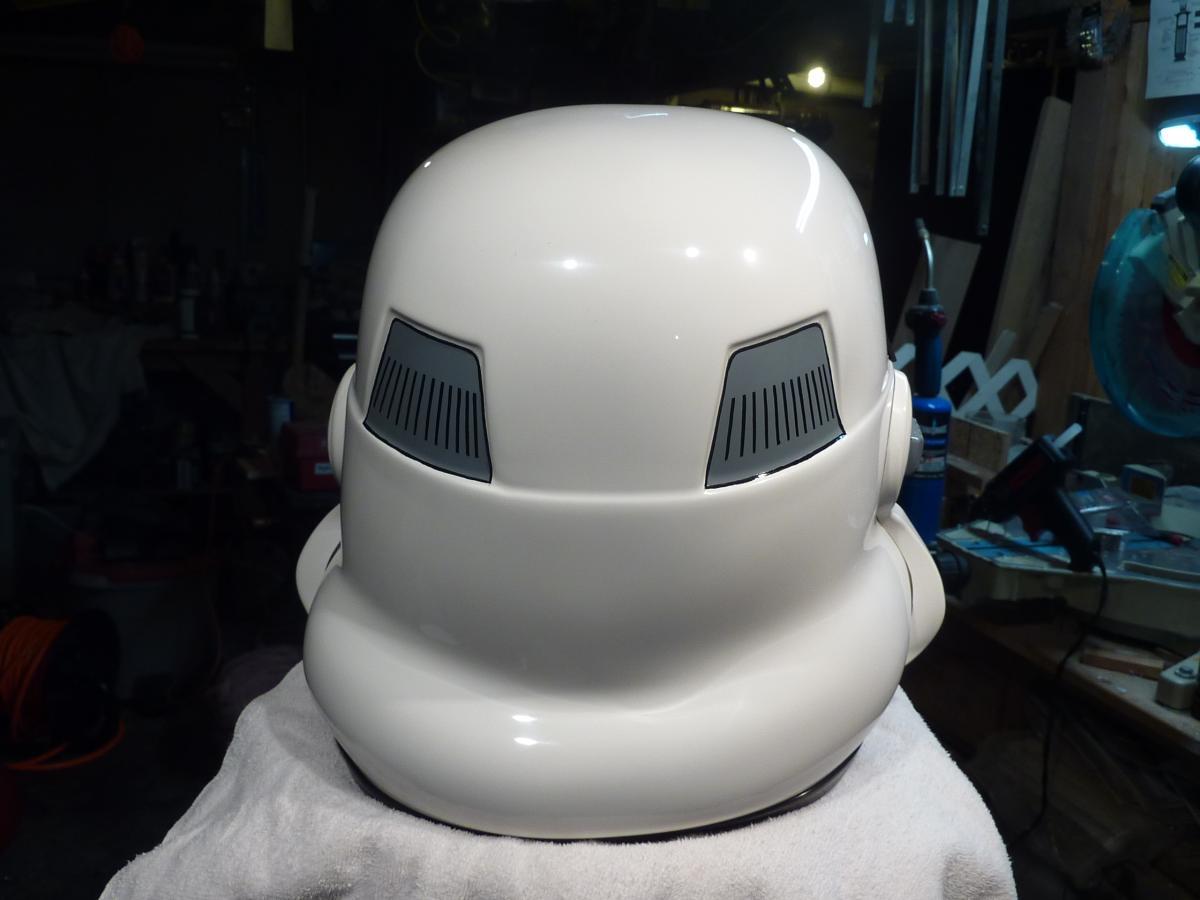
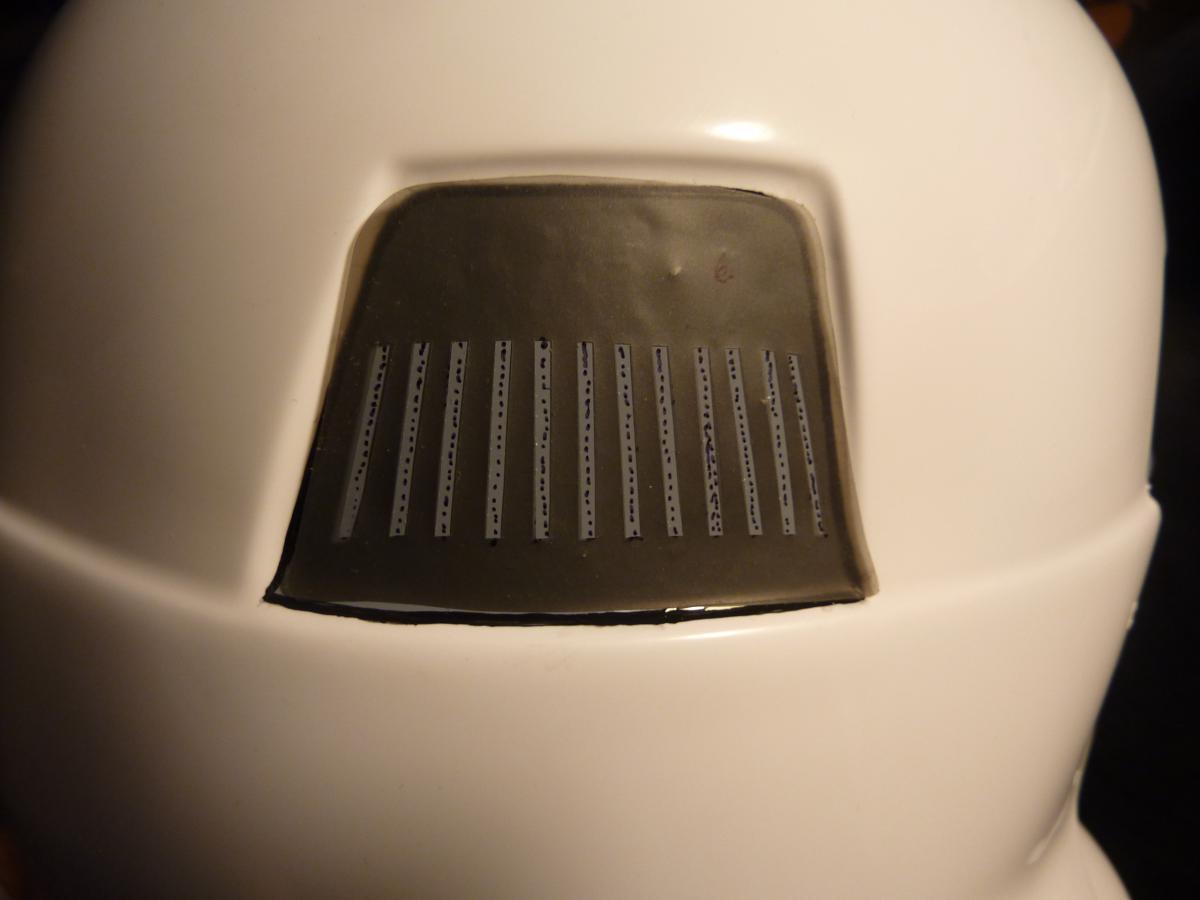
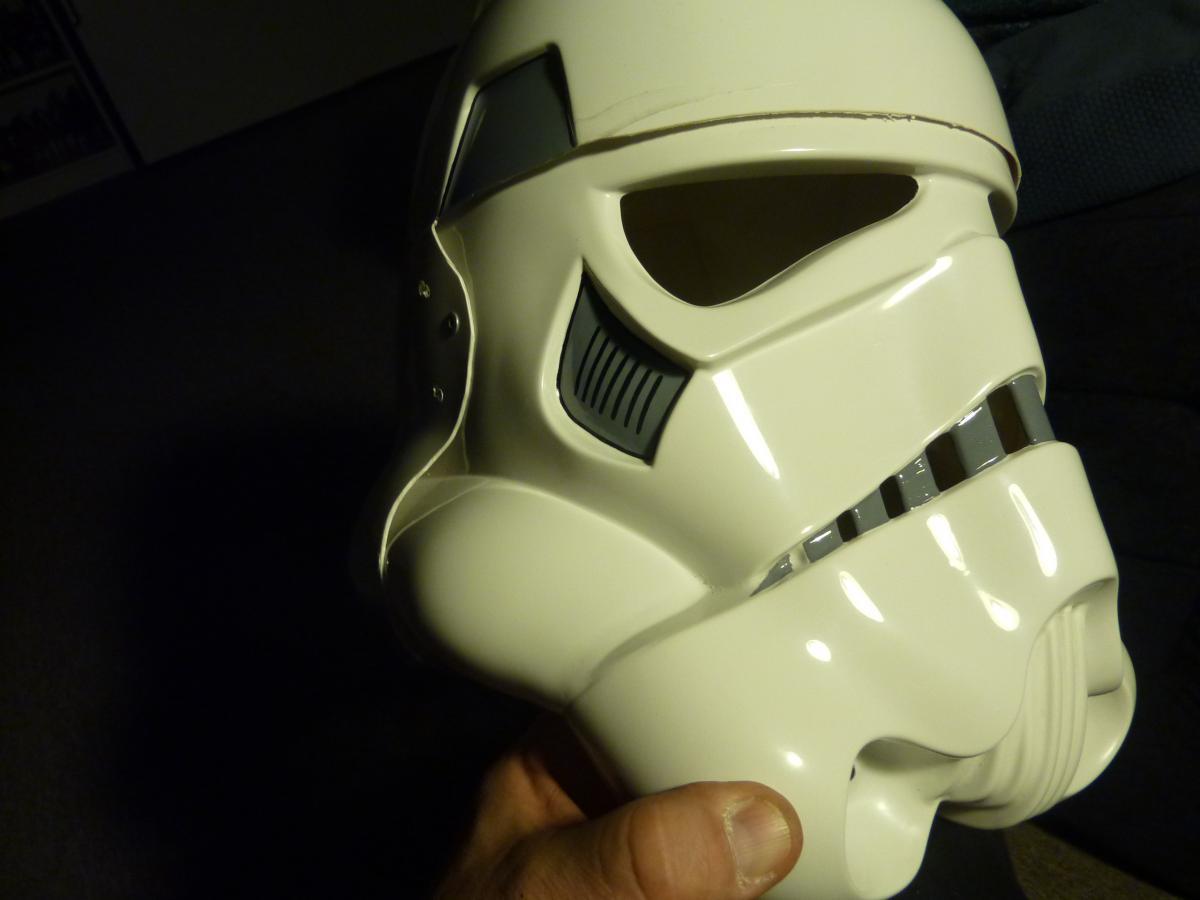
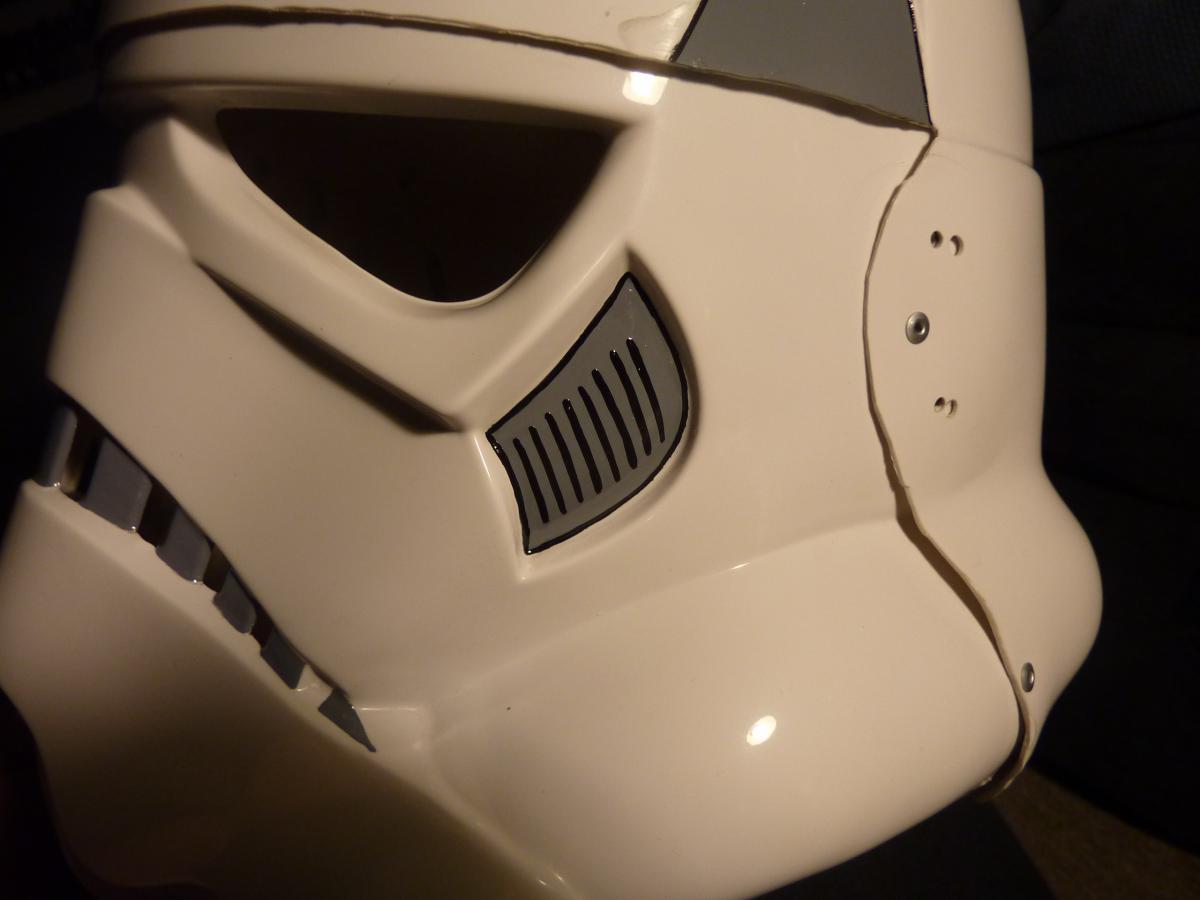
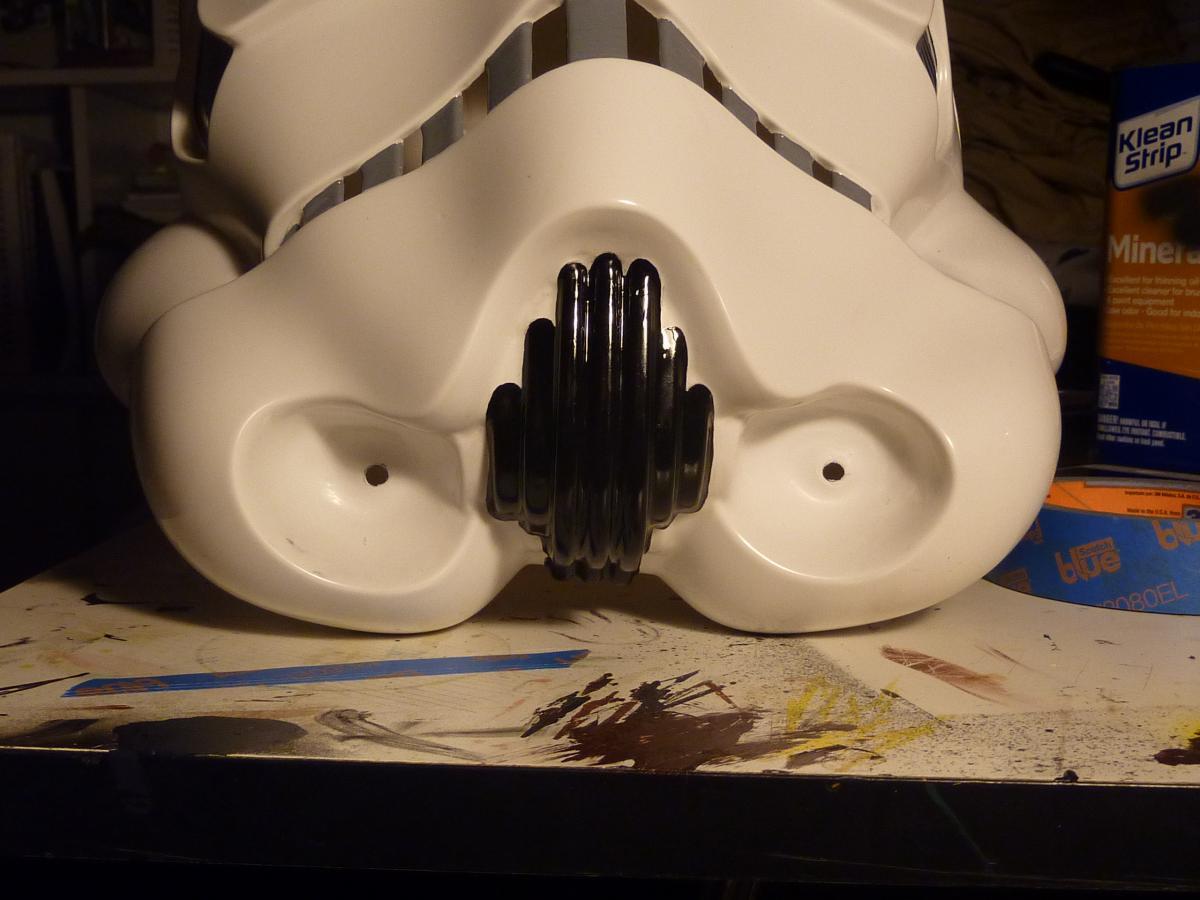
Thanks, guys!! Keep in mind that the above picture of the vocoder was taken while the paint was still wet. I did use semi-gloss here and that is how it turned out as you will see. Next up was the tube stripes. I used the masking tape method for making the stripes. After heavy burnishing of the tape to make complex curve of the tube, I placed trooperbay's template on the line I measured from the cheek and traced each stripe out. I used the exacto to carefully cut ouch each stripe and painted it with Humbrol. I almost immediately peeled the tape off. I think I might wait next time until the paint has fully dried. When I peeled it up, the paint became stringy left little strings that I needed to go back and remove with a thinner dampened brush. But overall, they came out OK. Next I moved onto the interior. I cleaned off all the adhesive from everything that was stuck on previously. I needed to clip down the new ear screws with snips. After that I could move onto applying the plasti-dip/cheesecloth interior coating. Typically, I will lay a thin layer of "dip" to embed the cheesecloth into, then a second coat of "dip" on top. Because the plstic was so thin I used 3 coats of dip and two embedded layers of cheesecloth.. After some time with the hair dryer and air drying, a final coat was applied Now I moved onto the lens install and foam padding. I painted the ear screws and after a final polish....DONE!!!


-
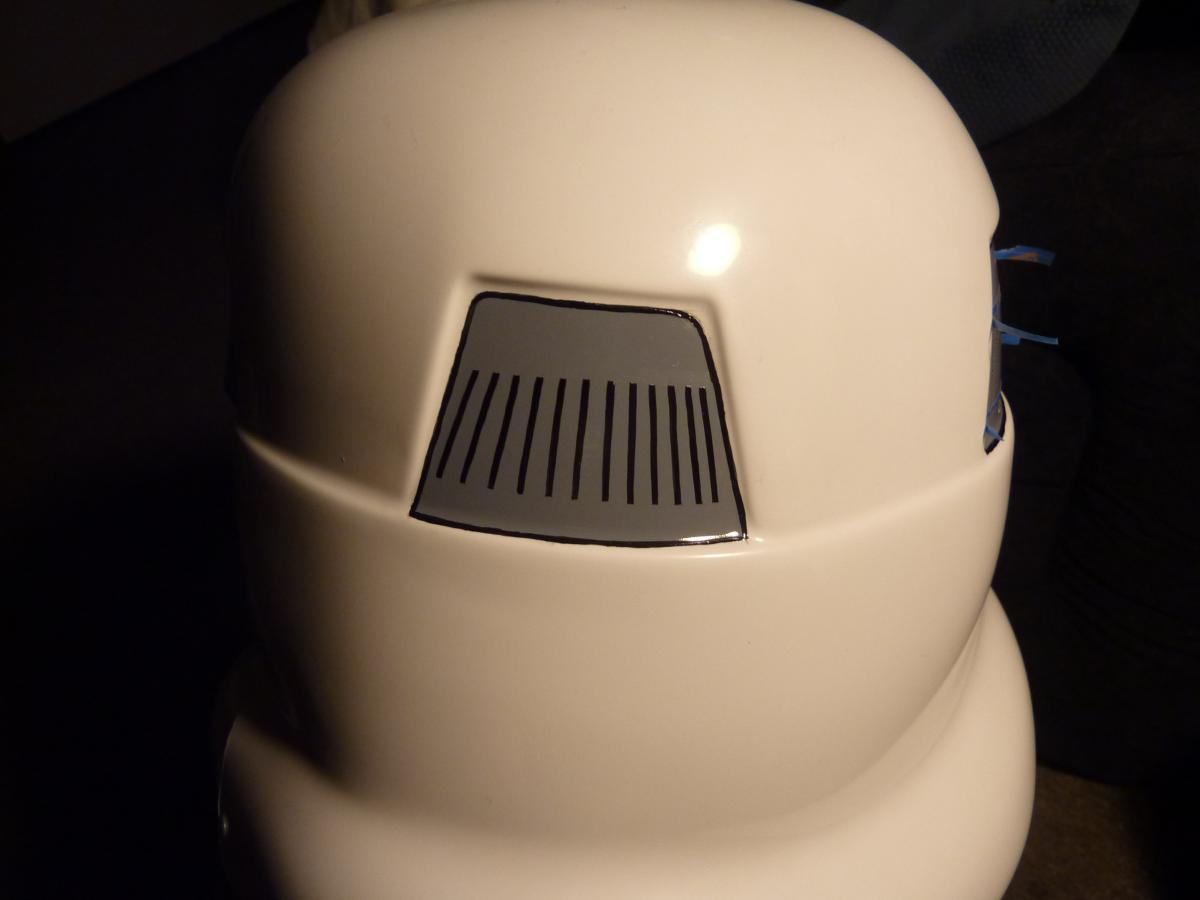
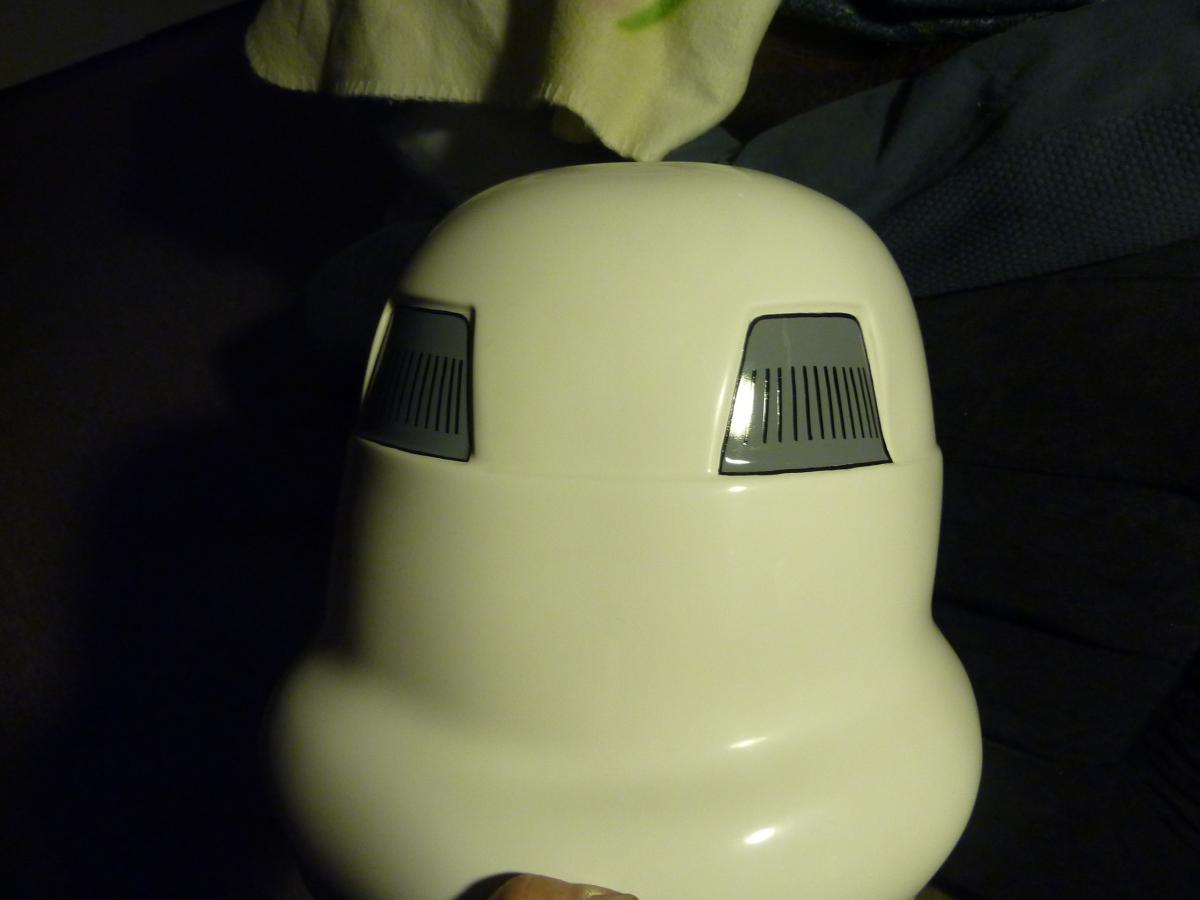
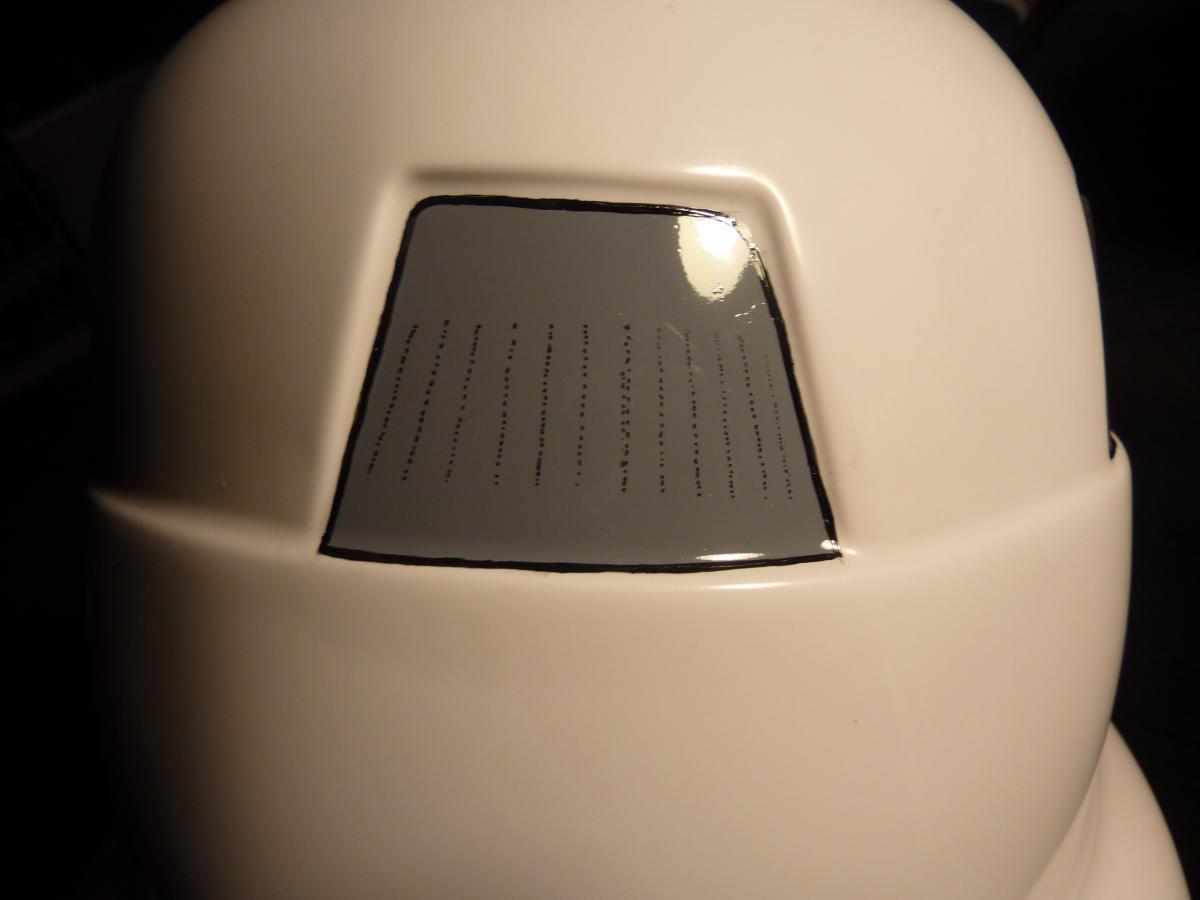
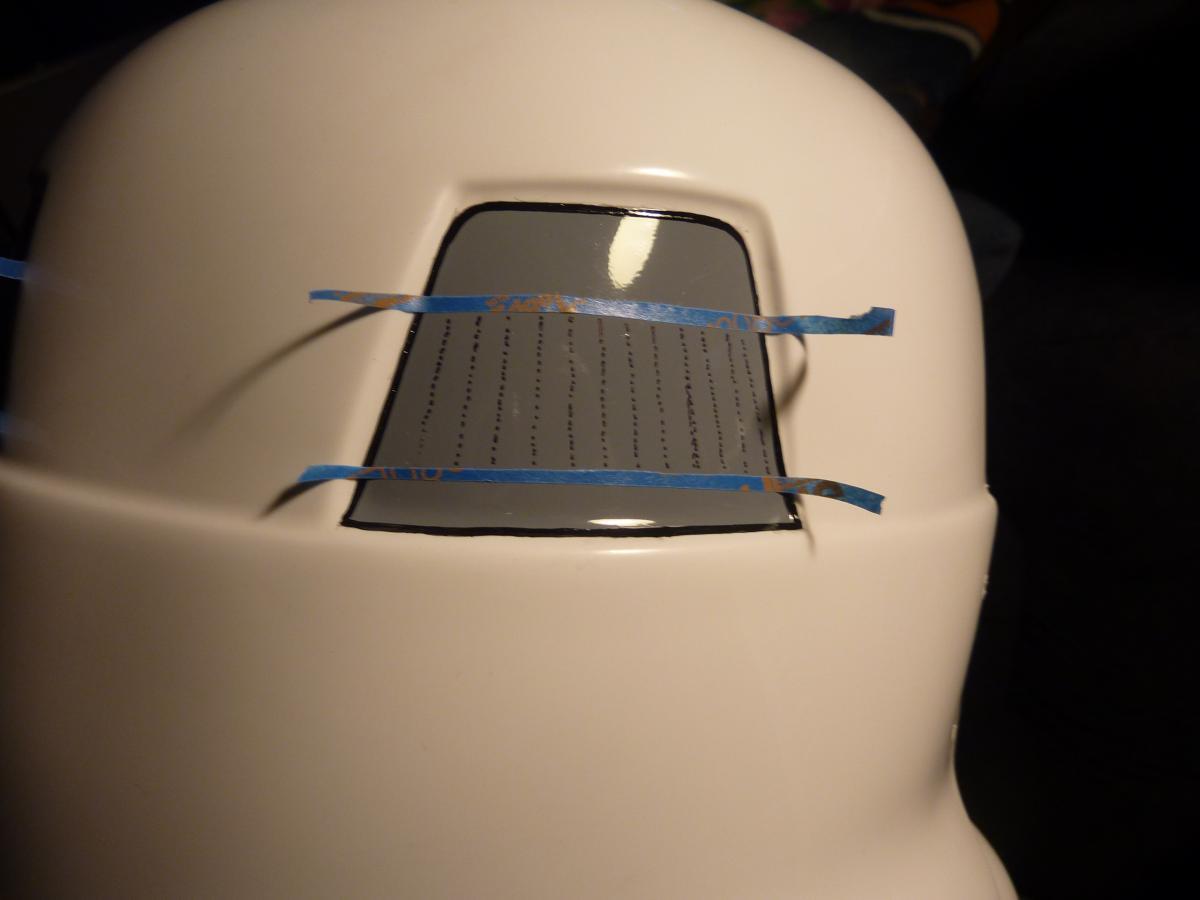
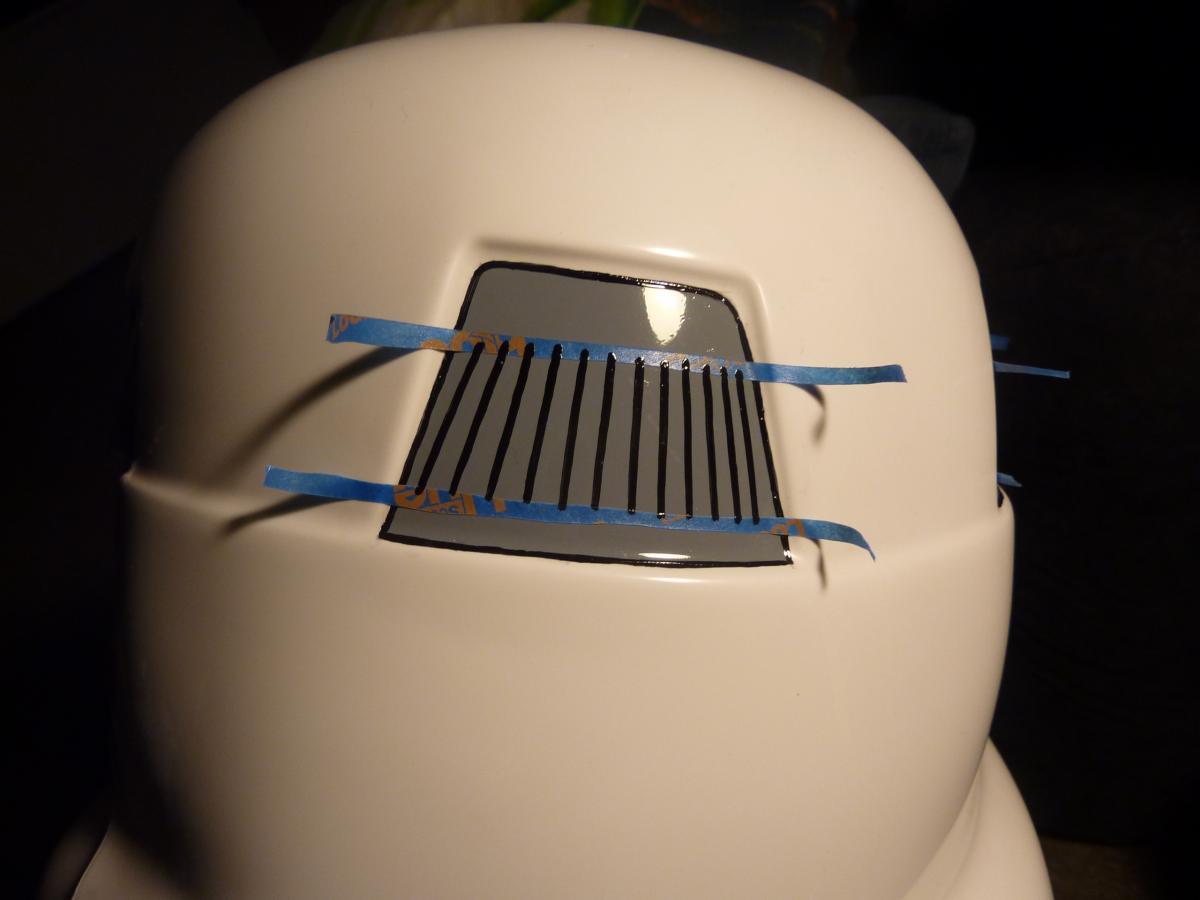
Sorry for the delay guys. Here are the final shots of the helmet rebuild:Vent striping continued. I used Trooperbays templates to mark out where the vent lines should go. A couple masking strips on the top and bottom assured the stripes would be flat on the top and bottom. The tear stripes were freehanded. as was the vocoder area


-
armor polish that's NOT Novus?
gazmosis replied to FirstCoastFett's topic in Hard Armor (General Discussion)
That gets my vote!!! -
Congratulations to our new Detachment Leader - Dark CMF
gazmosis replied to Darth Aloha's topic in Announcements
HUGE Congrats to a good trooper and a better man!! -
Is this belt suitable?
gazmosis replied to welshchris77's topic in Boots, Soft Parts, and other Accessories
I'd make sure this is no wider than 3 inches max -
Doopy's E-11 Blaster Kit Build Thread
gazmosis replied to Pretzel's topic in Build Threads Requireing Maintenance
I don't know if I would go with such a heavy gauge of wire for the power cylinders. a 24 gauge wire is more of what you are looking for -
http://www.hockeygiant.com/bau09rp003.html Try these or others. Google "hockey helmet repair"
-
Looking forward to seeing your progress!