gazmosis
-
Posts
4,043 -
Joined
-
Last visited
-
Days Won
23
Content Type
Profiles
Forums
Gallery
Articles
Everything posted by gazmosis
-

TK 12121 Requesting ANH Stunt EIB Status [MTK][466]
gazmosis replied to spacebrew's topic in Request Expert Infantry Status
I have looked your application over. I will do a full review tomorrow. I am not at home right now or I would. Looking good, though!! -
TK-69323 Requesting ANH Stunt EIB Status(ATA) [456]
gazmosis replied to sylverbard's topic in Request Expert Infantry Status
thank you for getting these posted up. I am not at home right now so I will get you in the database when I get back home tomorrow. -
Looking for advice on fixing ear gap
gazmosis replied to Arch27's topic in Assembly, Mods, and Painting
This is do-able. Jeff's guidance of saying that the solution lies in the round area is correct. Although I can't see how the back is trimmed (you CANNOT ignore that) On the front, I can see a really tight fit in the cheek/face corner and at the top. There is a slight gap in the middle of the round portion. I would start by taking down the lower portion near that corner and just a little off the top most portion just under your brow trim. Trimming the top will bring the whole ear a bit closer and trimming near that corner will allow the ear to rotate slightly downward closing the gap. DO THIS SLOWLY. A millimeter at a time. Look at the back of the ear, too. Make sure that is trimmer properly as well. -
That mouth....*shivers* set in way too far, is way too thin. The entire mouth line between the "tear" areas under the corners of each eye should be a honeycomb pattern.
-
TK - 99988 Requesting ANH Stunt EIB Status [ATA][465]
gazmosis replied to YESSRAM's topic in Request Expert Infantry Status
Thank you for getting those posted! -
Advice needed on A.P. Biceps and Forearms.
gazmosis replied to PGHtrooper21's topic in Assembly, Mods, and Painting
Just curious why you would think it would. -
That particular one is good. He did a great job.
-
Making Resin Parts From My Scratch Build
gazmosis replied to trooper96's topic in Build Threads Requireing Maintenance
One of THE most important things to remember is that if you are going the silicone route to make molds and you are going to fill your minute holes and tiny areas with clay, THE CLAY MUST BE SULPHUR FREE CLAY. Also, depending on the nature of the part you are molding, you will need to decide if you are going to make either a slit mold where you create a box around your part, fill the box with silicone, then slit one side with a razor knife to extract your part and create register points to re-align the mold. Or, does your part require a 2 part mold? A box is built around your part and it is set half way deep in a bed of clay ( sulphur free of course) silicone is poured over your part and allowed to set. The box is the turned over and the clay removed. Because silicone WILL STICK TO SILICONE, a release agent must be applied to the cured silicone if you want the halves to separate. After that, more silicone is applied to complete the mold. Keep in mind when doing a two piece mold that it completely encases the part. This means in order to cast it, you will need both a fill hole AND A VENT HOLE. A vent hole is a place for the air inside the mold to go when you fill the mold through the fill hole. These holes are usually made with a cylinder of clay. -
My first TK helmet build
gazmosis replied to AgeOfStrife's topic in Build Threads Requireing Maintenance
Stand and applaud!!! Outstanding work! Those tube stripes are in the top 10 of the best I've seen -
Making Resin Parts From My Scratch Build
gazmosis replied to trooper96's topic in Build Threads Requireing Maintenance
WOW. Getting into the world of molding and casting is not as easy as one would like to think it is. for the ultimate in accurate detail capturing, silicone is the way to go. However, there are as many silicones as there are stars in the sky and none of them are cheap. http://www.reynoldsam.com/ Click on that link and play around on that site sight for a while. If you are serious about producing repeatable casts, that is where you need to start -
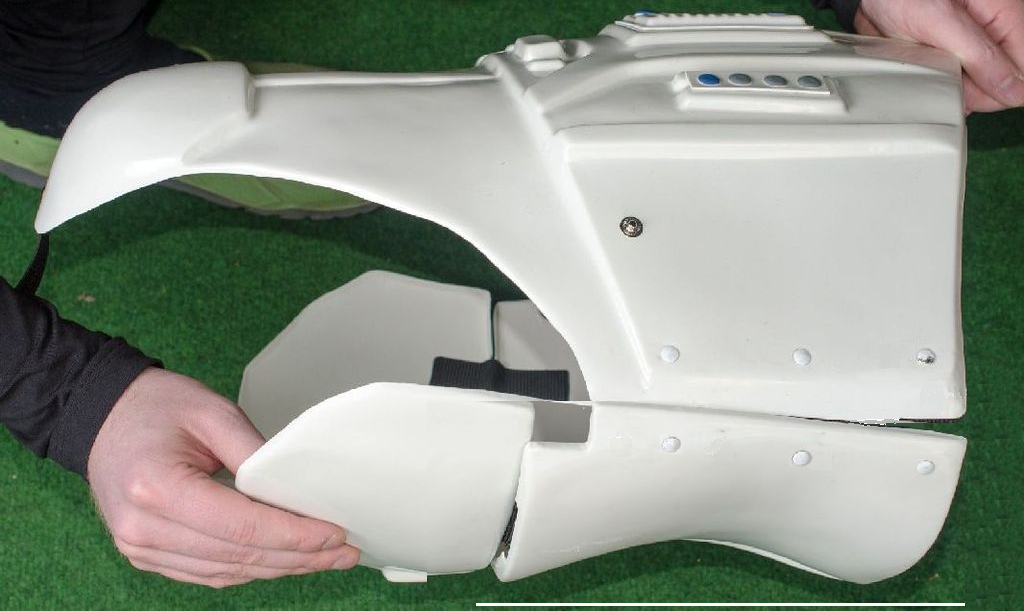
Sorry to be the bearer of bad news. We are here to help. It is honorable that you are choosing to march on. That in mind, I will give you this to read: http://www.whitearmor.net/forum/topic/12478-howto-easily-make-your-fx-armor-eib-acceptable/ Next I will tell you that the first thing you will need to do is obtain some ABS plastic. One of the things that made the FX armor not aceptable was that it is designed to be built with the halves overlapping each other at the seams. You will need to build it with the seams butted AGAINST each other then the seam is covered with a strip of ABS plastic that I said you were going to need to obtain.
-
Wow. An SDS helmet kit. We don't see that too often here. I think you have a mix of helmet parts there. The one with the rank bar molded into the center looks like the SDS ear and the one with the separate one looks like an old FX ear as does the vocoder. If you can bend the lens at all, you might be able to immerse it in hot water to soften it enough then lay it into the eye opening for the correct fit. Now is the bad news. Sadly, the FX armor can be built and modified to get you as far as EIB only. Without sugar coating anything, there are just too many inaccuracies with the FX armor. I am not even really sure where you got it from because it's not even being made by the original maker any longer for this reason. You can build it and get it 501st approved but if you really are looking for Centurion accuracy, I would seriously consider trading up for a set of one of the other armor a sold here. Let us know your body type and measurement around your belly button middle and we can better direct you.
-
TK-30514 Requesting ANH Stunt EIB Status (RS PROP)[464]
gazmosis replied to Saifai's topic in Request Expert Infantry Status
That gap for Centurion is a bit much. Plus in that picture, it looks like the butt and kidney are overlapping a bit. Anyway, we are talking about fudging a few mm here and a few mm there to get the back positioned correctly. Align that kidney and ab first. Then that back will fall into place after that. -
Landeaux's ANH stunt build
gazmosis replied to Landeaux's topic in Build Threads Requireing Maintenance
Study butt joining. Return edge trimming. Strapping options. Blaster building. Make sure you have the right tools, enough tools. -
TK-30514 Requesting ANH Stunt EIB Status (RS PROP)[464]
gazmosis replied to Saifai's topic in Request Expert Infantry Status
What you are picturing there is nowhere NEAR a big gap between your back and kidney. Heck, the corners are even touching. That gap can be totally eliminated by replacing your back to chest elastic with wider material and making that adjustment there. The kidney ab alignment will work on you....trust me. -
TK-30514 Requesting ANH Stunt EIB Status (RS PROP)[464]
gazmosis replied to Saifai's topic in Request Expert Infantry Status
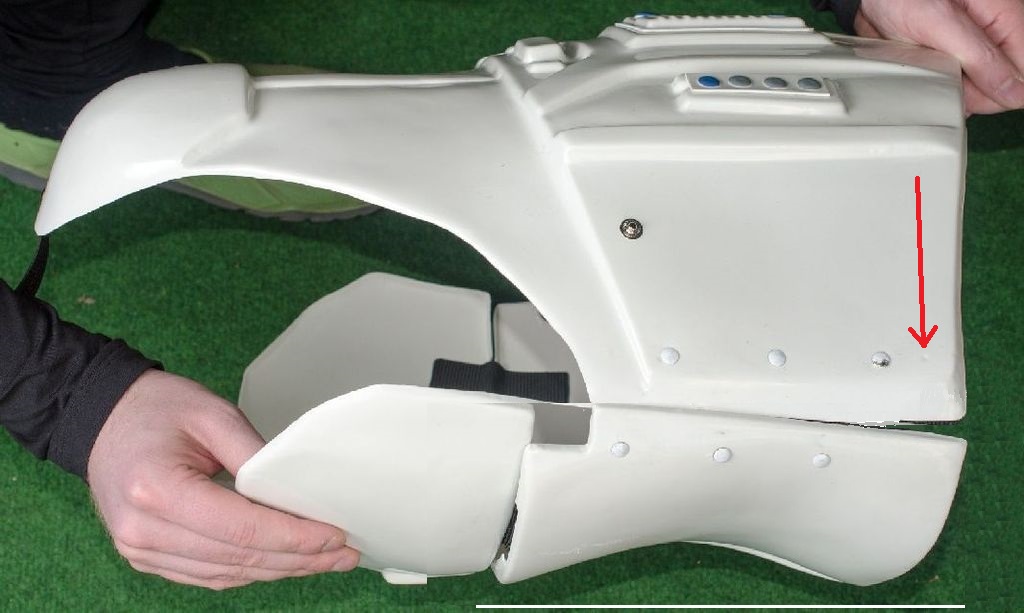
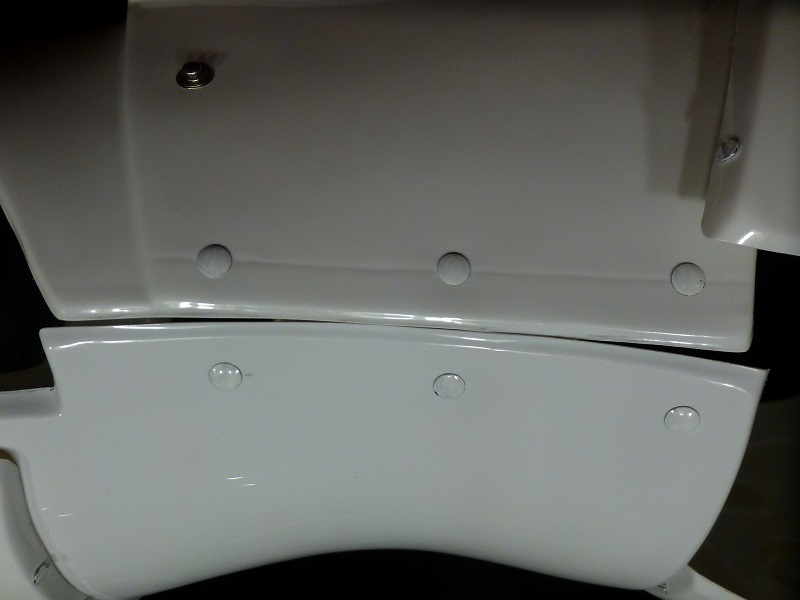
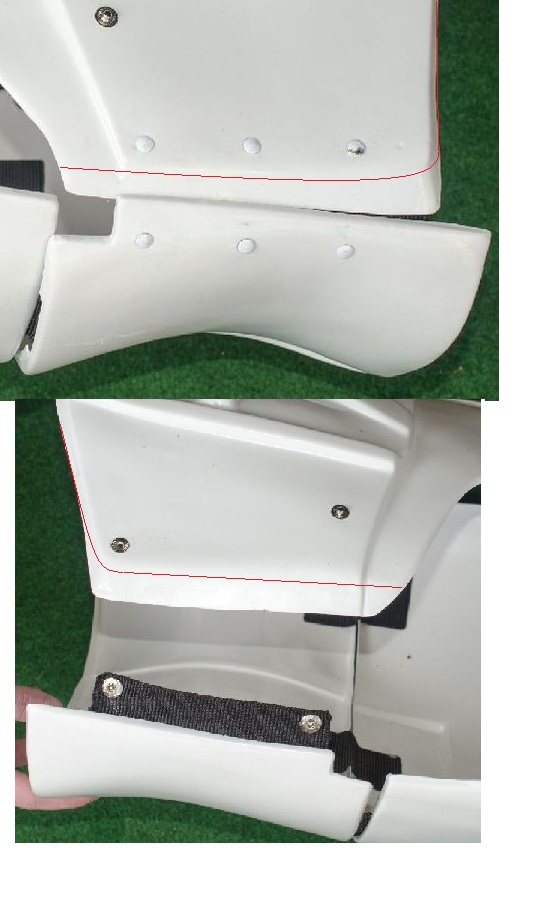
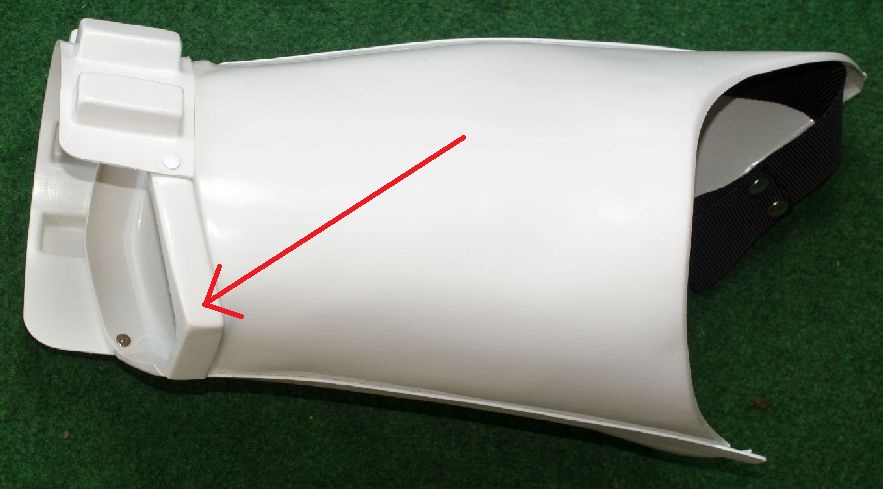
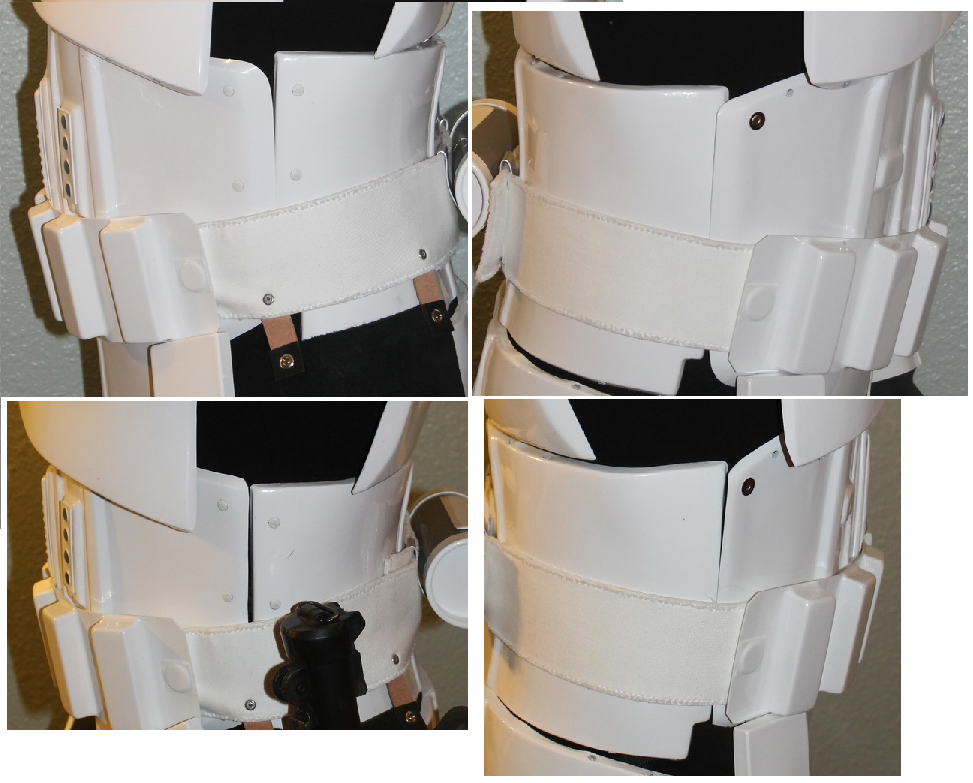
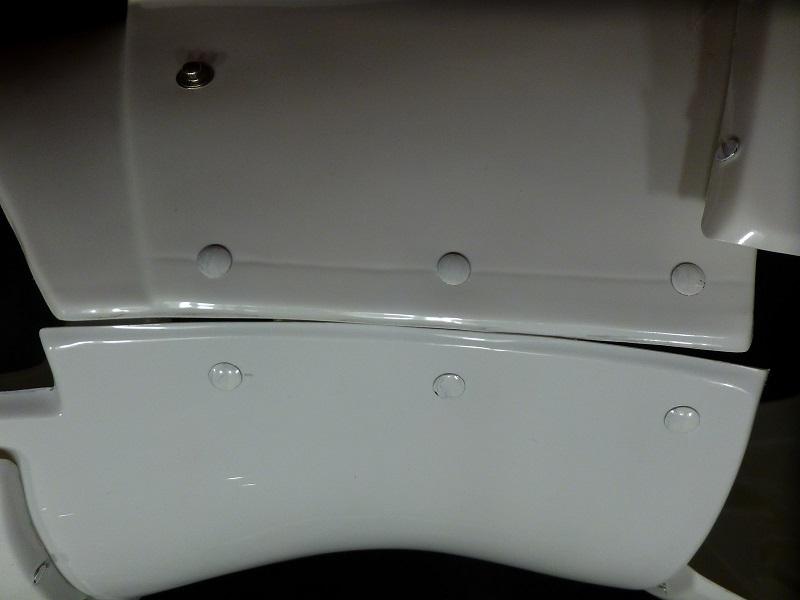
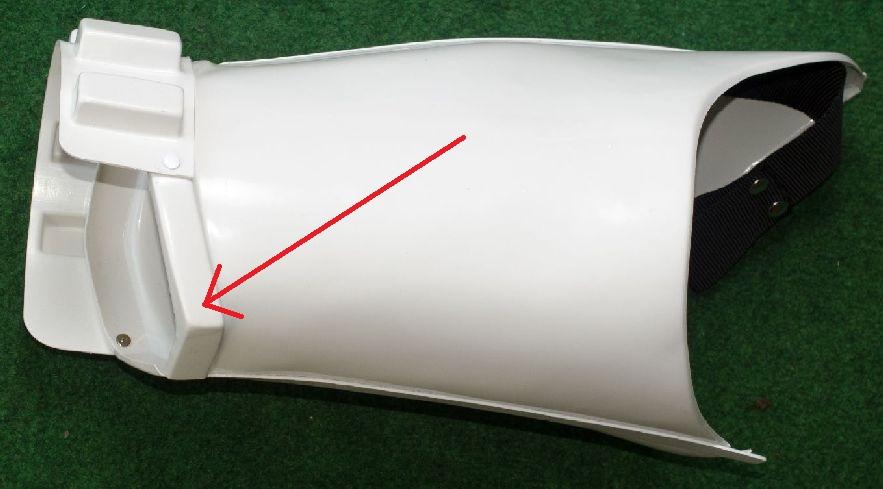
Hey there, Schießl! Thank you for your application for Expert infantry! We do have a few things to cover so let's take a look at your armor!! CRL and EIB Application Requirements: All the required photos have been posted and I happy to say that your armor contains all necessary elements needed to obtain the EIB badge!! Congratulations!!! Other-Armor Fit/Assembly: In this section, observations will be made about your armor and suggestions will be made to improve the final look of your suit. Any suggestions here will NOT affect any application unless specifically stated. I do need to comment on the quality of the pictures. They really could be better. You have a very impressive and solid build. Your armor is suited perfectly to your body type and fits you wonderfully. We need to discuss in depth the alignment of your ab and kidney plates. I will cover this in greater detail in "Centurion Suggestions" Although the correct color, I would at some point, upgrade the elastic that connects your chest and back plates over your shoulders. This is very thin and these straps support a great deal of your armor. You want them to last. You can make them as wide as the ribbed shoulder bridges. Because other troopers reference these pages it should be noted that the waist belt corners were ALMOST trimmed too far. The outer, vertical edges of the plastic waist belt should be just about the same size as the canvas belt itself. Centurion Suggestions: This application requires a much more specific set of photographs which reveal details not seen here. I try to spot and mention as much as I can but the final accuracy of the armor is the responsibility of the trooper. You already have many of the required details already installed on your armor. There are a few changes I am going to ask you to make prior to applying. I said I would go into greater detail regarding the alignment of your ab and kidney plates. First off...they are not. They should be straight across the top. This is how you have them now.I took this and aligned them so you can see how they should be in the following picture. With the parts properly aligned, you can see how this has thrown off your rivet locations compared to the proper locations shown here: Now you can see that things kind of got started off wrong because you can see where the top rivet should have been installed as I pointed out with the red arrow. I took it one step further and and let you see what your torso would look like with your rivets installed in the proper locations. . Looking at your full body shots I noticed a bit of overlap at your sides. RS makes its ab mold with a slightly extra bit of material on the sides for troopers that need a little extra room. If these extensions are to be left on, however, the hardware should be installed in the proper locations in relation to the side seam. With the overlap at your side, I don't think you need this extra material. Put your torso on and with a helper, tighten your belt and see if the edge of the kidney can reach the edges of the ab I have marked on these pictures.. If it can without too much effort, trim that off and you will have a MUCH improved overall look of your armor. The next issue deals with the mounting position of the thigh pack on your right thigh. The molded ridge on the lower portion of the thigh has a definitive "corner" toward the rear on both sides. These "corners" are the mounting points for the thigh pack as seen on this screen used thigh seen from the rear. There should be an extension of material behind the last box on each side extending to this mounting point. You have yours trimmed way short and mounted far short of the mounting location I have marked by the red arrow. Unfortunately, the only fix for this is to replace the thigh pack. Lastly, please try to take better quality picture for your Centurion Application! Please do not hesitate to contact me with any questions you have and congratulations again on your EIB!!!

-
TK-42178 Requesting ANH Stunt Build EIB Status (AP)[463]
gazmosis replied to Spycee's topic in Request Expert Infantry Status
HI Alex! I hope I may call you that. If not, Please forgive me. Thank you for your application for Expert Infantry. Let's take a look at this fine set of armor! CRL and EIB Application Requirements: All required photos have been posted. Your armor displays all necessary elements required for EIB. With that, I would like to congratulate and welcome you to Expert Infantry! Other-Armor Fit/Assembly: In this section I will touch on suggestions and observations made by both myself and your fellow troopers. These are suggestions to improve the final look of your armor and do not affect any application unless specifically stated. First I want to say how nice of a job you have done with the construction of this armor. I know what a challenge AP can be at times and you have nailed it. I still cannot believe that some who weighs only 185 lbs. would need to shim their armor. But you did and YOU NAILED IT! Well done, Sir, with that seam blending!! There was a mention regarding the rank bar on your ear. Although this element was only seen on the rear two bars in ANH, EIB applications don't really recognize that level of detail. I am sure we will see the correct one painted on your Centurion helmet. The only other item I found interesting was actually on your blaster. Although the maker of your blaster is still in the dark, Doopy Doos parts are clearly used but one part that is NOT is the rear sight. Your seems unusually tall. As you can see compared to the real Sterling sight on the right. Also yours doesn't have the scallopping. By the way; your charging handle behind the ejection port is installed backwards. The curve should be facing forward. Centurion Suggestions: Centurion photos require a much more detailed set of pics. For this reason, details may show up in a Centurion application that were not spotted here. The ultimate accuracy of a set of armor is set by its owner. You have already stated several things you have scheduled to change before you apply for Centurion like flexible handplates, a completely different helmet, and right, upper corner ab plate male snap. Make sure you have that small elastic for the shoulder bridges as well! I can't see the inside of the chest/back connections so these need to be verified to be correct, too. WITH A NEW HELMET, HANDPLATES, ETC, PLEASE MAKE SURE YOU TAKE NEW PHOTOS FOR YOUR CENTURION APPLICATION WITH ALL THE NEW CENTURION COMPONENTS!!!! Earlier it was mentioned about the screws that hold your belt clips on the thermal detonator. The ones you have are fine since an application has never been denied based on the type. For your knowledge, the original screws were slotted and flat topped like the ones seen here: Lastly, I would pop one of the rivets off the blaster retaining strap that is mounted in the center of the holster. Two rivets here are not necessary nor was it accurate. Congratulations again!!!
-
Dan Laws ANH "Move Along" Trooper WIP
gazmosis replied to BobasBounty's topic in ANH (Stunt and Hero)
What a showpiece!! -
TK-42178 Requesting ANH Stunt Build EIB Status (AP)[463]
gazmosis replied to Spycee's topic in Request Expert Infantry Status
I'll touch on both these points on the review -

-
Spacebrew's ANH Stunt Build (MTK)
gazmosis replied to spacebrew's topic in Build Threads Requireing Maintenance
The MTK armor is slightly larger around the midsection. If you are anywhere around 38 or 39 inches around the belly button, it will work. -
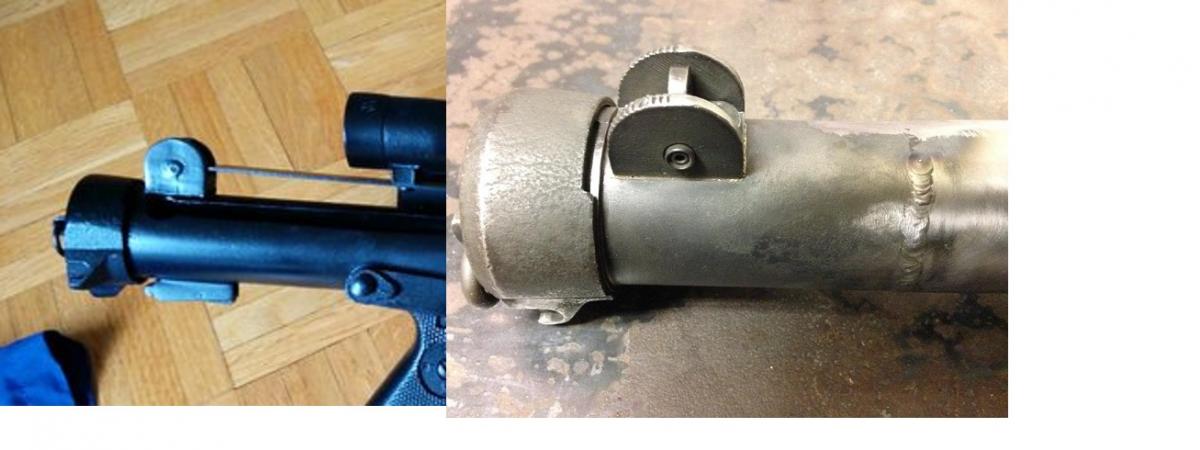
Ive seen these blasters before. They are nice. I can never get who they are from but Mark has been using him/them for a while.
-
TK-44228 Requesting ANH Stunt Centurion Status (RS)[164]
gazmosis replied to Lidocaine's topic in Request Centurion Status
I figured it would be perfect, but others looking at this app. Need to see this requirement. Thank you! -
TK-44228 Requesting ANH Stunt Centurion Status (RS)[164]
gazmosis replied to Lidocaine's topic in Request Centurion Status
Hey there, Luke!!! Thank you so much for your work to perfect this great armor. As Ruben stated, it probably will be used as a reference for future Centurion Applicants. Let's look at this!! CRL and Centurion Application Requirements: All but one photo off the required list is present. I looked back to see if I could pull it from your EIB application but it's not there either. You need to post a picture featuring the wrist openings of your forearms with no return edges. I can see most of it in your "arms up" shots, but please take/post this pic asap. All other aspects of your armor are correct to qualify for the Centurion award. With that, I would like to congratulate and welcome you to Centurion!! Other-Armor Fit/Assembly: In this section, we normally go over certain minor things on your armor that can improve the final look of your armor. The good news is..........not much to say here!!! Great work! There was a mention regarding your sniper knee. I'll go on record and say I hate these!! The ratio of sniper knees that DO NOT​ fit compared to the ones that do is so astronomical it's silly. Everyone struggles with these. Many of the sniper plates in the original film extended past the "corner" of the ridge on the outside of the lower leg. Although I would like to see your plate aligned a bit better with the top ridge of the shin, I have seen much worse. I do need to mention an incredible adjustment made to the sides of Luke's armor. RS was kind enough to leave a bit of extended material off the sides of their ab plate for those who need a little extra room. However, if the side rivets and male snap locations are not adjusted accordingly, they can end up out of place. Luke's EIB application showed this case. What it also showed was a bit of side overlap. I suggested that if he indeed had the room, to trim that little extra bit. This would put all the rivets and male snaps into their proper positions. As you can see, he did that and result was perfection. The before pics are on top. Troop with pride young man!!! Congratulations!!
-
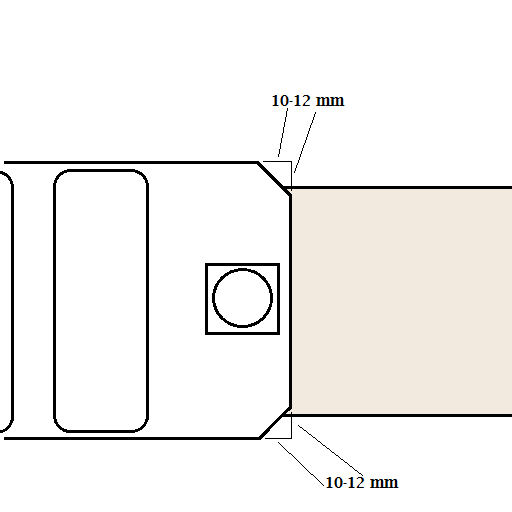
It's not the canvas belt I am referring to. The angled corners at the ends it what I am talking about.