Leaderboard


Popular Content
Showing content with the highest reputation on 11/19/2019 in all areas
-
Speaking of transport, just had to share my Boba-case I just finished Everything but the helmet fits, just like a TK or TD for that matter.3 points
-
New shot of the trooper and the speeder from a new TV spot. Looks pretty awesome!2 points
-
27 - 16/11/2019 Tasmanian Special Children's Christmas Party Sent from my SM-G960F using Tapatalk2 points
-
20) 11-17-19 -- Lancaster, Pa., Lancaster Science Factory This was a four-Garrison Troop as Garrison Carida welcomed Garrison Corellia, Old Line Garrison, and First State Garrison to join in the fun. (Plus the Galactic Academy, hence the tiny TIE Reserve Trooper between the officers and TIE Pilots.)2 points
-
WARNING: The following content may be controversial! DISCLAIMER: These are my opinions from years of experience, pure and simple. Over the years I have noticed many future Troopers doing an OT (Original Trilogy) TK ask about return edges before, during (and after) their build... If this is a subject that you are curious about, grab a cup of coffee or a tall glass of frosty blue milk (this is a long post, lol) and read on.... QUESTION: "What are they, what do they do, and should I leave them, trim them down some or remove them"? ANSWER: Return edges are part of the molding process and provide strength in certain areas on the edges of your armor. They also provide a heftier look to some pieces. To help you decide whether or not to keep them is why I started this thread. Here I will attempt to go into a few details about them. Know in advance that as mentioned I personally am NOT a fan of them in many areas for several reasons (listed below). Some people love them and some may disagree with my opinions... many of you may trooped for years with no problems which is AWESOME, but many folks have had issues and questions. 1. In most areas they are not screen accurate- In looking at the screen caps and film used armor photos below you will notice their scarcity. 2. They can (and in many cases will) get very uncomfortable- Many folks like the "thicker" look it gives their armor, but they can cut into you, especially in the area where your arm bends ("armor bite") and the groin area (chafing). As Troopers we do a lot of walking and arm bending carrying a weapon, so keep this in mind. 3. If aiming for higher levels they can cause fitting issues- Examples: A. If you leave them on your forearm openings and glue on the cover strips, they will need to be completely removed at the wrists for Centurion level, making the opening too wide. This can lead to you having to remove the cover strips, reduce the sides of the forearms and re-attach the strips. Quite a pain in the posterior plate to say the least. *** See EXAMPLE 1 below. B. If they are overly thick on the bottoms of your shoulder bells, they can prevent them from lying snug against the biceps. 4. They can cause splits/cracks- Especially on some armor areas. ABS is designed to flex, and in some cases a small amount of return edge is fine, but too much can cause stress on those areas. *** See EXAMPLE 2 below Over time that stress will take it's toll somewhere, and that is usually the return edge. Anovos armor is especially prone to this on the sides of the chest/back plates and neck openings. I suggest shimming these on the rear with ABS strips and E-6000 to prevent it. Let's start with the chest plate: Note how the ones below (including the back plate) have either no or minimal edges with no cracks or splits. Now here is a screen used one with a pretty prominent edge, Notice the stress crack. Now, onto the ab/kidney/back plate: To keep them in line and prevent them from overlapping, it is suggested that you LEAVE a fair amount of the edges on the top/bottoms of the kidney and bottom of the back plate, especially if using the "classic" strapping method. Yes, these can split/crack as well but not normally. Shoulder Bells Trimming off the entire edge on the bottoms is not only screen accurate (first two photos), it allows them to rest close to the bicep (bottom photo). Third photo shows "suggested" trim lines (red) of an untrimmed bicep. My recommendation is the blue line. Biceps/forearms For sheer comfort and a sleeker look, I recommend removing ALL of the top and bottom edges before fitting/gluing them. First, no one sees the tops (covered by the shoulder bell) and the bottoms can cut into your arms (armor bite). Suggested cut lines in red. Again, if you do get armor bite you will have to take them both completely apart, remove the edge and re-fit. Better to think ahead. Some (myself included) like to leave a bit of the return edge on the outside of the top of the forearm for a thicker look. However, I highly suggest removing all from the inside part (the "scoop") where your arm bends. Again, an armor bite issue. This should also be done BEFORE final fitting. Here are some screen used examples: For level 3 (Centurion) all of the return edge on the wrist opening must be removed, including the area inside the "hump" as seen below: Posterior (butt) plate: Again, it is suggested that you leave some of the return edge on the top (and bottom in most cases) to keep it from riding under/over the kidney. Now, the BOTTOM of the posterior plate is where we often find splitting issues. Should you leave some return edge? Sure! BUT(T), when trimming the corners, (see below) be SURE not to give it a sharp angle... this is where the trouble usually starts. Instead, give it a slightly rounded angle (as shown in green). Thigh tops The tops of the thighs are where we see a lot of questions. I recommend removing all the return edges from the entire upper parts, and here is why: As mentioned above, you will be doing a lot of walking. If you have the edges (or at least a large portion of them) intact, the friction and inside facing angles can really chafe the heck out of you, especially on the inside of the groin area. (Ouch). If there are sharp edges/points on the tops (below) these will poke into you. When trimming these, just follow the existing line. Also, if you do your final fitting, glue everything together and find this out afterward, you will have to take the entire thing apart, remove the return edges, trim down the sides and then re-build/glue them back together. The reason is that afterward the opening will be entirely too large and you will have a giant gap all the way around. Not a good look. Easier to do it beforehand, trust me. As seen below, there were no return edges (or at least minimal ones) used in the films. Sniper knee plate The bottom of this piece is an area often not trimmed enough. To allow it to sit flat (or very close to flat) against the top of the calf enough for the glue to adhere properly I suggest removing most if not all of the bottom edge. Note how in the first and third photos how the sniper knee is parallel to the front of the calf. Last up, a photo that best illustrates my point about return edges and how they were not really present in many places on ANH armor. *** Example 1. of what happens when you have to reduce the return edge(s) after attaching cover strips. NOTE: For the example below I am using an ATA bicep (first 3 photos). Be aware that ATA makes the "suggested" cut line on their return edges pretty slim (a GREAT thing in my opinion). As seen on the armor in the 4th photo, if followed, the "suggested" cut line makes the return edges much wider (red line). Top view Bottom view For the purposes of this tutorial, we will assume that the ATA has those wider suggested return edges. Okay, let's say you really like the thicker look the return edges give your armor, so you left them pretty wide during fitting and then glued on the cover strips. Enough to get your arm through with a little extra room. Should be good to go, correct? BUT, you find that after having your arm bent for a while they cut into you (armor bite), so you find you have to reduce or remove most or all of it. No biggie, right? Just break out the Lexan scissors or Dremel and cut away, leaving the cover strips attached. Easy! So you remove it and then you run into the fact that the opening is now enormous. This is not a good look, and can result in the piece(s) jangling around and not being approvable at higher levels (or even Basic depending on your GML). What I am getting at with the above info. is that if you decide to remove them, it's better to do it before final fitting/gluing. Side note: Many biceps have an unusual shape at the tops (in red, below) normally located on the inside. This can be completely removed. Doing this will not affect approval at any level, and is screen accurate. It sits under the shoulder bell so no one sees it anyway! Screen used bicep USELESS TRIVIA: Many have asked about the "thumbprint" that many armorers have on the left bicep (screen used example below). Some think it is so you can tell them apart, but I was speaking with Brian Muir a few years ago (he sculpted the original armor used in ANH) and asked him about it: "To be honest, I have no idea... it was not in my original sculpt, and must have been a mistake in casting". There you have it. *** EXAMPLE 2: What causes cracks/splits: ABS bends pretty well, just as it's designed to. BUT, when there are return edges involved that changes the game. For the below example I used a 2 inch wide strip of ABS with a 1/2 inch "return edge". Looks pretty solid, right? That's because the edge provides stability. Now I am bending it up/in to simulate use over time. (More than it normally gets bent in many cases, but only to prove a point). That stress has got to go somewhere, and it's the return edge that takes it all and gives way, again causing cracks/splits. The red arrow shows a weak area where the stress in concentrated and cracks can form. Even if trimmed off afterward that area will be prone to splitting, so a small shim behind it is suggested. To sum it up, return edges are not meant to bend a lot. I suggest inspecting your armor occasionally to spot any existing/potential cracks/splits so that you can catch them before they get worse. I hope this helps answer any basic questions you may have, and always feel free to ask more detailed ones here or offer differing opinions.1 point
-
Hi all, Firstly, I’d like to say that Low and higher brow heights are perfectly acceptable and all members are welcome in the legion. I would just highlight that some appear to reflect Stunt or Hero/Promo troopers. The intention of this post is to share educational reference photos with new and aspiring troopers. Based on watching ANH, viewing the many reference photos and additions behind the scenes and historic photos, there is a clear direction regarding various brow heights in ANH. In the spirit of the CRL, this guide would help improve uniformity across the legion. For those that favour a low brow, I would highly recommend checking out the Hero* or Promo Trooper as an ideal option. *please note that not all Hero helmets had a low brow. Below is the Promo Trooper. This features a hero helmet (this is different to the Stunt helmet) and is an iconic look, featuring a low brow (brow trim essentially ‘on’ the top of the eye sockets). There is essentially zero gap between the bubble lenses and the brow trim. There were just six hero helmets made for ANH, made in gloss ABS, intended for close up shots; Luke has a very similar look; Han, on the other hand, had a clear gap (seen here left of shot) 50 Stunt helmets were made for ANH. These were made from green HDPE plastic, then primed and painted. The majority of TKs seen in action and group shots in ANH were Stunt helmets and had a visibly different appearance, including a longer painted ‘frown’ with (for the most part) 4 ‘teeth’ either side, 3 screws per ear rather than 2, flat lenses rather than bubble and (for the majority seen on screen) had a consistent gap between the top of the eyes and the brow. First up is a photo taken outside Shepperton Design Studios and shows approximately half of the 50 Stunt helmets primed and ready to send to the studio. The brow height is consistent across these helmets, each having a clear gap between the eyes and the brow. Note below that perhaps 2 or 3 of 26 helmets have a slightly lower brow. On to screen used, there are a few lower brow stunts featured through ANH, however they are certainly outnumbered by the conventional look. Note the same scenario from ESB (re-using ANH Stunt helmets for the most part); Even quite a few Hero helmets, including Han’s, had the usual gap. I hope that these reference photos help to show the difference with various helmets. This post,and the information included, comes from a passion for the wonderful character that is the Stormtrooper and is not intended as a negative view on those that choose the low brow. Both have their place in our character lineup. I would simply suggest considering the hero or Promo Trooper as an option for those that prefer the low brow. Best wishes Dan NB - credit to StarWarsHelmets.com for a lot of this information. I’ve learned a lot from there over the last couple of years.1 point
-
A cool name and purpose. They look like FO Shoretroopers to me.1 point
-
There was a bit of that oily stuff on some parts, but not too much actually. If I remember correctly, there was quite a bit of that greasy stuff on the breast and back plate, not much on other parts! And I participated in his free shipping promo because I‘m located in Germany and international shipping rates are crazy!1 point
-
Has anyone actually personalised there’s by adding a photo? I’ve yet to do mine. Sent from my iPhone using Tapatalk Pro1 point
-
Hey everyone! My goodness its been a long time, and unfortunately not as much progress as I would have hoped has happened. But little progress is still better than no progress, so lets get to it! First off, Nomex flight gloves for trooping arrived, and boy are they comfy. I also applied tube stripe stickers, which I will be switching out for hand painted ones soon. I realize how it looks so much better with the tube stripes. Also, about a month ago I went on a troop to a trunk or treat. Again super fun, but now I realize I have a glaring issue, and that is with the chestplate. It drops down way to low, but I have just installed the crotch rivet so I hope that it will pull the back down and the chest up. Also here a nice shot that I took of my helmet. And that is pretty much it, shoulder straps and belt buttons are next. Until next time1 point
-
So... Progress? I have started with the biceps and taken them apart, the stuff that they used as glue might be stronger than the plastic itself! Tips on how to assemble them? Should I do same as with the forearms? Also here is how they came out: Left And right I also rounded out the edges of the covering strips1 point
-
looking great, congrats !!1 point
-
Troop number 75 [emoji2956][emoji2956] Sent from my iPhone using Tapatalk1 point
-
Completed BB-23 Sent from my iPhone using Tapatalk1 point
-
Chest Armour painted tonight, really love the way it's coming along. Sent from my SM-G960F using Tapatalk1 point
-
I may be able to create a Photoshop template when free time allows, if someone wants to PM some closeup photos and measurements of a real counter it would help immensely.1 point
-
Good luck with your build mate. !1 point
-
Looks like you guys participated in the October promo! Did you guys have a lot of mold release on the inside of you pieces? It's like super oil/greasy in mine.1 point
-
Looking forward to the progress Danny, good luck1 point
-
Rather than a new CRL, it will likely just be a variation of the existing one. Would really need to see a breakdown side by side to be sure.1 point
-
1 point
-
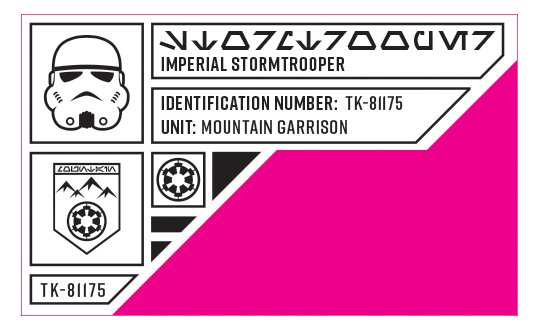
LOL! This was what I came up with for me. The pink is the plastic holder part and border, the rest would be etched...
 1 point
 -
Probably laser etched acrylic. If you have a laser cutter or know someone who does you could probably reverse-engineer and make your own.1 point