Leaderboard


Popular Content
Showing content with the highest reputation on 02/10/2026 in all areas
-
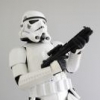
Please join me in congratulating Chris Pearson themaninthesuitcase as our amazing Detachment Leader for 2026! Chris will continue on leading the best detachment within the legion. He has been an absolute rock star when it comes to leading the FISD. We look forward to having another fun and successful year under your leadership!3 points
-
1 point
-
1 point
-
Thank you all. I have send my approval request to my local GMOs. Now waiting for response with feedback.... I let you know!1 point
-
Congratulations Chris!1 point
-
1 point
-
Looking great Andreas!1 point
-
Congratulations Chris!1 point
-
Congratulations Chris!1 point
-
I have some more updates to post here over the coming days. After making a couple of terrible fraction measuring mistakes of my own accord, I finally got in the right sized 3/16 white elastic to replace the more discolored ones I had on. Here is the white elastic on the right and left shoulder bridges.1 point
-
Congratulations Chris! Well done and thanks for everything you do1 point
-
@MapleTK Hi Randall; feel free to reach out if you need any help locally. I am one of the Canadian garrison GML’s.1 point
-
My pleasure. Many of use a free online image host as the forum has size restrictions, Imgur was working well but those in the UK can no longer access, FLICKR is another free one, if you get stuck please reach out.1 point
-
Congratulations Chris!!! We all wish the best for another happy season!!1 point
-
Congratulations Chris! And thank you to you and your command staff team for all that you do for the FISD!1 point
-
1 point
-
Congratulations Chris! Sent from my iPhone using Tapatalk1 point
-
Congratulations Chris!!!!!1 point
-
Congratulations Chris!1 point
-
1 point
-
Congratulations Chris!!!!!1 point
-
Congratulations Chris!!!1 point
-
Awesome! Congratulations Chris1 point
-
FISD Detachment Leaders 2006-2007 - Paul Hoeffer “Daetrin” TK8020 2007-2008 - Ed DaSilva "Exodus" TK4878 2008-2009 - Terrell Reber "SuperTrooper" TK1787 2009-2010 - Paul Hoeffer “Daetrin” TK8020 2010-2011 - Paul Hoeffer “Daetrin” TK8020 2011-2012 - Paul Hoeffer “Daetrin” TK8020 2012-2013 - Mason Carson "dashrazor" TK 4603 - Mid Term Change Tom Gardner "RogueTrooper" TK5940 2013-2014 - Eric Brager "Darth Aloha" TK9674 2014-2015 - Mathias Rodstedt "Locitus" TK2959 2015-2016 - Eric Brager "Darth Aloha" TK9674 2016-2017 - Tim Waychoff "Dark CMF" TK51878 2017-2018 - Paul Hoeffer “Daetrin” TK8020 2018-2019 - Paul Hoeffer “Daetrin” TK8020 2019-2020 - Sarah Bailey "Alay" TK20466 2020-2021 - Andrew Franke "Sly11" TK11469 2021-2022 - Andrew Franke "Sly11" TK11469 2022-2023 - Andrew Franke "Sly11" TK11469 2023-2024 - Andrew Franke "Sly11" TK11469 2024-2025 - Joseph Pedigo "justjoseph63" TK10963- Mid Term Change Chris Pearson "themaninthesuitcase" TK-10911 2025-2026 - Chris Pearson "themaninthesuitcase" TK-10911 2026-2027 - Chris Pearson "themaninthesuitcase" TK-10911
 1 point
 -
Before I started trooping I made my detonator a carry container, I had thought of carrying keys and credit card, shortly after I heard stories of TK's having their detonators pinched, probably pesky Jawa's.1 point
-
I say ish as this arrived in July, but 2025 I guess.... This is a ShearTech Rubber ANH E-11. I borrowed one of Marks at the start of the year having carried my Doopy for 9 years at that point. The lack of "oh no what if I drop it" was such a weight off my shoulder so once I got round to it a couple of months later I ordered one and it arrived in July. Where it mostly sat in a box until now. One thing I did change was the weathering. It came pre-weathered but not to my personal taste which is less is more. Most of the pre weathering was removed with IPA or acetone for stubborn areas and then I used Warhammer paints and a cheap Ali Express drybrush to repaint the slide and apply subtle weathering. The slide also got a coat of nuln oil and was then also drybrushed. I'll post some photos here. This isn't a Hyperfirm ultra idealised and perfected casting. It's a real world casting of a real Sterling, warts and all. I've also got a couple next to my Doopy Doo I built way back in 2016. ShearTech at the front, Doopy at the back.1 point
-
Changing Tent Using a changing tent for changes in the parking lot or even indoors. I got a couple of weights to go with it. They slide in the little pouches at the bottom of most of these types of changing tents. I used an imperial cog stencil used on black tent. The tents will have little loops on the outside and inside of the tent to let you roll up the front door. I use the loops as a location to put a light. I cut a 1-inch-wide PVC pipe and got caps for it that I can take on and off. This pipe can slide through the loops. Then using velcro, I velcored a push-button battery-operated puck light to it. Because of the weight of the PVC, it doesn't spin with the puck light on it. You can literally tilt the light up, straight or aimed down. The photo below shows the light bar on the outside, but there's loops inside so you can light up the inside of the tent if needed. I like this to have a place to put a light and be able to easily take it on/off. I like this for the underwear changing portion of outside changing. It wraps up nice and I can throw it right back into the truck once the changing portion is done.1 point
-
Here's a very brief overview of how to re-size thighs (or other armor, in my case it was thighs!) with a mix of scraps (always good to save what you can from trimming/assembly!) and some ABS paste. You will also need: * some spare ABS sheet (you can but it online, some use "For Sale" signs) * glue (E6000 or other) * sandpaper in several grits (I used: 80, 150, 320, 600, 800, 1000, 1500, 2000, and 2500) * a dust mask (ABS dust is probably bad for you) * ABS polish (Novus is what I used) In this case, I had to add several inches to my thighs, but this should work for biceps or other parts as well. The first thing I did was disassemble my thighs. I chose to do this in the back as they are flatter and thus less work would be needed (easier to find scraps to fit) and any gaffs (ABS paste isn't perfect!) would be less visible. I did a quick fit of my thigh armor to determine how much I would need to add, and then cut some spare ABS sheets to span the gap with an inner shim. I then used a heat gun and a large pot (that I use to fry turkey once a year) to give them a gentle curve so they would conform to my existing thigh curve - this will help with assembl versus gluing them on straight, which would probably work but may also add more stress to the gaps we'll be filling. I didn't take pictures here, but the process is simple. Lay your ABS sheet on the side of something round, heat it up with a gun (or an oven in a pinch) until it gets soft, it will start to "bend" and conform to the shape it is sitting on, take it nice and slow being careful not to scorch the plastic. Another quick test fit with the curved sheets to make sure everything still was good to go, then onto the next step: (Note: I used E6000 for all glueing in this process as it's easy to remove if you mess up and also somewhat flexible, but you could use the adhesive of your choice such as ABS cement.) Next, you will need some to rummage though your trimmings/scraps and find some bits and pieces that will work to span the gap you need to cover. You will also need some ABS paste: What is ABS paste? In summary, it is ABS shavings mixed with acetone to form a slurry that can be used to fill gaps and sanded/polished to help minimize gaps. There is a great article that goes into depth on how to make and use it here: (Quick note: I like to make small batches of ABS paste as I have noticed (and heard from others) that it can discolor over time, make just as much as I plan to use within 1-2 days just to be safe.) I went through my bag of scraps and found some bits that would work (3 per thigh, with a slight gap that should be covered by the cover strips). I had to modify a couple parts as they were originally from my shin armor so the curves were wrong, a little help with some pliers and a heat gun fixed them right up. Here they are after some slight trimming to fit, being glued down to the inner shims: After both thighs had dried, I trimmed the top and bottom of each thigh so they were flush with the existing curves, then put down a rough coat of ABS paste, using a combination of a toothpick and a razorblade to spread it out and shove it into the grooves. It helps to leave a millimeter or two so you have space for the paste, otherwise trying to force it into a hairline gap is very, very hard. I then sanded them down with some 80-grit sandpaper, then did another coat of ABS paste to fill in pockmarks, holes and goofs (not pictured). Here is my thighs after two rounds of sanding and filling, in this picture I am in the process of using 150-grit sandpaper on my left thigh (wear a mask!), you can still see the gooey ABS paste mess on the right thigh: Once I was happy with the results and was seeing no more low spots (in my experience it is near impossible to get rid of every small hole) I went on to increasingly finer grits of sandpaper, moving to wetsanding somewhere around 1000 grit: There is a great guide with more information here: After working my way up to 2500 grit, I then switched to Novus plastic polish. This is a two-stage polisher, here are my thighs after about half an hour of polishing: After that it all I had to do was re-attach the rear cover strips and I was ready for trooping: In summary - I wish I'd trimmed them correctly the first time, but this was a good learning experience and hopefully this will help others avoid the same mistake.1 point