Leaderboard


Popular Content
Showing content with the highest reputation on 04/02/2021 in Posts
-
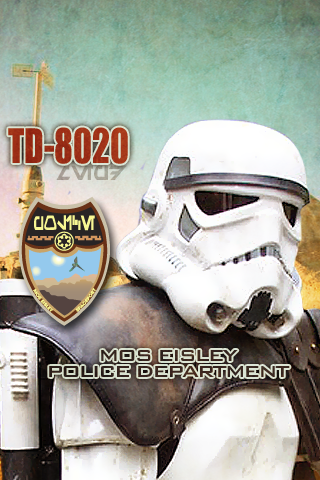
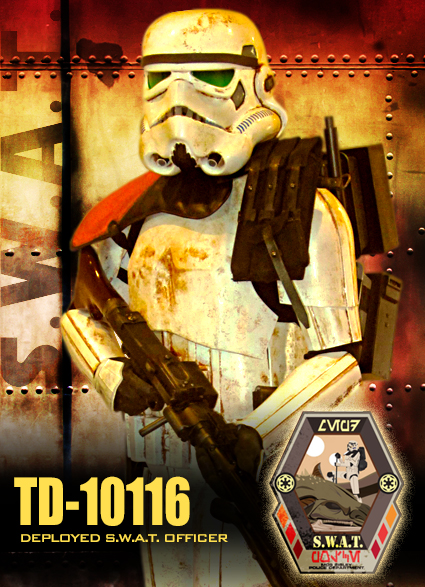
Photos on the original thread and update post have been replaced to improve some of the fit and finish issues and show off the changes we made last weekend! Hopefully this does it!4 points
-
After further discussion with MEPD command staff, we have decided to call the whole thing off. The command staff apologize for any inconvenience and hope you all had a bit of April fools fun!4 points
-
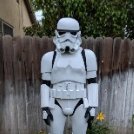
7) Reworked Helmet For your consideration. Please let me know if anything is still missing. Thank you, Grave TK-36036 / HKG3 points
-
NOW you tell me... I just spent all night converting my HWT pack into a Sandie pack.3 points
-
Esteemed members of the 1st Imperial Stormtrooper Detachment, greetings! This is a momentous and exciting day for all of us. Overwhelmingly, I expect that at this point in time, you truly have no idea as to why it is such an exciting day. Allow me to explain. It is inevitable that we will face change in nearly all areas of our lives eventually. Our costuming hobby is no different. Whether it is new movies, TV shows, or video games which present us with new opportunities, or a bold new idea for an exciting piece of merchandise that excites us, change brings with it a variety of emotions and energy. It is in this spirit of change, excitement, and energy, that this day breaks with new direction for us all. Inspired by the examples presented in the world today, by Disney, LFL, and the 501st Legion as global entities committed to effecting positive change in our world, and in the spirit of unity, camaraderie, and togetherness that we announce a major change in operations for us as members of the 1st Imperial Stormtrooper Detachment. As we all know – or maybe we don’t, but I will explain – the first scenes ever shot for anything Star Wars were some of those on the desert planet of Tatooine. It was there that the first world of Star Wars came to life for us. As a way to honor the history of the saga that shaped so many of our lives, it has been decided that, effective immediately, the 1st Imperial Stormtrooper Detachment, its CRLs, staff functions, websites, Facebook groups, members, etc are absorbed into the Mos Eisley Police Department. We look forward to serving proudly alongside our dirtier comrades in armor and having the opportunity to order new (to us) racing shirts, coins, and patches! With unquestioned loyalty, dirt don’t hurt! (For the purpose of clarification, this is our edition of the annual April Fool's post for 2021, it is not true)2 points
-
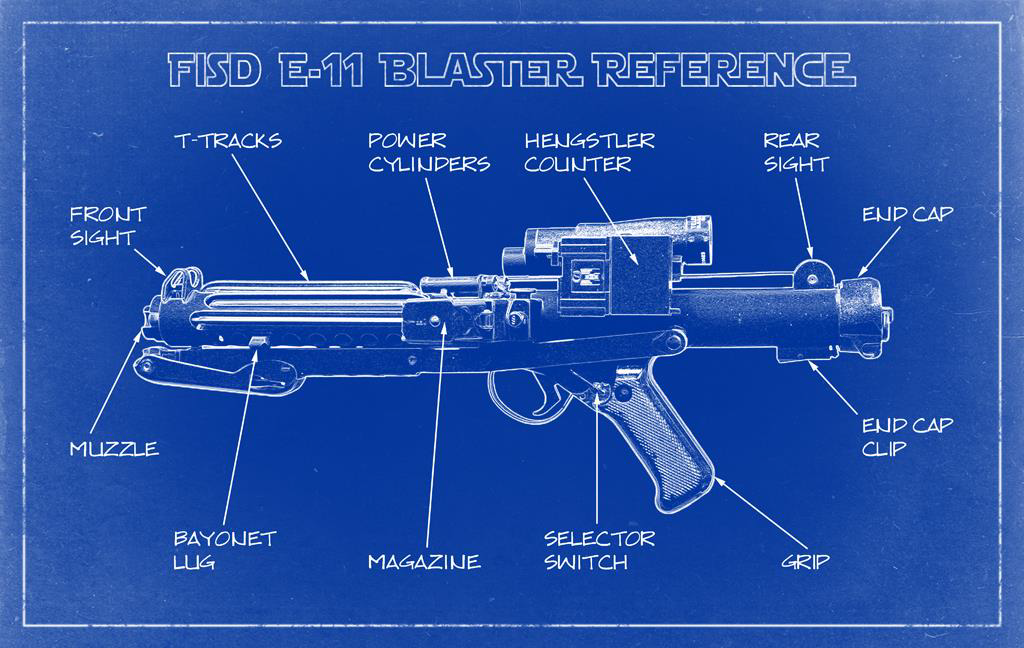
Following a recent discussion about the thigh ammo pack on a Stormtrooper’s right thigh, I wanted to post some reference photos. Many of us assume that the central ammo pack (3rd of 5 ammo packs) should be in the middle of the thigh, in line with the coverstrip. As below, this was not the case with the majority of ANH stormtroopers. It was offset to the right, slightly, when viewed from the front. **Depending on the make/accuracy of each person's kit, this may or may not be possible due to where the ammo pack has to be attached to the ridge on the thigh. Photos below;2 points
-
Thanks, just ordered the boots when the opened up this month!2 points
-
2 points
-
I agree! As long as it's pretty close it's not a big deal. We've passed them with a 1/2 to 3/4 inch difference many times.2 points
-
You are the best Greg, love the 1st April design2 points
-
I was hoping it would be more obvious.2 points
-
Oh my - he looks too sad for a commemorative coin... ;-)2 points
-
Nice catch, thank you! Sent from my iPhone using Tapatalk1 point
-
Your counter should go a little further forward

 1 point
 -
So I bought this to take care of the floppy Anovos belt. Stay tuned.....not only do I have an idea, but I have a plan!1 point
-
Thanks. Luckily I saw that warning several places on this forum before I ordered. I have one pair a vaguely similar leather boots that I wear normally. Those I had to buy one size up to be comfortable. They have the EU size on them, so I was able to order the same from Imperial Boots. Here's to hoping they fit well too!1 point
-
1 point
-
Thanks guys! Fingers crossed1 point
-
Dude! I don’t think I know anyone with your drive. For those who don’t know Joe, he’s banged out 6 Legion costumes since joining in October, and one RL costume, most of them with at least L2 cert, and man are they a sight to behold. We got to know each other as we were working on our first costumes with the Pathfinders Detachment last year. I know once you start this build that you’ll definitely go all the way for Centurion and I can’t wait to see THAT WIP. Your attention to detail will be a source of inspiration to future Storm Troopers. No pressure [emoji6]. Welcome brother!1 point
-
Awesome Max. You got this.1 point
-
A few things I didn't see on your list: Clamps- You don't need the expensive ones, but (like magnets) the more the better. (Link here). Dremel type tool with sanding drums- Trust me on this one. You can find them at Harbor Freight in MD. and they are pretty inexpensive. In case you haven't seen it, I have a thread here that will help, as well as many tutorials under may avatar below. Always feel free to ask any questions you may have, no matter how small. Posting photos of your progress any issues you may have will be more important than you know, so something to think about. My advice when you start: Take..... your..... time. Consider your build a marathon and not a sprint. When in doubt, ALWAYS ask for advice before cutting or gluing.1 point
-
Looks like you are on top of this, Alex! Having the boots on hand will be a GREAT help when fitting bottoms of the calf pieces. Does your AP kit include the canvas belt?1 point
-
Way to go Max, you have great support with Justin helping you, good luck with your application, the updates are a great improvement on those finer details.1 point
-
Nice work on the helmet, trooper. If I may, just a couple of things that you could consider. 1: the “tears” are currently quite small. Personally, I’d consider making them fill the moulded area a little better. Suggestion below; Secondly, you could consider filling out the vocoder paint a little more (the 2nd and 6th vertical bars). As per this link, the vast majority of ANH stunt helmet seen on screen had a slightly “fuller” vocoder; https://www.whitearmor.net/forum/topic/48252-anh-tk-vocoder-examples/ Here’s an example of what could be done, if you wanted to. Keep up the good work. :-)1 point
-
Looking real nice Dan, can't wait to see this finished.1 point
-
You need to post a link to your 501st legion membership profile, check others posts in this thread1 point
-
1 point
-
When I use velcro I use roughly 1/4 - 3/8" wide strips, any more then that is overkill IMHO. This allows for half the cover strip to be fixed, the other half free floating for the velcro. Note: Use industrial strength velcro. What also worked best for me was taking some 3m Scotch Brite pad to scuff the mounting area, then mineral spirits to remove any remaining dust or body oils.1 point
-
Don't sweat it Daniel, we live and learn brother. Can't tell you how many times I goofed as DO1 point
-
I have never requested a center box alignment either but rather an offset If anything. On this particular app I was just surprised as I did’t mention the ammo strip at all. It would have helped if the added requriment was stated in the thread for all to see instead of sent via PM. I agree that the ammo pack should be evenly spaced and idealy at the corners. I guess I missed that so that’s on me and I’m sorry for the extra hazzle. The EIB app was also some time ago so it might very well be that additional requriments are in affect and though not mentioned in that particular EIB review still has to be fixed at the time of a Centurion app1 point
-
Ever since being a DO I never required nor did I encourage center alignment. What mattered was the rear or mounting placement. Not sure when, or if this has ever changed.1 point
-
Hi Justin, Yes, I certainly see where you are coming from. And I believe the rivet placement is the key point in the discussion you're referring to, rather than the postitioning of the central ammo pack. That's why I specifically mentioned the different armour makers. With the best will in the world, even some of the 'most common' armour makes are not always overly accurate in some areas, whether this be with their kits or their commissions, so aligning the central ammo pack like the originals might not be possible. This certainly makes it harder for members when they feel their armour maker probably knows the "right" way to build it, yet, this is not always the case. Makers pre-shaping (and potentially pre-trimming) the ammo pack (or any other parts), is, I'm sure, meant with the best intentions. However, it does take away some of the applicants' choice to fine tune certain parts. Unfortunately, the armour makers are not obliged to make changes based on the CRL - it just depends how accurate they want to be. This then comes down to the purchaser on their choice of the various factors, including budget, accuracy, availabilty etc. Regarding the higher levels of approvals, I think a key point to bear in mind is that approvals are based around the wording of the CRL but also based on the visual appearance of the oroginal costumes. I quote "Text descriptions are only one part of the guideline. GML’s and costumers must consider both text and pictures (CRL and Reference) when reviewing the costume." Hopefully these reference photos will help future builders before they attaach their ammo pack. I'm a firm beleiver that the best reference material a builder can have is the oroginal movie suits themselves, within reason. Other build threads are good, especially when it comes to the certain "quirks" of certain makes, however, the end result is to look like those wonderful troopers on screen that we all fell in love with. :-) This is not just a response to the Centurion application that is being discussed, by the way. This has come up in another thread on a different platform and these reference images are hopefully hepful to all. :-)1 point
-
Thigh ammo strip pack was not always aligned with the coverstrip, but rivets and end of strip were aligned with the ends or the thigh ridges
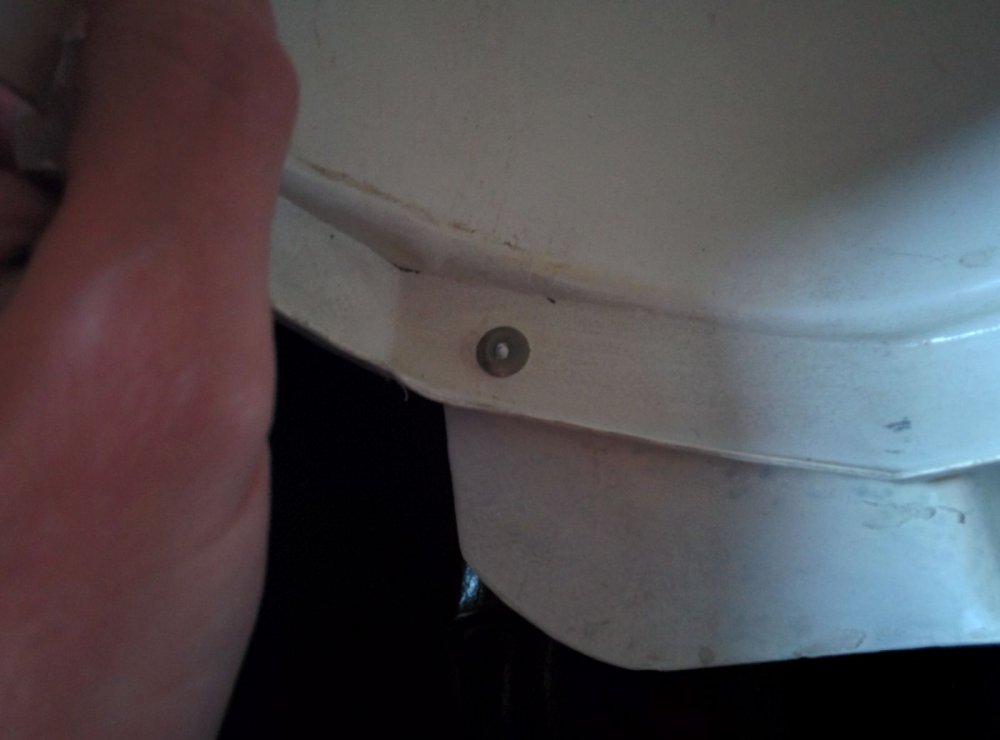
 1 point
 -
Something like this?1 point
-
So here are all the armor sections ready to roll. First up the chest plate. Here you can see how narrow I have my return edges. Should snap plates installed. I haven't done the lower ones yet that connect to the abb section. Still figuring out the best place to put those. Posterior plate next Back plate Kidney plate Abb plate Front pieces Back pieces Figure I am in pretty good shape with these now. Just a few minor things to finish up and I can start the strapping1 point
-
Once the paint has fully dried, you should be able to scrape it away with a toothpick. This won’t scratch your armor and will allow you to work the paint back to your desired line. Sent from my iPhone using Tapatalk1 point
-
Final helmet update: The imperial cog is my favorite emblem and I thought it would look nice on the side of the blast shield. A sticker might have been the easiest way, but it needed to be heavily worn off. That required more work… Okay, here we go... A plaque was required, as this helmet will be in my RS collection and there it would look odd without it. The layout is close to the original RS plaques and I weathered it to match the style of this bucket. This project was planned for winter 2020/2021 and now comes to an end. Building something outside the CRL restrictions was indeed real fun. Would I do it again? Yes! It was more difficult than a normal helmet (oh wonder) but worth the effort. Maybe I would use a little brighter kind of green (like TS-5, TS-28 or even TS-78). And I would add an aiming device on the right eye. It still hurts to not have it. Anyway, it was a fun journey and I really enjoyed to run a build thread again. Many thanks to everyone here for reading and commenting. Actually I wanted this post to end with a 360 degrees video of the helmet with all lights on. Sounds easy, but after 13 takes I still ended up with issues on lighting, auto-focus and a wobbly rotation. So instead, I now close it with the final list of modifications and a few pictures: 1 - Blast Shield 2 - Black Interior 3 - Two-tone paint job 4 - Antenna and radio 5 - Utility belt 6 - Universal supply box 7 - Bacta canister (illuminated) 8 - Helmet flashlights 9 - Breathing tube 10 - Kill marks 11 - Aurebesh letterings 12 - Imperial cog on blast shield 13 - Skull face 14 - Weathering and paint chips 15 - ‘flesh wound with guts‘ 16 - Greeblies 17 - Blaster marks 18 - Helmet stand with customized display plaque Have a nice weekend Troopers and Cadets.1 point
-
As promised, here's a hell ton of pictures First of all: My mood during sanding, filling and more sanding: Flashbacks when I did the Captain Phasma Armor Anyways.. Arms: The shoulders were kinda simple. Just trimming the excess ABS and glueing the tabs on. Bicep armor: Here my perfectionism hit me with a bat. I didnt like the soft details that happen due to the bac forming process, so I filled it and carefully filed the new details in. I used 2 part epoxy glue to glue and fill. Forearms: For the formarms I didnt use the ABS box, instead I used my resin box which has sharper edges. I made that box years ago for the First Order Gunner costume and for Phasma, I mirrored the master and made a mold of it. So why not make use of that for my personal costume as well Handguards: CFO Handplates from Dan, filled and sanded Chest: Back: Still WIP, nothing to show yet Detonator: Nothing to show yet Ab Armor Boxes are secured with screws Cod and Butt plate: Just one picture as these parts are not really interesting Thighs: Here I also filled the soft pulled detail and refiled the detail Shins: These were kinda tricky. I asked a good friend to help out. Unfortunately both halves werent fixed enough so while the glue hardened, it slightly changed position. To fix this, I filled the seam with 2 part epoxy and refiled the seam. As I already stated, I got the 2 shin bars 3D scanned. Then I mirrored the parts and printed the left and right version out. CFO Clip Greeblie If possible, I will update this post later with more pictures :-)1 point